Wire Wrapping for Beginners
May 28, 2026
Why Wire Wrapping Is the Perfect Entry Point for Crystal Jewelry
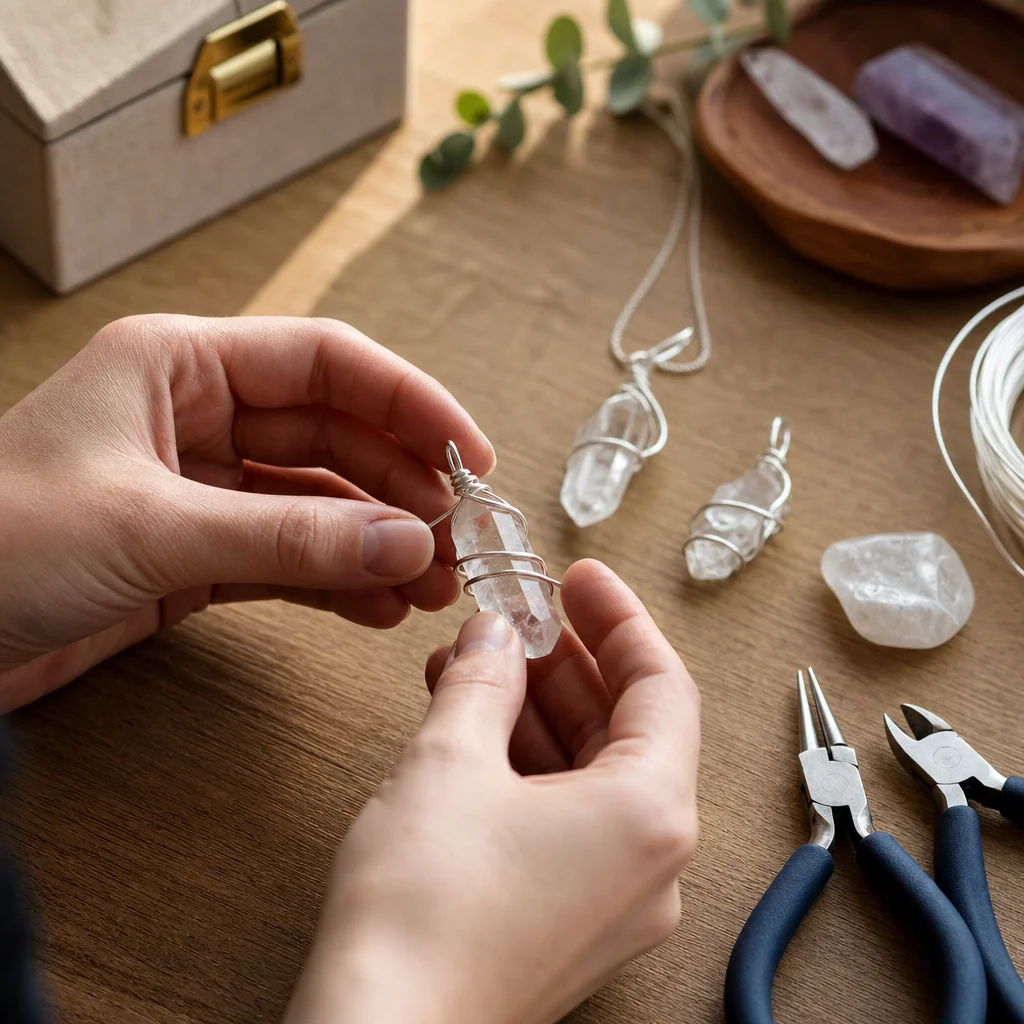
Wire wrapping is exactly what it sounds like: you take a piece of wire, wrap it around a stone, and create a setting that holds the stone securely without any glue, solder, or fancy equipment. That's the entire craft at its core.
What makes it perfect for beginners is the low barrier to entry. You need three tools, two types of wire, and a stone you like. Total startup cost: about $20-30. Compare that to metalsmithing (torch, kiln, chemicals, safety equipment) or lapidary (saws, grinders, polishing wheels), and you can see why wire wrapping is where most crystal jewelry makers start.
Wire wrapping has been practiced for thousands of years — some of the oldest known jewelry, dating back to ancient Sumeria (around 2000 BCE), used wire wrapping techniques. The method hasn't fundamentally changed because it doesn't need to. It works.
Tools You Need (and What You Don't)
Essential Tools (3 items, ~$15-25 total)
| Tool | What It Does | What to Buy |
|---|---|---|
| Round-nose pliers | Making loops, curves, and spirals | 6-inch with smooth jaws (no teeth — teeth mark the wire). $5-12. |
| Chain-nose (flat) pliers | Gripping, flattening, tucking wire ends | 6-inch, smooth jaws. $5-10. |
| Wire cutters (flush cut) | Cutting wire cleanly without pinched ends | Flush-cut style specifically. $5-10. Don't use scissors or nail clippers. |
Nice-to-Have Tools (Not Required to Start)
- Nylon-jaw pliers — for straightening bent wire without scratching it ($8-12)
- Bail-making pliers — for creating consistent loops in multiple sizes ($10-15)
- Ruler or measuring tape — for cutting consistent wire lengths
- Masking tape — for holding wire bundles together while you work
What You Don't Need
Despite what some tutorials suggest, you do not need: a bench block, a hammer, a torch, a dapping set, a tumbler, or a jewelry saw. Those come later, if ever. Start with the three basic tools and add more only when you feel limited.
Understanding Wire: Gauge, Shape, and Material
Wire selection is where beginners get confused fastest. Here's the plain-language breakdown:
Wire Gauge (Thickness)
Wire gauge uses an inverse scale — higher numbers mean thinner wire. This trips up a lot of people.
| Gauge | Thickness | Use For |
|---|---|---|
| 16 gauge | Thick (1.3mm) | Frame wires, structural foundations, bails |
| 18 gauge | Medium-thick (1.0mm) | Main wrapping wire for larger stones, pendant frames |
| 20 gauge | Medium (0.8mm) | General-purpose wrapping, most versatile for beginners |
| 22 gauge | Medium-thin (0.6mm) | Weaving, finer details, smaller stones |
| 24 gauge | Thin (0.5mm) | Delicate wrapping, very small stones, earring components |
| 26 gauge | Very thin (0.4mm) | Coiling, weaving, micro-details |
Beginner recommendation: Buy 20 gauge and 22 gauge in copper. These two thicknesses cover 90% of beginner projects.
Wire Shape
- Round wire: The default. Good for everything. Start here.
- Half-round wire: Flat on one side, rounded on the other. Used for banding (wrapping around bundles of round wire to hold them together). Intermediate skill level.
- Square wire: Four flat sides. Used in structured, architectural wraps where the wire itself is a visible design element. Advanced.
Wire Material
- Copper: The best practice material. Cheap ($3-5 for 20 yards), soft enough to shape easily, hardens as you work it. Start here.
- Brass: Slightly stiffer than copper, gold-colored. Good for when you want a warmer look.
- Sterling silver: Beautiful but expensive ($15-30 for 20 yards). Wait until you're confident in your technique before using silver — mistakes with silver hurt your wallet.
- Craft wire (colored copper core): Cheap and available in many colors, but can flake or tarnish. Fine for practice, not for pieces you want to last.
- Gold-filled: For when you're selling your work. Skip until you're experienced.
Three Essential Beginner Wraps
Wrap 1: The Simple Pendant Loop (30 Minutes)
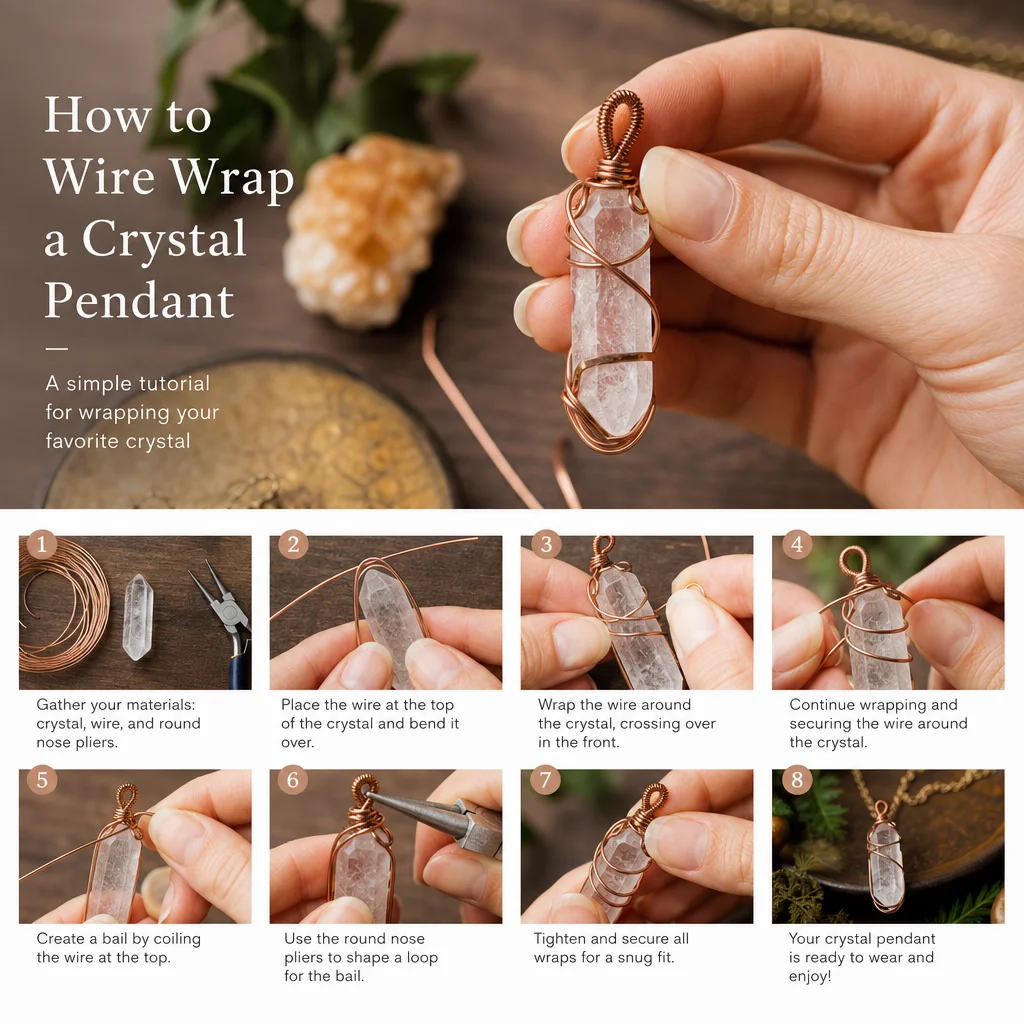
This is the "hello world" of wire wrapping — a single loop at the top of a stone that lets you hang it from a chain or cord.
Materials: One tumbled stone (oval or teardrop shape is easiest), 8 inches of 20-gauge copper wire
Steps:
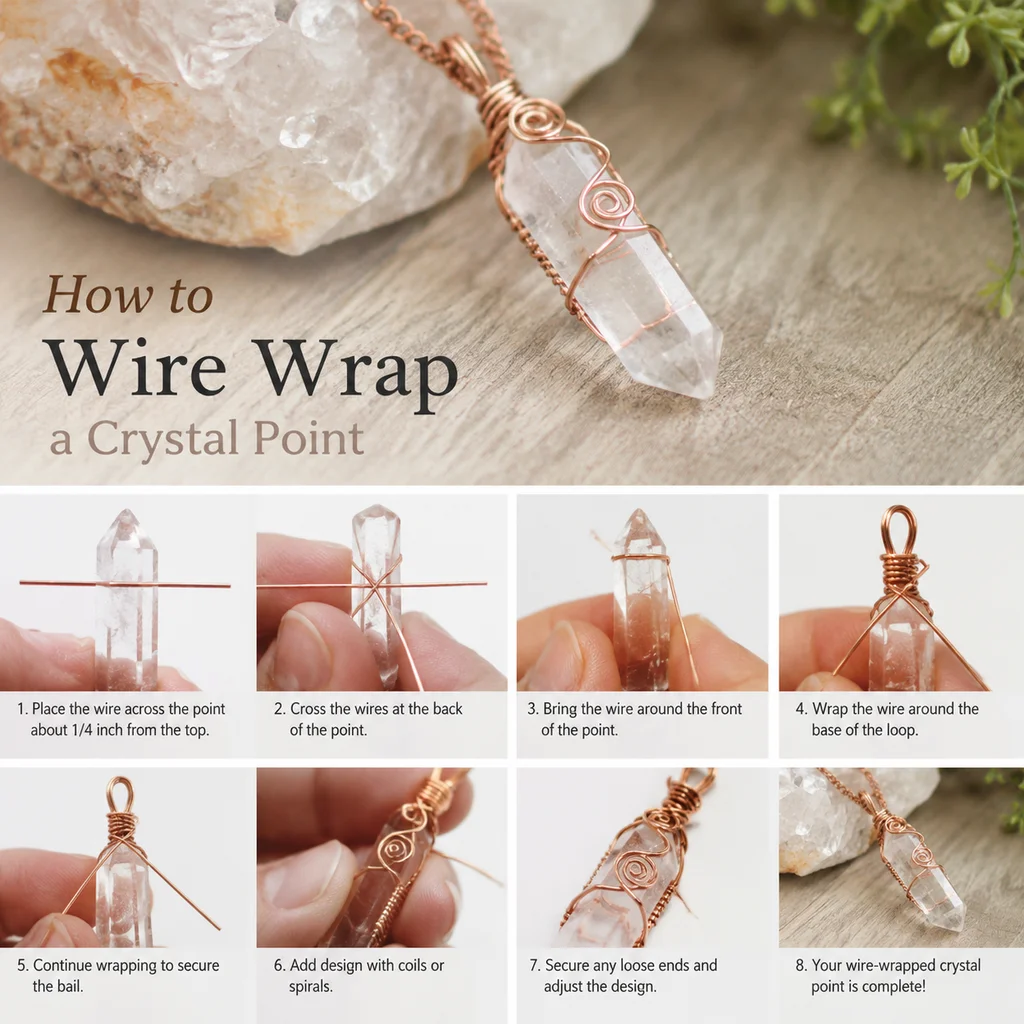
- Hold the stone vertically. Place the wire across the back of the stone, about one-third of the way down from the top.
- Wrap the wire around to the front, crossing it at the center.
- Bring both wire ends up to the top of the stone and twist them together 3-4 times to create a "neck" above the stone.
- Use round-nose pliers to form the two wire ends into a loop at the top.
- Wrap one wire end around the base of the loop 2-3 times to secure it.
- Use chain-nose pliers to tuck the cut end flat against the wrap.
- Thread a chain or cord through the loop.
This basic structure — frame the stone, create a neck, form a loop — is the foundation of every wire-wrapped pendant you'll ever make.
Wrap 2: The Spiral Cage (45 Minutes)
A cage wrap holds the stone without a frame — the wire spirals around the stone, creating an open cage that lets light through.
Materials: One round or irregular stone, 18 inches of 20-gauge copper wire
Steps:
- Find the approximate center of your wire. Make a small loop at the center point using round-nose pliers.
- Hold the stone against the loop. Wrap one wire end in a loose spiral down one side of the stone.
- Wrap the other wire end in a spiral down the opposite side.
- Cross the wires at the bottom of the stone and spiral back up, creating a cage pattern.
- When the stone feels secure, bring both wires to the top, twist them together for a neck, and form a loop.
- Tuck and trim all wire ends.
The spiral cage is more decorative than the simple loop and works especially well with translucent stones like rose quartz or amethyst, where you want light to pass through the stone.
Wrap 3: The Wrapped Briolette (20 Minutes)
A briolette is a teardrop-shaped stone drilled with a single hole at the top. This is the fastest and most elegant beginner wrap.
Materials: One briolette bead, 6 inches of 22-gauge copper wire
Steps:
- Thread the wire through the drill hole, leaving 1.5 inches on one side and the rest on the other.
- Pinch both wires against the top of the briolette.
- Wrap the short wire end tightly around the long wire 3-4 times, right above the stone.
- Trim the short wire and tuck the end flat.
- Use round-nose pliers to form a loop with the long wire.
- Wrap the remaining wire around the base of the loop 2-3 times. Trim and tuck.
Briolette wraps are the most common style for crystal earrings and delicate pendants. Once you can do this confidently, you can produce sellable jewelry.
Common Beginner Mistakes (and How to Fix Them)
- Wire too thin for the stone: If your wrap feels flimsy or the stone slips out, switch to a thicker gauge. A 1-inch stone needs at least 20-gauge wire for the frame.
- Overworking the wire: Copper hardens as you bend it. If you keep re-bending the same spot, it will eventually snap. Plan your bends before making them.
- Inconsistent tension: Wrap with even pressure. Loose wraps look messy and don't hold stones securely. Practice on cheap copper wire until your tension is consistent.
- Scratched stones: Some softer stones (fluorite, calcite, malachite) can be scratched by wire. Wrap these gently, and consider padding the contact points with an extra layer of thin wire.
What to Practice On
Don't start with expensive stones. Use tumbled stones from a rock shop ($1-3 each), or even glass marbles, river rocks, or sea glass. The technique is the same regardless of what's inside the wire. Save the $50 labradorite cabochon for when your wraps look clean and consistent.
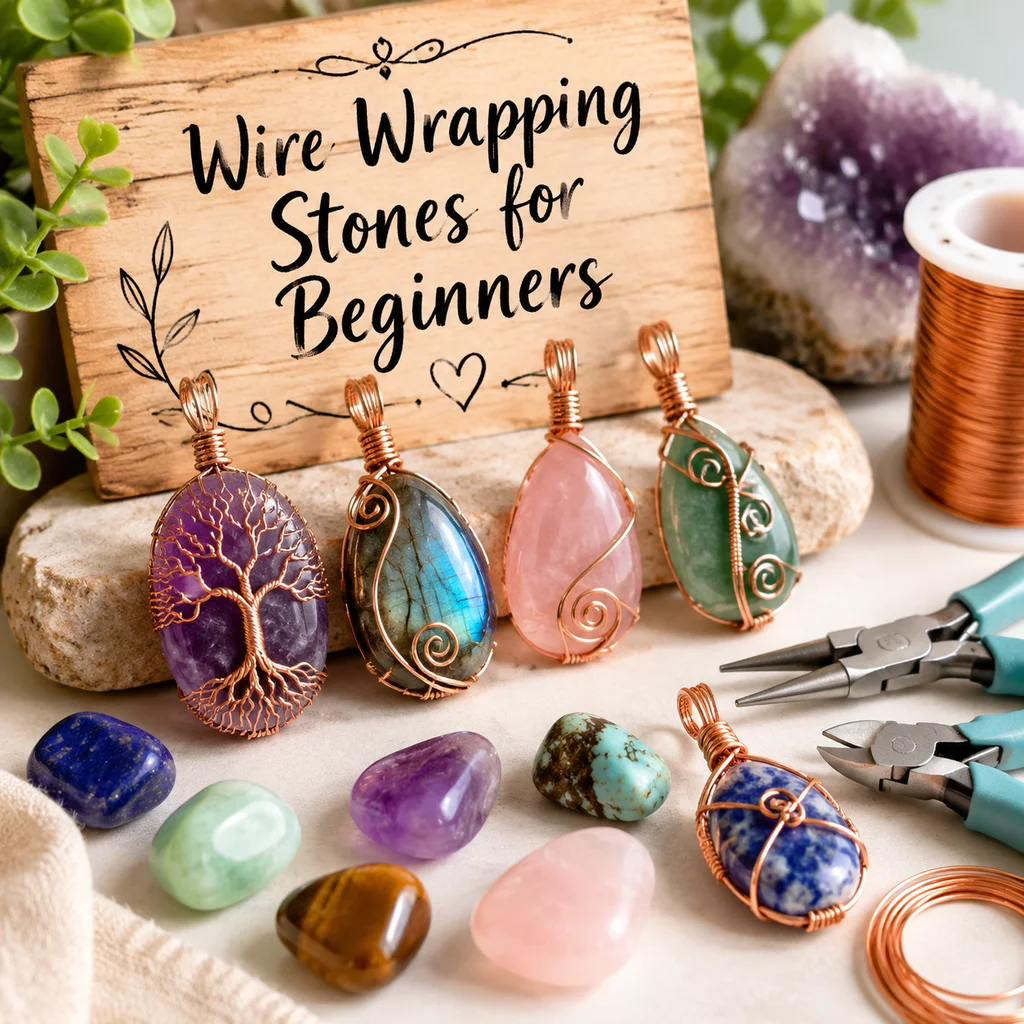
Good practice stones for beginners: tumbled amethyst, rose quartz, green aventurine, agate, jasper — all cheap, durable, and forgiving of handling.
FAQ
Q: How long does it take to get good at wire wrapping?
A: You can produce wearable pendants after one afternoon of practice. Clean, consistent, sellable wraps take 2-4 weeks of regular practice. Complex gallery-level wraps take months to years.
Q: Can I sell wire-wrapped jewelry?
A: Yes. Wire-wrapped crystal pendants typically sell for $15-50 on Etsy and at craft markets, depending on the stone and the complexity of the wrap. Copper wraps sell for less than silver, but your material costs are also lower.
Q: Do I need to harden the wire after wrapping?
A: Work-hardening (bending and shaping the wire) happens naturally during the wrapping process. You don't need to do anything extra. If a piece feels too soft, you can tap it lightly with a nylon hammer on a bench block — but this is an advanced technique and not necessary for beginners.
Frequently Asked Questions
What is the best wire for wrapping crystals?
Copper wire is widely considered the best metal for beginners. It is highly malleable and beautifully complements natural crystals. We recommend starting with dead-soft copper wire in 20 or 22 gauge, which makes it much easier to practice foundational loops and weaves. Once comfortable, you can transition to solid silver or gold-filled artisan wires.
Can I use any type of crystal or stone for wire wrapping?
Yes, you can wrap almost any stone! However, beginners should start with tumbled stones or naturally faceted crystals that have hard, defined edges. Smooth, perfectly round pebbles can be slippery and frustrating to hold in place. Look for natural stones with slight indentations or irregular shapes to make your initial wire wrapping projects much easier.
Do I need expensive tools to start making wire wrapped jewelry?
Not at all! To start your handcrafted jewelry journey, you only need three basic tools: chain-nose pliers, round-nose pliers, and a flush cutter. You do not need specialized mandrels or heavy-duty equipment to create beautiful pieces. Keeping your tool kit simple allows you to focus entirely on mastering the fundamental wire wrapping techniques.
How do I keep my wire from scratching my natural crystals?
To prevent scratching delicate natural crystals, always use nylon-jaw pliers. These specialized pliers have soft plastic jaws that let you grip and manipulate the wire tightly without leaving deep tool marks on the softer stones. If you don't have nylon pliers, you can also carefully wrap the tips of your metal tools in masking tape as a temporary fix.
Is making handcrafted wire wrapped jewelry hard to learn?
Wire wrapping is actually one of the most accessible jewelry-making techniques! While it looks incredibly intricate, it relies on a few basic bends and weaves. With a bit of patience, muscle memory, and practice, even absolute beginners can create beautiful, professional-looking crystal pendants in just a few afternoons of dedicated practice.

Comments