That Instagram Post Changed Everything
That Instagram Post Changed Everything
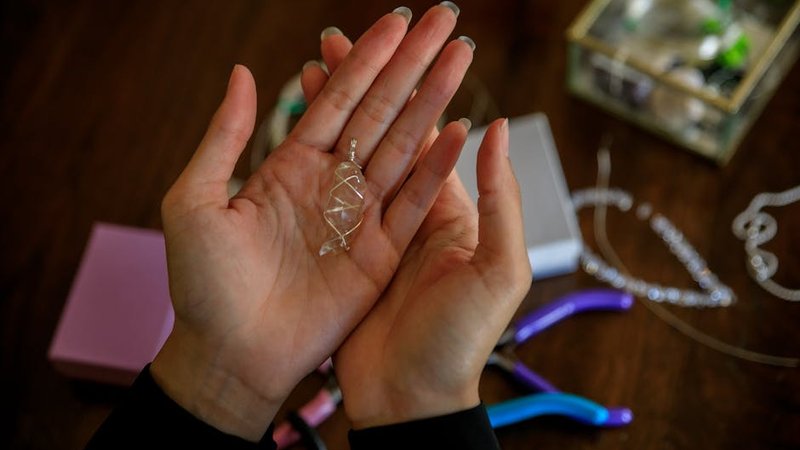
I was doom-scrolling through Instagram at 2 AM — you know, the kind of mindless scrolling where you're barely looking at anything — when a wire wrapped crystal pendant stopped me dead in my tracks. It was a raw amethyst point, wrapped in swirling copper wire that looked like tiny vines growing up the stone. The whole piece was organic, slightly imperfect, and absolutely gorgeous. I stared at it for a solid five minutes, checked the creator's profile, saw they had 200K followers, and thought: I want to make that.
That was six months ago. Since then, I've made probably 80 wire wrapped pieces, given away half of them as gifts, sold a few at a local craft market, and developed a genuine obsession with twisting thin pieces of metal around rocks. What I've learned is that wire wrapping is one of the most accessible, forgiving, and satisfying jewelry-making techniques you can pick up. You don't need a kiln, a soldering iron, or months of practice. You need a few basic tools, some wire, something to wrap, and patience.
Here's everything I wish someone had told me when I started.
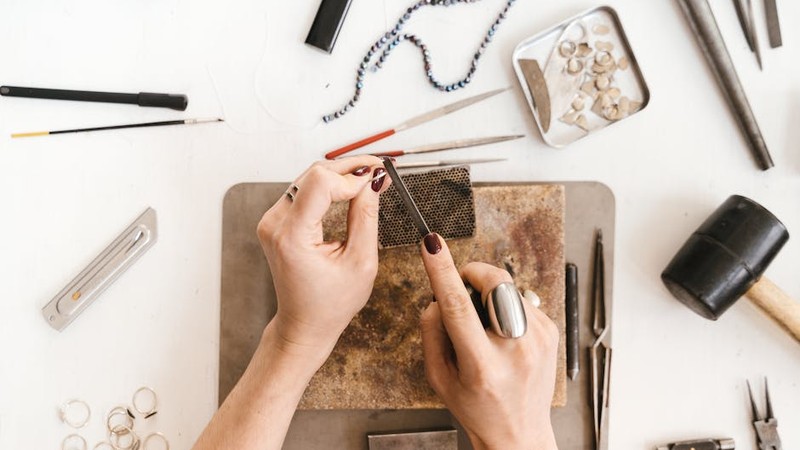
What Tools Do You Actually Need?
One of the things I love about wire wrapping is the minimal tool requirement. You can start with just four tools, and plenty of experienced wrappers still use the same $30 set they bought on day one.
Round-Nose Pliers
These are your most important tool. Round-nose pliers have two conical jaws that taper to a point, used for making loops and curves. The loop size depends on where on the jaw you place the wire — closer to the tip means smaller loops, closer to the base means larger. Most pliers have slightly different tapers on each jaw, so you can make different sized loops by flipping which jaw you wrap around.
Chain-Nose (Flat) Pliers
Chain-nose pliers have flat inner jaws that taper to a point. They grip wire, flatten bends, open jump rings, and tuck in sharp ends. Get a pair with smooth inner jaws — serrated jaws leave marks that nothing fixes short of sanding them smooth.
Wire Cutters (Flush Cutters)
You need flush cutters specifically — they have a flat side that makes a clean cut and a beveled side that leaves a slight point. Always cut with the flat side facing the finished work. Standard flush cutters handle up to about 16-gauge; use heavy-duty cutters for thicker wire.
Nylon-Jaw Pliers (Optional but Recommended)
These have smooth nylon jaws instead of metal, used for straightening bent wire and flattening curves without marks. Not essential starting out, but once you've kinked your wire for the third time trying to straighten it by hand, you'll understand why they're worth having.
Understanding Wire Gauges
Wire gauge is the thickness of the wire, and it uses a counterintuitive system: higher numbers mean thinner wire, lower numbers mean thicker wire.
18-20 gauge — Your structural wire. I use 20-gauge for most pendant frames and 18-gauge when I need something sturdier.
22-24 gauge — Your wrapping wire. You'll go through this fast — a single pendant might use 2-3 feet of wrapping wire. Stock up on 22-gauge.
26-28 gauge — Very fine wire for delicate detail work. Save this for advanced projects.
Copper vs. Silver vs. Gold Wire
Copper Wire
Start with copper. It's cheap, easy to work with, looks beautiful, and is incredibly forgiving. You will make mistakes — when you're working with $3-a-spool copper, that stings a lot less than $30-a-spool silver. Copper does tarnish over time, but many people love the patina. You can polish it or intentionally accelerate the tarnishing for an antiqued look.
Sterling Silver Wire
Silver is harder than copper, holds its shape better, but fights back more when you bend it. Finished silver pieces look professional and don't tarnish as fast. Get comfortable with copper first, then upgrade to silver once your techniques are solid.
Gold and Gold-Fill Wire
Solid gold wire is extremely expensive and mostly used by advanced jewelers. Gold-fill wire is a more practical alternative — it has a thick layer of gold bonded to a brass or copper core, giving you the look and durability of gold at a fraction of the cost. It's still pricey compared to copper or silver, so save this for special pieces once your skills are solid.
Four Fundamental Techniques You Need to Know
Everything in wire wrapping builds from four basic techniques. Master these and you can make almost anything.
1. Making a Loop
The loop is the foundation of wire wrapping. Grip the wire end with round-nose pliers, rotate to bend into a circle. The tricky part is consistency — you want loops the same size, centered, and closed neatly. Practice making 20-30 loops and try to make them identical. It's harder than it sounds and the single best beginner exercise.
2. Wire Wrapping (The Wrap)
Make a loop, grip the wire just below it with chain-nose pliers, and wrap the tail around the neck below the loop (3-5 wraps looks clean). The key is keeping wraps tight and evenly spaced — loose, sloppy wraps are the number one beginner mistake and the line between "homemade" and "handmade."
3. The Weave
Weaving wraps thin wire around two or more thicker wires for decorative patterns. The most basic weave: take two parallel frame wires and coil your thin wire around both. Vary the spacing, wrap count, and angle for different looks — basket weaves, cage wraps, and figure-eight patterns all build on this.
4. Tucking and Finishing
Every piece has an end, and that's where beginners struggle. Cut the tail wire close (1-2mm from the wrap), then press it down firmly with chain-nose pliers so it doesn't snag or scratch. A well-tucked end is invisible; a poorly tucked end is sharp and ugly.
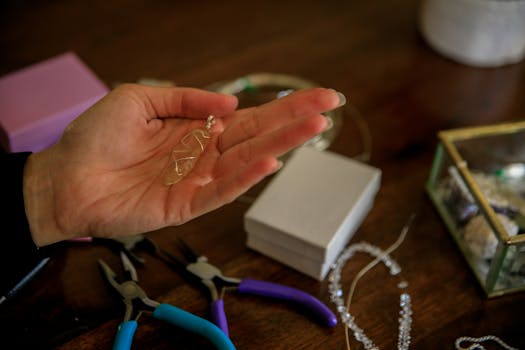
Your First Project: Crystal Point Pendant
Let's make something. This crystal point pendant teaches frame construction, wrapping, and finishing all in one piece. You'll need a crystal point (amethyst, quartz, or citrine), about 10 inches of 20-gauge copper wire, and about 2 feet of 22-gauge copper wire.
Step 1: Create the Frame
Cut about 8 inches of your 20-gauge wire. Find the center point and bend the wire into a V shape. Place your crystal point in the V — the point of the V should sit just below where the crystal starts to narrow. Now use your round-nose pliers to bend the two wire ends up and around the crystal, one on each side, creating a cradle that holds the stone. The wire should follow the natural contour of the crystal as it wraps around.
Step 2: Secure with Wrapping Wire
Cut about 12-18 inches of your 22-gauge wrapping wire. Hold the frame and crystal together, and start wrapping at the base of the crystal where the two frame wires cross. Wrap tightly around both frame wires 4-5 times. As you move up the crystal, angle your wrapping wire so it spirals upward, crossing over itself to create a decorative pattern. Keep the wraps snug against the crystal and the frame wires.
Step 3: Continue Up the Crystal
Keep wrapping as you work your way up the crystal. Every half inch or so, do 2-3 tight wraps around just the frame wires to secure everything. This creates a rhythm: decorative spiral, tight bind, decorative spiral, tight bind. The tight bind points are what keep the crystal from sliding out.
Step 4: Create a Bail at the Top
When you reach the top of the crystal, you need to create a bail — the loop that the necklace chain passes through. Take the two frame wire ends and bend them upward, crossing them over each other. Use your round-nose pliers to form a loop with one of the wires, then wrap the other wire around the base of that loop 3-4 times to secure it. Cut the excess and tuck the ends.
Step 5: Finish and Polish
Cut your wrapping wire, leaving about an inch of tail. Wrap the last bit tightly and tuck the end down with your chain-nose pliers. Check the entire piece for any sharp ends or loose spots. If you want to brighten the copper, give it a quick polish with a jewelry cloth.
Congratulations — you just made your first wire wrapped pendant. It probably won't be perfect. Mine sure wasn't. But it'll be yours, and you'll learn more from that one imperfect piece than from reading a dozen tutorials.
Common Mistakes (I've Made All of These)
Using Wire That's Too Hard
Wire comes in different tempers: dead soft, half-hard, and full-hard. Dead soft wire is extremely flexible and easy to bend, which makes it great for weaving and wrapping but terrible for structural elements that need to hold their shape. Half-hard is the sweet spot for most wire wrapping — it bends easily enough to work with but holds its shape once formed. Full-hard is stiff and used mostly for things like ear wires and clasps.
My early mistake was buying dead soft wire for everything and wondering why my pendant frames bent out of shape. Use half-hard for structural elements.
Twisting Too Hard and Breaking the Wire
Thin wire (22-24 gauge) can only twist so far before snapping. Work gently and avoid bending the same spot repeatedly. When wire starts feeling stiff, that's called "work hardening" — the metal is literally becoming more brittle. Switch to fresh wire rather than pushing your luck.
Wraps That Are Too Loose
Loose wraps are the cardinal sin of wire wrapping. They look sloppy, they don't hold the stone securely, and they catch on clothing and skin. The solution is simple: pull the wrapping wire tight after every single wrap. Don't wait until you've done five wraps and then try to tighten them all at once — it doesn't work. Tighten each wrap as you make it, and use your chain-nose pliers to squeeze the wraps together if any gaps appear.
Not Measuring Before Cutting
I can't count how many times I've cut my wire too short and had to start over. Always cut your wire a little longer than you think you need. It's much easier to trim excess than to add more wire to a piece that's too short. When estimating, add at least 2-3 inches to your calculated length as a safety margin.
Where to Go From Here
Once you're comfortable with the basic crystal pendant, a whole world of projects opens up. Here are some popular next steps that build on the techniques you've already learned.
Tree of Life Pendants
These are stunning wire wrapped pendants that create a tree shape with the wire as branches and small gemstone chips as leaves. They look incredibly intricate but are actually made using the same wrapping techniques you already know. The "trunk" is a simple wrapped loop, and the "branches" are created by spreading frame wires and weaving thin wire between them. There are hundreds of free tutorials on YouTube for different tree styles.
Wire Wrapped Rings
Rings teach you to work on a smaller scale with tighter curves. The challenge is getting sizing right and keeping wraps clean at small scale. Start with adjustable ring designs, which forgive sizing mistakes.
Bracelets and Cuff Bangles
Use thicker wire (16-18 gauge) for the cuff base and wrap with thinner wire and beads. The long straight sections give you room to practice consistent wraps, and they're more forgiving than rings.
Woven Wire Jewelry
This overlaps with fine metalwork — multiple thin wires woven together to create intricate bands and decorative elements. Look into Viking knit, basket weave, and Spanish galley techniques once you're ready.
Where to Buy Materials and Learn More
Etsy has hundreds of shops selling copper and silver wire at competitive prices. For bulk deals, dedicated jewelry supply websites offer better pricing and more variety. For crystals, gem and mineral shows are ideal — great selection, fair prices, and you can see exactly what you're getting.
YouTube is your best free learning resource. Search for "wire wrapping for beginners" and look for videos that show pliers and wire up close with instructors who explain what they're doing. Several excellent wire wrapping books provide structured projects progressing from easy to advanced.
The wire wrapping community is active and welcoming on social media. Share your work, ask questions, and don't be afraid to post the messy early pieces — everyone started somewhere.
Comments