Wire Wrapping Stones for Beginners: Tools, Techniques, and Your First Pendant
The first time I tried wire wrapping, I twisted a piece of wire around a stone so tightly that it cracked. Not chipped — cracked clean through. A perfectly good amethyst, ruined in about 30 seconds because I had no idea what I was doing.
Wire wrapping looks effortless when done well, and that's what makes it so appealing to beginners. No soldering, no torches, no chemicals — just wire, pliers, and stones. But like any craft, there's a huge gap between "looks easy" and "actually easy." The good news is that with the right techniques and a bit of practice, you can start making beautiful wrapped pieces within your first few hours of trying.
Here's a comprehensive beginner's guide to wire wrapping stones, covering everything from tool selection to your first finished pendant.
Understanding Wire: The Foundation of Everything
Wire Gauges Explained
Wire thickness is measured in gauge (AWG in the US). Counterintuitively, higher numbers mean thinner wire. For wire wrapping, you'll work with a range of gauges, each serving a different purpose:
- 16 gauge (1.3mm): Structural wire for frame-style wraps, heavy-duty rings, thick bangles. Hard to bend with basic pliers but holds shape well.
- 18 gauge (1.0mm): The workhorse. Use for main wraps, ring shanks, structural elements, and anything that needs to hold its form. This is the gauge I use most often.
- 20 gauge (0.8mm): Medium wire for wrapping around stones, decorative coils, ear wires, and connecting elements. A good balance of flexibility and strength.
- 22 gauge (0.6mm): Thin wire for fine detail work, small wraps, weaving, and binding multiple wires together. Easy to work with but not strong enough for structural elements.
- 24-26 gauge (0.5-0.4mm): Very thin wire for decorative accents, weaving patterns, and binding. Breaks easily if stressed.
Wire Hardness
Wire comes in different hardness levels:
- Dead soft: Extremely malleable, bends easily with your fingers. Great for intricate wrapping and sculptural work. Too soft for structural elements — it won't hold its shape under stress. Work-hardens as you manipulate it.
- Half hard: The best all-around choice for wire wrapping. Firm enough to hold shape, soft enough to work without excessive force. Most of your 18-20 gauge wire should be half hard.
- Full hard: Stiff, difficult to bend. Use for ear wires, clasps, and elements that need to maintain their shape under pressure. Not ideal for wrapping.
Dead soft wire becomes harder as you work with it — every bend, twist, and hammer stroke increases its stiffness. This is called work hardening, and it's why dead soft wire is actually a great choice for beginners: it's easy to shape, and by the time you're done, it's hardened enough to hold its form.
Wire Materials
- Copper: The best practice wire. Cheap ($3-5 per 10 feet), easy to work with, and takes texture well. Turns green over time (patina), which some people love and others seal with lacquer to prevent.
- Brass: Slightly stiffer than copper, gold-colored, affordable ($4-7 per 10 feet). Good for warm-toned designs.
- Sterling silver: The classic jewelry metal. Softer than copper but stronger for its thickness. $8-15 per foot depending on gauge. Solders well if you want to combine techniques.
- Gold-fill: A thick layer of gold bonded to brass. Looks and wears like solid gold but costs a fraction ($10-20 per foot). The best choice for selling — customers love gold, and gold-fill doesn't wear off like plating.
- Argentium silver: A tarnish-resistant sterling silver alloy. Slightly more expensive than regular sterling but worth it if you hate polishing.
Start with copper for practice, then move to sterling or gold-fill when you're ready to sell.
Choosing Stones for Wire Wrapping
Not all stones wrap equally well. Here's what makes a stone wire-wrap friendly:
Ideal Stone Shapes
- Flat-backed cabochons: The easiest to wrap. The flat back gives you a stable surface to work against. Oval and round cabs are perfect for beginners.
- Tumbled stones: Smooth, rounded stones with no sharp edges. Inexpensive and available in endless varieties. Their irregular shapes create unique, organic-looking wraps.
- Faceted stones with flat tops: Briolettes (teardrop-shaped faceted stones) are popular for wire-wrapped pendants. Look for stones with a visible drill hole or flat edge where wire can grip.
- Drilled beads: Stones with a hole through them. Easy to wire-wrap using the hole as an anchor point.
Stones to Avoid (At First)
- Perfectly round beads: Wire slips off round surfaces easily. Hard to get a secure grip without holes.
- Very small stones (under 10mm): Difficult to wrap neatly — your wire will look bulky relative to the stone.
- Very large stones (over 40mm): Require heavy wire and advanced structural techniques to support the weight.
- Fragile stones: Opals, turquoise, and some thin slabs can crack under wire pressure. I learned this the hard way with that amethyst.
Where to Buy Stones
For practice, tumbled stone lots from Amazon or Etsy cost $10-20 for 20-30 stones. For better quality cabochons, try specialty suppliers like Rio Grande, Thunderbird Supply, or Fire Mountain Gems. Individual cabochons range from $2-30 depending on the stone type and quality.
The Essential Tool Kit
You need fewer tools for wire wrapping than you might think:
- Round nose pliers ($6-15): For making loops and curves. The tapered jaws let you control loop size.
- Chain nose pliers ($6-12): For gripping wire, opening/closing loops, and making sharp bends. Flat jaws reach into tight spaces.
- Flat nose pliers ($6-10): Similar to chain nose but with wider, completely flat jaws. Better for flattening and gripping larger areas.
- Flush cutters ($8-15): For cutting wire. The flat cut is essential for clean joins.
- Nylon jaw pliers ($8-15): Optional but highly recommended. Used for straightening bent wire and smoothing out kinks without leaving marks. Worth their weight in gold.
- Needle file set ($5-10): For smoothing cut wire ends.
Total starter kit: $40-75 if buying new. Many craft stores sell basic sets for under $30. The quality won't be professional-grade, but it's sufficient for learning.
Basic Techniques You Need to Know
Making a Basic Loop
This is the foundation of wire wrapping. Grip the end of the wire in your round nose pliers, about 1cm from the tip. The closer to the tip you grip, the smaller the loop. Rotate the pliers to bend the wire into a circle. The wire tail should cross over itself, completing the loop. Use flat nose pliers to press the tail against the wire stem, closing the gap.
Practice making loops until they're consistently round and centered. This single technique is used in virtually every wire-wrapping project.
Making a Wrapped Loop
Start with a basic loop, but before closing it, wrap the tail end around the wire stem 2-3 times. This creates a secure connection that won't open. Trim the excess tail with flush cutters and use your chain nose pliers to press the cut end flat against the wraps.
Wrapped loops are used everywhere in jewelry making — connecting pendants to chains, making bead links, attaching ear wires. Master this and you've unlocked half of wire wrapping.
Creating a Wire Bail
A bail is the loop that connects a pendant to a chain. To make a simple bail for a wrapped stone: take a 3-4 inch piece of 20-gauge wire, fold it in half, and wrap the folded end over the top of your stone. Twist the two wire ends together below the stone, creating a loop at the top. Wrap the twisted portion neatly and trim.
The Weave (Figure-Eight Pattern)
Take two parallel wires and use a thin (22-24 gauge) wire to wrap between them in a figure-eight pattern: over the top wire, between the wires, under the bottom wire, between the wires, over the top wire again. This creates a decorative band that's both structural and beautiful. The weave is the basis for many advanced wire-wrapping designs.
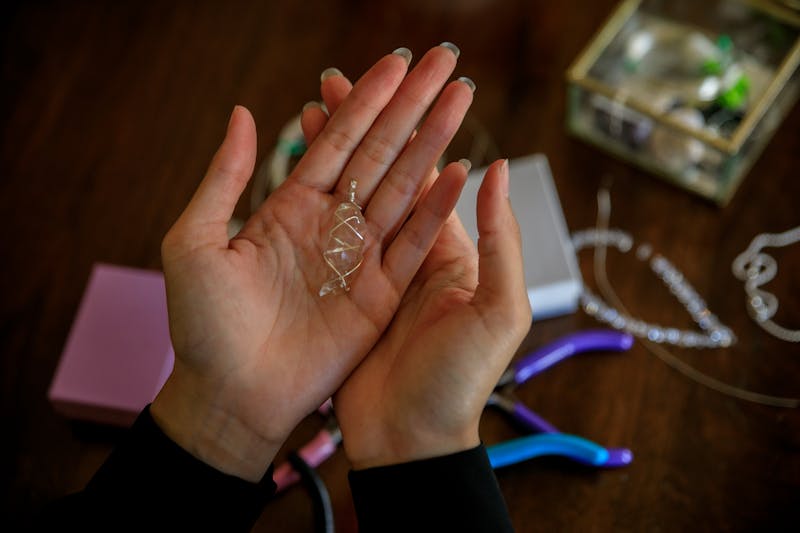
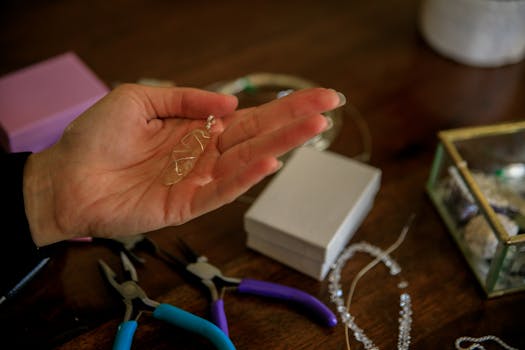
Your First Project: Simple Wrapped Cabochon Pendant
This is the project I wish someone had walked me through on day one. It uses basic techniques, requires minimal tools, and produces a professional-looking result even on your first try.
Materials
- 1 oval or round cabochon (20-30mm is ideal)
- 18 gauge half-hard round wire: 8 inches (for the frame)
- 22 gauge dead-soft round wire: 18-24 inches (for the wrapping)
Step 1: Create the Frame
Take the 18-gauge wire and bend it into a shape that roughly matches the outline of your cabochon. For an oval stone, form an oval loop. For a round stone, form a circle. Don't worry about being perfect — the wrapping will cover imperfections. Leave about 1 inch of wire extra at each end for the bail.
Place the frame against the front of the stone. It should sit slightly proud (above the surface) of the stone's edge. If it's too loose, make it smaller. Too tight, make it bigger. This is the most critical measurement — get it close, and the rest falls into place.
Step 2: Wrap the Top
Cross the two wire ends of your frame above the stone, creating an X. Twist them together 2-3 times to lock the frame in place. These twisted ends will become your bail — the loop that the chain passes through. Shape them into a neat loop above the stone and wrap the ends around the base of the loop to secure.
Step 3: Bind the Frame to the Stone
Take your 22-gauge wire and wrap it 3-4 times around one side of the frame, close to the top. This anchors the wrapping wire. Now bring the wrapping wire across the front of the stone, and wrap it 3-4 times around the opposite side of the frame. Continue this back-and-forth pattern, working your way down the stone.
Keep your wraps snug against the frame wire. Loose wraps look messy and don't hold the stone securely. Each pass across the stone should be spaced evenly — about 3-5mm apart for a clean look, or closer together for a denser, more ornate design.
Step 4: Wrap the Bottom
When you reach the bottom of the stone, wrap the wire around the frame 3-4 times to secure it. Cut the wire with flush cutters and use your chain nose pliers to press the cut end flat. Make sure there are no sharp points — they'll catch on fabric and skin.
Step 5: Shape and Tension
Check that the stone sits securely in the frame. If it's loose, you can add tension by gently squeezing the frame wire inward with your flat nose pliers. If the wrapping wire has any loose spots, use your pliers to snug them up.
Run your finger over the entire front of the pendant. It should feel smooth with no sharp edges. If any wire ends are poking out, file them down or tuck them under a wrap.
Step 6: The Bail
Your bail should be centered above the stone and large enough to fit a chain through. If it's too small, gently widen it with your round nose pliers. If it's asymmetrical, adjust it now — it gets harder to fix once you've moved on.
A well-shaped bail is the difference between "homemade" and "handmade." Take 30 seconds to make sure it's even and centered.
Common Beginner Problems and Solutions
The Stone Is Loose in the Wrap
Either your frame is too large or your wraps aren't tight enough. To fix: remove the stone, squeeze the frame smaller with your pliers, and re-wrap more tightly. If you've already done a lot of wrapping, it might be easier to start over with a better-fitting frame. Measure twice, wrap once.
The Wrapping Wire Keeps Breaking
You're probably work-hardening it too much by bending it back and forth in the same spot. Dead soft wire is more forgiving. Also check that you're not pulling too hard when wrapping — steady, even pressure is better than force.
Wire Marks Are Visible on the Stone
Placer jaws can scratch softer stones. Wrap the stone in tape while working, or use nylon-jaw pliers for adjustments near the stone surface. Some makers actually like the look of wire marks on the stone — it's a matter of taste.
The Bail Is Crooked
This happens when the two frame wires aren't crossing at the same point above the stone. Before twisting, make sure both sides are even. If the bail is already formed and crooked, you can often straighten it by gently bending the base where it meets the frame.
The Finished Piece Looks Messy
Messy wrapping is usually caused by inconsistent spacing, loose wraps, or visible cut ends. Take your time with each wrap, press cut ends flat, and aim for even spacing. Speed comes with practice — don't rush your first pieces.
Three More Beginner-Friendly Projects
Wire-Wrapped Briolette Pendant
Briolettes (teardrop-shaped faceted stones) have a hole drilled through the top. Thread a piece of 22-gauge wire through the hole, bend it into a V-shape above the stone, and wrap the two wire ends around the stem below the hole. Create a wrapped loop at the top for the bail. This project takes 10-15 minutes and looks surprisingly elegant.
Simple Wire Ring
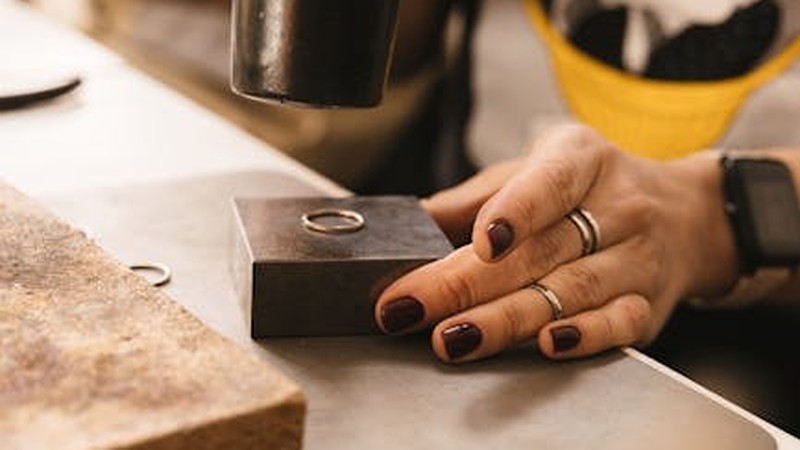
Wrap a stone onto a ring frame made from 16-18 gauge wire. Use a ring mandrel to size the frame, place a small cabochon or tumbled stone on top, and use 22-gauge wire to bind the stone to the frame. This project teaches you wire tension and structural wrapping in a small, manageable scale.
Wire-Wrapped Earrings
Matched pairs are great for practicing consistency. Wrap two identical tumbled stones using the same technique as the pendant project, then attach them to ear wires. The constraint of making two identical pieces forces you to be precise and deliberate with each wrap.
Developing Your Style
Every wire wrapper eventually develops a recognizable style. Some prefer clean, minimalist wraps with lots of negative space. Others go for elaborate, cage-like designs with intricate weaving. Some use only straight lines and geometric shapes. Others embrace organic, flowing forms.
Don't try to force a style — it emerges naturally as you make more pieces and discover which techniques and aesthetics you're drawn to. Try different approaches. Make a piece that's super ornate, then make one that's as simple as possible. The contrast will teach you a lot about what you like.
Take photos of everything you make, even the ones you don't like. Looking back at your progress over weeks and months is incredibly motivating, and your early "failures" often contain elements worth revisiting later.
Wire wrapping is one of the most accessible and rewarding jewelry-making techniques. With a small investment in tools and materials, you can start creating unique, sellable pieces from your very first day. The key is patience with yourself — every experienced wire wrapper started with a cracked amethyst and a crooked bail. The only difference between them and you is practice.

Comments