Wire Wrapped Bangle Bracelet Tutorial: 3 Begi...
June 5, 2026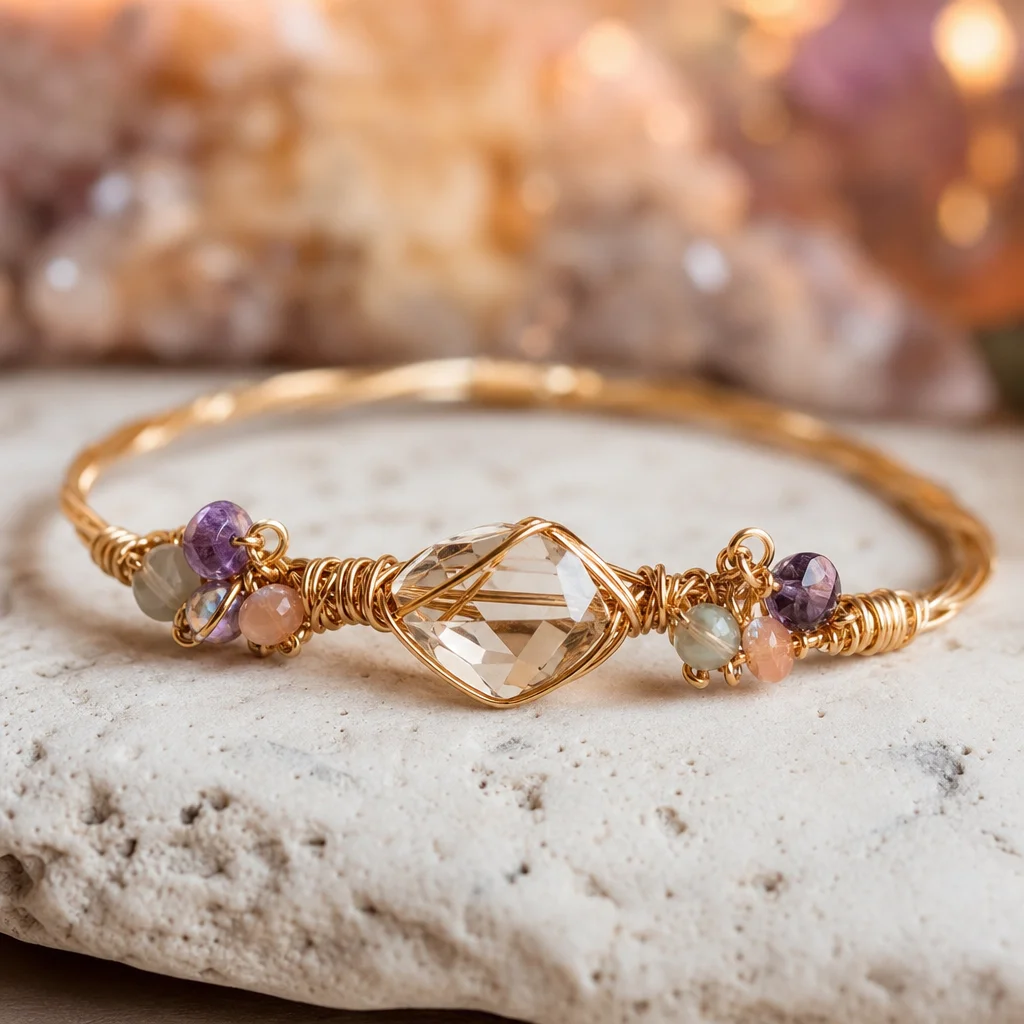
Getting Started: Understanding Wire Wrapped Bangles
Wire wrapped bangles are among the most satisfying jewelry pieces to make because they require minimal tools, no soldering, and yet produce results that look professional and complex. The fundamental concept is simple: wrap wire around a mandrel to create a circular form, then use additional wire to attach beads, create decorative elements, or build layered patterns on top of the base shape.
Unlike chain bracelets that rely on connecting links, a bangle is a rigid or semi-rigid circle that slips over the hand. This makes bangle construction more forgiving than many other wire projects — there are no tiny jump rings to open and close, no clasps to attach, and the continuous circle design means any wrapping mistakes on one section can be balanced or covered by design elements elsewhere.
This tutorial covers three progressively more detailed designs, all suitable for beginners. Each starts with the same base bangle technique, so once you master the foundation, you can focus on the decorative variations. The three designs are: a simple wrapped ring, a bead-accented design, and a crystal point centerpiece.
Tools and Materials You Need
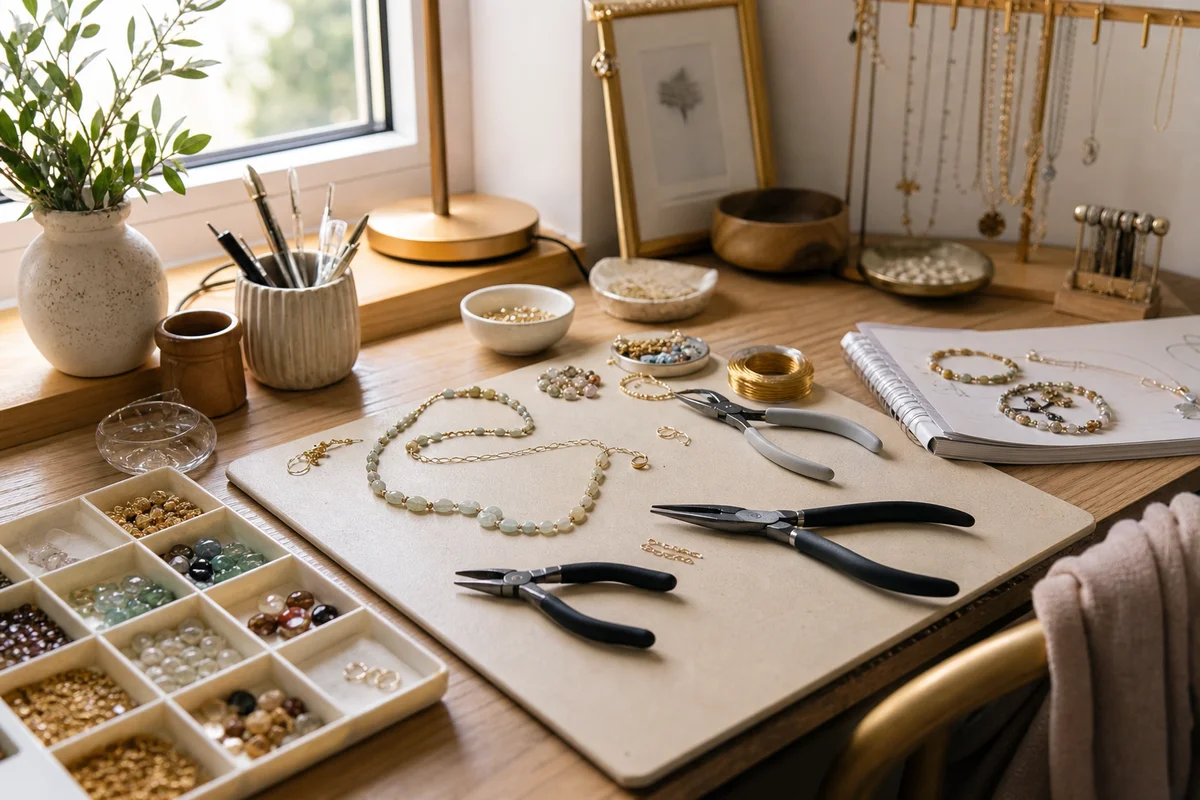
Before starting, gather these tools and materials. You do not need anything expensive or specialized — most of these are available at craft stores or online for under $30 total:
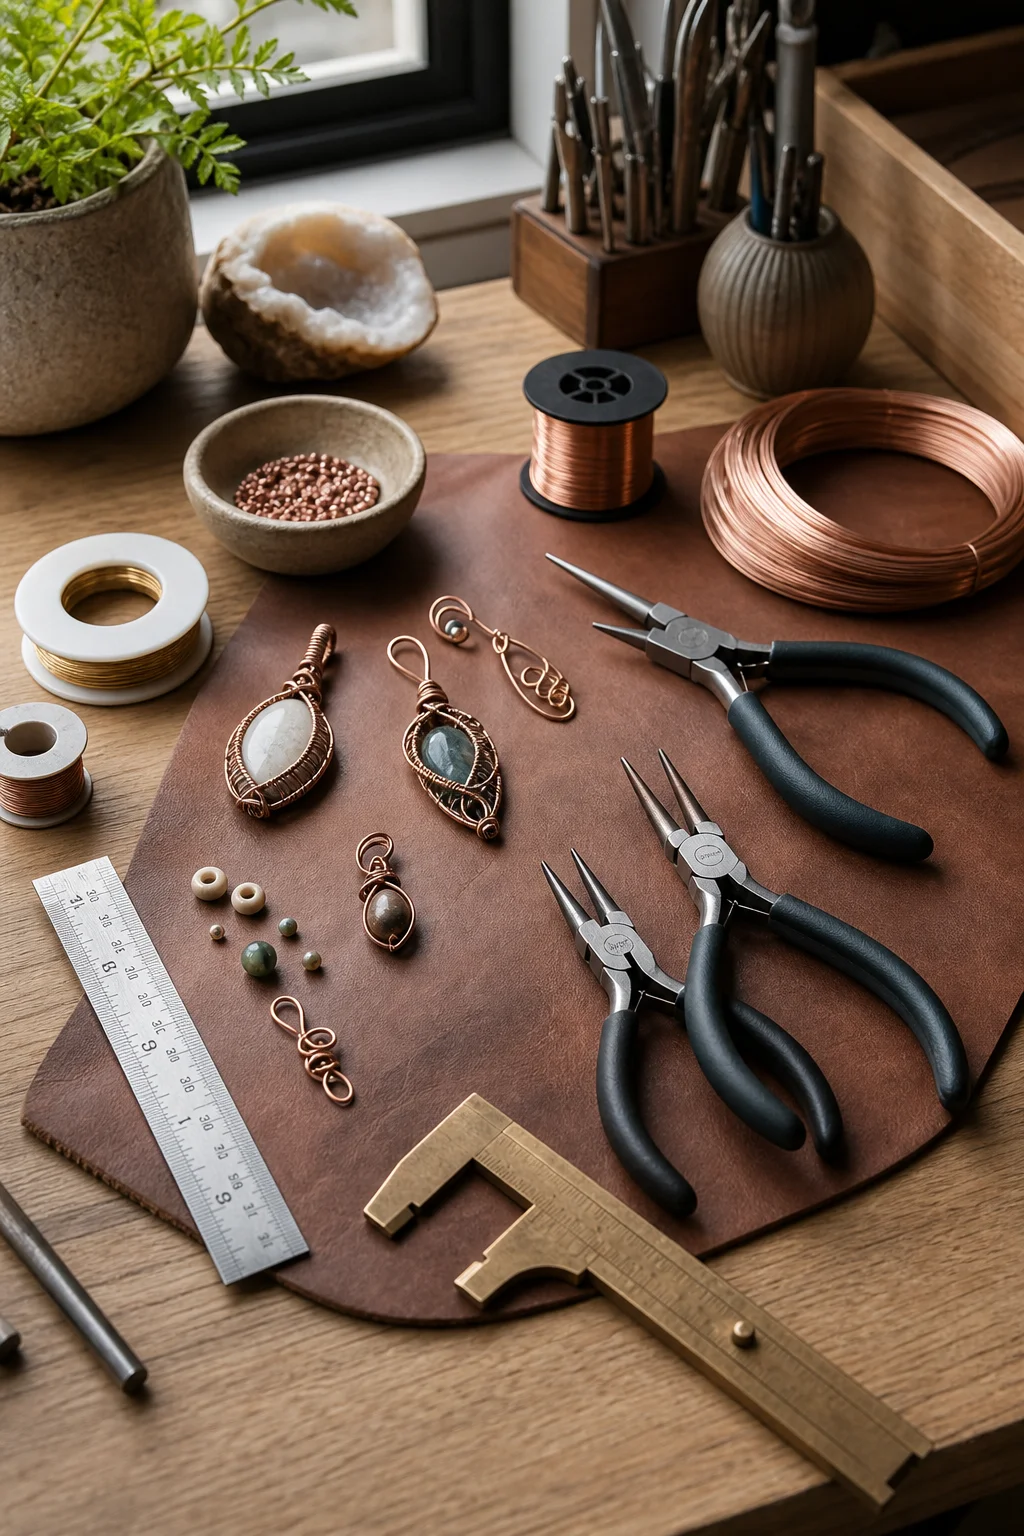
- Round nose pliers: For making loops and curves in the wire. Essential.
- Chain nose (flat) pliers: For flattening wire, opening loops, and gripping wire in tight spaces. Essential.
- Wire cutters (flush cut): For cutting wire cleanly. Essential.
- Mandrel: A cylindrical tool for shaping the bangle. A wooden dowel, a metal bangle mandrel, or even a thick marker pen works. The size determines your bangle diameter. Essential.
- Ruler or measuring tape: For measuring your hand size and wire lengths.
- 16-gauge copper wire: For the bangle base. Copper is the best material for beginners — it is inexpensive, soft enough to shape easily, and develops a beautiful warm patina over time.
- 20-gauge or 22-gauge copper wire: For wrapping and decorative work. Thinner wire is more flexible and easier to wrap around the base wire.
- Nylon jaw pliers (optional): For straightening bent wire without marring the surface.
- Beads, crystal chips, or crystal points: For Designs 2 and 3.
Measuring Your Bangle Size Correctly
This is the step most beginners get wrong, and it determines whether your finished bangle will slide comfortably over your hand or get stuck halfway. Do not measure your wrist — measure your hand at its widest point.
Close your hand into a loose fist (thumb tucked across fingers, not clenched tightly). Wrap a flexible measuring tape around the knuckle area — the widest part of your fist. Record this measurement. This is your hand circumference, and your bangle's inner diameter needs to be slightly larger than this measurement divided by pi (3.14).
For example, if your hand measures 8 inches around: 8 ÷ 3.14 = 2.55 inches inner diameter. Round up to the nearest eighth inch: 2.625 inches. Select a mandrel that produces a circle of approximately this diameter. If you are using a wooden dowel, its diameter should be slightly smaller than the target — the wire will add about 1-2mm to the total diameter.
Common sizes: small hands (7-7.5 inch circumference) need about 2.25-2.4 inch diameter bangles. Medium hands (7.5-8 inches) need 2.4-2.6 inches. Large hands (8-8.5 inches) need 2.6-2.7 inches. When in doubt, go slightly larger — a loose bangle is wearable; a tight one is not.
Design 1: Simple Wrapped Wire Bangle
This is the foundational design that teaches the core technique. No beads, no crystal points — just wire, shaped and wrapped.
Step 1: Cut a 10-12 inch length of 16-gauge copper wire for the base. Grip one end with your round nose pliers and bend it into a small loop (about 3-4mm across). This loop serves as a decorative end and also prevents the wire from snagging.
Step 2: Wrap the wire around your mandrel, starting from the looped end. Wrap it smoothly and evenly, keeping consistent tension. Make approximately 2.5 to 3 full wraps — you should end up with a multi-layered circle of wire. The exact number of wraps depends on your mandrel size and how thick you want the bangle to look.
Step 3: Remove the coiled wire from the mandrel. Grip the tail end with round nose pliers and create a matching loop, mirroring the first one. Use your chain nose pliers to adjust the loops so they sit flat and aligned. The two loops will be the decorative ends of the bangle, and they also create a slight overlap that keeps the wire layers from spreading apart.
Step 4: Cut a 20-inch length of 20-gauge copper wire. Thread one end under the bangle base, near one of the loops. Wrap it around the base wire 4-5 times, creating a small decorative coil. This anchors the wrapping wire.
Step 5: Continue wrapping the 20-gauge wire along the base, adding a wrap every 1-2 inches. You can space them evenly or cluster them — either looks good. When you reach the other end, wrap 4-5 times near the second loop to match the first cluster. Trim the wrapping wire and use chain nose pliers to flatten the cut end against the base so it does not snag.
Step 6: Check the bangle's shape by holding it at eye level and looking for any flat spots or irregular curves. Use your fingers to gently reshape any uneven areas. The final product should be a smooth, even circle with decorative loops at the ends and subtle wrapping accents along the body.
Design 2: Bead-Accented Bangle
This design builds on the same base technique but adds beads along the wrapping wire for color and visual interest.
Step 1: Create the base bangle exactly as described in Design 1, Steps 1-3. You need a clean, even base before adding beads.
Step 2: Select 5-8 beads for your accent positions. For crystal-themed bangles, small tumbled stones (amethyst, rose quartz, citrine) or chip beads work well because they sit flat against the base wire. Make sure the bead holes are large enough for your 20-gauge wrapping wire to pass through — most standard chip beads accommodate 20-gauge easily.
Step 3: Cut a 24-inch length of 20-gauge wrapping wire. Anchor it to the base as in Design 1, Step 4.
Step 4: Thread the first bead onto the wrapping wire. Position it where you want it on the bangle, then wrap the wire around the base 2-3 times on each side of the bead to lock it in place. The wraps should be snug against the bead to prevent it from sliding.
Step 5: Continue adding beads at even intervals around the bangle, wrapping each one securely. Space the beads evenly — a simple way to do this is to mentally divide the bangle into sections (if using 6 beads, space them 60 degrees apart; for 5 beads, space them 72 degrees apart).
Step 6: After the final bead, wrap the remaining wire around the base several times to create a matching coil at the second end. Trim and flatten the tail. Check all bead positions — if any have shifted during the process, gently adjust them and add an extra wrap to secure.
Design 3: Crystal Point Centerpiece Bangle
This design uses a larger crystal point as a focal element on the bangle. It is more visually dramatic than the previous designs but uses the same basic techniques.
Step 1: Create the base bangle as before. For this design, make the base slightly larger than for Designs 1 and 2, because the crystal point and its wire wrapping will take up some of the inner space.
Step 2: Select a crystal point (natural or tumbled) roughly 1-1.5 inches long. Amethyst, clear quartz, citrine, and rose quartz points all work beautifully. The crystal should have a natural taper that allows it to sit comfortably on the wrist when mounted on the bangle.
Step 3: Position the crystal point on the outside of the bangle base. Cut a 30-inch length of 20-gauge wire. Thread the center of the wire under the bangle base at the point where you want to mount the crystal.
Step 4: Wrap the wire in opposite directions around the crystal point, crossing over at the front. Make an X pattern with the wire, positioning the cross point about one-third of the way down from the top of the crystal. Wrap each side of the wire around the bangle base 3-4 times to secure.
Step 5: Continue wrapping up and around the crystal in a cage-like pattern, crossing the wires at regular intervals. The goal is to create a secure wrap that holds the crystal without excessive wire covering the stone — you want the crystal visible, not buried under wire. Four to six wire crossings on each side of the crystal are usually sufficient.
Step 6: Bring both wire ends back to the bangle base and wrap them in opposite directions along the base for 2-3 inches on each side of the crystal mount, creating decorative accents that integrate the crystal with the bangle. Trim both wire tails and flatten them against the base.
Common Mistakes and How to Avoid Them
The most frequent beginner mistake is using wire that is too soft. Even 16-gauge copper is relatively soft, and after multiple wraps it may lose its shape and the bangle may deform when you try to put it on. The solution: after shaping the base bangle, gently tap the entire circle with a nylon hammer (or a regular hammer through a cloth) on a hard surface. This work-hardens the copper, making it stiffer and more shape-retentive without changing its appearance.
Second common mistake: making the bangle too small. Always measure your hand, not your wrist, and err on the side of slightly too large. You can make a bangle slightly smaller by squeezing it gently, but you cannot make it larger without cutting and re-wrapping.
Third: using wire cutters that leave sharp burrs. Flush cutters are essential — they cut the wire flat on one side and angled on the other. Always orient the flat cut toward the inside of the bangle so the angled (potentially sharp) side faces outward where it can be filed smooth.
Fourth: overworking the wire. Copper work-hardens as you bend and manipulate it. If the wire becomes brittle or starts to crack at bend points, you have overworked it. Use fresh wire for new pieces and avoid repeatedly re-bending the same section.
Finishing and Polishing
Once your bangle is complete, use fine sandpaper (400-600 grit) to smooth any sharp wire ends. Follow with polishing cloth to bring out the copper's natural shine. If you prefer a darker, more antiqued look, dip the finished bangle in a solution of warm water and a few drops of ammonia for 10-15 seconds, then rinse and dry — this accelerates the natural patina process. For a bright, polished finish, a jewelry polishing pad or brass brush will restore the copper's shine. Apply a thin coat of Renaissance wax or clear nail polish to the finished piece to slow the patina process if you prefer to maintain the bright copper look.
Frequently Asked Questions
What types of crystals are best for wire wrapping in a bangle bracelet?
For wire wrapping, crystals with smooth surfaces and moderate weight are ideal. Clear quartz, rose quartz, and amethyst are popular choices due to their ease of handling and aesthetic appeal.
Can I use different colors of wire for my wire wrapped bangle bracelet?
Absolutely! Using different colors of wire can add a unique and personalized touch to your bracelet. Just ensure the wire is compatible with the crystal's color and the overall design theme.
How can I determine the best size of crystals for my bangle bracelet design?
Choose crystals that are proportionate to the bangle's size. For a standard bangle, 8mm to 10mm crystals are commonly used. Larger crystals can be used for a statement piece, while smaller ones can create a delicate look.
Are there any precautions I should take when cleaning my wire wrapped crystal bangle bracelet?
Use a soft cloth for general cleaning and avoid harsh chemicals. If the wire tarnishes, gently buff it with a wire brush or steel wool. Always remove your bracelet before swimming or using hand sanitizers to prevent damage.
Can I combine different types of crystals in one wire wrapped bangle bracelet design?
Yes, combining different types of crystals can create a diverse and dynamic design. Just ensure that the crystals complement each other in color and size for a cohesive look.


Comments