How to Start Making Jewelry at Home: A Realistic Beginner Roadmap
So You Want to Make Jewelry at Home
I get it. You've been scrolling through Instagram, looking at beautiful handmade earrings and necklaces, and thought, "I could probably do that." Maybe you watched a few YouTube videos, got inspired, and now you're trying to figure out where to actually start without spending a fortune on tools you might not end up using.
The good news is that making jewelry at home is absolutely doable. Thousands of people do it as a hobby, and quite a few have turned it into a side business or even a full-time income. The bad news is that the beginning can feel overwhelming because there are so many techniques, materials, and tools to choose from. This guide is designed to help you cut through the noise and get started with a realistic approach that won't drain your bank account.
Pick Your Technique Before You Buy Anything
This is the single most important decision you'll make, and the one most beginners get wrong. They go online, buy a random assortment of tools and materials, and then try to figure out what to make with them. That's backwards. You should choose a technique first, based on what kind of jewelry you actually want to make, and then get only the tools and materials needed for that technique.
Here are the main beginner-friendly options, in order of accessibility:
Beaded jewelry is the easiest entry point. You're essentially stringing beads on wire or thread and adding clasps. The tools are minimal, the materials are affordable, and you can make wearable pieces within your first hour. Beading covers everything from simple stretchy bracelets to complex multi-strand necklaces with intricate patterns. It's the most forgiving technique for beginners because mistakes are easy to fix.
Wire wrapping is the next step up in terms of difficulty, but it's still very accessible for beginners. You're using wire to create structures that hold beads, stones, or charms. Basic wire wrapping requires just a few tools: round-nose pliers, chain-nose pliers, wire cutters, and the wire itself. You can start with simple wrapped loops and progress to more complex designs as your skills improve. Wire wrapping is versatile because you can use it with almost any type of bead or stone, including irregularly shaped crystals that can't be drilled.
Macrame jewelry uses knotted cord to create patterns, often incorporating beads or pendants. It requires very few tools, just the cord and some kind of clipboard or board to hold your work. Macrame bracelets and necklaces have a casual, bohemian aesthetic that's popular right now, and the technique is easy to learn from online tutorials.
Resin jewelry involves mixing liquid resin, adding colorants, dried flowers, glitter, or small objects, and pouring it into molds. It requires some specific materials and a well-ventilated workspace, but the results can be stunning. Resin is a good option if you're interested in making pendants, earrings, or bangles with embedded elements that would be difficult to achieve with other techniques.
Metal stamping and basic metalwork are more advanced and require more tools, but they're worth mentioning because they're the gateway to more serious jewelry fabrication. Metal stamping involves pressing letters or designs into metal blanks with steel stamps and a hammer. Basic soldering lets you join metal pieces together. These techniques require a bigger initial investment but open up a much wider range of design possibilities.
The Bare Minimum Toolkit
Whatever technique you choose, resist the urge to buy a massive toolkit right away. Start with the absolute minimum and add tools as you need them. Here's what you need for the most popular beginner technique, basic beaded jewelry:
A set of three basic pliers: round-nose, chain-nose, and flush cutters. These three tools will handle almost everything you need to do with wire, from making loops to cutting to opening and closing jump rings. Buy decent quality but don't go overboard. Mid-range tools from a jewelry supply company work fine for beginners. You don't need professional-grade tools until you've been making jewelry for a while and know you'll stick with it.
Beading wire in a couple of gauges. For most beaded necklaces and bracelets, 49-strand flexible beading wire in 0.018 or 0.019 inch diameter is a good all-purpose choice. It's strong, flexible, and works with most bead sizes. You'll also need crimp beads or crimp tubes and a crimping tool to secure the wire to the clasp.
Findings, which is the catch-all term for all the metal components that hold jewelry together: jump rings, ear wires, clasps (lobster clasps are easiest for beginners), head pins, and eye pins. Buy a mixed findings pack to start, so you have a variety of components to experiment with.
Beads, of course. Start with a modest collection of beads that appeal to you. Glass beads, gemstone chips, and basic metal beads are affordable and versatile. Don't go overboard buying expensive beads until you've practiced enough to feel confident that you won't waste them on poorly executed pieces.
A bead board or bead mat is helpful but not essential. A bead board has grooves that let you lay out your design before stringing, which helps with planning the pattern and length. A bead mat prevents beads from rolling around on your work surface. A towel works almost as well as a bead mat if you're trying to keep costs down.
Setting Up Your Workspace
You don't need a dedicated studio. A corner of a desk, a kitchen table, or even a lap desk works fine. What you do need is good lighting. Trying to work with small beads, thin wire, and tiny findings in poor light is frustrating and leads to mistakes. A desk lamp with a daylight bulb makes a huge difference.
Organization matters more than you'd think. Small beads, findings, and wire spools have a way of getting tangled, mixed up, and lost. Small containers, bead boxes with compartments, or even pill organizers work well for keeping things sorted. Start simple and upgrade your storage as your collection grows.
Keep your tools together in one place. A small toolbox, pencil case, or dedicated drawer means you won't waste time hunting for your round-nose pliers every time you sit down to work. Consistency matters: if you always know where your tools are, you're more likely to actually sit down and make something.
Good ventilation is important for some techniques, particularly resin work and any soldering. For basic beading and wire wrapping, ventilation isn't a concern. But if you're planning to work with resin or chemicals, set up near a window or in a space with good air circulation.
Your First Projects: Start Simple and Finish Something
The biggest mistake beginners make is choosing projects that are too ambitious for their current skill level. It's tempting to jump straight into complex multi-strand necklaces or elaborate wire-wrapped pendants, but you'll learn faster and feel better about your progress if you start with simple projects and actually finish them.
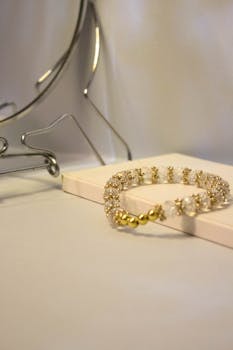
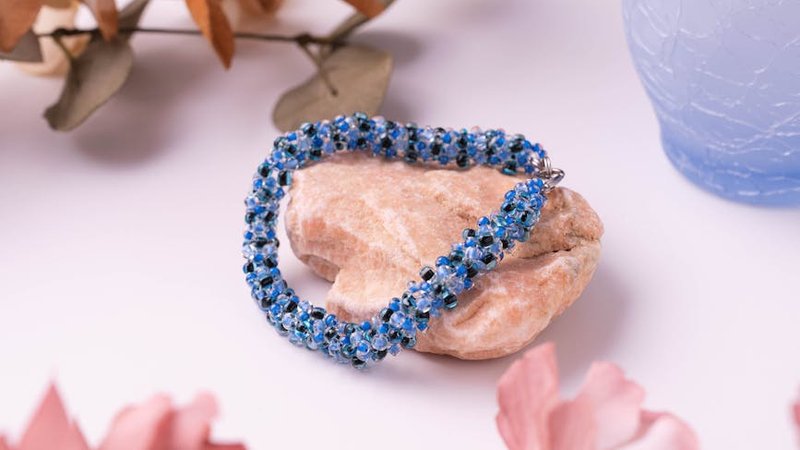
A single-strand beaded bracelet is the perfect first project. Choose 3-5 types of beads in colors that work together, plan a simple repeating pattern, string them on beading wire, add a clasp, and you've made a bracelet. It's straightforward, the materials are inexpensive, and wearing something you made yourself is genuinely satisfying.
Simple drop earrings are another great beginner project. Thread a bead onto a head pin, make a wrapped loop at the top, and attach it to an ear wire. Two of those, and you have a pair of earrings. You can vary the design endlessly by changing the bead shape, size, and color combination.
A simple wire-wrapped pendant takes a bit more practice but is very achievable for a beginner. You'll need a stone or bead with a hole drilled through it, some wire, and your basic pliers. There are hundreds of free tutorials online that walk you through the process step by step. Start with a simple wrapped loop design before trying more complex wrapping patterns.
The key is to complete projects, not just start them. Every finished piece, even if it's not perfect, teaches you something and gives you a reference point for improvement. Having a small collection of finished pieces also helps you see your progress over time, which is motivating.
Where to Learn Techniques
YouTube is the single best free resource for learning jewelry-making techniques. There are hundreds of channels dedicated to specific techniques, and watching someone demonstrate a process is much easier to follow than reading about it. Look for channels that show the process clearly, explain the "why" behind each step, and don't skip the fundamentals.
Online courses offer more structured learning. Platforms like Udemy, Skillshare, and Craftsy have jewelry-making courses that take you from absolute beginner through intermediate techniques. Some are free, most are affordable, and the structured progression can help you avoid the common problem of watching random tutorials without developing a coherent skill set.
Local classes, if available, provide hands-on instruction and the opportunity to ask questions in real time. Community colleges, craft stores, and local bead shops sometimes offer beginner classes. The social aspect of learning with other beginners can also be motivating.
Books are an underrated resource. A good jewelry-making reference book gives you reliable information on techniques, materials, and troubleshooting that you can refer to anytime, even without internet access. Look for books that cover a specific technique you're interested in rather than general overviews.
Common Beginner Mistakes to Avoid
Buying too many supplies at once is probably the most common mistake. You get excited, fill your cart with beads, tools, findings, and materials for five different techniques, spend a few hundred dollars, and then lose interest before using half of it. Start with enough supplies for two or three simple projects. When you've finished those and still want to continue, then buy more.
Skipping the basics leads to frustrating results. It's tempting to jump straight to complex designs, but if you haven't mastered making a clean wrapped loop, your elaborate multi-component piece will fall apart. The basics, making loops, opening jump rings correctly, crimping securely, are the foundation of everything else. Spend time practicing these fundamental skills until they become automatic.
Using the wrong wire gauge for the job causes endless problems. Wire that's too thin will break under stress. Wire that's too thick will be impossible to bend into the shapes you want. As a general rule, 20-gauge wire is a good all-purpose choice for ear wires, jump rings, and basic wire wrapping. 22-gauge works for smaller, more delicate work. 18-gauge is good for structural components that need more strength.
Not finishing pieces is a motivation killer. Having a drawer full of half-finished projects is discouraging. Set a goal of completing at least one piece every time you sit down to work. It doesn't have to be perfect. It just needs to be done.
When You're Ready to Level Up
Once you've made a dozen or so pieces and feel comfortable with the basics, you'll naturally start wanting to try more advanced techniques and work with better materials. That's the right time to invest in better tools, more specialized materials, and possibly a class or course in a technique that interests you.
Intermediate skills to explore include wire weaving, basic soldering, metal stamping, stone setting, and chain making. Each of these opens up new design possibilities and takes your work to a different level. Don't try to learn all of them at once. Pick one that complements the technique you've already learned and focus on it for a while.
Better materials make a bigger difference than you'd expect. Once your skills are solid enough to do them justice, working with higher-quality beads, gemstones, and metals elevates your finished pieces significantly. The same design in cheap glass beads versus quality gemstones looks like a completely different piece of jewelry.
Start photographing your work if you haven't already. Good photos are essential if you ever want to sell your jewelry, but they're also useful for tracking your progress and building a portfolio. You don't need professional equipment. A smartphone camera with good natural lighting is sufficient for most purposes.
The Realistic Take
Making jewelry at home is one of the most rewarding creative hobbies you can pick up. The barrier to entry is low, the learning curve is manageable, and you end up with wearable art that you made yourself. It's also a hobby that can grow with you. You can stay at the simple beading level forever and still enjoy it, or you can progress to advanced metalwork and gemstone setting if that's where your interest takes you.
The key to success as a beginner is starting small, finishing what you start, and not comparing your first attempts to the work of people who've been doing this for years. Everyone starts somewhere, and the only way to get better is to make a lot of imperfect pieces. So pick a technique, get your basic tools, and make something. It's going to be great.
Comments