Macrame Jewelry for Beginners — 5 Essential Knots to Start Making Bracelets Today
What is Macrame, Exactly?
This article was created with the help of AI writing tools. SageStone editorial team reviewed and edited the content for accuracy and clarity. So if you've been curious about macrame but felt intimidated, you're in the right place. Let's walk through everything together.
The word "macrame" comes from the Arabic term migramah, which translates to "striped towel" or "ornamental fringe." But honestly, that doesn't tell you much about what it actually feels like to sit down with a spool of cord and start tying knots. Macrame is the art of creating decorative pieces — and yes, jewelry — entirely through knotting. No needles. No looms. No fancy equipment. Just your hands, some cord, and a little patience.
The craft has been around for centuries. Sailors used it in the 13th and 14th centuries to decorate knife handles, bottles, and parts of their ships. It picked up serious popularity in the 1970s when bohemian style took over home decor. And now? It's back in a big way, especially in the handmade jewelry world.
What makes macrame jewelry so appealing is how accessible it is. You don't need a workshop. You don't need power tools. A pair of scissors, some cord, and maybe a few beads — that's genuinely all it takes to make something beautiful you can wear or gift to someone.
The Five Knots You Need to Know
Every macrame project — from the simplest bracelet to an elaborate wall hanging — comes down to a handful of core knots. Once you learn these five, you can create hundreds of different designs. Seriously. The variations come from how you combine them, not from learning new techniques.
1. Square Knot — The Foundation
If macrame had a "hello world," this would be it. The square knot is the backbone of almost every macrame pattern you'll encounter. It's the one you'll use the most, so it's worth practicing until it feels second nature.
Here's how it works. You'll need four cords — two working cords (the ones you actively tie with) and two filler cords (the ones that stay still in the middle). Take the left working cord, bring it over the two filler cords, then under the right working cord. Now take the right working cord, pass it under the filler cords, and up through the loop on the left. Pull tight. That's a half square knot.
Now do the same thing in reverse. Right cord goes over the fillers and under the left cord. Left cord goes under the fillers and through the loop on the right. Pull tight again. Two half knots make one complete square knot.
The trick is keeping your tension even. If you pull too hard on one side, the knot will lean. If you're too loose, it'll look sloppy. Don't stress about it being perfect right away — your first ten square knots will probably look a bit wonky, and that's completely fine.
2. Half Hitch — The Spiral Maker
The half hitch is where things start getting interesting visually. Unlike the square knot, which stays flat, a series of half hitches naturally twist into a spiral. It's a gorgeous effect, and it happens almost by itself.
To tie a half hitch, take your working cord and wrap it around the filler cord in one direction — let's say left to right. Pass the working cord through the loop you just created, then pull it snug against the filler. One hitch done.
Now here's the thing: if you keep tying half hitches in the same direction, the knot will spiral. Keep going and that spiral gets tighter and more pronounced. It's one of those satisfying things where the design emerges on its own as you work. People love using half hitches for bracelet patterns because a single spiral running down the center of a piece looks way more complex than the technique actually is.
3. Lark's Head — The Starting Point
You'll use the lark's head knot to attach your cords to whatever you're working from — a dowel rod, a keyring, a stick from your yard, or even just another piece of cord. It's not glamorous, but it's how every macrame project begins.
Fold your cord in half so you have a loop at one end. Pass that loop over your rod or ring from front to back. Then bring the two tail ends of the cord through the loop and pull them down to tighten. That's it. One lark's head knot. It holds securely but can still slide along the rod if you need to adjust your spacing.
Most macrame jewelry projects start with a row of lark's head knots. You fold several cords, attach them all next to each other, and suddenly you have the base structure for whatever you're making. It takes about five seconds per knot, so setting up a project goes fast.
4. Overhand Knot — The Simplest One
You already know how to tie an overhand knot. You've been doing it your whole life — it's the basic knot you use when tying your shoes (the first part, before the bow). In macrame, it serves a specific purpose: securing ends and preventing cord from unraveling.
Make a loop with your cord, pass the end through the loop, and pull tight. Done. You'll mostly use overhand knots at the very beginning and very end of your projects to keep everything from falling apart. They're also handy for adding small beads — tie an overhand knot, slide a bead onto the cord below it, tie another overhand knot, and the bead stays put.
Some designers use clusters of overhand knots as a decorative element. A row of tiny overhand knots can look like little pearls or beads running along a bracelet. It's subtle, but it adds texture.
5. Cow Hitch — The Connector
The cow hitch is essentially two lark's head knots stacked on top of each other, and it's used when you need to attach one cord to another — like when you're joining a new piece of cord into an existing project or connecting a pendant to a necklace.
Pass your cord over and around the object (or another cord), then bring the end back around and pass it through the loop you created. Then do the same thing again right next to it — wrap around, pass through. Two wraps, one knot. The cow hitch holds firmly and distributes tension evenly, which matters when the piece will be worn and pulled on.
You won't use this one as often as the other four, but when you need it, nothing else really works as well. It's one of those knots that's easy to forget until you're staring at your project thinking "how do I attach this part?" and then you remember — oh yeah, cow hitch.
What Materials Should You Buy?
One of the best things about macrame is that the startup cost is genuinely low. You can get everything you need for under $20 and make dozens of pieces before running out of supplies.
For cord, waxed cotton cord in 3mm is the sweet spot for jewelry. It holds its shape, doesn't fray easily, and the slight wax coating gives it a smooth finished look. If you want something softer, cotton cord without wax works too — it has a more organic feel. Leather cord is great for minimalist pieces. A simple leather cord with one or two knots and a stone pendant can look incredibly elegant. Natural hemp cord gives a rustic, earthy vibe that works beautifully with wooden beads and shell accents.
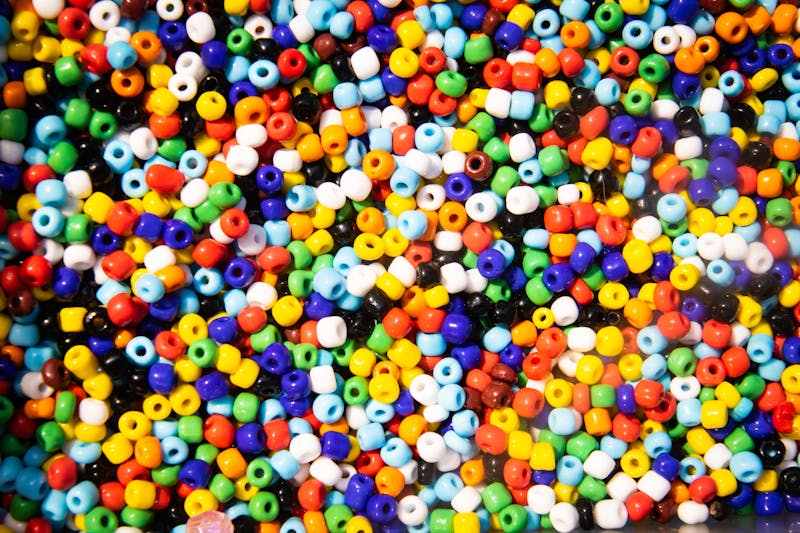
For embellishments, grab a small assortment of beads — glass, wood, and ceramic all work well with macrame. Copper clasps add a nice metallic touch to bracelets and necklaces. Wooden beads in different sizes can serve as focal points or spacing elements in your designs.
You'll also want a pair of sharp scissors, some tape (masking tape works great for holding your project to a table while you work), and maybe a clipboard or a piece of cardboard to anchor your cords. But really, that's optional. Plenty of people just tape their cords to their knee and knot away.
Three Beginner Projects to Try Today
Enough theory. Let's talk about actual things you can make right now with what you've just learned. These three projects each take 20 minutes or less, and they use only the knots we covered above.
Simple Beaded Bracelet — 10 Minutes
This one uses square knots and a few beads. It's the perfect first project because it's quick, it looks great, and it teaches you how to incorporate beads into your knotting.
Cut four cords, each about 24 inches long. Fold them in half and use lark's head knots to attach them to a keyring or a small loop of cord. You'll now have eight working strands. Separate them into two groups of four. Tie about an inch of square knots on each group, then thread a bead onto the two middle filler cords of each group. Tie another inch of square knots below the bead. Add another bead. Keep going until you've got three or four beads spaced along the bracelet. Finish with a few more square knots, tie off the ends with overhand knots, and trim the excess cord.
That's it. A finished bracelet in about ten minutes, and it looks like something you'd buy at a craft fair.
Plant Hanger Pendant — 20 Minutes
Okay, hear me out. A "plant hanger" pendant isn't literally for plants. It's a small decorative pendant shaped like a tiny macrame plant hanger, and it works as a necklace focal point or a bag charm. You'll use square knots and half hitches for this one.
Cut six cords about 18 inches long. Lark's head them onto a small ring. Take three cords on each side and work a series of alternating square knots — left group and right group, meeting in the middle. After about two inches of square knots, switch to half hitches on the center cords to create a spiral section. After an inch of spiral, go back to square knots for another inch. Tie an overhand knot at the bottom, trim the ends, and you've got a layered, textured pendant that looks way more intricate than the technique suggests.
Shell and Knot Anklet — 15 Minutes
This one is perfect for summer. It uses overhand knots and a few small shells — the kind you can buy in bags at craft stores or collect from the beach if you're lucky enough to live near one.
Cut two long cords, about 36 inches each, so you can tie the anklet directly onto your ankle. Tie an overhand knot near one end. Thread a small shell onto one of the cords, push it up to the knot, and tie another overhand knot right below it. Repeat this — knot, shell, knot, shell — until you've got shells spaced about an inch apart along the cord. Make the anklet long enough to wrap around your ankle twice, then tie it off. The shells will catch light and make a soft clicking sound when you walk, which is oddly satisfying.
If shells aren't your thing, this same technique works with small wooden beads, glass beads, or even tiny bells.
Where to Buy Macrame Supplies
Getting materials is straightforward. Amazon has a massive selection of macrame cord, beads, and starter kits. Search for "macrame cord 3mm" and you'll find dozens of options — waxed cotton, natural cotton, and synthetic blends. The reviews are helpful for figuring out which cords are actually good quality versus which ones are frustrating to work with.
Etsy is worth checking out too, especially if you want something a little more unique. A lot of small sellers dye their own cord in beautiful colors, and you can find handmade wooden beads and ceramic pendants that you won't see on Amazon. Search the same term — "macrame cord 3mm" — and you'll get different results focused on artisan supplies.
If you want to support local shops, check craft stores near you. Michaels, Joann, and independent bead shops usually stock at least basic macrame cord and beads. The selection is smaller, but you can touch and feel the materials before buying, which helps when you're just starting out and don't know what different cords feel like.
A Few Tips Before You Start
Keep your cords relatively short while you're learning. Long cords tangle, and untangling them is frustrating enough to make some people quit before they really get started. You can always attach longer cords later once you're comfortable.
Consistency matters more than perfection. If all your square knots are roughly the same size and tension, the piece will look good even if individual knots aren't flawless. Don't obsess over each knot — step back and look at the overall pattern instead.
And practice on scrap cord first. Cut a few pieces of cheap cord and just tie knots while you watch TV or listen to a podcast. Your fingers need to learn the muscle memory, and that only happens through repetition. Once the basic motions feel automatic, you can focus on design and creativity instead of thinking about which cord goes where.
Macrame jewelry is one of those crafts where the barrier to entry is almost zero and the creative ceiling is enormous. Five knots. A few dollars worth of cord. That's all you need to start making things people will genuinely compliment you on. So grab some cord, pick a project, and start tying. You'll surprise yourself with what you can create.
Comments