Resin Crystal Earrings: 6 Beginner Designs
June 10, 2026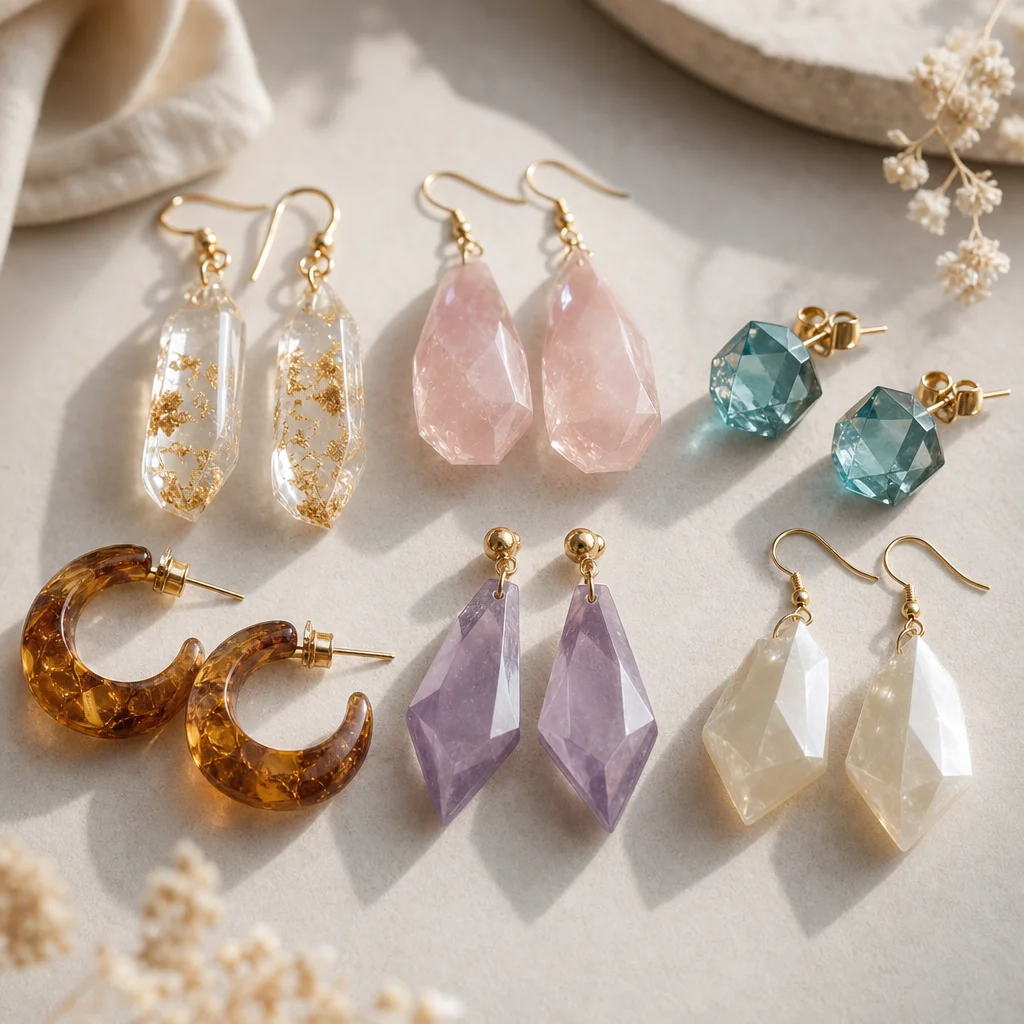
Creating Resin Crystal Earring Designs: A Step-by-Step Tutorial
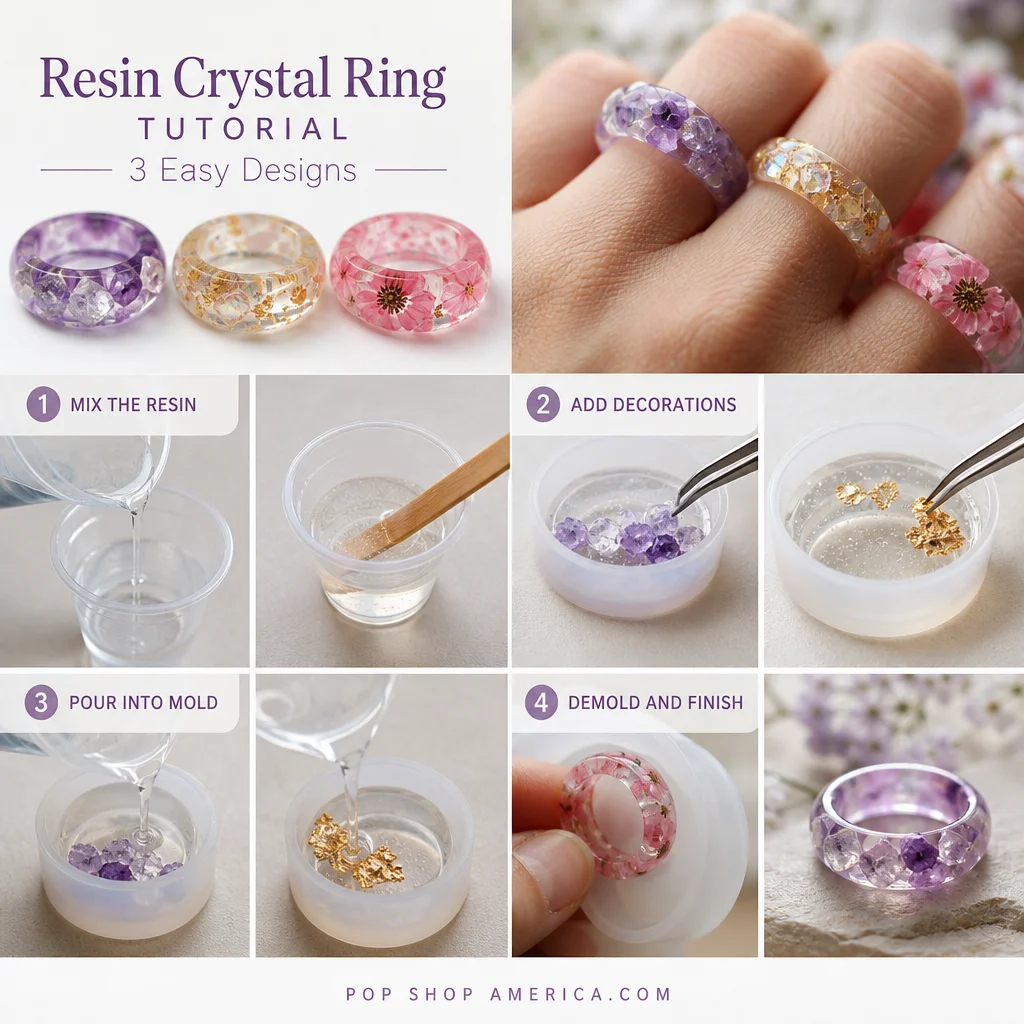
Hey there! So, you're into crafting your own resin crystal earrings, huh? I've got a super fun guide for you that'll walk you through it step-by-step! Honestly, once you get the hang of it, it's super satisfying. I've been into this for a while now, and what I love about it is how it lets your creativity really shine. Plus, you can rock something that's totally one-of-a-kind! Here's how to do it:- Okay, gather your things—resin, your fave crystals, and some cute molds, yeah?
- Follow the instructions for mixing the resin—it's super easy, no biggie!
- Then pour it into the molds and throw in your crystals—get as creative as you want with the arrangement!
- Now, kick back and wait for it to cure—it's a bit of a wait, but totally worth it.
- After it's done, just pop out your earring designs and rock your new sparkle!
Introduction
Hey there! Welcome to our crystal paradise! No matter if you're a seasoned jewelry-maker or just dipping your toes in, crafting your own earrings is totally thrilling and so satisfying. Get ready to join me for a wild adventure through six totally rad earring designs. We're diving into the fun with epoxy resin, cute silicone molds, teeny crystals, gold leaf, mica powder, and those tiny earring hooks. It's going to be a blast in the resin art wonderland!Materials Needed
Essentials for My Crystal Creations
Epoxy resin, gotta have it! You know, it's the secret sauce to all these stunning pieces. And then there's those silicone molds, they're a must for perfect shapes, super essential. Can't forget about tiny crystals; they're what add that magical sparkle. Oh, and the gold leaf—it's so shiny and just so fun to play with! And mica powder, that's the real deal when it comes to that iridescent touch. And of course, earring findings, they're the cherry on top, the finishing touch. Plus, you can't mix everything up without those mixing cups; can't forget those either! Oh hey! Check out this Design 1, the Ocean Wave. It's a total stunner with those Blue Mica and Quartz Chips mixed in. So vibrant and sparkly, it's like you've got a piece of the ocean right on your wrist. What I love about this one is how it catches the light, honestly—it's just so dang eye-catching. It's the perfect combo if you're into that ocean vibe or just looking for something that really pops!
Step 1: Get Your Workspace Ready
Hey, got your workspace all set up? It should be nice and tidy, like a fresh canvas, you know? Clear out all your crystals and supplies so you're all set for some crafting fun!Step 2: Mix the Resin
Alright, let's kick this off! Just do what the brand says, they're like the perfect pair, resin and hardener. Mix 'em in a 1:1 ratio, easy peasy. Pour 'em into two cups and stir 'em together, like you're making a smoothie. No lumps, though, alright?Step 3: Sprinkle on the Blue Mica and Quartz Bits
Alright, here we go! Just throw in some blue mica powder and sprinkle those quartz bits into the resin. You know, see how much you dig—it's more for a super sparkly look, less for a subtle shimmer.Step 4: Get Pouring
Alright, here we go! Pour the mixed resin into the molds. Oh, and for a little extra bling, grab a toothpick and swirl in some mica and quartz chips. It's like throwing a little ocean wave into your own masterpiece.Step 5: Bubble Busters
Alright, so here's the deal: pick up that heat gun or lighter and give the resin a little nudge to pop those bubbles. But, keep it cool, okay? You don't want to burn your beautiful creation! It's like, you've got to be careful, you know? You don't want to ruin all that effort you put in.Step 6: Cure
Alright, so now let that resin do its magic. Just follow the directions, usually 24 to 48 hours. Sit back and relax, you'll be amazed how quick it goes—before you know it, it's all done!Step 7: Sanding
Alright, so once they're all set, just give the edges of the earrings a little sanding to smooth out any rough spots or sharp corners. It's really simple, just take your sandpaper and gently go over the edges. You want to make sure everything is nice and smooth, so they're super comfortable to wear.Step 8: Add the Clips
Okay, so just clip those earring posts or hooks onto the back of your resin charm. It's like a mini puzzle, but it's super easy!Design 2: Galaxy (Purple + Gold Leaf)
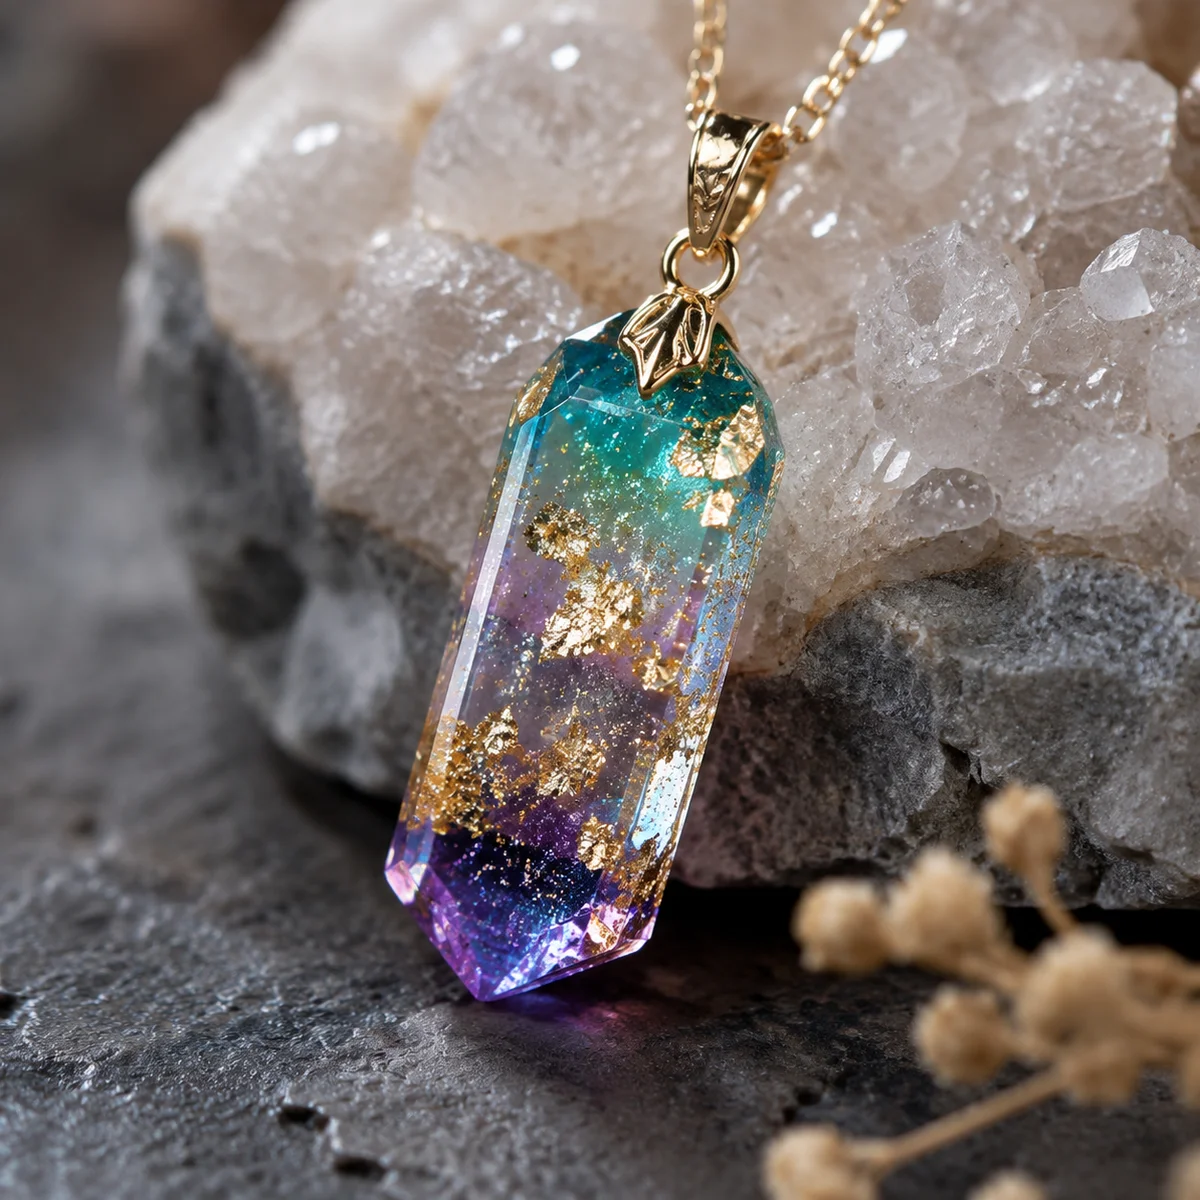
Oh, have you seen the Galaxy collection? It's a total showstopper, let me tell ya! The deep purple crystals are like little stars, and the gold leaf... well, it's like it's sprinkled with a bit of stardust. What I love about it is how it catches the light, you know? It's honestly become my favorite. You should totally check it out; it's pretty amazing.Step 1: Get Your Workspace Ready
Okay, so here's the deal. Just like last time, make sure your space is nice and tidy. It's super important to have a clean slate.Step 2: Stir Up the Resin
Alright, so you just gotta mix the resin and hardener together, like the instructions say. Keep it easy peasy, just do what they tell ya.Step 3: Sprinkle on Some Purple Mica and Gold Leaf
Alright, so you've got your resin all mixed up. Now, it's time to jazz it up with some purple mica and gold leaf. Just throw in the mica and then sprinkle the gold leaf on top. It's like adding glitter to a party—it's just so sparkly! It's like, whoa, magic!Step 4: Pour into Molds
Hey, so your resin is all mixed up, right? Now, just pour it into the silicone molds, and don't forget the toothpick! Give it a swirl to mix in the mica and gold leaf. It's going to create that awesome galaxy look you're aiming for!Step 5: Zap Those Bubbles
Hey, just grab your heat gun or lighter and zap those bubbles into oblivion!Step 6: Let It Sit
Alright, so you've got your resin, just let it sit and do its thing like they tell you to. Don't rush it, seriously!Step 7: Sanding
Alright, so you've got your earrings cured, right? Now, it's time to give 'em a little sanding to smooth out the edges.Step 8: Attach Findings
Attach the earring findings to the back of the resin piece.Design 3: Botanical Garden (Green Aventurine + Flower Mold)
Step 1: Prepare Your Workspace
Organize your workspace and gather all your materials.Step 2: Mix the Resin
Mix the resin and hardener according to the instructions.Step 3: Add Green Aventurine and Flower Mold
Stir in the green aventurine powder and pour the mixed resin into the flower mold.Step 4: Add Resin to the Mold
Pour additional resin into the mold to create a base layer.Step 5: Remove Bubbles
Use a heat gun or lighter to remove bubbles.Step 6: Cure
Allow the resin to cure.Step 7: Sanding
Sand the edges of the cured earrings.Step 8: Attach Findings
Attach the earring findings to the back of the resin piece.Design 4: Rose Garden (Pink + Rose Quartz Dust)
Step 1: Prepare Your Workspace
Ensure your workspace is clean and organized.Step 2: Mix the Resin
Mix the resin and hardener following the instructions.Step 3: Add Pink Mica and Rose Quartz Dust
Incorporate the pink mica powder and rose quartz dust into the mixed resin.Step 4: Pour into Molds
Pour the mixed resin into the silicone molds and swirl with a toothpick.Step 5: Remove Bubbles
Use a heat gun or lighter to remove bubbles.Step 6: Cure
Let the resin cure.Step 7: Sanding
Sand the edges of the cured earrings.Step 8: Attach Findings
Attach the earring findings to the back of the resin piece.Design 5: Geometric Minimalist (Clear + Single Crystal in Triangle)
Step 1: Prepare Your Workspace
Organize your workspace and gather all the materials.Step 2: Mix the Resin
Mix the resin and hardener according to the instructions.Step 3: Add Single Crystal
Place a single crystal in the center of the silicone mold in a triangular formation.Step 4: Pour into Molds
Pour the mixed resin into the mold, covering the crystal.Step 5: Remove Bubbles
Use a heat gun or lighter to remove bubbles.Step 6: Cure
Let the resin cure.Step 7: Sanding
Sand the edges of the cured earrings.Step 8: Attach Findings
Attach the earring findings to the back of the resin piece.Design 6: Golden Sunset (Amber + Pyrite in Circle)
Step 1: Prepare Your Workspace
Ensure your workspace is clean and organized.Step 2: Mix the Resin
Mix the resin and hardener according to the instructions.Step 3: Add Amber and Pyrite
Incorporate the amber and pyrite into the mixed resin.Step 4: Pour into Molds
Pour the mixed resin into the silicone molds and swirl with a toothpick.Step 5: Remove Bubbles
Use a heat gun or lighter to remove bubbles.Step 6: Cure
Let the resin cure.Step 7: Sanding
Sand the edges of the cured earrings.Step 8: Attach Findings
Attach the earring findings to the back of the resin piece.Frequently Asked Questions
Q: What is the best resin to use for making earring designs?
A: For earring designs, it's best to use clear epoxy resin as it allows the crystals and mica powders to shine through.Q: How do I remove air bubbles from the resin?
A: Use a heat gun or a lighter to gently blow over the surface of the resin to remove bubbles. Be careful not to overheat the resin.Q: Can I use regular mica powder for my designs?
A: Yes, you can use regular mica powder for your designs. However, it may not have the same shimmering effect as specialized mica powders.Q: How do I attach the earring findings to the resin?
A: Once the resin is cured, you can use earring findings like posts or hooks and attach them to the back of the resin piece using a strong adhesive.Q: Can I use gold leaf on my designs?
A: Yes, you can use gold leaf on your designs. It adds a beautiful shimmering effect and can be sprinkled on top of the mixed resin.Q: Is there a way to speed up the curing process of the resin?
A: Some manufacturers offer a UV curing process that can speed up the curing time. Follow the instructions provided with the resin for the best results.Q: Can I customize my own earring designs?
A: Absolutely! You can experiment with different combinations of crystals, mica powders, and colors to create unique and personalized earring designs.Disclaimer
Please note that while crystal healing is a popular belief, there is no scientific evidence to support its effectiveness. The information provided in this tutorial is for educational purposes only and should not be used as a substitute for professional medical advice.Practical Tips & Common Mistakes
Creating resin crystal earrings can be a delightful process, but it's important to be aware of a few practical tips and common mistakes to avoid.
- Always Use the Right Resin: Not all resins are suitable for jewelry making. Ensure you use a clear, hardening epoxy resin that is safe for skin contact.
- Prevent Air Bubbles: Shake the resin vigorously before use, and gently stir to minimize air bubbles. Use a toothpick to gently pop any that do form.
- Seal the Molds: Before pouring the resin, seal the silicone molds with a thin layer of resin to prevent the crystals from sticking to the mold walls.
- Let It Cure Properly: Give your earrings ample time to cure. Rushing the curing process can result in weak or cloudy earrings.
- Be Gentle with Crystal Placement: When adding crystals, apply gentle pressure to avoid breaking them or damaging the resin surface.
Care & Maintenance Guide
Proper care and maintenance will ensure your resin crystal earrings remain beautiful for years to come.
- Keep Them Dry: Avoid exposure to water, as it can damage the resin and the crystals.
- Store Them Properly: Keep your earrings in a cool, dry place away from direct sunlight to prevent fading or cracking.
- Use a Soft Cloth: Wipe your earrings gently with a soft, lint-free cloth to remove any dust or smudges.
- Avoid Chemicals: Refrain from using harsh chemicals or abrasive cleaners, as they can harm the resin and crystals.
- Handle with Care: When wearing, be mindful of your surroundings to prevent scratches or damage.
Frequently Asked Questions
What is the best way to prevent air bubbles in resin?
Shake the resin vigorously before use and gently stir to minimize air bubbles. Use a toothpick to gently pop any that form.
Can I use any crystals for resin earrings?
Yes, you can use a variety of crystals for resin earrings, but it's best to use small, flat-backed crystals that won't stick to the mold walls.
How long should I let my earrings cure?
Allow your earrings to cure for at least 24-48 hours to ensure they are fully hardened and ready to wear.
Can I clean my resin crystal earrings with water?
No, it's best to avoid water and use a soft, lint-free cloth for cleaning to prevent damage to the resin and crystals.


Comments