Resin Crystal Bangle: 4 Bold Wrist Designs
June 11, 2026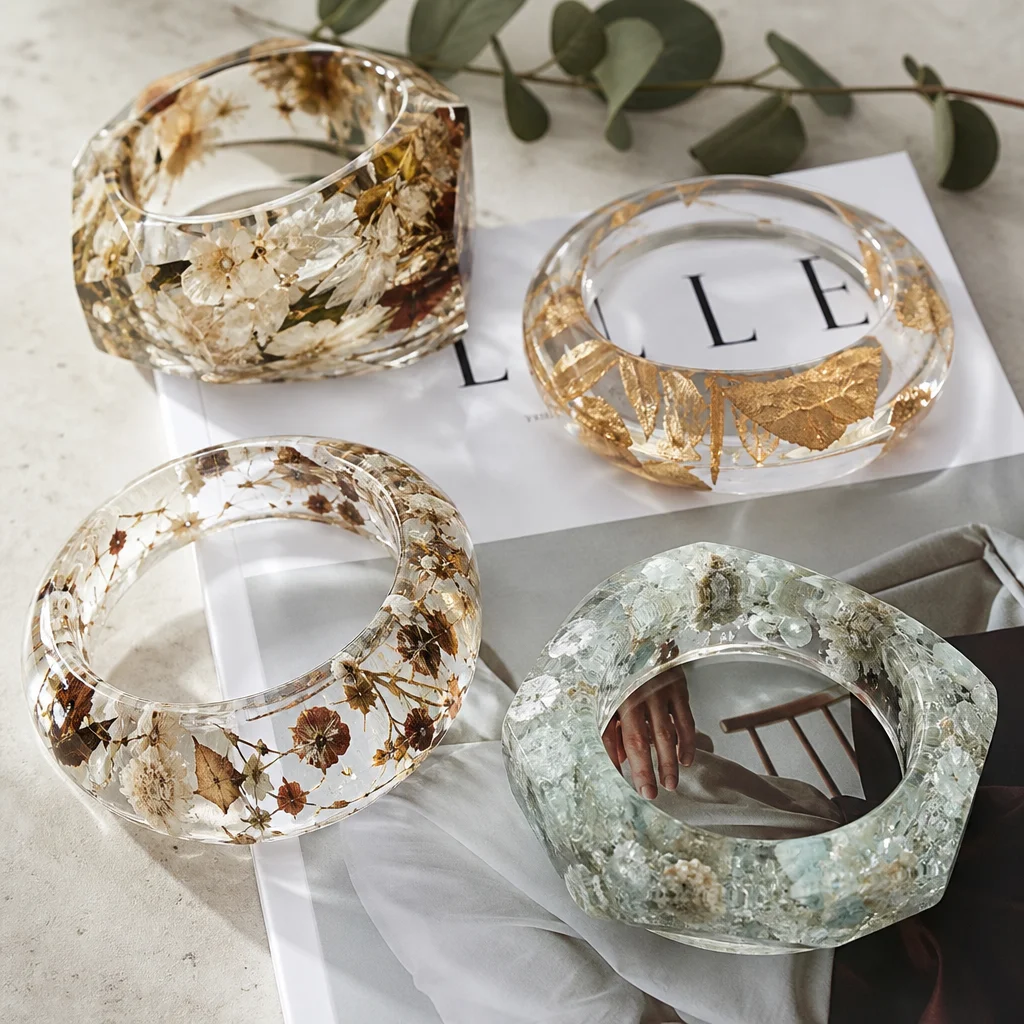
Why Resin Bangles Are Having a Moment
Resin jewelry has exploded in popularity over the past few years, and crystal bangles are at the center of this trend. The appeal is obvious: you get the natural beauty of crystals suspended in a clear, glossy medium, and you can create designs that would be impossible with stone alone. Ocean waves, galaxies, botanical gardens, geode slices — all of these are achievable with resin and the right techniques.
I got into resin bangle making after seeing one at a craft fair that had real beach sand, tiny shells, and aquamarine crystals suspended in what looked like frozen ocean water. It was gorgeous. I went home, bought a basic resin kit, and immediately ruined my first three attempts. What I've learned since would have saved me dozens of hours and dollars, so I'm sharing it here.
Essential Materials and Tools
Before we get to the four designs, let's cover what you actually need. Having everything ready before you start mixing resin is critical — once resin is mixed, you have a limited working time (typically 30-45 minutes for epoxy, much less for UV resin).
Resin Types
- Epoxy resin (2-part): The standard for bangles. You mix resin and hardener in a specific ratio (usually 1:1 by volume). It cures in 24-72 hours depending on the brand. Good for deep pours and embedding. Brands I've used successfully: ArtResin, ProMarine, and Max Clear. Cost: $20-35 for 32oz kit.
- UV resin (1-part): Cures in minutes under a UV lamp. Great for thin layers and quick projects but not ideal for thick bangles (cure depth is limited to about 1-2mm per layer). Cost: $15-25 for 200ml. Better for pendants and earrings than bangles.
Molds
Bangle molds come in two main types:
- Silicone molds: Flexible, easy to demold, reusable. You can find bangle-specific silicone molds on craft sites for $5-15 each. Look for molds with smooth interior surfaces — textured molds transfer their texture to the finished piece.
- DIY molds: You can make custom molds using silicone putty (Mold Max or similar) around an existing bangle. This lets you create any size and shape. Cost: $10-20 for mold putty.
Crystals and Inclusions
The crystals you embed make or break the design. For bangles specifically:
- Small tumbled stones (4-8mm): Best for bangles because they don't protrude or create weak points. Amethyst, rose quartz, clear quartz, and aquamarine work beautifully.
- Crystal chips and gravel: Tiny fragments create a "galaxy" or "confetti" effect. Very affordable ($5-10 for a bag of mixed chips). Good for filling gaps between larger stones.
- Crushed glass: Adds sparkle without the cost of real crystals. Can be tinted with resin pigments for custom colors.
- Dried flowers and leaves: Real botanicals add a nature element. Must be completely dry before embedding. Pressed flowers from craft stores work well.
- Glitter and mica powder: For color and shimmer. A little goes a long way — too much glitter makes the resin cloudy.
Other Essentials
- Mixing cups: Silicone cups are best — resin doesn't stick to silicone.
- Stirring sticks: Wooden craft sticks. Flat ones work better than round for thorough mixing.
- Heat gun or torch: For popping bubbles after pouring. A culinary torch (creme brulee) works great.
- Sanding paper: 400, 600, and 1000 grit for smoothing rough edges after demolding.
- Polishing compound: For the final glossy finish. Car wax actually works in a pinch.
Design 1: Ocean Wave Bangle
This is the design that started my resin obsession. It looks like a slice of the ocean frozen around your wrist.
What You Need
Clear resin, blue resin pigment (3 shades: light blue, medium blue, deep blue), white pigment, small aquamarine or blue quartz chips, fine sand (optional), bangle mold.
Step-by-Step
- Prepare the base layer. Mix a small amount of resin with the lightest blue pigment. Pour a thin layer (about 2mm) into the mold. This is your shallow water.
- Add the white foam. Mix a tiny amount of white pigment with resin and use a toothpick to create wispy white lines across the blue surface. This simulates sea foam. Don't overdo it — less is more.
- Embed crystals. Place aquamarine chips randomly in the wet resin. Some should be fully submerged, some partially visible at the surface. The randomness is what makes it look natural.
- Let partially cure. Wait 4-6 hours (resin should be tacky but not fully set). This is crucial — the next layer needs to bond with this one.
- Pour the deep layer. Mix resin with the medium and deep blue pigments separately. Pour them side by side, then use a toothpick to gently swirl them together. This creates the depth gradient of ocean water.
- Add wave texture. While the second layer is still wet, use a toothpick or pin to create wavy lines across the surface. This simulates wave patterns. Work quickly before the resin starts to set.
- Full cure and demold. Wait 24-48 hours. Gently flex the silicone mold to release the bangle. Don't pull forcefully — if it's sticking, the resin hasn't fully cured yet.
- Sand and polish. Sand any rough edges with 400 grit, then 600, then 1000. Polish with compound. Your ocean wave bangle should look like captured water.
Design 2: Galaxy Bangle
Deep, dark, and sparkling — this bangle looks like a band of the Milky Way around your wrist.
What You Need
Clear resin, dark blue/black pigment, purple and pink mica powder, crystal chips (clear quartz, amethyst, rose quartz), fine holographic glitter, small metal star charms (optional).
Key Technique
The galaxy effect comes from layering. Mix resin with the dark blue/black pigment for the base. Pour half the mold. While wet, sprinkle crystal chips, mica powder, and a tiny amount of glitter. The mica powder creates nebula clouds, the glitter creates distant stars, and the crystal chips create bright celestial objects. Pour the second half on top and let it cure. The key: don't stir or overwork the inclusions after placing them — let them settle naturally for an organic look.
Design 3: Botanical Garden Bangle
Real pressed flowers suspended in crystal-clear resin create a wearable garden.
What You Need
Clear resin (no color), dried pressed flowers (pansies, daisies, and ferns work best), small clear quartz points, green leaf skeleton pieces (optional).
Key Technique
Botanical bangles require more planning than others because the flowers need to be positioned precisely. Arrange the flowers on the bottom of the mold (the "front" of the bangle) before pouring any resin. Use tweezers for precise placement. Secure the flowers with a tiny drop of resin and let it tack up before doing the main pour. This prevents the flowers from floating or shifting when you pour the bulk resin. Add crystal points at intervals for contrast.
Design 4: Geode Slice Bangle
This design mimics the interior of a crystal geode — rough edges with crystalline center.
What You Need
Clear resin, metallic gold or silver pigment, large crystal chips (amethyst or clear quartz, 8-12mm), small crystal gravel for filling, iridescent flakes.
Key Technique
Build from the edges inward. First, coat the mold edges with metallic pigment — this creates the "rock" exterior of the geode. Then arrange large crystal chips along the inner edge, pointing inward, creating the crystalline rim. Fill the center with clear resin mixed with iridescent flakes and tiny crystal gravel. The result should look like you're wearing a slice of a crystal cave.
Common Mistakes and How to Avoid Them
- Bubbles: Mix slowly (fast mixing creates air bubbles), let mixed resin sit for 5 minutes before pouring (bubbles rise), and use a heat gun to pop surface bubbles immediately after pouring.
- Sticky surface after curing: Usually means incorrect mixing ratio. Measure carefully — even 10% off can cause curing issues. Ambient temperature matters too: resin cures best at 70-80°F (21-27°C).
- Crystals floating to the top: Pour half the resin, add crystals, let it partially set, then pour the rest. This traps the crystals in place.
- Mold sticking: Ensure the mold is clean and dry before pouring. A light spray of mold release (even cooking spray in a pinch) helps. Silicone molds generally don't need release agent, but it doesn't hurt.
- Yellowing over time: UV-resistant resin (ArtResin is one) resists yellowing. Cheaper resins will yellow in sunlight. Store finished bangles away from direct sunlight.
Frequently Asked Questions
Can I use real crystals in resin bangles?
Yes. Small tumbled stones, crystal chips, and crystal gravel all work well. Avoid very large or heavy stones — they can create structural weak points in the resin. Stones with rough edges actually bond better to resin than perfectly smooth ones because the resin grips the texture. Most crystals are chemically stable in resin, but avoid stones that are water-soluble (selenite, halite) or particularly soft.
How long does a resin bangle take to make?
Mixing and pouring: 15-20 minutes. Waiting for partial cure (for layered designs): 4-6 hours. Full cure: 24-48 hours. Sanding and polishing: 15-30 minutes. Total from start to finish: about 2 days, but only about 1 hour of active work. UV resin speeds this up dramatically (cure in 10-15 minutes per layer) but isn't ideal for thick bangles.
Is epoxy resin safe for skin contact?
Fully cured epoxy resin is generally safe for skin contact. However, uncured resin and hardener are sensitizers that can cause skin irritation and allergic reactions with repeated exposure. Always wear nitrile gloves when mixing and pouring. Work in a well-ventilated area. Some people develop resin allergies over time — if you notice skin irritation after working with resin, switch to UV resin (which doesn't have the same sensitizing chemicals) or wear a respirator mask.
Can I make resin bangles without a mold?
Technically yes, using a tube or existing bangle as a form, but it's much harder to get a good result. The inside of the bangle won't be smooth, and removing it from a rigid form (without the flexibility of silicone) often damages the piece. For your first few bangles, invest in a proper silicone mold — the $5-15 cost is worth avoiding the frustration of ruined projects.
Frequently Asked Questions
How do you keep crystals from sinking in resin bangles?
To prevent crystals from sinking in resin, artisans first pour a thin base layer and let it cure until tacky. The crystals are then placed onto this sticky surface, holding them securely in position. Once set, the remaining resin is added. This handcrafted method ensures your natural gemstones remain perfectly suspended in the center of the bangle.

Comments