Wire Wrapped Tree of Life Pendant Tutorial
June 2, 2026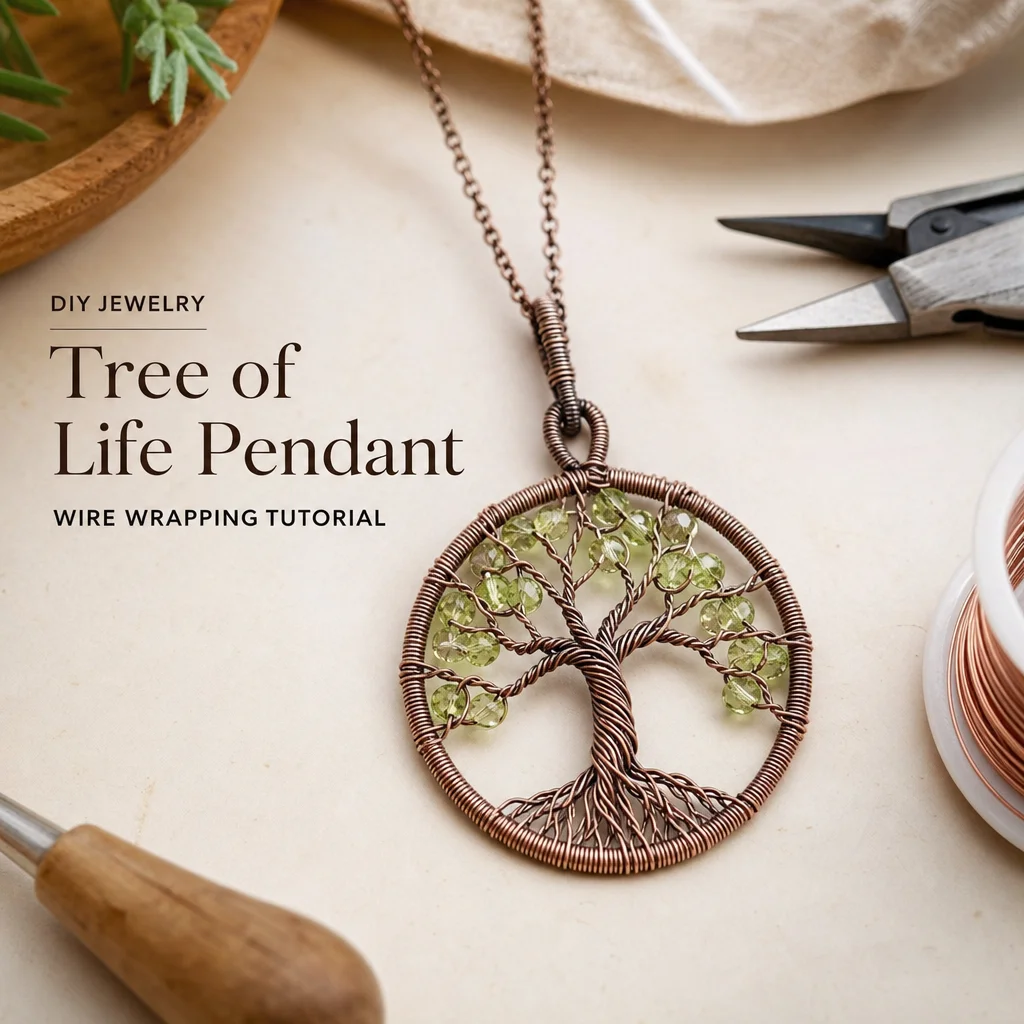
What Is a Wire Wrapped Tree of Life?
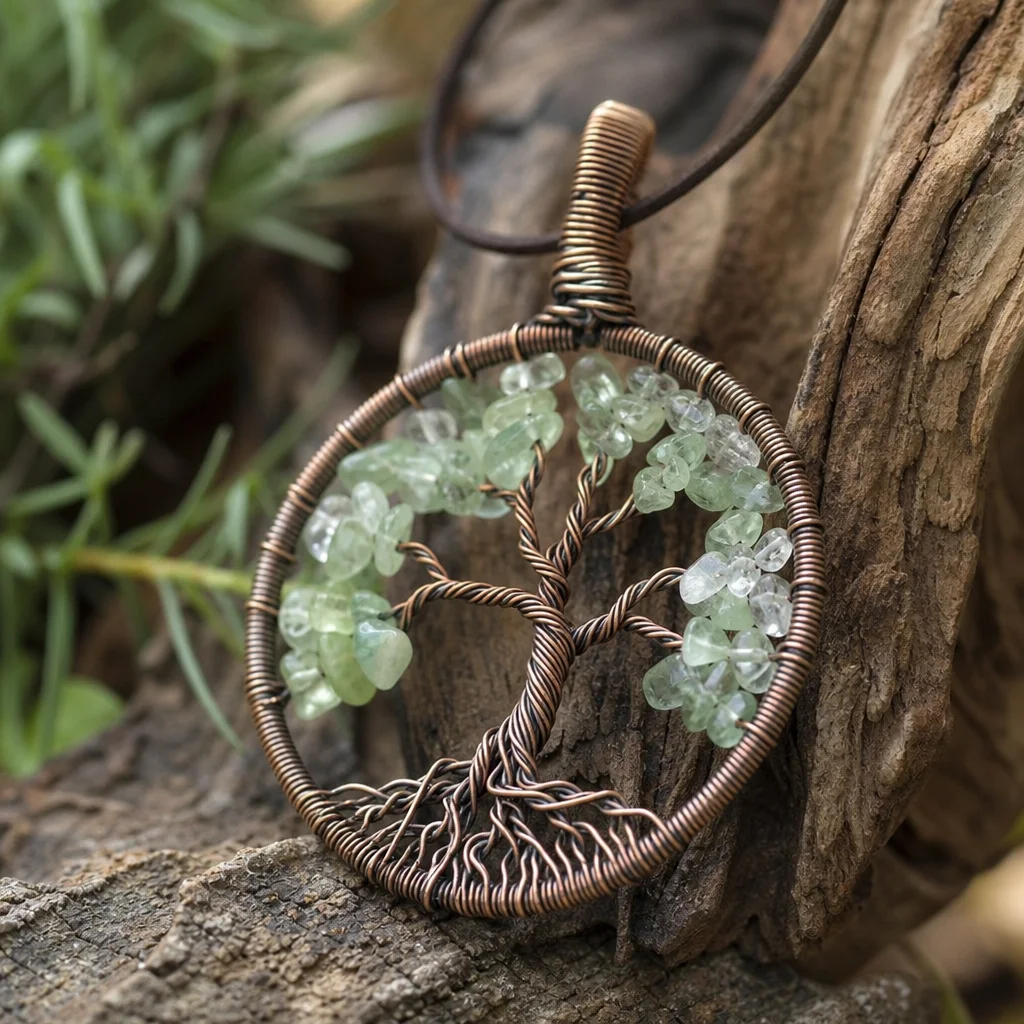
The Tree of Life is one of the most enduring symbols in human history, appearing in cultures from ancient Mesopotamia to Celtic traditions to modern spiritual practice. In jewelry, the wire wrapped Tree of Life pendant translates this symbol into a wearable art form — a circular wire frame representing the earth, with wire branches spreading upward from a trunk, and small gemstone chips arranged as leaves or blossoms.
This project is an excellent introduction to wire wrapping because it uses basic techniques (bending, wrapping, and simple weaves) to create a result that looks impressive and professional. Even your first attempt will produce a wearable pendant, and with practice you can make increasingly refined versions with tighter wirework and more elaborate branch patterns.
Materials You'll Need
Wire
Frame wire: 18-gauge (0.8mm) round copper, brass, or sterling silver wire. You'll need about 12-18 inches for the circular frame. Copper is the easiest to work with for beginners — it's soft, bends easily, and looks beautiful polished or with an antiqued patina. Sterling silver costs more but produces a more formal, jewelry-store finish.
Wrapping wire: 24-gauge or 26-gauge (0.4-0.5mm) round wire in the same metal. You'll need a significant amount — roughly 3-5 feet — for wrapping the roots, trunk, branches, and bead placement. Thinner wire (26-gauge) gives a more delicate look but is harder to control. Start with 24-gauge if this is your first project.
Bail wire: A small pre-made jump ring or bail, or make your own from 20-gauge wire. The bail is the loop at the top that connects the pendant to a chain or cord.
Gemstone Chips
Small crystal or gemstone chip beads — tiny, irregularly shaped pieces ranging from 3mm to 8mm in length. Popular choices include peridot (green leaves), amethyst (purple blossoms), rose quartz (pink flowers), mixed gemstone chips for a colorful tree, or turquoise for a lush green canopy.
You'll need roughly 30-50 chip beads for a standard-sized pendant. Buy more than you think you need — some will be too large or oddly shaped to use, and it's better to have selection options. Chip bead strands are sold by the strand and are quite affordable.
Tools
- Round nose pliers: For making loops and curves
- Flat nose pliers (chain nose): For flattening wire, gripping, and tucking wire ends
- Wire cutters (flush cutters): For cutting wire cleanly
- Cylinder or mandrel: For shaping the circular frame — a marker pen, dowel, or small bottle works. The diameter determines the pendant size; 1.5 to 2 inches (38-50mm) is standard.
- Ruler or measuring tape: For sizing the frame
Step-by-Step Instructions
Step 1: Make the Circular Frame
Cut an 14-16 inch length of your 18-gauge frame wire. Wrap it around your cylinder or mandrel to form a circle, leaving about 1.5 inches of overlap. Use your round nose pliers to bend the overlapping ends into small, tight loops that interlock — this creates a secure closure without soldering. Flatten the loops with your flat nose pliers so they lie flat against the frame.
Check that your circle is as round as possible. Gently reshape it with your fingers, working around the entire circumference. Minor imperfections won't be noticeable in the finished piece, but a severely oval shape will look off.
Step 2: Attach the Bail
At the top of your circle, attach your jump ring or bail. If making a bail from 20-gauge wire, wrap a 2-inch piece around your round nose pliers to form a loop, twist the tail to secure, and attach it to the frame by wrapping the remaining tail around the frame wire two or three times. Tuck the cut end flat against the frame with flat nose pliers.
Step 3: Create the Trunk and Roots
Cut a 10-12 inch piece of your thin wrapping wire (24 or 26 gauge). Find the bottom center of your circle frame. Wrap the wire around the frame two or three times to anchor it, leaving a 2-3 inch tail hanging below the circle (this will become the roots).
With the main wire now anchored to the bottom of the frame, bring it upward across the bottom gap of the circle — this creates the trunk. The trunk should be relatively straight and centered, spanning about one-third to one-half the diameter of the circle.
For the roots, take the 2-3 inch tail hanging below the frame and wrap it around the bottom of the frame, splitting it into two or three root-like branches that curve along the bottom of the circle. Wrap each root end around the frame wire once and trim. This creates the appearance of roots anchoring the tree into the circular earth.
Step 4: Create the Branch Structure
From the top of the trunk, begin branching out. Bend the wrapping wire to the left, wrap once around the frame, then bring it back toward the center. Then bend to the right, wrap once around the frame, and return to center. Continue this branching pattern — left, right, left, right — working your way up toward the top of the circle.
Each branch should curve organically, like a real tree branch. Don't make them perfectly symmetrical — natural trees aren't. Vary the spacing between branches and let some extend further around the frame than others. The frame defines the boundary, so branches should reach toward the frame wire but generally stay within the circle.
As you create each branch, wrap the wire around the frame one or two times at the endpoint before reversing direction. These wrap points serve double duty: they secure the branch to the frame and create natural anchor points where you can later place gemstone chips.
Step 5: Add Gemstone Chips as Leaves
This is where the tree comes to life. Thread a gemstone chip onto your wire, position it on one of the branches near the frame, and wrap the wire around the chip and the frame to hold it in place. Continue adding chips along each branch, spacing them roughly evenly.
The technique for securing chips is simple: thread the chip onto the wire, position it where you want it (usually near the frame wire at the branch tip or mid-branch), and wrap the wire 1-2 times around both the chip and the frame wire. The wire doesn't need to wrap tightly around the chip itself — it just needs to trap it between the branch wire and the frame wire.
Work systematically around the circle, adding chips to each branch in turn. Aim for an even distribution — not clustered on one side and sparse on the other. The chips should form a rough canopy shape, denser at the top and sides, with the trunk visible at the center-bottom.
For a natural look, mix chip sizes. Use the smaller chips for the branch tips and outer edges, and slightly larger ones in the body of the canopy. Leave the very top of the circle a bit more open (fewer chips) so the tree has an organic silhouette rather than looking like a filled-in circle.
Step 6: Fill Gaps and Refine
Once you've placed chips along all the branches, step back and look at the overall shape. Are there gaps where you can see too much empty space? Add a few more chips to fill those areas. Is one side noticeably heavier than the other? Add or rearrange chips for better balance.
Use your flat nose pliers to gently adjust any chips that are sitting at awkward angles. You can nudge the wire around them to reposition. Don't force anything — the wire is thin and can break if you bend it back and forth too many times.
Step 7: Finish and Secure
When the tree looks complete, bring your wrapping wire to a point on the frame where you can make a final wrap. Wrap the wire end around the frame three to four times for a secure anchor. Use your wire cutters to trim the wire as close to the frame as possible, then use your flat nose pliers to pinch the cut end flat against the frame so it won't catch on clothing or skin.
Check all your wire ends — every place you cut wire should have the end tucked flat against the frame. Any protruding wire ends can scratch the wearer or catch on fabric. Take the time to go around the entire pendant and pinch down any wire ends you find.
Step 8: Shape and Polish
Gently reshape the circle frame if it has become slightly oval during the wirework. Hold the pendant at arm's length and check the overall shape — the circle should be round, the tree should be centered, and the chips should form a pleasing canopy.
If you used copper wire, you can polish it with a jewelry polishing cloth for a bright, warm finish. Alternatively, you can patina copper with a liver of sulfur solution (following all safety instructions) for an aged, darkened look that makes the branches and tree structure stand out more dramatically against the brighter chips. Silver wire can be polished with a silver cloth or dipped in silver cleaner.
Tips for Better Results
Wire Tension
Consistent, even tension in your wrapping wire makes a huge difference. Wrap with firm but not straining pressure. If the wire is too loose, the branches will wobble and the chips will shift. If it's too tight, the wire might snap (especially 26-gauge). Practice finding the right tension on a scrap piece of wire before starting your pendant.
Branching Patterns
Study actual trees — or look at photos of trees — before planning your branch structure. Real trees have a characteristic branching pattern: the trunk splits into a few major limbs, each of which splits into smaller branches, and so on. Mimicking this hierarchical branching pattern produces a more realistic tree than simply zigzagging back and forth at the same level.
Color Harmony
Choose chip colors that work with your frame metal. Copper frames pair beautifully with warm-toned chips: peridot, citrine, carnelian, amber. Silver frames work well with cool-toned chips: amethyst, blue lace agate, moonstone, aquamarine. Mixed chip strands create a colorful, playful look that works with either metal.
Common Mistakes and How to Avoid Them
Cutting wire too short: Always start with more wire than you think you need. It's frustrating to run out of wrapping wire three-quarters through your tree. A 3-5 foot piece of thin wire for a standard pendant gives you plenty to work with.
Over-tightening branches: If you pull the branch wire too tight against the frame, the circle will distort and become oval. Wrap firmly but don't pull so hard that you bend the frame wire.
Too many chips: Resist the temptation to fill every gap with chips. An overly full tree looks like a gemstone donut rather than a tree. Leave some space — the wire structure of the branches should be visible between the chips.
Ignoring wire ends: Untrimmed or protruding wire ends are the number one reason wire wrapped jewelry is uncomfortable to wear. Take the extra time to check every wire end and pinch it flat.
Variations to Try Once You've Mastered the Basics
Once you're comfortable with the basic Tree of Life pendant, try these variations: use different metals for the frame and wrapping wire (copper frame with silver branches), create a double-ring frame for a larger tree, add tiny seed beads along the branches in addition to or instead of chips, make the tree asymmetrical for an artistic modern look, or incorporate a focal stone at the top of the trunk as a "sun" or "moon" above the tree.
Frequently Asked Questions
How long does it take to make a Tree of Life pendant?
For a beginner, expect 45-90 minutes for your first pendant. As you gain proficiency, you can complete one in 20-30 minutes. The most time-consuming part is adding and securing the gemstone chips — plan for this to take half your total time.
What gauge wire should I use?
18-gauge for the frame (gives it enough stiffness to hold its shape), 24-gauge for wrapping (good balance of workability and strength). If you have strong hands and want more delicate work, try 26-gauge for wrapping, but be aware it breaks more easily.
Can I use tumbled stones instead of chip beads?
Very small tumbled stones (under 6mm) can work, but they tend to be rounder and harder to secure in the wire. Chip beads are preferred because their irregular shapes nestle into the wire branches more naturally. Save tumbled stones for wire wrapping projects where they're wrapped individually rather than assembled as a cluster.
Frequently Asked Questions
What does a wire wrapped Tree of Life pendant symbolize?
The Tree of Life is a powerful symbol representing personal growth, strength, and a deep connection to all living things. Just like a tree's branches reach for the sky while its roots ground into the earth, wearing this pendant promotes balance and stability. When you wrap natural crystals into the design, it beautifully amplifies the grounding and healing energies of the stones.
How do I keep my wire wrapped pendant from tarnishing?
To protect your handcrafted wire wrapped jewelry, keep it away from water, perfumes, and lotions. Always store your pendant in an airtight ziplock bag or a dry jewelry box when you aren't wearing it. If you use copper or silver wire and it begins to naturally oxidize over time, you can gently polish it with a jewelry polishing cloth to restore its brilliant, artisan shine.


Comments