I Watched 100 Wire Wrapping Tutorials and My Hands Still Shook
I Watched 100 Wire Wrapping Tutorials and My Hands Still Shook
Let me paint the picture: it's midnight, I'm on my fourth "beginner-friendly wire wrapping" video of the evening, and the instructor just casually shaped a perfect spiral while saying "and that's all there is to it." Meanwhile, my copper wire looks like it went through a blender and my fingertips are stinging from a fresh set of nicks.
I spent about three weeks in this cycle — watching tutorials, buying supplies, attempting projects, failing, watching more tutorials. The problem wasn't the tutorials themselves. Most of them were genuinely good. The problem was that "beginner" means different things to different people, and a lot of projects labeled as easy require a level of hand control and spatial reasoning that absolute beginners simply don't have yet.
So I started over. I picked the absolute simplest wire wrapping projects I could find, practiced them until they felt natural, and only then moved to more complex work. These five projects are the ones that actually got me started — the ones where I went from "this is impossible" to "oh, I can do this" in a single afternoon.
The Basic Toolkit (You Don't Need Much)
Before we get to projects, let's talk tools. One of the mistakes I made early on was buying way too much stuff. You need three tools, wire, and something to wrap around. That's genuinely it to start.
Round nose pliers. These have conical jaws that taper to a point. They're for making loops and curves. Every single project in this list uses them. Spend $12–$20 on a decent pair — the really cheap ones have rough jaws that leave marks on your wire.
Chain nose pliers. These are flat on the inside and taper to a point. Think of them as your all-purpose pliers — gripping, bending at angles, flattening, opening jump rings. Again, smooth jaws matter.
Wire cutters (flush cutters). Flush cutters cut one side flat and one side slightly pinched. You always want the flat cut facing outward on your finished piece. They look like tiny bolt cutters and cost about $8–$15.
That's it. You'll see fancy tools like nylon jaw pliers (for straightening bent wire) and bail-making pliers (for consistent loop sizes) in tutorials, and they're nice to have later. But for right now, those three will carry you through everything below.
Understanding Wire: The Stuff That Actually Matters
Wire is confusing when you start. There are gauges, tempers, materials, and shapes, and nobody explains which combination you need for what.
Gauge. Wire thickness is measured in gauge (ga), and counterintuitively, higher numbers mean thinner wire. For beginner projects, you'll work with three sizes most of the time:
- 20 gauge (0.8mm) — Your structural wire. This holds shape and forms the frame of your pieces. Stiff enough to support beads, thin enough to bend by hand with a little effort.
- 22 gauge (0.6mm) — Your wrapping wire. Used for binding, coiling, and securing. Thinner and more flexible than 20ga, it wraps neatly around structural wire without bulk.
- 24 gauge (0.5mm) — Your detail wire. Good for fine wrapping, weaving, and delicate work. Too thin for structural use on its own, but excellent for finishing touches.
Temper. Dead soft wire bends easily and stays where you put it. Half-hard wire has some spring to it and holds shapes better. Full hard is stiff and used for things like ear wires that need to maintain their curve.
Buy dead soft for learning. It's forgiving, easy to manipulate, and if you make a shape you don't like, you can usually flatten it out and start over. Half-hard is great once you know what you're doing, but it fights back when you're still figuring things out.
Material. Start with copper. I can't stress this enough. Copper is cheap ($5–$8 for a spool that'll last through dozens of projects), it's soft enough to work easily, and it looks genuinely beautiful with a warm, earthy tone. Practice on copper until you're comfortable, then move to sterling silver or gold-filled wire for finished pieces.
Some people skip straight to silver because they want "real" jewelry. I get the impulse, but silver costs 5–10x more per spool, and every mistake costs real money. Copper lets you fail freely, and that freedom is what makes learning possible.
Project 1: Simple Wrapped Pendant
This is the project I should have started with. It takes about 10 minutes, requires zero experience, and produces something you'd actually wear. The concept is simple: take a bead or stone, and wrap it in wire so it can hang from a chain.
What you need:
- One large bead or tumbled stone (20–30mm works well)
- 12 inches of 20ga copper wire
- 8 inches of 22ga copper wire
- Round nose and chain nose pliers
- Wire cutters
Steps:
1. Cut your 20ga wire to about 12 inches. Hold it in the middle and bend it into a U-shape over your round nose pliers, creating a small loop at the bend. This loop becomes your bail (the part that hangs on a chain).
2. Thread both wire ends through your bead, working from the bottom up. Position the bead so it sits just below the loop.
3. Now wrap the two wire ends around each other below the bead. Use your chain nose pliers to snug the wrap tight. Cross the wires once or twice — that's enough to secure the bead.
4. Take your 22ga wrapping wire and coil it tightly around the base of the bail (the loop area above the bead) about 3–4 times. This hides the messy crossing point and looks decorative.
5. Trim the wire ends with your flush cutters, and use the tips of your chain nose pliers to tuck the sharp ends flat against the piece. Thread it onto a chain or cord.
Your first pendant won't be perfect. The wire will be a little uneven, the loop might be slightly lopsided. That's fine — the handmade quality is part of the charm. Make three or four of these, and by the fourth one you'll notice a real improvement in your control.
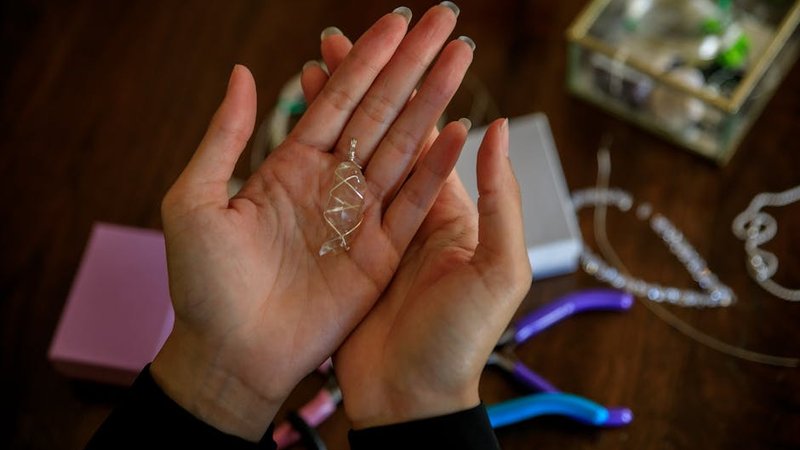
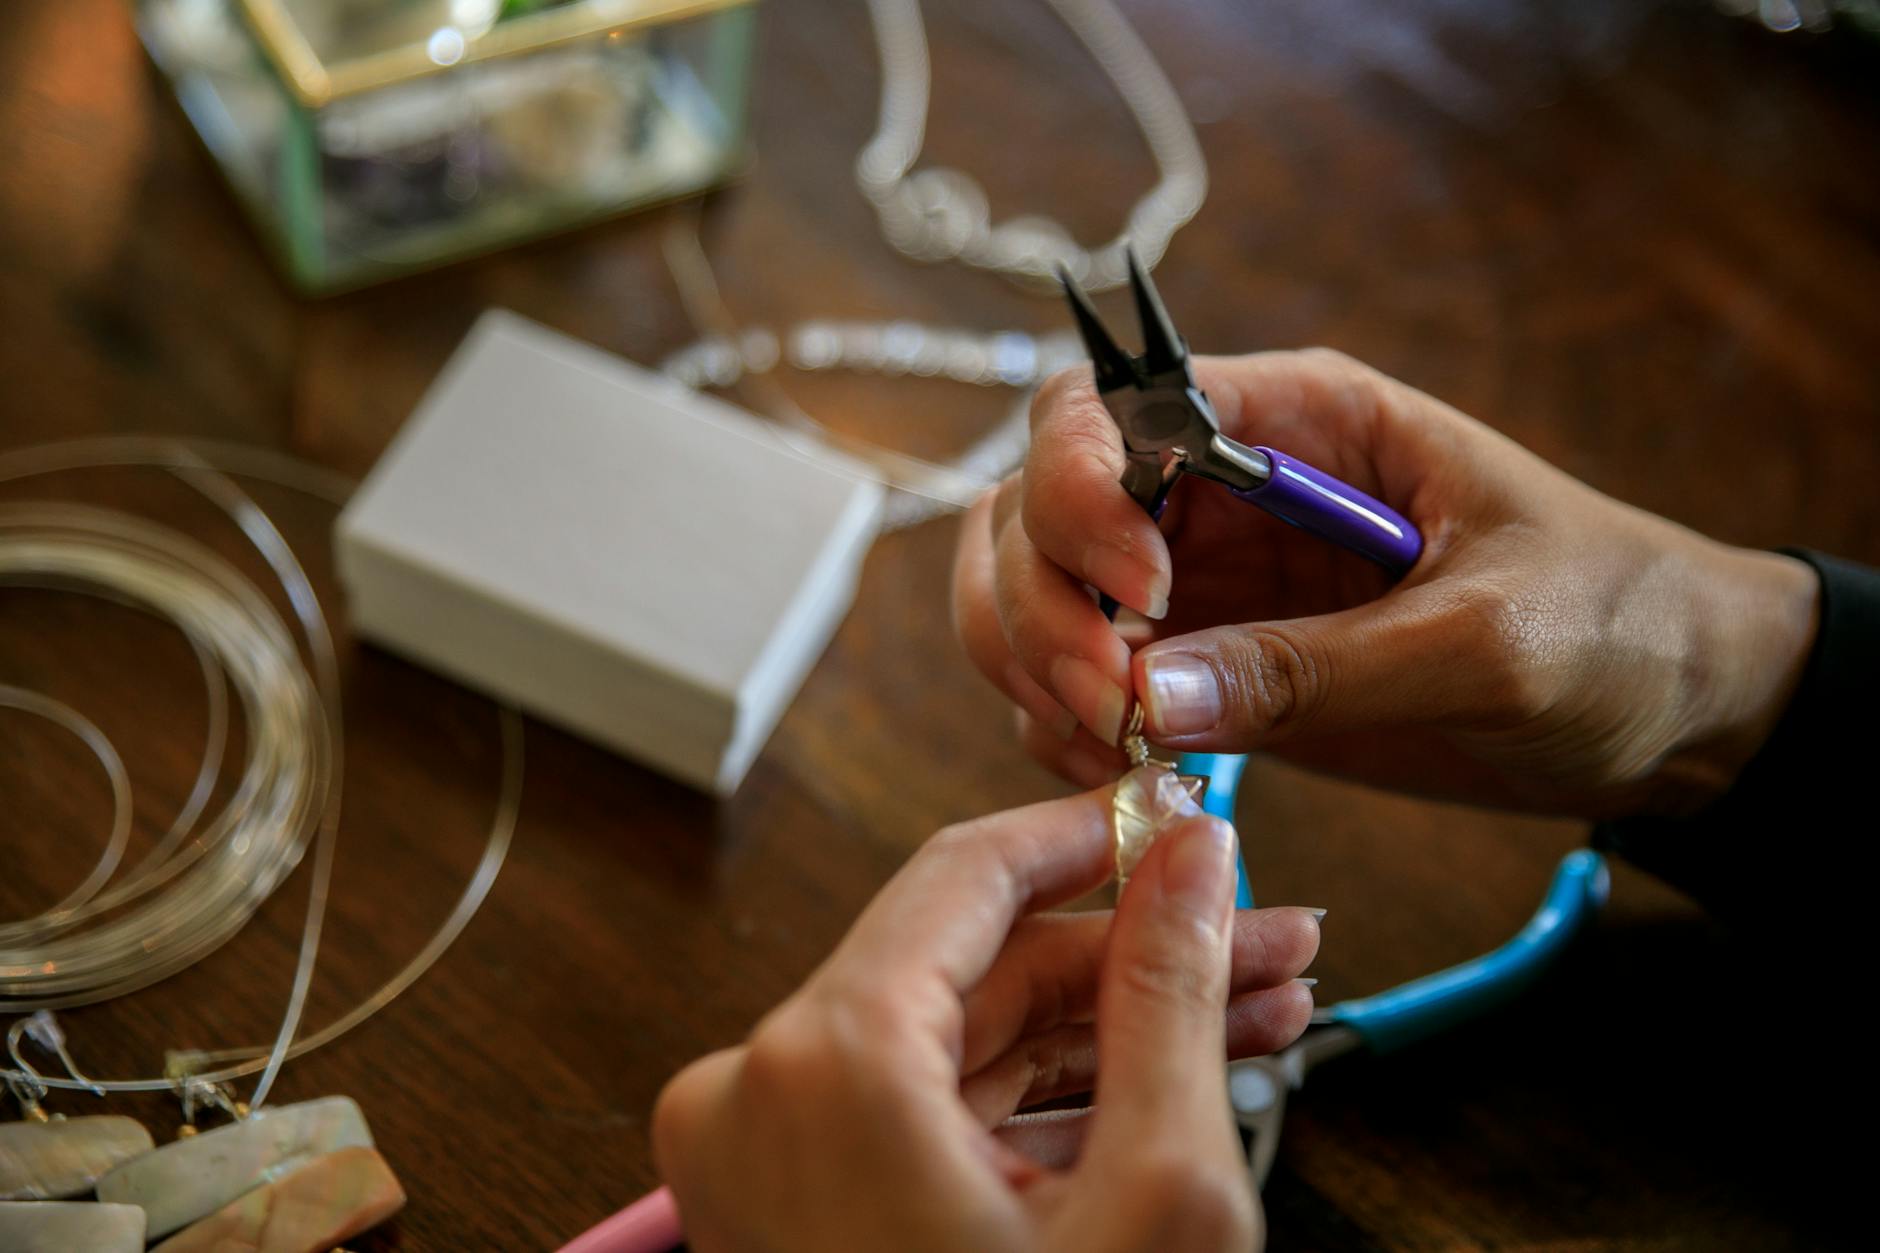
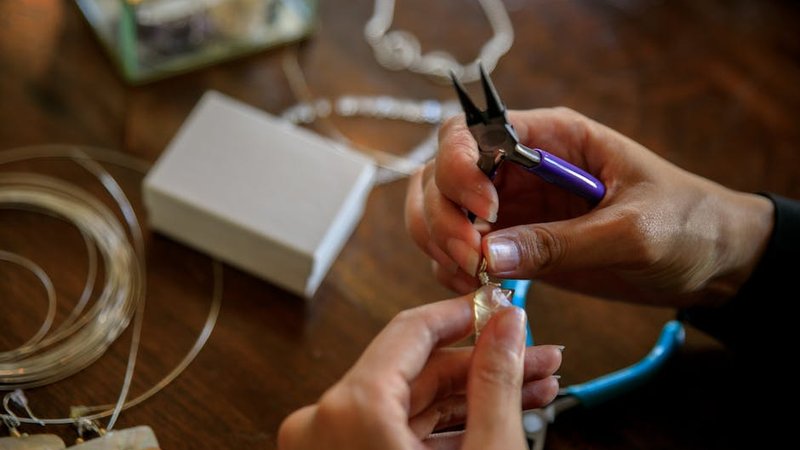
Project 2: Wire Wrapped Crystal Point Pendant
This is the project that made wire wrapping click for me. Crystal point pendants are everywhere right now — they're one of the most popular wire wrapped styles, and for good reason. A raw crystal wrapped in copper wire looks incredible with zero design effort on your part. The crystal does the heavy lifting aesthetically; you just provide the frame.
What you need:
- One crystal point or rough stone (quartz, amethyst, or citrine — whatever catches your eye)
- 18–20 inches of 20ga copper wire
- 10 inches of 22ga copper wire
- All three tools
Steps:
1. Hold the 20ga wire about 2 inches from one end. Bend it at a 90-degree angle, creating a short tail and a long working end. Wrap the short tail around the long wire 2–3 times to create a small "catch" at the base of the crystal.
2. Place the base of your crystal against that wrapped catch. Hold the crystal in one hand and use the other hand to bend the long wire up along one side of the crystal, over the top, and down the other side. You're creating a basic frame that follows the crystal's shape.
3. At the bottom, cross the wires beneath the crystal point and wrap them together 2–3 times. Now repeat — wrap the wire up one side, across the top, and down the other. You want 3–4 wraps total on each side, creating a cage-like frame.
4. At the top, form a decorative loop with the remaining wire. Wrap it around the base of the loop 2–3 times with your 22ga wire to secure it.
5. Use your 22ga wire to add a few decorative wraps anywhere the frame feels loose. This is where you can get creative — spiral accents, criss-cross patterns, or just clean securing wraps. Trim and tuck all wire ends.
Pro tip: work the wire snug against the crystal but not so tight that it cracks. If your crystal has an irregular shape, follow the contours rather than forcing it into a symmetrical frame. Organic shapes look better anyway.
Project 3: Simple Beaded Drop Earrings
Earrings are where most people start selling their wire wrapped work, and for good reason — they're small, quick to make, and people buy them impulsively. This pair takes about 15 minutes total once you've got the basic loop-making motion down.
What you need:
- Two matching beads (8–12mm, any shape)
- Two ear wires (store-bought, or make your own from 20ga wire)
- 4 inches of 22ga copper wire (per earring)
- Round nose and chain nose pliers, cutters
Steps:
1. Thread your bead onto the 22ga wire, centering it. Bend both wire ends upward on either side of the bead, creating a V-shape with the bead at the bottom.
2. Using your round nose pliers, grab both wire ends just above the bead and curl them into a single loop. The loop should be large enough to slide onto your ear wire. If the loop is too small, reposition your pliers further from the bead and re-curl.
3. Wrap one wire tail tightly around the "neck" below the loop 3–4 times. This is called a wrapped loop, and it's the most fundamental technique in wire wrapping. Practice it until it feels automatic — you'll use it in almost every project.
4. Trim the wrapped tail and the other tail (the one you didn't wrap with). Tuck both cut ends flat with your chain nose pliers.
5. Open your ear wire slightly (always open sideways, never pull apart), slide the wrapped loop on, and close the ear wire. Repeat for the second earring.
Match the wraps on both earrings as closely as you can. They don't need to be identical — slight variation is a hallmark of handmade jewelry — but the loop sizes should be roughly the same so they hang evenly.
Project 4: Memory Wire Bracelet
I'm including this one because it's essentially cheat code for beginners. Memory wire is pre-coiled stainless steel wire that holds its circular shape permanently. You don't need to form anything — just string beads and close the ends. The wire wrapping part comes in the finishing.
This is a zero-failure-rate project. I've made dozens of these, including some of my first attempts, and they all turned out wearable. It's the perfect confidence builder.
What you need:
- Memory wire bracelet coil (sold in packs, pre-formed into bracelet-sized circles)
- Assorted beads (seed beads, 4–8mm accent beads, whatever you like)
- 2–3 inches of 22ga copper wire (for end caps)
- Round nose pliers, chain nose pliers, heavy-duty cutters
- Important: Memory wire will ruin your regular wire cutters. Use cutters specifically rated for memory wire, or use an old pair you don't care about.
Steps:
1. Using your heavy-duty cutters, cut one full loop from the memory wire coil. Add about a quarter-turn extra so it wraps comfortably around your wrist with a small gap for sliding on and off.
2. Use your round nose pliers to curl one end of the memory wire into a small closed loop. This keeps beads from falling off. Make the loop tight — you don't want it catching on things.
3. String your beads in whatever pattern you like. A common approach is alternating small seed beads with larger accent beads, but there's no wrong answer. Fill the wire to about a quarter-inch from the end.
4. Curl the second end into a loop, just like the first. Check that your beads are snug but not compressed — they should have a tiny bit of room to shift.
5. Here's the wire wrapping part: take a few inches of 22ga copper wire and wrap it tightly around the loop ends, adding small coiled accents or tiny charms. This transforms the bracelet from "beads on wire" into something that looks deliberately handmade.
Memory wire bracelets are also a fantastic way to use up leftover beads from other projects. I keep a spool of memory wire on my desk specifically for this — when I finish a project and have a handful of orphan beads, they go straight onto a bracelet.
Project 5: Tree of Life Pendant
Okay, this one is a step up in complexity. I debated whether to include it in a "beginner" list, but it's so popular and so satisfying that I think it belongs here — with the caveat that you should do projects 1–3 first. The tree of life is one of the most recognizable wire wrapped designs, and making one feels like a genuine achievement.
What you need:
- One metal ring or wire frame (2–3 inches diameter — I make mine from 16ga copper wire formed into a circle)
- 15–20 inches of 24ga copper wire (for tree branches)
- 20–30 small gemstone chips or seed beads (for leaves)
- 4 inches of 20ga copper wire (for trunk and roots)
- All three tools
Steps:
1. If you're making your own frame, cut a length of 16ga wire, form it into a circle, and wrap the ends together with 22ga wire. Alternatively, buy a pre-made craft ring. Hold the ring vertically — the bottom is the root line, the top is the crown.
2. Take your 24ga wire and fold it in half. Loop the fold over the bottom of the ring, centering it. These two wire halves become your tree roots. Wrap each one around the bottom of the ring 2–3 times, letting the ends trail downward and outward.
3. Thread both wire ends through the center of your 20ga trunk wire, then twist the trunk wire tightly — about 8–10 full twists for a 2-inch ring. The twisted trunk should extend from just above the root line to about a third of the way up the ring.
4. Now separate your 24ga wires and start branching. Thread a few gemstone chips onto each wire branch, then wrap each branch around the ring frame. Create 5–7 branches total, spreading them across the upper two-thirds of the ring. Alternate the direction of each branch for a natural look — some go left, some right, some curve upward.
5. As you add each branch, wrap the wire around the frame 2 times before moving to the next branch position. This keeps everything secure and creates a layered canopy effect. Trim all wire ends at the back of the frame and tuck them flat.
The first tree of life I made looked like a sad stick figure. The second one was better. By the fifth, I was giving them as gifts and getting genuine compliments. The learning curve is real but fast — the main skill you're developing here is the ability to visualize branch placement before you commit to wrapping.
Common Beginner Mistakes (I Made All of These)
After struggling through dozens of failed attempts and then watching other beginners hit the same walls, I can confidently say these are the five mistakes that cause the most frustration:
Using wire that's too thick. Beginners often think thicker wire means stronger, more professional results. In reality, thick wire (18ga and below) is genuinely hard to bend and shape without proper technique. Start with 20ga and 22ga — they're thick enough to hold structure but thin enough that your hands can actually form them.
Cutting wire too short. I can't count how many times I got halfway through a wrap and ran out of wire. Always cut more than you think you need. You can always trim excess, but you can't add more. My rule: estimate what you need, then add 30%.
Gripping too hard. When you're nervous, you squeeze the pliers harder, which leaves dents and scratches in soft wire. Use the lightest grip that still gives you control. If you're leaving marks on your wire, you're pressing too hard. Nylon jaw pliers can help, but developing a lighter touch is the real fix.
Not leaving a tail. When you finish a wrap or coil, you need a little bit of extra wire to tuck under and secure. If you cut right at the end of your wrap, there's nothing to hold. Always leave at least a quarter-inch tail on every wire end for tucking.
Starting with expensive materials. I mentioned this already, but it bears repeating because I see it constantly. People buy sterling silver and gemstones for their very first project, and the pressure to not waste expensive materials makes them tense up, which makes the work worse, which makes them more frustrated. Start with copper and cheap beads. Save the good stuff for when the technique is in your hands, not just in your head.
Wire wrapping is one of the most accessible jewelry-making techniques out there. No torch, no solder, no kiln — just wire, pliers, and patience. The five projects above took me from complete beginner to someone who could make gifts that people actually wanted to wear. Your timeline might be faster or slower, and that's fine. The point is to start with projects that build real skills rather than projects that just look impressive in someone else's YouTube video.
Grab some copper wire, make a simple wrapped pendant, and see what happens. The worst case is you're out five bucks and an evening. The best case is you've found a hobby that'll keep you busy (and your friends stocked with jewelry) for years.

Comments