Wire Wrapping a Double-Terminated Crystal: Advan
June 3, 2026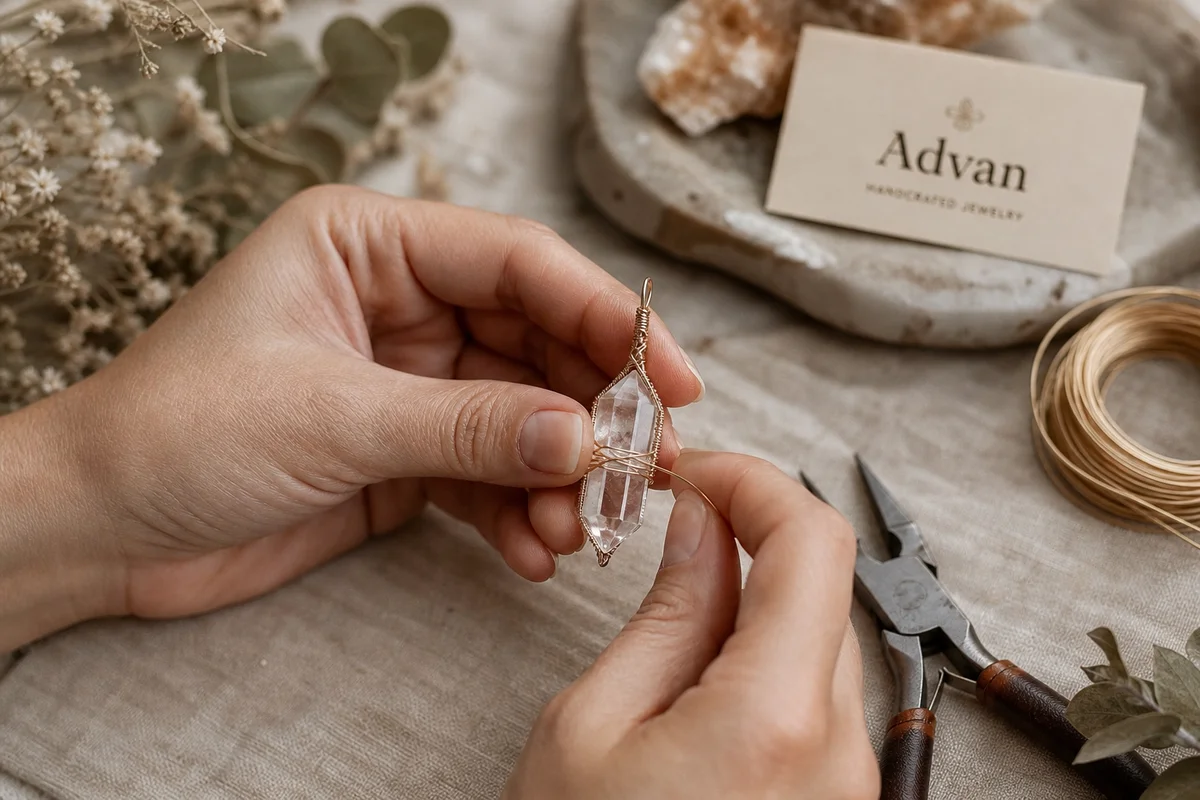
What Makes Double-Terminated Crystals Special for Wire Wrapping
A double-terminated crystal has natural point formations at both ends—unlike a single-point crystal that tapers to a point on one end and is flat or broken on the other. This natural symmetry opens up design possibilities that single points do not offer: you can suspend the crystal from either end, you can wrap the middle while leaving both tips exposed, and the crystal's natural form becomes a visual feature rather than something to hide behind wire.
Common double-terminated stones used in wire wrapping include Herkimer diamonds (double-terminated quartz from Herkimer County, New York), tourmaline rods, apophyllite points, danburite, and some selenite pieces. The wrapping challenge is different from single-point crystals because you cannot simply wrap around a single base—you need to secure the crystal from the middle or along its length while maintaining its orientation and displaying both terminations.
Wire and Tool Selection
Wire Gauges
You need two types of wire for a double-terminated pendant:
- Frame wire (18-gauge): this forms the main structural loop and bail (the part that goes through the chain). 18-gauge is stiff enough to hold its shape under moderate stress but flexible enough to wrap with tools. Use round wire in copper, sterling silver, or gold-filled.
- Wrapping wire (20-22 gauge): this creates the decorative wraps that hold the crystal in place. 20-gauge provides more visible, substantial wraps; 22-gauge allows for finer, more intricate patterns. For beginners, 20-gauge is easier to control and see what you are doing.
Copper is the best wire for practice because it is affordable ($8-15 for a 30-foot spool of 20-gauge), easy to bend, and shows wrapping patterns clearly. Silver-colored craft wire (aluminum) is even cheaper but too soft for structural elements—use it only for decorative wraps over a copper or silver frame.
Essential Tools
- Round-nose pliers: for making loops and curves in the wire
- Chain-nose pliers (flat inside): for gripping wire without marring it and tucking wire ends
- Wire cutters: flush cutters are preferred—clean cuts without sharp burrs
- Nylon-jaw pliers: for straightening bent wire and smoothing wraps without scratching
- Ruler or caliper: for measuring wire lengths and crystal dimensions
The Cradle Wrap: Step-by-Step
The cradle wrap is the most reliable technique for securing double-terminated crystals. Instead of wrapping the stone at one end (as you would with a single point), you create a wire "cradle" that wraps around the stone's middle section, leaving both terminations visible. This is the technique I will describe in detail, as it works for virtually any size and shape of double-terminated crystal.
Step 1: Measure and Cut Wire
Measure the circumference of your crystal at its widest point (the middle). Add 3-4 inches to this measurement—that is your frame wire length. For a crystal with a 1-inch circumference, cut about 14-15 inches of 18-gauge wire. For the wrapping wire, cut 18-24 inches of 20-gauge wire. It is better to have too much than too little—you can always trim excess, but running short mid-wrap is frustrating.
Step 2: Create the Frame Loop
Find the center of your 18-gauge frame wire. Using round-nose pliers, make a small loop at this center point. This loop will become the bail (where the chain passes through). Make the loop large enough to accommodate your chain—about 4-5mm inner diameter is standard. Wrap the two wire ends around the base of the loop 2-3 times to secure it, creating a small wrapped loop bail.
Now you have two wire ends extending downward from the bail. These will form the sides of the cradle.
Step 3: Shape the Cradle
Hold the crystal in one hand and the wire frame in the other. Position the bail loop at the top of where you want the crystal to hang. Bend the two wire ends down along either side of the crystal, curving them gently to follow the crystal's shape. At the bottom of the crystal, cross the two wire ends and twist them together 2-3 times. This creates the base of the cradle.
The frame now has the general shape: a bail at the top, two wire arms running down the sides of the crystal, and a twisted closure at the bottom. The crystal should be loosely held in the frame but not yet secure.
Step 4: Begin the Decorative Wrapping
Take your 20-gauge wrapping wire and anchor it at the top of the frame, just below the bail. Wrap the thin wire tightly around both frame wires 4-5 times to create a secure starting point. Now begin wrapping down toward the crystal, spiraling the wrapping wire around one frame wire, then crossing over to the other frame wire, creating a pattern that visually holds the crystal in place.
Work slowly and keep the wraps tight and evenly spaced. The wrapping wire should lie flat against the frame wire—no gaps, no loose coils. Each wrap should nestle against the previous one.
Step 5: The Center Band
When you reach the widest part of the crystal (usually the middle), create a tighter, more concentrated band of wraps—6-8 wraps in a small space, close together. This center band is the primary structural element that prevents the crystal from sliding out of the frame. The crystal should now be firmly wedged between the upper wraps and the center band.
Step 6: Complete the Wrap
Continue wrapping below the center band, following the crystal's tapering shape toward the bottom. At the bottom, where the frame wires cross, wrap both wires together 4-5 times to secure the wrapping wire. Use chain-nose pliers to tuck the wrapping wire end under the last wrap and squeeze it flat so there are no sharp points.
Trim any excess frame wire at the bottom with flush cutters. Use nylon-jose pliers to press the cut ends flat against the crystal or frame to prevent snagging on clothing or skin.
Design Variations for Different Crystals
Herkimer Diamond
Herkimer diamonds are small, typically 0.5-2 inches, with sharp, well-defined terminations at both ends. The cradle wrap works beautifully for these because the crystal's natural form is the main visual feature—keep wire minimal. Use fine wrapping wire (22-gauge) and create 2-3 simple crossing wraps at the center point. Less is more with Herkimer diamonds—the crystal should dominate the design, not the wire.
Tourmaline Rod
Black tourmaline rods are longer and more cylindrical than Herkimer diamonds, often 1-3 inches long. The cradle wrap should be adjusted to accommodate the rod shape: make the frame wires follow the crystal's length rather than hugging it closely. A simple central wrap band (3-4 wraps) combined with looped ends at the top creates a clean, modern pendant. Tourmaline rods are durable, so you do not need to worry about wire pressure damaging the stone.
Apophyllite
Apophyllite points are often pyramidal with a flat base—technically not always double-terminated, but the pointy-to-flat shape can be wrapped similarly. Apophyllite is relatively fragile (Mohs 4.5-5), so keep wire wraps loose enough to avoid pressure points that could cause chipping at the edges. The basket wrap (a more open version of the cradle) works well—wrap around the crystal's middle with visible gaps between wraps, creating a latticework effect.
Advanced: Adding Wire Weaving Decoration
Once you are comfortable with the basic cradle wrap, you can add wire weaving between the frame and wrapping wires. This creates a braided or woven pattern that is visually more complex and provides additional structural support.
The simplest weave is the "figure-eight" pattern: pass the wrapping wire over the left frame wire, under the right frame wire, over the left, under the right—creating a continuous figure-eight pattern that looks like braid. This technique uses wrapping wire more quickly (budget for 30+ inches of 22-gauge for a full pendant) and takes significantly longer (45-90 minutes vs. 20-30 minutes for basic wrapping), but the visual result is striking.
Common Mistakes and How to Avoid Them
- Wire too tight against crystal: this can chip fragile stones or create pressure points that crack over time. Leave a small gap between the wrapping wire and the stone surface, especially with soft stones like apophyllite or calcite.
- Uneven wraps: practice makes perfect, but using nylon-jaw pliers to press wraps flat after each section helps maintain consistency.
- Exposed wire ends: always tuck cut ends under wraps and flatten with pliers. Sharp wire ends snag clothing and scratch skin.
- Frame too loose: the crystal should not rattle inside the frame. If it moves, add more wrapping wire at the center band until the crystal is snug but not compressed.
- Using soft wire for the frame: aluminum craft wire bends too easily and does not hold shape. Use copper, sterling silver, or gold-filled wire for the structural frame.
Frequently Asked Questions
Can I use this technique for a single-terminated crystal?
Yes, but you will need to adapt it. For a single point, wrap the base (non-point end) with wire and create a frame that holds the base while the point extends upward. The cradle technique is specifically designed for double-terminated symmetry, but the principles of frame + wrapping wire + center band apply to any crystal shape.
How do I prevent the wire from tarnishing?
Copper wire naturally darkens (patinas) over time. If you want to maintain the bright copper color, apply a thin coat of clear nail polish or Renaissance Wax after completing the pendant. Sterling silver wire can be polished with a jewelry polishing cloth. Some people prefer the aged patina look, especially with copper—it gives the piece a warm, antique appearance.
What chain works best with a double-terminated pendant?
A simple cable chain or snake chain in silver, gold, or copper complements wire-wrapped pendants without competing visually. Chain width should be proportional to the pendant size—thin chain (1-2mm) for small pendants, medium chain (2-3mm) for larger pieces. Avoid overly decorative chains that distract from the pendant itself.
Frequently Asked Questions
How do you secure a double-terminated crystal without using glue?
Securing a double-terminated crystal without glue requires a tension-based cradle wrap. By creating precise bends in the wire and anchoring them at both ends of the stone, the structural tension holds the crystal firmly in place. Our artisans meticulously calculate these pressure points so your natural gemstone remains perfectly balanced and secure for everyday wear, entirely free of chemical adhesives.
What is the best wire gauge for wrapping delicate crystals?
When wire wrapping delicate or fragile crystals, using a thicker base wire (like 18 or 20 gauge) for the frame provides essential strength, while thinner weaving wires (26 or 28 gauge) add intricate detail without putting too much pressure on the stone. This combination ensures the handcrafted piece is durable and protects the natural crystal from chipping or cracking during the wrapping process.



Comments