Resin Troubleshooting: Bubbles and Sticky Fix
June 12, 2026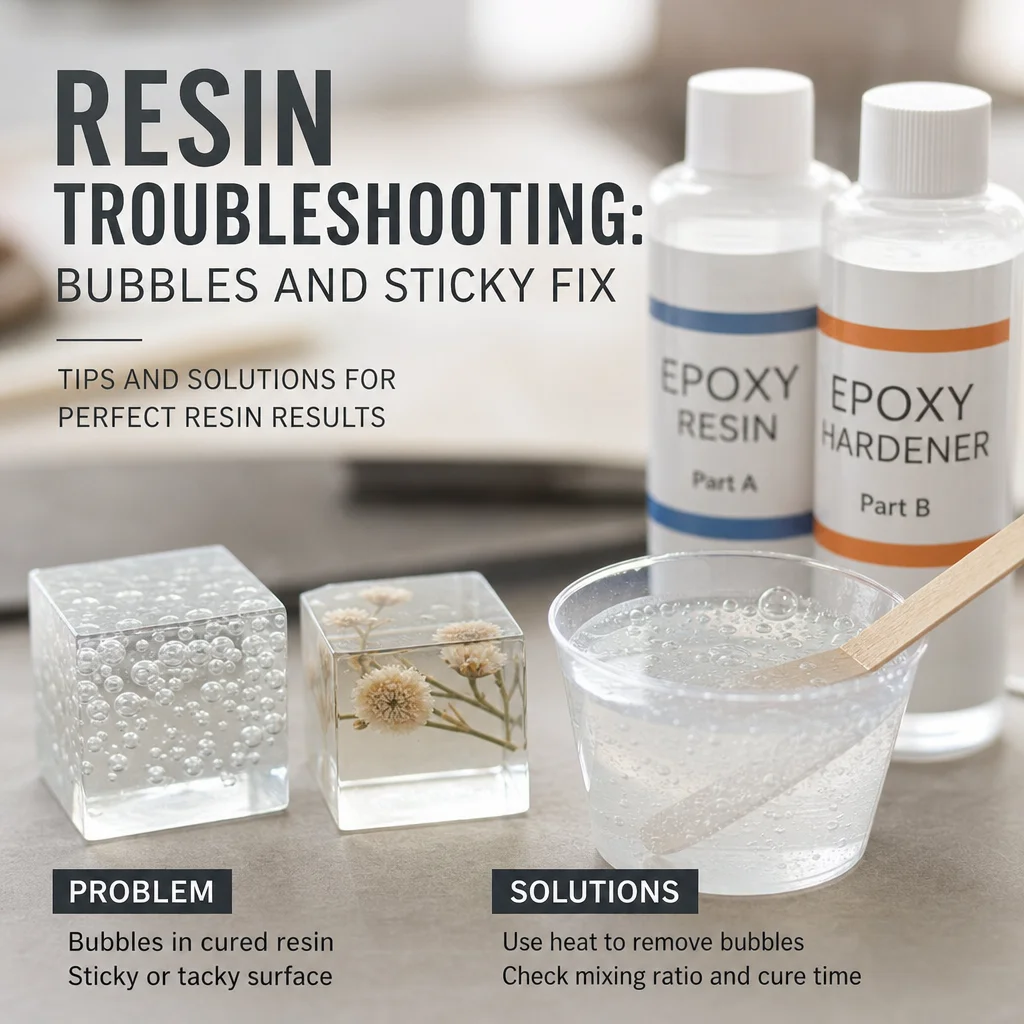
Epoxy Resin Troubleshooting Guide
Hey there, fellow crystal crafters! Ever had one of those projects where your epoxy resin didn't turn out just right? Don't worry, we've all been there. Epoxy can be a bit of a picky thing, even when you're a pro. I'm here to help you out with this guide. I'll go over the usual mishaps you might run into with epoxy resin, what causes them, and how to keep 'em at bay. Plus, if they sneak up on you, I'll show you how to smooth things over. Let's get into it!1. Bubbles - Causes and How to Prevent and Remove
**Why It Happens:** Hey, so bubbles in your epoxy are like a party with no invitations—air just pops in during the mixing or pouring. It can also sneak in when the resin meets high humidity or gets poured into a pot with hidden air guests. **Prevent It:** And to keep 'em out, make sure you mix your epoxy well and give it a headspace so air has nowhere to hide. And honestly, a dry environment is a bubble-free zone!- Don't forget to mix your resin and hardener really well before you start pouring.
- Use a stir stick with a flat edge, so you don't end up with those pesky bubbles.
- Just pour the resin into the mold a little at a time. It lets the air bubbles escape, you know?
- Keep your workspace clean, no dust or debris, or you'll regret it later.
2. Cloudy/Milky - Humidity and Temperature Issues
**Why It Happens:** So, you know when your epoxy looks all cloudy or milky? That's usually because there's moisture floating around in the air or stuck on your project. It's like the moisture is playing hide and seek with your resin, and when it finds it, it causes that icky cloudiness. **Prevent It:** Well, here's the deal. You gotta keep your workspace nice and dry. Use a dehumidifier or just make sure you've got your project nice and dry before you pour the resin. It's all about keeping the moisture monster at bay!- Work in a place where it's not too dry, like 40-70% humidity, that's ideal.
- Make sure your resin and hardener are in super tight containers, no air getting in.
- Just cover your project when it's curing, so it doesn't catch any humidity.
3. Sticky/Tacky That Never Cures - Wrong Ratio, Old Resin, Cold Environment
**Why It Happens:** Hey, so you know that sticky or tacky finish that just won't go away? It's usually because of a few things. Like, maybe you mixed the stuff wrong, or the resin's been sitting around too long, or maybe it's just too cold out there. All that can really slow down the curing process. **Prevent It:** Alright, here's the deal. To keep it from happening, just make sure you're mixing it right, use fresh resin, and if it's super cold, try to warm things up a bit. Easy peasy!- Always use fresh resin and hardener, okay?
- Make sure you mix your resin and hardener just like the instructions say.
- Keep your workspace nice and toasty, at room temperature, you know?
Hey there, if your project is still sticky after the recommended curing time, no worries, you can give it a light sanding and slap on a new layer of resin. But if the resin's feeling a bit old, it might not play nice and cure at all. In that case, you're gonna need to yank out the old stuff and start fresh.
4. Yellowing Over Time
**Why It Happens:** Epoxy resin gets all yellow after a while because it's sensitive to UV light and heat, y'know? **Prevent It:** Oh, and to keep it looking fresh, just keep it out of direct sunlight and avoid too much heat. It's really not that hard, just a bit of common sense.- Hey, make sure to keep your resin and finished pieces out of the bright sun, you know? It can fade them.
- And if you gotta show off your project to the sun, grab some UV-blocking resins or coatings, they're a lifesaver.
5. Shrinking, Divots, and Fish Eyes
**Why It Happens:** Oh, you know those pesky shrinking, divots, and fish eyes? They're usually because of air bubbles or extra moisture in the resin, and sometimes just not curing evenly. **Prevent It:** So, to keep 'em at bay, try not to rush the curing process and give the resin a bit of time to set up properly. Keep it out of direct sunlight and away from heat sources. I've found that patience is key!- Make sure you mix your resin and hardener real good to get all the air bubbles out.
- Go slow and pour your resin little by little so the trapped air can bubble up and escape.
- Check your mold for any little bits or gunk, you want it nice and clean.
Fixing Up Your Crystal Creations
Hey, so if you've got any little divots or those pesky fish eyes, just give 'em a good sand and slap on a fresh layer of resin. And if you're dealing with bigger shrinkage issues, well, you might need to give the whole project a redo. It's not the end of the world, but it's something to keep in mind.
6. Color Separation
**Why It Happens:** You know, color separation is just when the pigments in your epoxy kind of sink and pull away from the resin while it's curing. It's like when you stir your milk and then leave it for a bit, and it separates into curds and milk. **Prevent It:** To keep it from happening, you just need to stir it up really well before you pour it, and then let it cure without moving it. It's like making a smoothie, you gotta mix it up and let it chill without disturbing it.- Don't forget to give those pigments a good stir before you dump them in the resin.
- Make sure the resin and pigments are both the same temperature – it's super important!
- Now, mix 'em up just before you use them, okay?
Hey, if the colors start to separate, just give the mix a good stir to bring 'em back together. But if it's already too late, you might have to sand the area down a bit and add some fresh resin to cover it up. No biggie, just a little touch-up, you know?
7. Dimples in Surface
**Why It Happens:** Hey, so dimples in your epoxy's surface can pop up because of air bubbles, moisture that got trapped, or just not curing evenly. **Prevent It:** You know, I've found that to prevent them, you gotta be super careful with your technique. Make sure you're not introducing air bubbles, and let it cure just right. It's all about patience, honestly.- Mix your resin and hardener thoroughly to remove air bubbles.
- Pour your resin in small increments to allow trapped air to escape.
- Ensure your mold is smooth and free of debris.
- Sand down any dimples and apply a new layer of resin.
Prevention Checklist
- Use fresh resin and hardener.
- Mix your resin and hardener precisely according to the manufacturer's instructions.
- Work in a controlled environment with low humidity and room temperature.
- Cover your project as it cures to protect it from humidity.
- Keep your workspace free of dust and debris.
- Stir your pigments thoroughly before adding them to the resin.
- Keep your resin and pigments at the same temperature.
- Mix your resin and pigments immediately before use.
- Pour your resin in small increments to allow trapped air to escape.
- Use a stir stick with a flat edge to avoid creating bubbles.
- Ensure your mold is smooth and free of debris.
Historical Context and Cultural Significance of Epoxy Resin
Epoxy resin has a rich history that dates back to the early 20th century. Originally developed for industrial purposes, it quickly gained popularity in various fields due to its versatility and durability. In the jewelry-making world, epoxy resin has become a go-to material for its ability to encase and protect delicate items, as well as for its ability to create unique, one-of-a-kind pieces. The cultural significance of epoxy resin in jewelry-making can be seen in the artistry and creativity it allows, with artists and crafters able to transform everyday objects into works of art.Practical Usage Scenarios and Tips
When working with epoxy resin, it's important to consider the specific project you're undertaking. Whether you're creating a pendant, a ring, or a set of earrings, here are some practical usage scenarios and tips to help you achieve the best results:- Pendants: For pendant designs, consider adding a bezel to secure the item within the resin. This not only protects the pendant but also adds an extra layer of craftsmanship.
- Rings: When making rings, ensure you have the correct size mold. It's important to have the ring fit comfortably and securely.
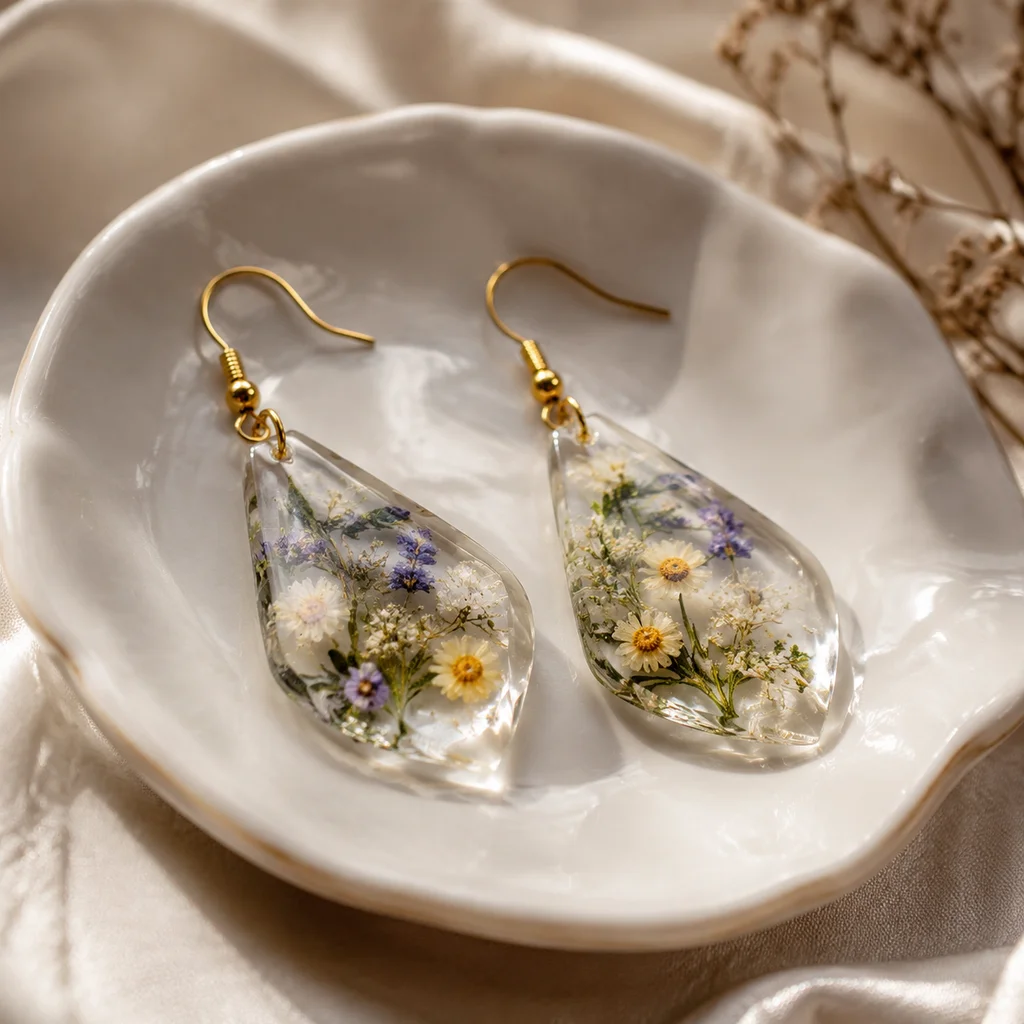
- Earrings: For earrings, use a small mold or a custom-shaped mold to create the desired shape and size.
Related Crystals/Minerals Comparisons
Epoxy resin is often compared to other materials used in jewelry-making, such as glass and resins like polyester or acrylic. While these materials share some similarities, they also have distinct differences:- Glass: Similar to epoxy, glass can be used to encase items, but it is heavier and more brittle.
- Polyester Resin: Polyester resin is similar to epoxy in terms of ease of use and durability, but it emits a strong odor and requires a hardener.
- Acrylic Resin: Acrylic is easier to sand and polish than epoxy, but it is more prone to yellowing over time.
Buying Guide Considerations
When purchasing epoxy resin, there are several factors to consider:- Type of Resin: Choose between clear or pigmented resins, and consider whether you need a UV-blocking version.
- Varnish and Coatings: Look for varnishes or coatings that can protect your finished project and add a glossy finish.
- Accessories: Don't forget to pick up the necessary accessories, such as mixing cups, stir sticks, and molds.
Care and Maintenance Details
Proper care and maintenance of your epoxy resin projects are essential to ensure their longevity:- Cleaning: Use a soft cloth and gentle soap to clean your finished pieces. Avoid using harsh chemicals or abrasive materials.
- Storage: Store your finished projects in a cool, dry place away from direct sunlight and extreme temperatures.
- Polishing: If your project has a glossy finish, you can use a microfiber cloth and a polish to maintain its shine.
Common Mistakes to Avoid
Avoid these common mistakes to improve your epoxy resin projects:- Not Measuring Properly: Always measure your resin and hardener precisely according to the manufacturer's instructions to avoid issues with curing.
- Ignoring Safety Precautions: Wear protective gear, such as gloves and goggles, when working with epoxy resin to prevent accidents.
- Not Giving Enough Time to Cure: Be patient and allow your project to cure completely before handling or using it.
FAQ
**Q1: Why is my epoxy not curing?** A1: There could be several reasons, including an incorrect mix ratio, old resin, or a cold environment. Ensure you're following the manufacturer's instructions and working in a warm, dry environment. **Q2: How can I remove bubbles from my cured epoxy?** A2: You can gently sand them out with a fine-grit sandpaper. For larger bubbles, use a pin to pop them, then sand the area to smooth it out. **Q3: Can I fix a cloudy or milky finish?** A3: If your project has already cured, you can sand it down and apply a new layer of resin to cover the cloudy areas. If it's still curing, cover it to protect it from humidity. **Q4: Why is my epoxy yellowing?** A4: Yellowing is often due to exposure to UV light or heat. Store your resin and finished projects away from direct sunlight and use UV-blocking resins or coatings if necessary. **Q5: How can I prevent color separation in my epoxy?** A5: Stir your pigments thoroughly before adding them to the resin and keep your resin and pigments at the same temperature. Mix your resin and pigments immediately before use. **Q6: What's the best way to clean my epoxy resin jewelry?** A6: Use a soft cloth and gentle soap to clean your finished pieces. Avoid using harsh chemicals or abrasive materials. **Q7: Can I use epoxy resin to create transparent jewelry?** A7: Absolutely! Clear epoxy resin is perfect for creating transparent jewelry, and it can be enhanced with pigments for added color. Remember, the key to successful epoxy resin projects is patience and attention to detail. By understanding the causes and fixes for common issues, you'll be well on your way to creating stunning, bubble-free masterpieces. Happy crafting!Frequently Asked Questions
How do I get bubbles out of resin jewelry?
To remove bubbles from resin pieces, use a heat gun or butane torch on a low setting to gently pass over the surface. Warming resin bottles in a water bath before mixing also reduces viscosity and trapped air. For smaller pieces like pendants, a toothpick helps pop stubborn surface bubbles. At SagStone, our artisans use precise pouring techniques during the crafting process to minimize trapped air for a flawless, crystal-clear finish.
Why is my resin sticky and not fully curing?
Sticky resin usually means incomplete curing caused by incorrect mixing ratios, low room temperature, or insufficient cure time. Always measure components precisely by volume or weight as specified. Your workspace should be at least 70°F (21°C) for proper chemical reaction. If resin remains tacky well past the recommended cure window, the bond has likely failed and the piece will need to be recast for proper hardness and durability.
How long should resin cure before wearing jewelry?
Most jewelry-grade epoxy resins need 24 hours for initial handling and 72 hours for full hardness. For pieces worn daily like rings or pendants, allowing a full 5-7 day cure ensures maximum scratch resistance and longevity. Fast-curing formulas may feel solid sooner but remain softer long-term. Each handcrafted SagStone crystal jewelry piece goes through a complete curing cycle to guarantee lasting brilliance and durable wear for years.
Can sticky resin be fixed after it has already cured?
Once resin stays sticky past the full curing period, it generally cannot be salvaged. The chemical reaction has failed. You can attempt pouring a thin fresh layer of properly measured resin over the tacky surface, but results are inconsistent. Prevention works best—measure accurately, keep humidity below 50%, maintain warm temperatures, and mix slowly. Recasting with fresh material delivers far better results than trying to rescue compromised pieces.
How do I prevent air bubbles when pouring resin?
Prevent bubbles by warming resin bottles in warm water before mixing, stirring slowly in one direction to avoid whipping air in, and pouring in thin steady layers. Let mixed resin rest for 5-10 minutes so bubbles rise naturally before pouring. Pouring from a slight height in a thin stream also helps release trapped air. A quick heat gun pass after pouring pops remaining surface bubbles for that professional glass-like clarity.


Comments