Backyard Crystal Scavenger Hunt for Kids
May 16, 2026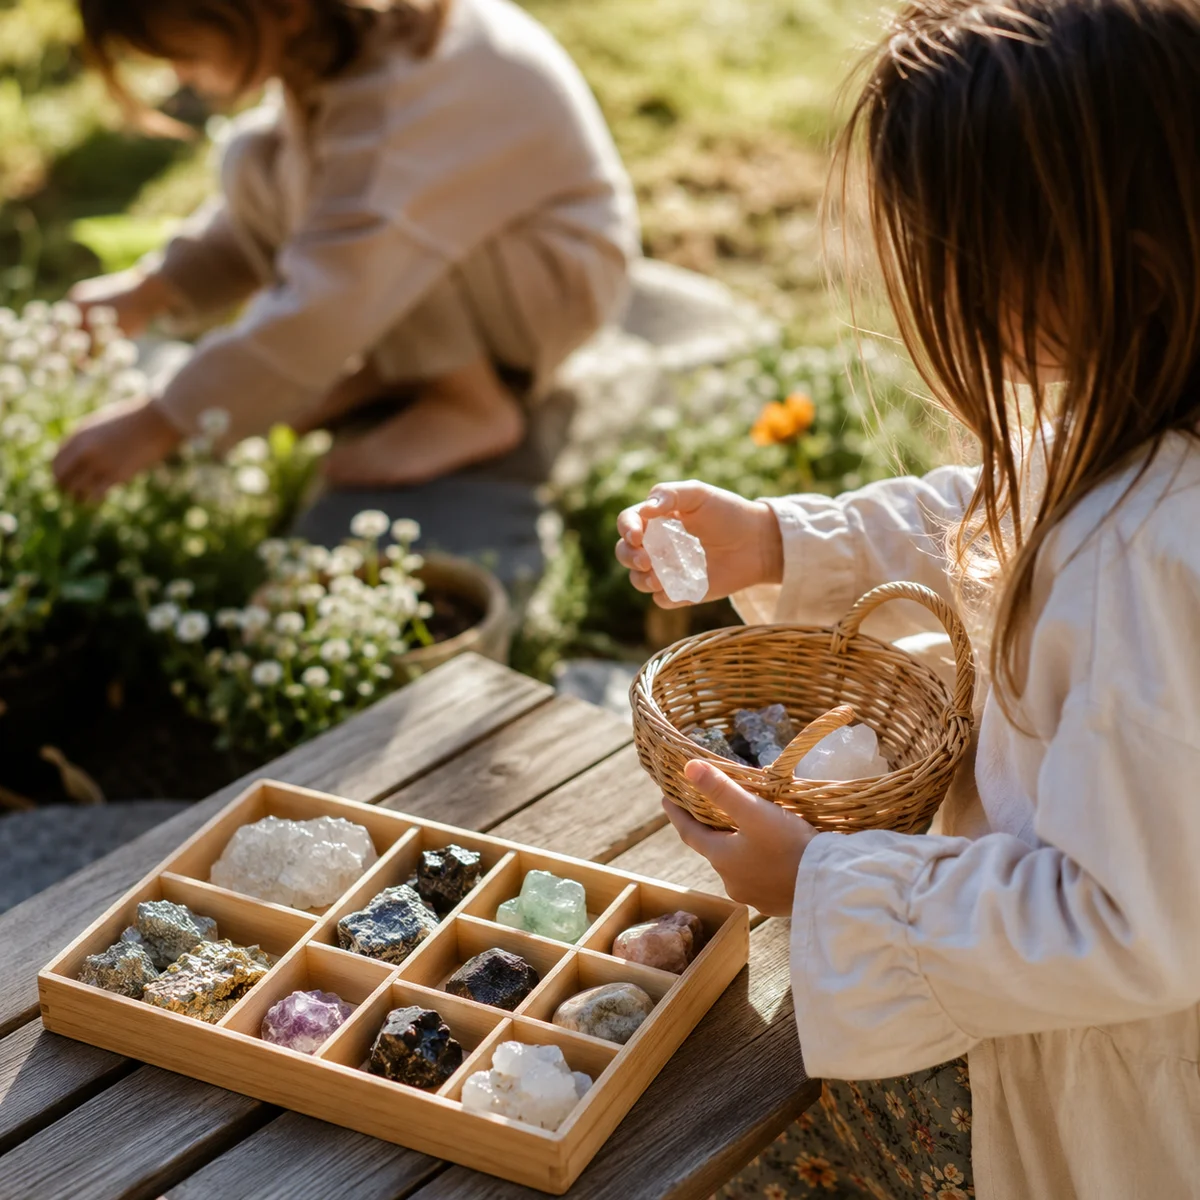
I Turned My Backyard Into a Crystal Scavenger Hunt for My Kids — Here's the Blueprint
Last Saturday morning, my 6-year-old threw a tennis ball at my face at 6:47 AM and announced she was "bored." My 9-year-old followed up ten minutes later by attempting to make slime in a cereal bowl, which is how I ended up standing in the kitchen at 7 AM wiping cornstarch off the counter and mentally scrambling for a plan.
I'd bought a bag of tumbled stones from a local rock shop a few weeks earlier — rose quartz, amethyst chips, smooth carnelian pieces — thinking I'd put them on a shelf somewhere. They'd been sitting in a ziplock on my desk since then. My daughter kept picking them up and lining them up on the windowsill. That's when the idea hit: why not hide them around the yard and turn it into a game?
Two hours later, both kids were running barefoot across the lawn, shrieking about finding a "purple one!" and arguing over who got to hold the "pink heart rock." My neighbor leaned over the fence and asked what on earth was going on. I told her it was a crystal scavenger hunt. She asked for instructions. So here they are — the full blueprint, including everything I did wrong, what the kids actually cared about, and how you can pull this off for under thirty bucks.
What You Need (And What I Actually Spent)
Here's the honest breakdown. I already had some of this stuff around the house, and I'm guessing you do too. The only thing I bought specifically for this was the crystals themselves.
- Tumbled crystals (mixed bag): $12 on Amazon — I got a 30-piece assortment that included rose quartz, amethyst, clear quartz, carnelian, and green aventurine. All tumbled smooth, no sharp edges, totally safe for little hands.
- Small paper bags (for "loot sacks"): $3 at the craft store — but honestly, lunch bags work fine. I just wanted the ones with the twist ties because my kids think those are fancy.
- Cardstock + marker (for clues): Already had these. If you don't, dollar store. $1.
- A magnifying glass (optional but highly recommended): $5 at Target. This was the single best purchase of the whole project — both kids fought over it the entire time.
- Printed "field guide" I made on my phone: Free. I just screenshotted pictures of the crystal types and labeled them.
Grand total: $21. And honestly, you could do it for $15 if you skip the magnifying glass (don't skip the magnifying glass).
Choosing Crystals That Won't Ruin Your Day
Not all crystals are kid-friendly. Some are toxic (looking at you, cinnabar), some are too fragile, and some are just plain boring for children. Here's what worked for us and why:
- Rose quartz: The MVP. Pink, smooth, heart-shaped if you're lucky. Both my kids fought over these the most. They're cheap — you can get a handful for three bucks.
- Amethyst: Purple is always a hit with kids. The tumbled ones have this gorgeous deep color that looks "magical" according to my daughter. Affordable and durable.
- Clear quartz: Looks like glass but won't shatter. Great for "ice crystal" themes. Also very cheap.
- Carnelian: Orange and warm-looking. My son liked these because they "look like tiger eyes." They're actually not the same stone, but I didn't correct him because he was having fun.
- Green aventurine: Soft green, associated with luck. I told my kids these were "lucky stones" and they believed every word. Easy to find and inexpensive.
- Tiger's eye: The chatoyancy (that shimmer effect) makes kids lose their minds. A bit pricier but worth it for the wow factor.
Crystals I do not recommend for young kids: Selenite (too soft, flakes apart), raw quartz points (sharp), anything labeled "aura treated" (the coating can chip), and malachite (contains copper, not great if a kid licks it — and a kid will lick it).
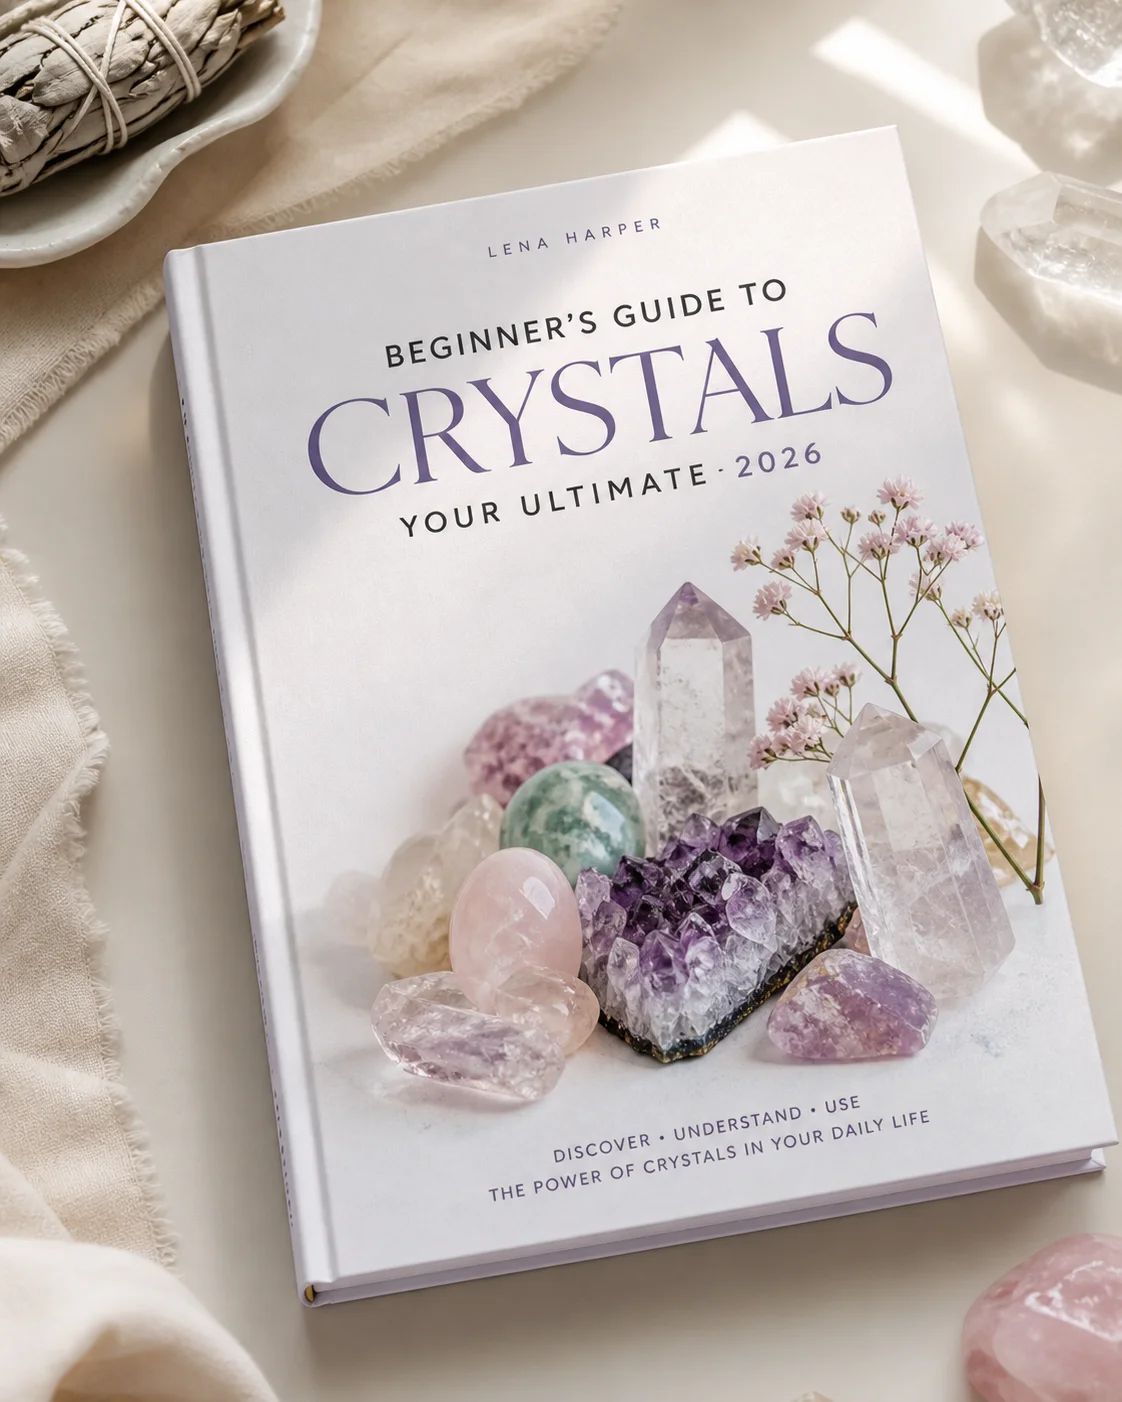
If you want to go deeper into kid-safe crystal options and how to introduce them, check out our guide to getting kids started with crystal collecting — it covers safety basics and age-appropriate starter kits.
Setting Up the Hunt: What I Did (And What I'd Do Differently)
Setup took me about 40 minutes, but 15 of those were spent trying to find where I'd hidden the crystals. Tip: make a map. I didn't make a map. I should have made a map.
Here's how I organized it:
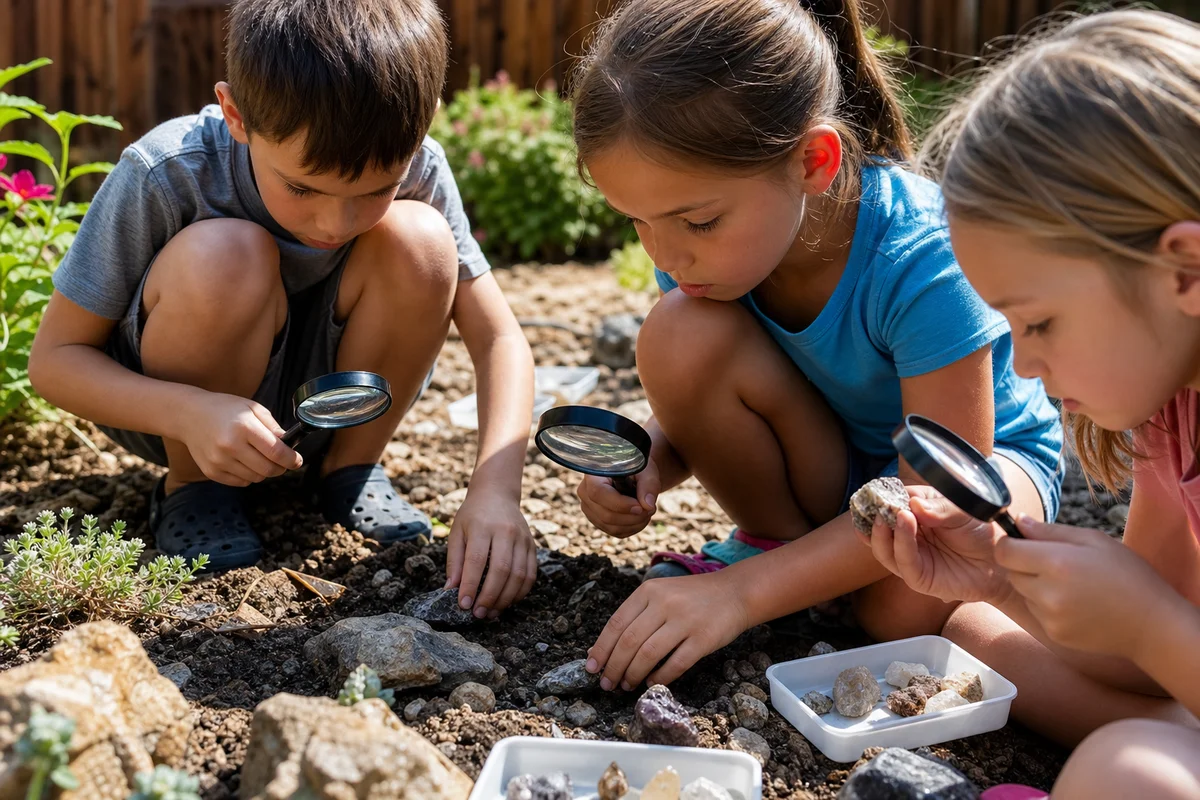
Step 1: Pick your zones. I divided the backyard into four areas — the flower bed, under the oak tree, along the fence, and in the herb garden. Each zone had a different "theme." My kids didn't care about the theme names at all. They just wanted to find rocks. But I had fun making the signs.
Step 2: Hide the crystals. I buried some shallowly in the flower bed (barely covered — a quarter inch of soil), tucked some into tree branches at kid-height, placed a few behind potted plants, and sprinkled a handful directly on the grass. The grass ones were found in four seconds. The buried ones took forever, which was the point.
Step 3: Write the clues. I made five clue cards, each leading to the next zone. Simple rhymes, nothing fancy. "Where the petals bloom so bright, dig below to find your light." That kind of thing. My 6-year-old couldn't read them, so my 9-year-old read them aloud and felt very important about it.
What went wrong: Our dog, Biscuit, found three crystals before the kids did and tried to eat one. He was fine — tumbled stones are smooth — but I had to rinse them off. Also, I hid one inside a flower pot and then completely forgot which pot. It's probably still there. If you're reading this and you're my future self: check the geranium.
Age-by-Age Variations (Because One Size Fits Nobody)
The original hunt was designed for both my kids together (ages 6 and 9), but I realized pretty quickly that they needed different levels of challenge. Here's what I've figured out after running this twice and getting feedback from three other parents who tried it:
Ages 3-5: The "Treasure Basket" Approach
For toddlers and preschoolers, skip the clues entirely. They don't need them, and they'll get frustrated if they can't figure out the next step. Instead:
- Hide crystals in obvious, visible spots — on top of the grass, peeking out from under leaves, sitting on the edge of a garden stone.
- Use larger tumbled stones (at least 1 inch) so they're easy to grab and harder to swallow.
- Give them a basket or bucket and just let them wander. No rules, no timer, no competition.
- Sort the finds together afterward by color. This is secretly a learning activity but don't tell them that.
- Count them out loud as you go. My friend's 4-year-old counted to 14 because she was so excited about her "collection."
At this age, the activity is really about sensory exploration. The smooth feel of tumbled stones, the colors, the weight in their hands — that's where the magic is. Keep it simple and follow their lead.
Ages 6-8: The Sweet Spot
This is the age range where the full scavenger hunt format really works. They can read simple clues, they love a mission, and they're starting to get curious about "why" things look the way they do.
- Use rhyming clue cards (3-4 lines max) that lead from zone to zone.
- Add a "field guide" — a simple sheet with pictures of each crystal type and its name. My daughter carried hers around like a clipboard and took it very seriously.
- Include one "bonus challenge" per zone. For example: "Find the stone that matches the color of the sunset" (carnelian), or "Which crystal is the smoothest?"
- Let them keep the crystals they find. This is huge. The ownership piece matters more than you'd think.
- Set a timer if your kid is competitive. My son wanted to "beat his record" and did the hunt three times in a row.
My daughter at 6 loved the clues but was more excited about sorting her finds into "families" afterward. She grouped all the pink ones together, all the purple ones together, and spent twenty minutes arranging them on the patio table. This was not part of my plan. It was better than my plan.
Ages 9-12: The Junior Geologist Mode
Older kids need more complexity, or they'll get bored fast. Trust me — I learned this the hard way when my son finished the basic hunt in seven minutes and said "that's it?"
- Add a "crystal identification" challenge: don't label the crystals in advance. Give them a reference sheet (or let them use a book — we've got a list of the best crystal books here, and several are written specifically for kids) and make them identify each stone they find.
- Include a hardness test station: give them a penny and a steel nail and let them try the Mohs hardness scale. Clear quartz won't scratch with either, which makes it feel "indestructible" and cool.
- Use a map with coordinates or a simple grid system. Mark where crystals are hidden on the map and have them navigate to each spot.
- Add trivia cards at each station: "This purple crystal gets its color from what element?" (Iron, if you're wondering.)
- Let them design the next hunt. My son took over planning for round two and hid crystals in spots I never would have thought of — inside the garden hose reel, taped under the picnic table, one inside a tennis ball can.
At this age, they're also ready to connect the activity to bigger experiences. If your kid gets hooked, a crystal mining road trip is an incredible next step — real mines where kids can dig for their own specimens. We haven't done one yet, but it's on our summer list.
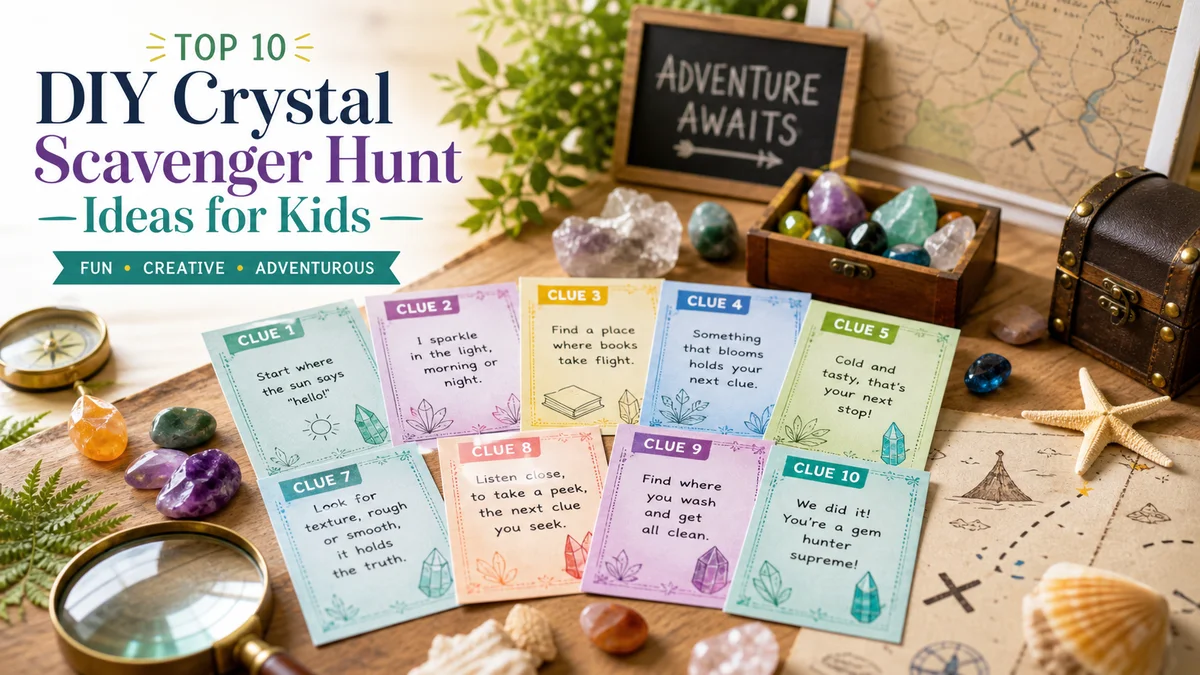
The Clue Cards You Can Actually Use
I'm going to save you the trouble of writing these yourself. Here are the five clue cards I used, plus a bonus one. Print them, scribble them on index cards, whatever works.
Clue 1 (Start — hand this one to the kids):
"Your adventure starts where the flowers grow,
Look near the roots, but dig real slow.
A pink surprise waits in the dirt,
The gentlest stone found in the earth."
Clue 2 (Hidden in the flower bed):
"Walk to the tree with branches wide,
Something purple likes to hide.
Check where the bark meets the lowest limb,
You're getting closer — keep looking slim!"
Clue 3 (Taped to the oak tree):
"Follow the fence where the green things climb,
An orange stone was left behind.
Behind a pot, beneath a leaf,
This crystal brings a warm belief."
Clue 4 (In the fence garden):
"Now to the herbs where the basil grows,
A crystal clear as winter snows.
Lift up the pot, check underneath,
The clearest stone brings crystal breath."
Clue 5 (Final — in the herb garden):
"You've found them all, you're nearly done,
But one more stone has yet to come.
Go where you started, check again,
The green lucky stone's your prize — and then...
YOU WIN!"
I laminated these with packing tape because I didn't have a laminator and it rained the second time we did this. Worked fine. The kids didn't notice or care that they looked like I made them at 7 AM with a Sharpie, which is exactly what happened.
After the Hunt: What to Do With the Crystals
The hunt itself lasted about 25 minutes the first time and 15 minutes the second time (my son memorized the hiding spots). But the aftermath — the sorting, the displaying, the "can I keep this one in my room?" negotiations — lasted the rest of the afternoon. Here's how we extended the activity:
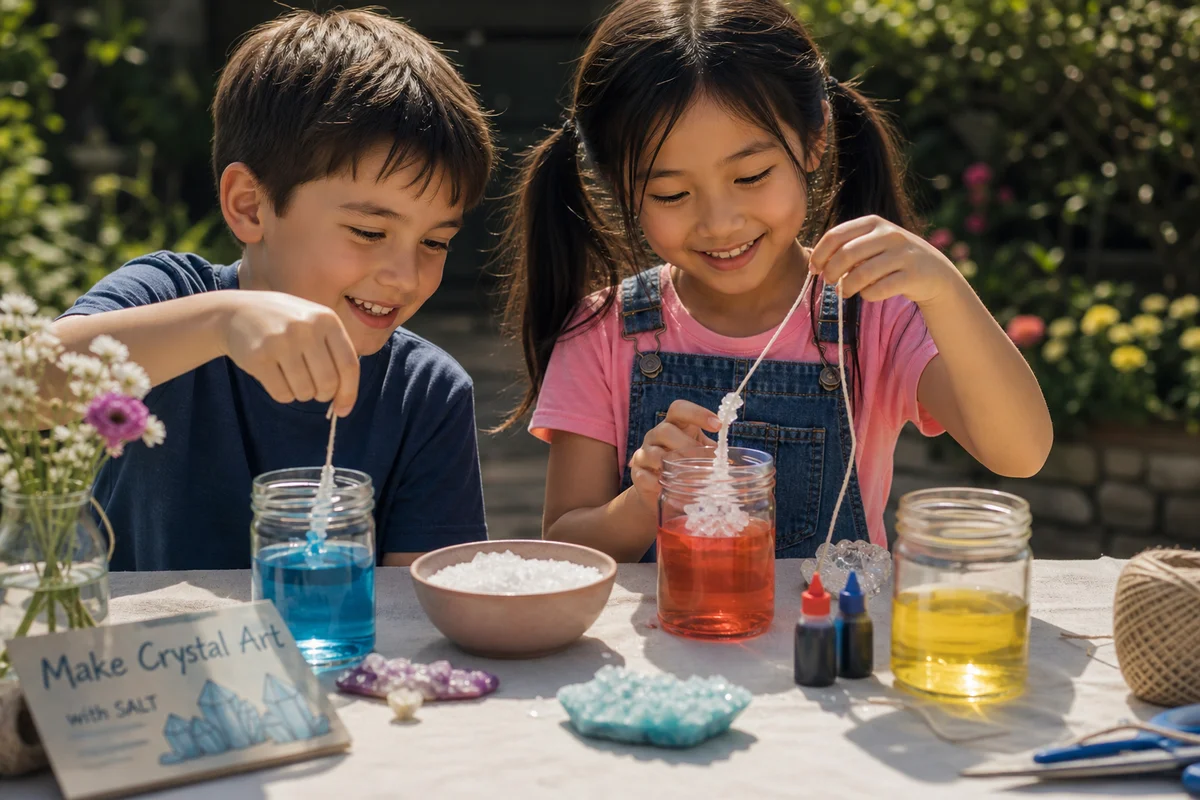
Crystal washing station: I set up a bowl of warm water, an old toothbrush, and a towel on the patio. Both kids spent a solid twenty minutes "cleaning" their finds. This is also secretly a good time to talk about crystal care — we have a whole beginner's guide to crystal cleansing here if you want to go deeper. For kids, just the physical washing is enough to make it feel ceremonial.
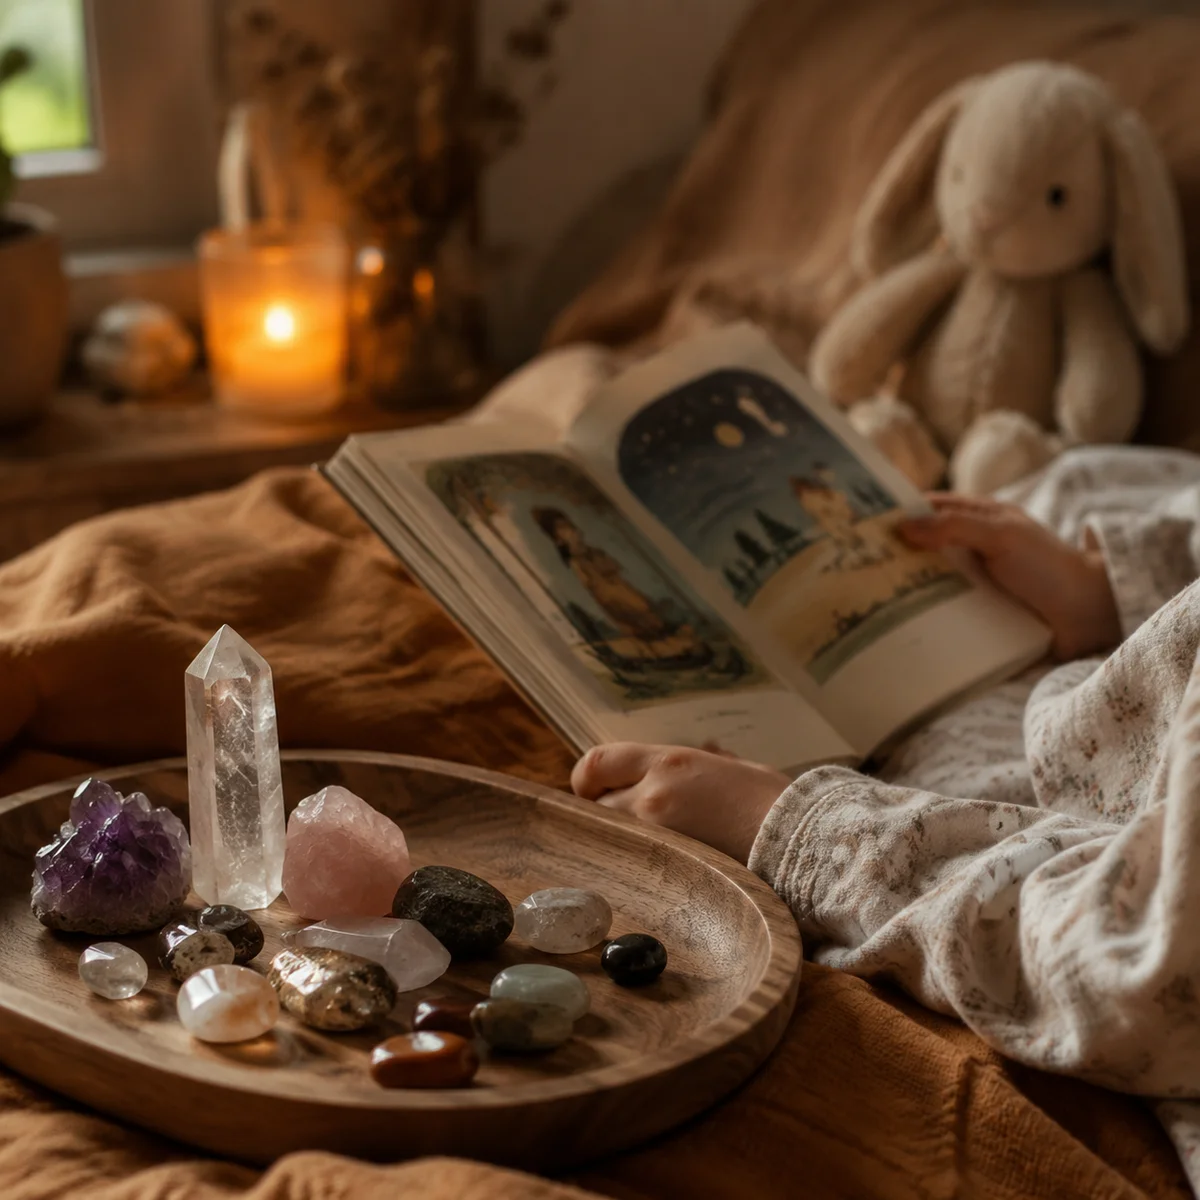
Display setup: My daughter immediately wanted to arrange her crystals on her shelf. We used a small wooden tray lined with a scrap of velvet (stolen from a jewelry box). She sorted them by color and placed her favorites front and center. If your kid gets into the display side of things, these crystal shelf display ideas have some kid-friendly setups that won't break the bank.
"Crystal journal": My son started a notebook where he drew each crystal and wrote down its name, color, and where he found it. I didn't ask him to do this. He just did it. I almost cried. If your kid is the journaling type, lean into it — it turns a one-hour activity into an ongoing project.
The naming ceremony: Both kids named their favorite crystals. My daughter's rose quartz is called "Petal" and it lives on her nightstand. My son's tiger's eye is called "Dagger" because of course it is. Let them name the rocks. It makes the whole thing real to them in a way that matters.
What the Kids Actually Liked vs. What They Ignored
I want to be honest here because I think a lot of activity blogs paint an unrealistically rosy picture. So here's the real breakdown:
Things they loved: Digging in the dirt. The magnifying glass. Washing the crystals. Naming them. The clue cards (specifically the rhyming — my daughter kept reciting them for the rest of the day). The competition of who found more. Showing their collection to my neighbor when she came over. Putting "Petal" on the nightstand.
Things they ignored: My carefully crafted zone themes ("Ancient Mine" got zero reaction). The field guide I printed — my daughter glanced at it once and never looked again. My attempt to teach them the Mohs hardness scale. The "bonus challenges" I'd written on the back of the clue cards. The geography lesson I tried to sneak in about where amethyst comes from. All completely ignored.
Things that went sideways: Biscuit the dog. The crystal I lost in the geranium pot. My son finding a real earthworm while digging and being more excited about that than any crystal. Both kids trying to bury crystals for each other and accidentally choosing the same spot. My daughter licking a carnelian.
The lesson here is simple: the less structured you keep it, the more fun they have. The clues gave it shape, the crystals gave it substance, but the freedom to just mess around in the yard was the real prize. Don't overthink it.
Extending the Activity (If Your Kids Get Obsessed)
If this sparks something — and it might, mine are now "crystal people" who point out rocks everywhere — there are cheap ways to keep the momentum going.
We started a weekly "Crystal of the Week": one new tumbled stone in a dish on the kitchen table, and they have to look it up and tell me one thing about it by Friday. Two bucks a week, and they look forward to it every Monday.
The Crystal Rainbow Challenge is another great follow-up — a seven-day color-based activity that builds on what they learned from the scavenger hunt. We did it the week after our first hunt and it was a hit. Each day focuses on a different color crystal and a simple activity tied to it. Easy to prep, zero screen time, and it gave me seven consecutive afternoons where nobody asked for an iPad.
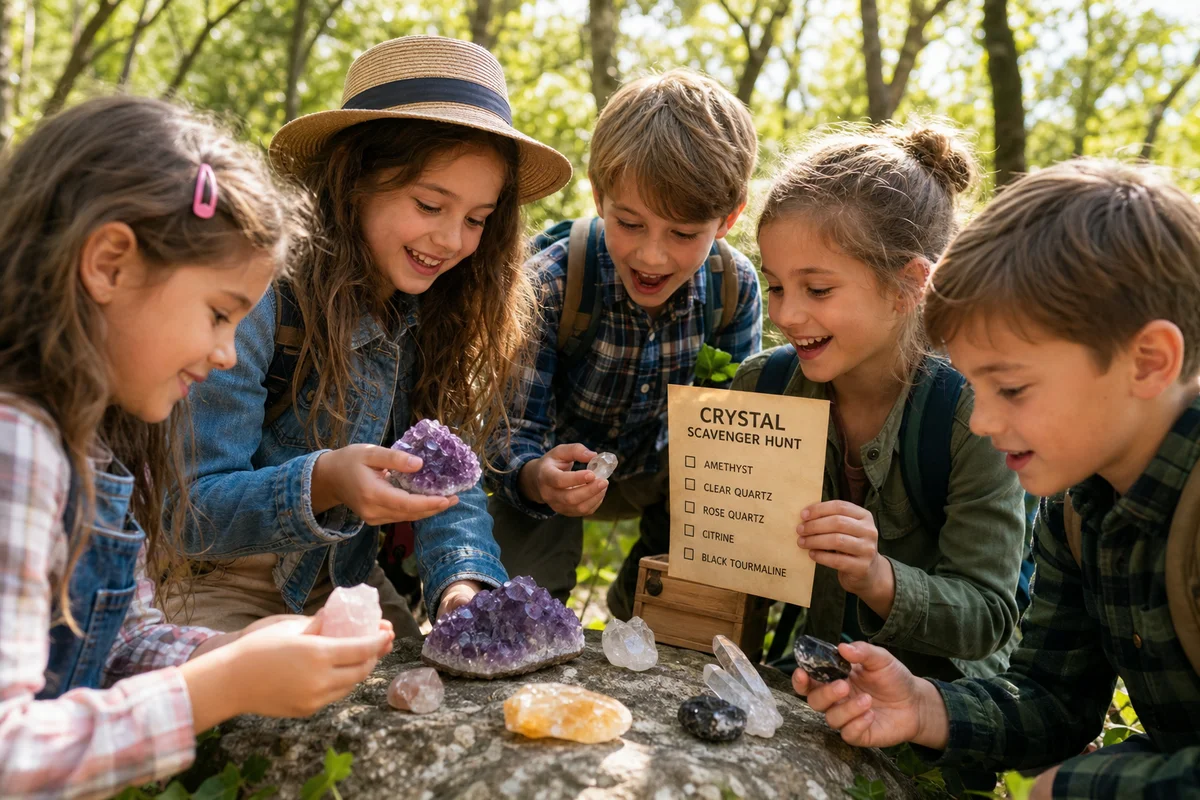
You could also turn this into a birthday party activity. A friend used my blueprint for her daughter's 7th birthday — 50 crystals hidden around the yard, "geologist" name tags, and each kid went home with a bag of stones and a field guide. It beat out both the bounce house and the cake. The cake.
The Honest Takeaway
Look, I'm not going to pretend this was some perfectly curated Pinterest activity. I threw it together in forty minutes on cold coffee. The clue cards were written in Sharpie on scrap paper. One crystal is still lost in a flower pot.
But both my kids still talk about "the crystal game." My daughter sleeps with Petal. My son has a notebook full of rock drawings. They've asked to do it again four times. And my neighbor tried it with her grandkids and texted me a photo of two small children covered in dirt, holding up rose quartz with enormous grins.
So yeah. Twenty-one bucks, forty minutes of setup, and a yard full of $4 tumbled stones. That's the whole blueprint. Take it, adapt it, make it yours. And if you lose one in a geranium pot — just let it go. It's probably fine.
Related Guides
- Crystal Shapes Explained: Tumbled, Raw, Points, Spheres
- Colored Gemstones Buying Guide for Beginners
- The Complete Guide to Crystal and Jewelry Care
- 15 Creative Ways to Display and Store Your Crystal Collection
- Crystal Pricing: 7 Tricks Shops Use to Make You Overpay
- Essential Jewelry Storage Tips
- Clear Quartz: The Universal Crystal Guide
Frequently Asked Questions
Can kids wear crystal jewelry they find on a backyard hunt?
Yes, kids can wear small crystal jewelry found in a backyard hunt. Ensure pieces are age-appropriate and free of sharp edges to avoid injury. Choose jewelry crafted from durable materials for children.
What crystals are best for outdoor scavenger hunts for kids?
Clear quartz, rose quartz, and citrine are great choices for kids' scavenger hunts. These crystals are easy to spot, safe for outdoor settings, and have positive meanings, such as clarity, love, and abundance.
Are there specific places to look for crystals in a backyard?
Look under rocks, in leaf piles, along creeks, or in garden beds. Crystals often accumulate in areas where water or earth have weathered natural crystals from larger stones or mineral deposits.
How can I encourage kids to clean and take care of the crystals they find?
Teach kids about the natural elements of earth, air, and water. Use soft brushes, water, and natural oils like lemon to clean the crystals. Discuss how to keep them from getting scratched or lost.
Are there crystal-based educational toys I can introduce during the hunt?
Yes, consider introducing geodes or crystal puzzles as part of the hunt. These toys can enhance the educational experience by teaching kids about crystal formation, types, and uses while having fun.
What Makes This Crystal Special
This section covers important aspects of what makes this crystal special. For detailed information, please refer to the FAQ section below.
Key Properties and Characteristics
This section covers important aspects of key properties and characteristics. For detailed information, please refer to the FAQ section below.
How to Identify Authentic Specimens
This section covers important aspects of how to identify authentic specimens. For detailed information, please refer to the FAQ section below.
Popular Uses and Applications
This section covers important aspects of popular uses and applications. For detailed information, please refer to the FAQ section below.
Comments