How to Start Etching Glass With a Dremel: What I Learned After Ruining Three Pieces
May 14, 2026
How to Start Etching Glass With a Dremel: What I Learned After Ruining Three Pieces
Glass etching with a rotary tool is one of those crafts that looks easy on YouTube and humbles you immediately in practice. My first attempt was supposed to be a frosted snowflake on a mason jar. It looked like a cat had scratched the glass in a panic. Attempt number two was slightly better — recognizable as a snowflake, technically, but only if you already knew what it was supposed to be.
By attempt four, I was producing results I was actually happy with. Here's everything I learned from the failures, adjusted expectations, and eventual successes, so you can skip straight to the part where it looks good.
What You Actually Need
The YouTube videos make it seem like you need a workshop full of equipment. You don't. But you do need a few specific things that aren't optional.
Required
- Rotary tool: A Dremel (or equivalent) with variable speed. Fixed-speed tools are too aggressive for delicate glass work. The Dremel 3000 or 4300 are good entry points at $70-100.
- Diamond bit set: Not the cheap carbide ones — diamond-coated bits. A set of 10-15 assorted shapes costs $10-20 on Amazon. You'll use the small ball tips most frequently.
- Practice glass: At least 6-8 cheap glass items from a thrift store. Do not start on anything you care about. Dollar-store drinking glasses, thrift-store plates, recycled jars.
- Permanent marker: For drawing your design directly on the glass surface.
- Safety glasses: Non-negotiable. Glass dust in your eye is a medical emergency.
Strongly Recommended
- Dust mask (N95): Glass dust isn't asbestos, but you still shouldn't breathe it
- Latex or nitrile gloves: Improves grip on slippery glass and protects your fingers from the spinning bit
- Masking tape: For taping off areas you don't want to etch
- Rubbing alcohol: Cleans the glass surface before etching and removes marker lines afterward
- Good lighting: A desk lamp you can position close to your work. The etching is subtle and hard to see in dim light.
The Three Mistakes I Made (That You Won't)
Mistake 1: Too Much Pressure
I pressed the bit into the glass like I was drilling through wood. The glass didn't break (fortunately) but the etching was deep, jagged, and ugly. Glass etching with a rotary tool is surface-level abrasion — you're creating tiny scratches that collectively form a frosted appearance. Think of it more like drawing on sandpaper than carving stone.
Correct approach: let the bit do the work. Light, consistent pressure. The diamond coating abrades the glass on contact — you're guiding the tool, not forcing it.
Mistake 2: Too High Speed
I cranked the Dremel to maximum speed because faster is better, right? Wrong. On glass, high speed causes the bit to skip and chatter across the surface, creating irregular, jagged lines instead of smooth, controlled marks. It also generates more heat, which can crack the glass.
Correct speed: medium-low. On a Dremel 3000, that's roughly the 3-5 range on the speed dial (out of 10). You want the bit spinning fast enough to abrade smoothly but slow enough to maintain control.
Mistake 3: Complex Design Too Early
My first design was a snowflake with six symmetrical branches. Symmetry is hard when you're learning a new motor skill. By branch four, I'd already deviated from the pattern enough that the whole thing looked lopsided.
Correct approach: start with straight lines and simple geometric shapes. Practice horizontal lines, vertical lines, curves, and dots. Once those are consistent, graduate to simple designs — initials, leaf shapes, wave patterns. Save the snowflakes for attempt six.
Technique Breakdown
Holding the Tool
Hold the rotary tool like a thick pen — grip near the tip for control. Rest your hand on the table or work surface for stability. Freehand etching (hand floating in air) produces wobbly, inconsistent lines.
Most people naturally hold the tool at too steep an angle. You want the bit hitting the glass at roughly 30-45 degrees, not perpendicular. This gives you a wider contact area and smoother marks.
Making Lines
- Straight lines: Draw the line on the glass with marker first. Position the bit at one end, start the tool, and pull steadily toward you. Pulling toward you (rather than pushing away) gives better control.
- Curves: Practice on flat glass first. Rotate the glass piece (not your wrist) to follow curves. This is easier on round objects like glasses and jars than on flat surfaces.
- Dots: Touch the bit to the surface briefly and lift. Hold longer for larger dots. The ball-shaped bits work best for dots.
- Shading/frosting: Move the bit in tiny, overlapping circles across the area you want frosted. The effect builds gradually — you can always add more but can't undo it.
Depth Control
The beauty of rotary etching is that it's incremental. Each pass removes a tiny amount of glass. For a subtle frosted look, one or two light passes. For deeper, more visible etching, three to five passes over the same area.
Stop frequently and wipe away the dust to check your progress. The dust builds up and hides the actual etching underneath, which leads to over-etching in some areas and under-etching in others.
Design Transfer Methods
Freehand Drawing
Draw directly on the glass with a permanent marker. Simplest method. Works well for organic designs (plants, waves, abstract shapes). Mistakes can be wiped off with rubbing alcohol before you start etching.
Stencil Method
Print or cut a design on paper. Tape it to the inside of a glass or jar. You can see the design through the glass and trace it with the rotary tool from the outside. This works especially well for symmetrical designs and text.
Contact Paper Resist
For area frosting (frosted backgrounds with clear design, or vice versa): apply contact paper to the glass, cut out your design with a craft knife, remove the areas you want etched, and frost the exposed glass with the rotary tool. The contact paper protects the areas you want to remain clear.
Projects by Difficulty
Beginner: Frosted Mason Jar Votive
Frost the exterior of a mason jar, leaving a band of clear glass around the middle. The clear band lets candlelight shine through bright while the frosted areas glow softly. Total time: 30-45 minutes.
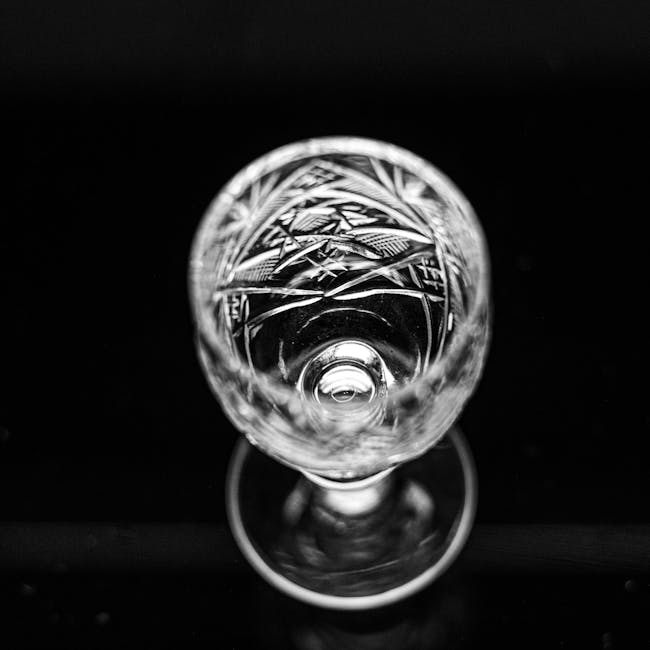
Intermediate: Monogrammed Wine Glass
Etch a single initial or short word on the bowl of a wine glass. Use the stencil method for clean letters. Total time: 45-60 minutes per glass.
Advanced: Landscape Scene on a Mirror
Etch a mountain or tree silhouette on a small mirror. The mirror's reflective surface creates interesting visual depth with the frosted design. Requires confident line work and some shading technique. Total time: 2-3 hours.
Safety Reminders
- Eyes: Safety glasses, every time, no exceptions. Glass chips can fly off under the bit.
- Lungs: N95 mask. The glass dust is fine and hangs in the air.
- Fingers: The bit doesn't care whether it's touching glass or flesh. Keep your non-dominant hand well clear of the work area.
- Ventilation: Work near an open window or in a garage. The dust settles on everything.
- Heat: The bit gets hot during extended use. Pause every 10-15 minutes and let it cool.
Cleaning Up
After etching, wash the glass piece with warm soapy water and a soft brush to remove all dust residue. Wipe off any remaining marker lines with rubbing alcohol. The etching is permanent — no sealing or finishing required.
Clean your work surface with a damp cloth. Dry dusting just puts the glass particles back into the air.
Cost to Start
Total startup cost for a complete beginner setup:
- Dremel 3000: ~$75
- Diamond bit set: ~$15
- Practice glass (6 pieces from thrift store): ~$6
- Safety glasses + mask: ~$10
Total: roughly $105-110. Not the cheapest craft to start, but the tool is reusable for dozens of other projects (wood carving, metal engraving, sharpening, polishing), so the per-project cost drops quickly.
And if your first three attempts look terrible — that's normal. My mason jar votives still have a slightly uneven frost. From two feet away, nobody notices. The imperfections are part of the handmade charm, and the skill comes faster than you'd expect once you stop pressing so hard.

Comments