How to Clean Crystals That Have Been Sitting in
May 14, 2026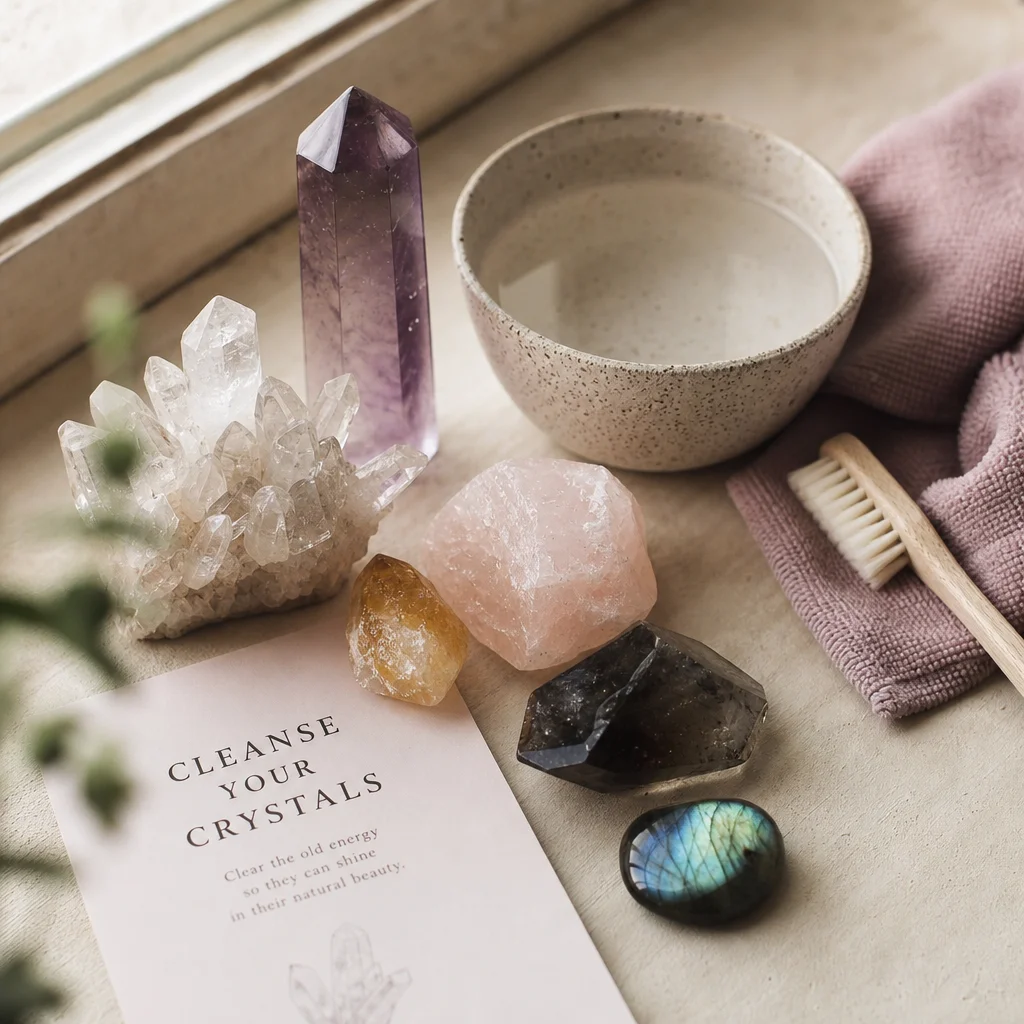
How to Clean Crystals That Have Been Sitting in a Drawer for Years
I recently helped a friend clean out her grandmother's apartment. In a dresser drawer, wrapped in tissue paper that had partially disintegrated, we found a collection of about twenty crystals — some labeled in faded handwriting, some not. They'd been in that drawer for what we estimated was fifteen to twenty years. Most were covered in a fine layer of dust, some had developed a hazy film, and a few had verdigris (green copper corrosion) on the wire wraps of pendants.
Bringing old, neglected crystals back to life is surprisingly straightforward in most cases. Here's what I've learned from cleaning not just that inherited collection, but dozens of thrift store and estate sale finds over the years.
Step 1: Assess What You Have Before Touching Anything
Before you start scrubbing, figure out what you're dealing with. Different minerals require different approaches, and the wrong cleaning method can cause permanent damage.
Identify (or Estimate) the Mineral
If you know what the crystal is, look up its Mohs hardness and whether it's water-sensitive. If you don't know, proceed with the gentlest method first and escalate only if needed.
Key categories:
- Water-safe and hard (quartz varieties, feldspar, tourmaline): Can handle soap, water, and gentle scrubbing
- Water-safe but soft (calcite, fluorite, malachite): Use water carefully, no scrubbing, no acids
- Water-sensitive (selenite, halite, azurite): Dry cleaning only
- Metal-set pieces: The metal often needs more attention than the stone
Check for Damage First
Look for cracks, chips, loose settings, and previous repairs (glue residue is common on old wire wraps). Cleaning can worsen existing damage if you're not careful. Set aside anything fragile or damaged for gentler treatment.
Step 2: Remove Surface Dust and Debris
For all minerals, start here. Don't jump straight to water.
- Compressed air: A can of computer duster ($5 at any office supply store) blows dust out of crevices without touching the surface. Especially useful for crystal clusters with deep nooks.
- Soft makeup brush: A clean, dry powder brush (the fluffy kind) gently sweeps dust from flat surfaces without scratching even soft minerals.
- Microfiber cloth: For smooth, polished surfaces, a dry microfiber cloth picks up dust effectively.
Do this over a towel or tray. Old crystals can release decades of accumulated dust that you don't want breathing in or spreading around your workspace.
Step 3: Wash (For Water-Safe Minerals Only)
If the crystal is quartz, agate, jasper, feldspar, tourmaline, or any hard silicate mineral, a gentle wash is safe and effective.
The Basic Wash
- Fill a bowl with lukewarm water (not hot — temperature shocks can crack some minerals)
- Add a few drops of mild dish soap (Dawn or similar — no lotions, no antibacterial additives)
- Submerge the crystal and let it soak for 5-10 minutes
- Use a soft toothbrush to gently clean crevices and textured surfaces
- Rinse thoroughly under running water
- Pat dry with a microfiber cloth, then air dry completely before storing
For Stubborn Grime
Degraded tissue paper, adhesive residue, or old price stickers: apply a small amount of rubbing alcohol (isopropyl) to a cotton swab and dab the affected area. Alcohol dissolves most organic residues without damaging mineral surfaces. Avoid getting it on any metal settings.
For Iron Staining
Quartz crystals that have been sitting in damp conditions often develop orange-brown iron oxide staining. A product called "Iron Out" (sodium hydrosulfite, available at hardware stores) removes it effectively. Dissolve a small amount in warm water, submerge the crystal for 15-30 minutes, then rinse thoroughly. Use in a well-ventilated area — the fumes are unpleasant.
This works for quartz only. Do not use Iron Out on calcite, malachite, turquoise, or any carbonate/copper mineral.
Step 4: Handle Water-Sensitive Minerals
For crystals that dissolve or degrade in water (selenite, halite/rock salt, azurite, some forms of chalky calcite), cleaning requires a different approach:
- Dry brushing only: Use the softest brush you have. A clean paintbrush or makeup brush works well.
- Damp cloth wipe (not wet): For selenite specifically, a barely-damp microfiber cloth can remove surface film. Wipe quickly and dry immediately. "Barely damp" means you can press the cloth against the back of your hand and not feel wetness.
- Eraser for surface marks: A clean white vinyl eraser (not the pink ones, which can leave residue) can remove surface marks from selenite and calcite without water.
Selenite that has developed a yellowed or cloudy appearance after years in storage may be permanently altered — the cloudiness is often caused by microscopic surface damage from dust and humidity, and it can't be reversed. Accept it as patina.
Step 5: Deal With Metal Settings
Old wire-wrapped pendants and rings need special attention because the metal may be in worse shape than the stone.
Sterling Silver Settings
- Black tarnish: baking soda paste (see my detailed tarnish guide) or a silver polishing cloth
- Green verdigris (copper corrosion): a mixture of equal parts white vinegar and flour, applied as a paste and left for 30 minutes, then rinsed off. This dissolves copper carbonate
- Heavily corroded areas: may need professional cleaning or re-wrapping
Gold-Filled or Gold-Plated Settings
- These are trickier. Plating is thin and aggressive polishing can remove it entirely. Use only a soft polishing cloth, no pastes or chemical dips.
- If plating has worn through, you'll see a different-colored metal underneath. This is cosmetic — the piece is still structurally sound — but it can't be fixed without replating.
Base Metal (Mystery Metal) Settings
- If you're not sure what the metal is, be conservative. Mild soap and water, gentle drying, leave it alone. Aggressive cleaning on mystery metals can cause unexpected reactions.
Step 6: Polish (Optional)
For hard, smooth minerals (quartz, agate, jasper), a final polish with mineral oil or baby oil can restore some of the original luster. Apply a small amount to a soft cloth and buff the surface. This is purely cosmetic — it doesn't protect or preserve the mineral.
Do not oil porous minerals (turquoise, howlite, chalky calcite). The oil will be absorbed and can permanently discolor the stone. Turquoise specifically should never be oiled — it changes the color in a way that collectors consider damage.
Storage After Cleaning
Don't put freshly cleaned crystals back in the conditions that caused the problem:
- Individual wrapping: Soft minerals in separate small bags or wrapped in acid-free tissue paper
- Hard and soft separated: Store Mohs 1-5 minerals away from Mohs 6+ minerals
- Low humidity: A silica gel packet in the storage container helps prevent moisture-related degradation
- Dark storage for light-sensitive minerals: Amethyst, citrine, and some fluorite fade in prolonged sunlight — store in opaque containers or drawers
- No rubber: Rubber bands and rubber-lined boxes contain sulfur that tarnishes silver and can react with some minerals. Use plastic or fabric alternatives.
What Can't Be Fixed
Some damage from long-term neglect is permanent:
- Surface pitting on calcite or fluorite from acidic dust or moisture exposure
- Faded color in light-sensitive minerals stored in sunny windowsills
- Chips and fractures from being jostled in a box with harder specimens
- Corroded metal settings that have structurally weakened
These pieces are still usable and displayable. They just carry the evidence of their history. Sometimes that's part of the story — my friend keeps her grandmother's amethyst cluster with the slightly chipped point exactly as it is, because those chips happened during her grandmother's lifetime and are part of the object's personal history.
Clean what can be cleaned. Accept what can't. Store properly going forward. That's the whole process.
For a comprehensive overview, see our Ultimate Crystal Guide for Beginners.
This is one topic from our larger The Complete Guide to Crystal and Jewelry Care, Cleaning, and Storage, which covers the full spectrum of jewelry maintenance.
Some old crystals appreciate in value after proper cleaning — I check potential returns with an investment return calculator before deciding whether to restore or sell.
Step 4: Soaking and Gentle Scrubbing
For crystals that are water-safe and have a more stubborn layer of grime, a soak followed by gentle scrubbing can be effective. Here's how to do it:
- Prepare a Solution: Mix a few drops of mild dish soap with warm water in a bowl. The soap will help lift oils and dirt without damaging the crystal.
- Soak the Crystal: Submerge the crystal in the soapy water for about 10-15 minutes. This allows the soap to penetrate and loosen the grime.
- Scrub Gently: Use a soft-bristled toothbrush or a non-abrasive brush to gently scrub away the dirt. Avoid using anything too harsh that could scratch the surface.
- Rinse Thoroughly: Once the crystal is clean, rinse it under warm running water to remove any soap residue. Be sure to dry it immediately afterward to prevent water spots.
Step 5: Removing Verdigris and Other Corrosions
Verdigris, that greenish layer of corrosion on metal, can be removed with a few household items. Here's a method that works well:
- White Vinegar Solution: Mix equal parts white vinegar and water in a bowl. This solution is gentle enough to clean the metal without damaging the crystal.
- Soak the Metal: Place the metal-wrapped crystal in the vinegar solution for about 15-30 minutes. The vinegar will start to dissolve the corrosion.
- Scrub Gently: Use a soft cloth or a non-abrasive brush to gently scrub the verdigris away. Be patient, as it may take several sessions to completely remove it.
- Rinse and Dry: Rinse the crystal thoroughly under running water and dry it with a soft cloth. Once the metal is clean, you can apply a small amount of clear nail polish to the wire wraps to prevent future corrosion.
Step 6: Dry Your Crystals Properly
After cleaning, it's crucial to dry your crystals properly to prevent water spots and damage. Here are some tips:
- Use a Soft Cloth: Gently pat the crystal dry with a soft, lint-free cloth. Avoid rubbing, as this can cause scratches.
- Air Dry: If the crystal is particularly large or has intricate designs, allow it to air dry on a soft towel. This ensures that no water gets trapped in crevices.
- Use a Hair Dryer: For a quick dry, use a hair dryer on the lowest setting and hold it several inches away from the crystal. This method is especially useful for large or heavy crystals.
Expert Tips for Crystal Care
Over the years, I've picked up a few tips and tricks that have made crystal care easier and more effective:
- Use a Magnifying Glass: It's hard to see all the nooks and crannies of a crystal. A magnifying glass can help you spot areas that need extra attention.
- Keep a Soft Brush: A small, soft-bristled brush is great for cleaning the crevices of small or delicate crystals.
- Store Wisely: Once your crystals are clean, store them in a cool, dry place away from direct sunlight. This will help prevent future dust accumulation and damage.
Common Mistakes to Avoid
When cleaning crystals, it's easy to make mistakes that can damage them. Here are some common pitfalls to avoid:
- Using Harsh Chemicals: Avoid using any harsh chemicals, even if they're labeled as "safe for jewelry." These can strip away protective coatings or etch the surface.
- Over-Scrubbing: Don't use too much force when scrubbing. This can scratch the crystal's surface or loosen the metal setting.
- Ignoring Damage: If a crystal is already cracked or chipped, don't clean it. The cleaning process can worsen the damage.
- Not Drying Properly: Allowing your crystals to air dry can lead to water spots. Always dry them thoroughly after cleaning.
Comparison: Cleaning Methods for Different Crystal Types
Here's a quick comparison table of cleaning methods for different types of crystals:
| Crystal Type | Recommended Cleaning Method |
|---|---|
| Quartz, Feldspar, Tourmaline | Warm water and mild soap, gentle scrubbing |
| Calcite, Fluorite, Malachite | Warm water and mild soap, no scrubbing |
| Selenite, Halite, Azurite | Dry cleaning only, avoid water and chemicals |
| Metal-Set Pieces | White vinegar solution for corrosion, gentle scrubbing |
FAQ
Can I use toothpaste to clean my crystals?
Can I use toothpaste to clean my crystals?
No, toothpaste is too abrasive and can scratch the surface of your crystals. It's best to use a gentle soap and water solution or a specialized crystal cleaner.
How often should I clean my crystals?
How often should I clean my crystals?
The frequency depends on how often you wear them and the environment they're stored in. As a general rule, cleaning your crystals every few months is a good practice.
Can I clean my crystals in the dishwasher?
Can I clean my crystals in the dishwasher?
No, the dishwasher's harsh chemicals and high temperatures can damage your crystals. Always hand wash them with a gentle soap and water solution.
What should I do if my crystal is cracked?
What should I do if my crystal is cracked?
Cracked crystals should not be cleaned. The cleaning process can worsen the damage. If the crack is minor, you may consider using clear nail polish to seal it, but this is not a permanent fix.
Can I use essential oils to clean my crystals?
Can I use essential oils to clean my crystals?
No, essential oils can be too harsh and can damage the crystal's surface. Stick to gentle cleaning methods like warm water and mild soap or specialized crystal cleaners.


Comments