Wire Wrapping 101 — 5 Simple Techniques Every Jewelry Beginner Should Learn
This article was created with AI assistance. The information has been fact-checked, but some details may vary based on personal experience and available materials.
What Is Wire Wrapping, Anyway?
Wire wrapping is exactly what it sounds like. You take a piece of metal wire, bend it around a stone or bead, and turn it into wearable jewelry. No soldering. No torch. No kiln. Just your hands, a few tools, and some patience.
The technique has been around for thousands of years — ancient Egyptians and Celts both used wire wrapping to set stones into jewelry. The reason it stuck around so long is simple: it works. You can create pendants, rings, earrings, and bracelets using nothing but twisted and coiled wire. And once you get the basics down, the designs you can make are practically limitless.
I'm going to walk you through everything a complete beginner needs to know. Tools, materials, five core techniques, and a first project you can finish in under an hour. Let's get into it.
The Starter Tool Kit (Around $15–25)
You don't need a workshop. You don't need expensive equipment. A handful of pliers and a spool of wire will get you started. Here's what matters:
1. Round Nose Pliers — $5–8
These are non-negotiable. The tapered jaws let you create loops and curves of different sizes. Bigger loops near the base, smaller loops near the tip. You'll use these for almost every wire wrapping project, so grab a pair with smooth jaws (no serrations — those leave marks on your wire).
2. Chain Nose Pliers — $5–8
Flat on the inside, tapered to a point. These are your workhorse. Use them for gripping wire, making sharp bends, opening and closing jump rings, and flattening wrapped sections. If you only buy two pairs of pliers, make it these and the round nose ones.
3. Wire Cutters — $3–5
Flush cutters are ideal. They snip wire clean on one side and leave a slight pinch on the other. Cut with the flat side facing your finished piece so you get a neat end. Cheap cutters work fine for thin wire (22–24 gauge), but invest in better ones if you plan to work with thicker stuff regularly.
4. Flat Nose Pliers — $5–8 (Optional)
Similar to chain nose but with flat, wider jaws. They give you more surface area for gripping and flattening. Handy for weaving work and making sharp right-angle bends. Not essential on day one, but you'll want them eventually.
That's it. Walk into any craft store with a $20 bill and walk out with everything you need to start wrapping wire tonight.
Picking Your Wire
Wire choice matters more than most beginners realize. The metal affects how your piece looks, how it wears over time, and how easy it is to work with. Let's break down the main options.
Copper Wire — $3–5 per spool
Start here. Copper is cheap, soft, and forgiving. It bends easily, holds its shape, and looks great with warm-toned stones like amber, citrine, and tiger's eye. The catch? Copper oxidizes over time, turning darker and developing a patina. Some people love that aged look. If you don't, a quick dip in lemon juice and salt will brighten it right up. For your first few projects, copper is the way to go — mistakes are cheap at this price.
Sterling Silver Wire — $10–20 per spool
Silver wire takes your pieces up a notch. It doesn't oxidize the way copper does (it tarnishes slowly, and polishing cloth fixes that), and it pairs well with almost any gemstone color. Silver is slightly harder to bend than copper, so your hands might cramp a bit during long wrapping sessions. It's also stiffer, which means your finished loops and wraps hold their shape better.
Gold-Filled Wire — $20–40 per spool
Gold-filled isn't the same as gold-plated. Gold-filled wire has a thick layer of actual gold bonded to a brass core. It won't flake or wear off the way plating does. Use it when you're making gifts or pieces you plan to sell — the gold tone adds serious perceived value. It's pricier, so save it for pieces you've already practiced in copper first.
Wire Gauge: What the Numbers Mean
Wire thickness is measured in gauge (ga). Counterintuitively, smaller numbers mean thicker wire. Here's what you need to know as a beginner:
20 gauge (0.8mm) — This is your structural wire. Use it for frames, ear wires, and any part that needs to hold weight or keep its shape under tension. It's stiff enough to support a pendant but still bendable by hand.
22–24 gauge (0.5–0.6mm) — This is your wrapping wire. Thin enough to coil tightly around stones and thicker wire, but strong enough to hold everything in place. 22 gauge works well for most wrapping. Drop to 24 gauge when you need really fine, delicate coils.
Buy one spool of 20ga and one of 22ga in copper. That combo will cover your first dozen projects at least.
Five Techniques Every Beginner Should Learn
These five techniques are the foundation of almost every wire wrapped piece you'll ever make. Master them in order — each one builds on the last.
Technique 1: Simple Loop
This is where everyone starts. It's the most basic loop in jewelry making, and you'll use it constantly for hanging pendants, connecting beads, and making ear wires.
Here's how: grip the end of your wire with round nose pliers, about a centimeter from the tip. Rotate the pliers to bend the wire into a circle. Keep rotating until the wire wraps back toward itself. You should have a small loop at the top with the tail pointing straight down.
The trick is positioning. Where you place the wire on the pliers jaws determines loop size. Closer to the tip = smaller loop. Closer to the base = larger loop. Consistency comes with practice. Make twenty of these in a row and your loops will start looking identical.
Technique 2: Wrapped Loop
A simple loop works, but it can pull open if your pendant catches on something. The wrapped loop solves that problem. It's the same basic idea, but you wrap the tail end around the wire stem below the loop, creating a secure connection that won't budge.
Make your loop as normal, but leave a longer tail — about an inch. Grab the tail with chain nose pliers and wrap it tightly around the straight wire below the loop, making 2–3 neat coils. Snip off the excess with your cutters and use chain nose pliers to tuck the sharp end flat against the wraps.
This is the loop you'll use for any piece that needs to be durable. Earrings, bracelets, pendants on chains — wrapped loops hold up to daily wear way better than simple ones.
Technique 3: Wire Wrapped Briolette
A briolette is a gemstone cut into a teardrop shape, usually with a hole drilled through the top. Wrapping a briolette means creating a neat wire "cap" at the top of the stone so it hangs securely from a chain or ear wire.
Start by threading your wire through the briolette's hole. Bend both wire ends upward, then use round nose pliers to form a wrapped loop at the top. One wire becomes your stem. The other wraps around the stem and the stone's top, creating a tidy cage effect. Three to four wraps is usually enough.
This technique opens the door to working with irregular stones — each one has its own shape and challenges, which is part of the fun. Once you're comfortable with briolettes, you can adapt the same approach to wrap almost any drilled stone.
Technique 4: Weaving
Weaving involves crossing two or more wires over and under each other in a pattern. It creates beautiful, intricate bands that work well for bracelets, ring shanks, and decorative elements on pendants.
Start with two pieces of 20ga wire laid parallel. Take a length of 22ga wire and wrap it around both base wires a couple of times to anchor it. Then start weaving: go over the first wire, under the second, back over the first, under the second. Keep the wraps snug but not too tight — you want the weave to lie flat and even. Push each row up against the previous one as you go.
The braided look you get from basic over-under weaving is surprisingly elegant. And once you've got the motion down, you can experiment with different patterns — figure eights, spirals, and tighter coils all create different textures.
Technique 5: Cage Wrap
Cage wrapping is one of the most satisfying techniques to learn. You create a wire "cage" around a round or oval stone, holding it securely without any glue, drilling, or heat. The wire itself does all the work.
Cut three or four pieces of wire long enough to extend past your stone on both ends. Hold them together at the center and wrap them tightly with thin wire to create a bundle. Position the bundle against one side of your stone, then bend the wires one by one over and around the stone, crossing them at the back. Keep wrapping and crossing until the stone sits firmly inside the wire frame. Twist the wire ends together at the top to form a bail for hanging.
Cage wraps look complex but they're surprisingly forgiving. If a wire is too loose, just give it another wrap. If the cage isn't sitting right, rearrange the wires. The organic, slightly imperfect look is actually part of the appeal — it gives each piece character.
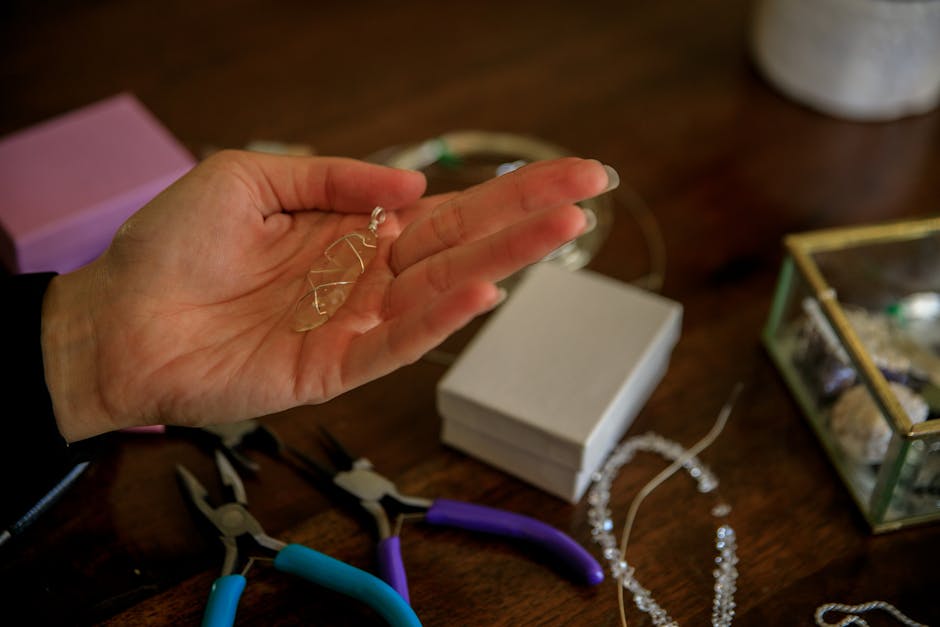
Your First Project: Crystal Pendant (30–60 Minutes)
Don't overthink your first piece. Pick a stone you like — a quartz point, a polished agate, or even a sea glass shard if that's what you have — and wrap it using either the cage wrap or briolette technique.
Cage wrap is more forgiving for total beginners since it doesn't require a drilled hole. Find a stone roughly the size of a grape. Cut four pieces of 20ga copper wire, each about 8–10 inches long. Hold them together, wrap the middle with 22ga wire, and start bending the wires around your stone. Cross them at the back, twist them at the top into a bail, and you're done.
Expect it to look a little rough. That's normal. Your first five or ten pieces will have wonky loops and uneven wraps, and that's fine. Wire wrapping is a tactile skill — your fingers need to develop muscle memory before the results get consistent. The only way to get there is to make stuff. Bad stuff, then okay stuff, then good stuff.
Set a timer for 45 minutes. Put on a podcast or some music. And just wrap. Don't aim for perfection. Aim for finished.
A Few Things That Trip People Up
Wire gets kinks. When it does, don't try to straighten it by bending it back and forth — that weakens the metal and it'll break at the kink. Snip off the damaged section and keep going. It's just wire. There's more.
Your pliers will leave marks on soft wire. It's going to happen. You can minimize it by wrapping a bit of painter's tape around the jaws, or by using nylon-jaw pliers (worth picking up later). But for practice pieces in copper? Don't sweat the tool marks. They add texture.
Work hardening is real. The more you bend and unbend a piece of wire, the stiffer and more brittle it gets. If your wire starts feeling stubborn, it's not you — it's the metal. Start with a fresh piece.
Where to Go From Here
Once you're comfortable with these five techniques, the world opens up. Try combining them — a wrapped loop at the top of a cage-wrapped stone, or a woven band finished with wrapped loop connections. Look at wire wrapped jewelry online (Instagram and Pinterest are goldmines for inspiration) and try to reverse-engineer pieces you like.
The beauty of wire wrapping is that you don't need a studio, a big budget, or years of training. You need wire, a few tools, and the willingness to make some ugly pieces before you make beautiful ones. Every wire wrapper started exactly where you are right now — staring at a spool of copper wire, wondering where to bend first.

Comments