How to Make a Wire Wrapped Crystal Pendant
May 14, 2026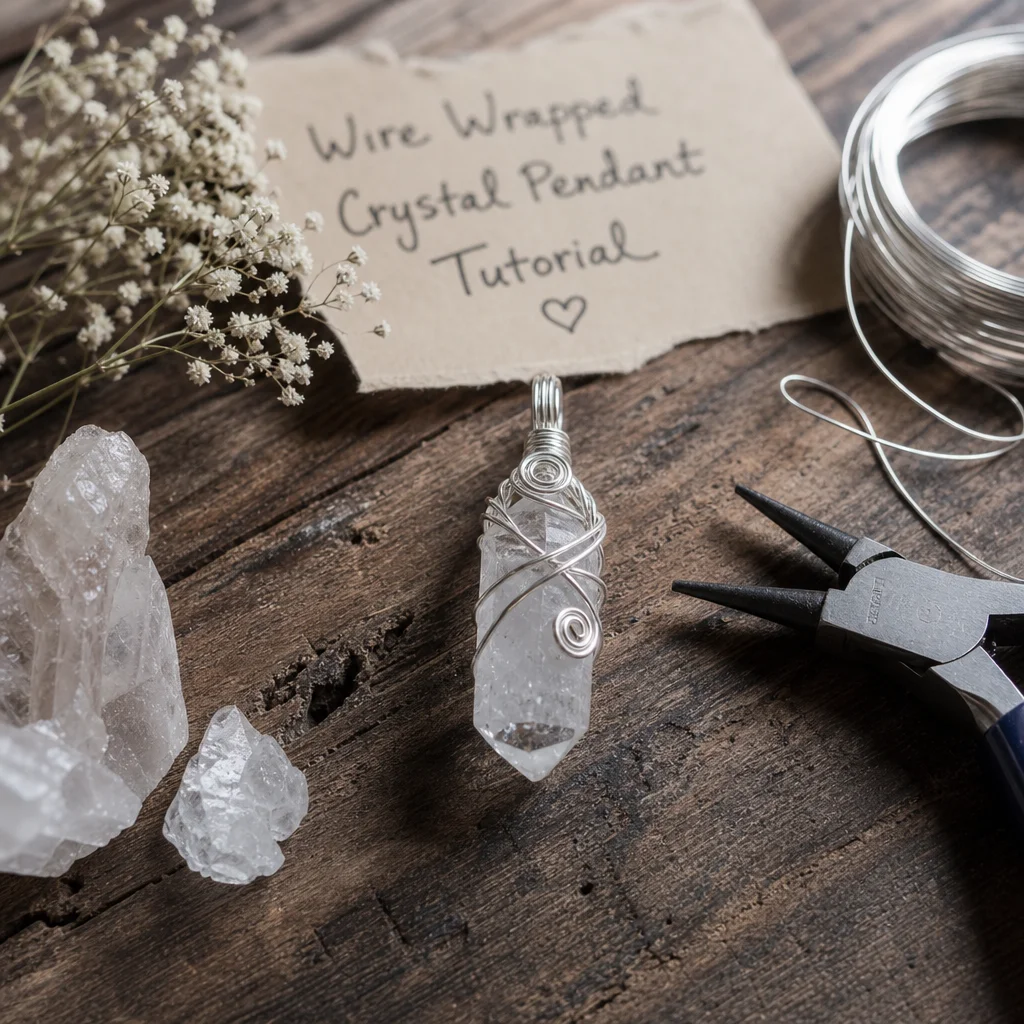
How to Make a Wire Wrapped Crystal Pendant (Even If You Have Shaky Hands)
I spent two hours on my first wire wrapped pendant and the result looked like a bird's nest after a windstorm. The crystal fell out twice. The wire kinked in eleven places. I almost gave up right there.
But here's what nobody tells you about wire wrapping: your first five pendants are supposed to look bad. The skill isn't about having steady hands or expensive tools. It's about understanding a few mechanical principles that keep wire and stone together. Once those click, everything gets easier fast.
This tutorial walks you through making a simple cage-style pendant from scratch. No prior experience needed. I'll include the specific mistakes I made so you can skip them entirely.
What You Actually Need (And What You Don't)
Craft stores love selling "complete wire wrapping kits" for sixty dollars. Skip those. Here's the real list:
Wire
Buy 20-gauge copper craft wire. Copper is cheap, forgiving, and bends easily enough that you won't fight it. One spool from any hardware store runs about four dollars and makes roughly thirty pendants.
Avoid silver-plated wire for your first attempts. It's stiffer, marks permanently when you kink it, and costs three times as much. You'll waste it on practice pieces.
Round wire (as opposed to square or half-round) is easiest to work with. The shape doesn't matter functionally for a cage wrap, but round wire slides against itself smoothly during tightening.
Stone
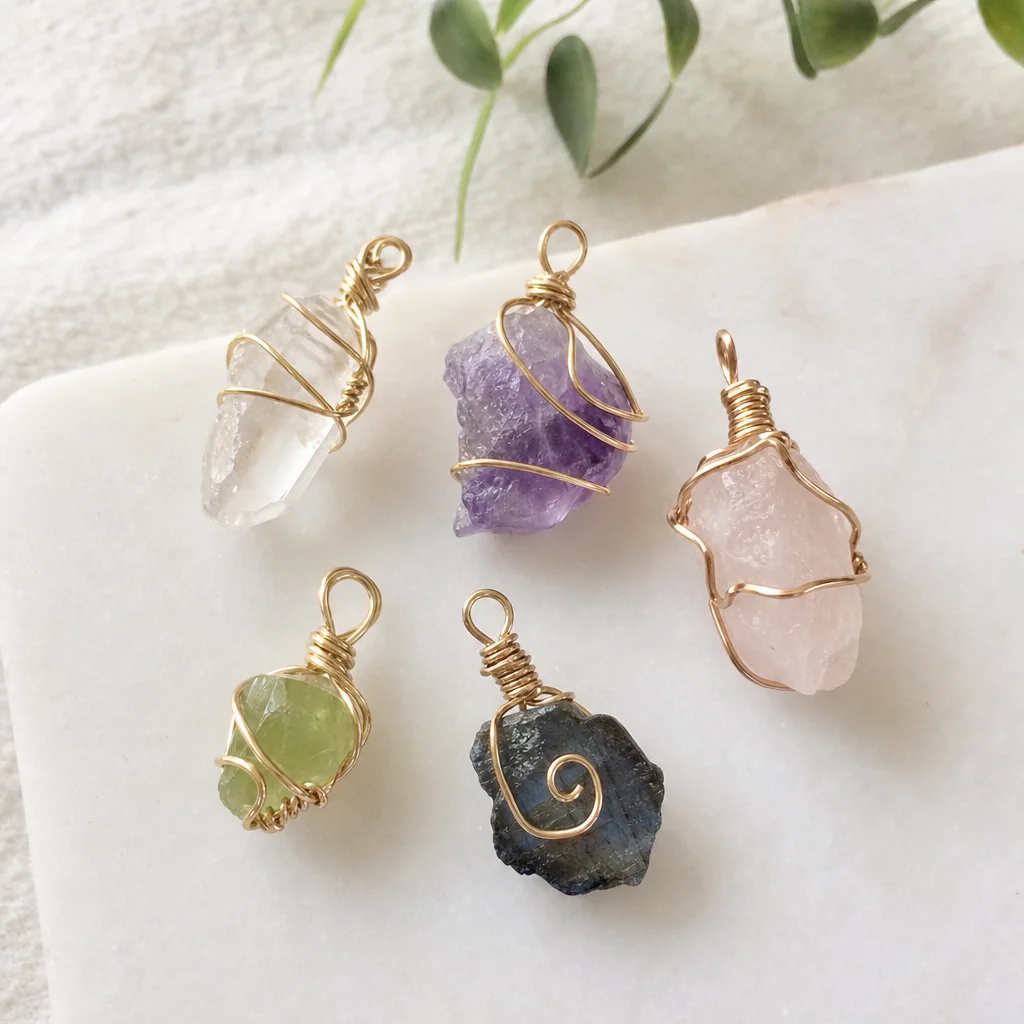
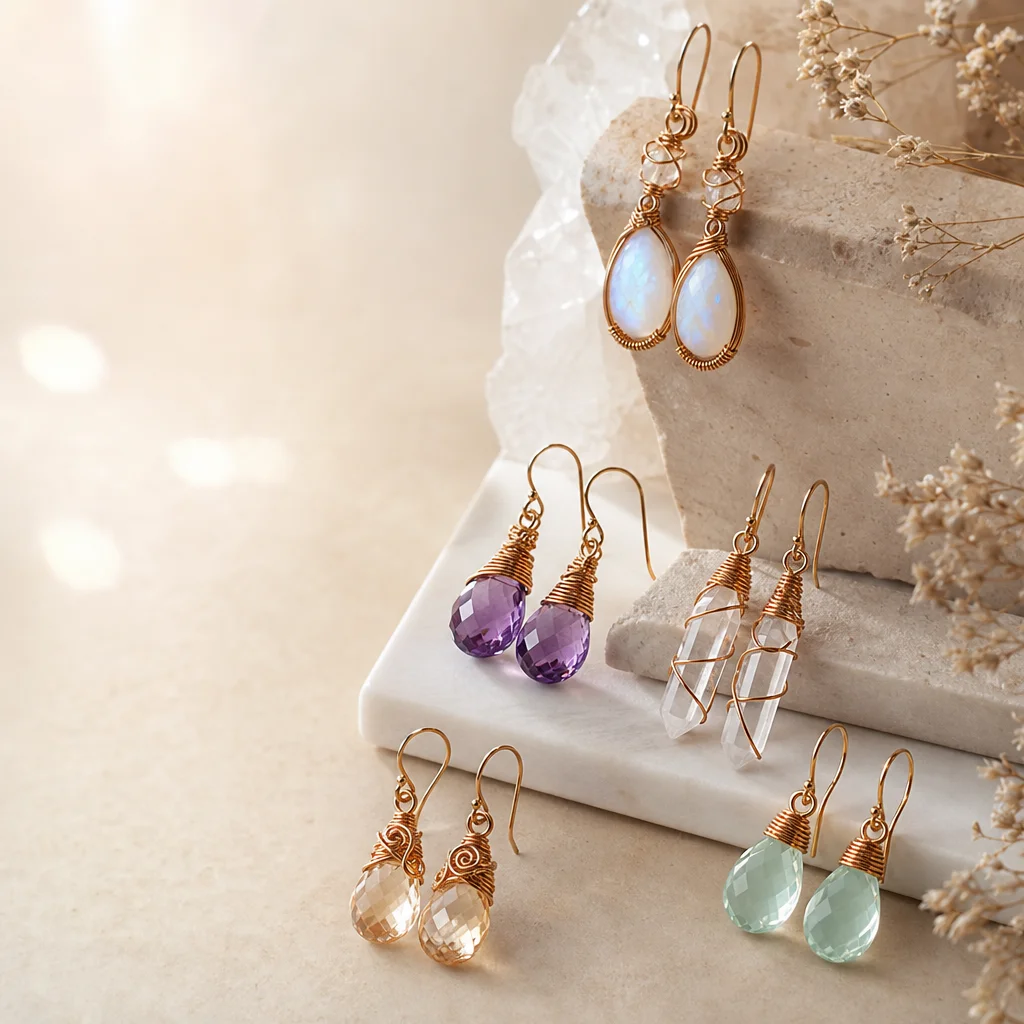
Pick a tumbled stone roughly the size of a large grape. Smooth, oval-shaped stones are easiest for beginners. Rough crystals with pointy edges will fight you — the wire slips off sharp corners until you develop a feel for tension control.
Good beginner stones: aventurine, sodalite, carnelian, unakite. These tend to have smooth tumbled shapes and aren't so polished that wire slides right off.
Tools
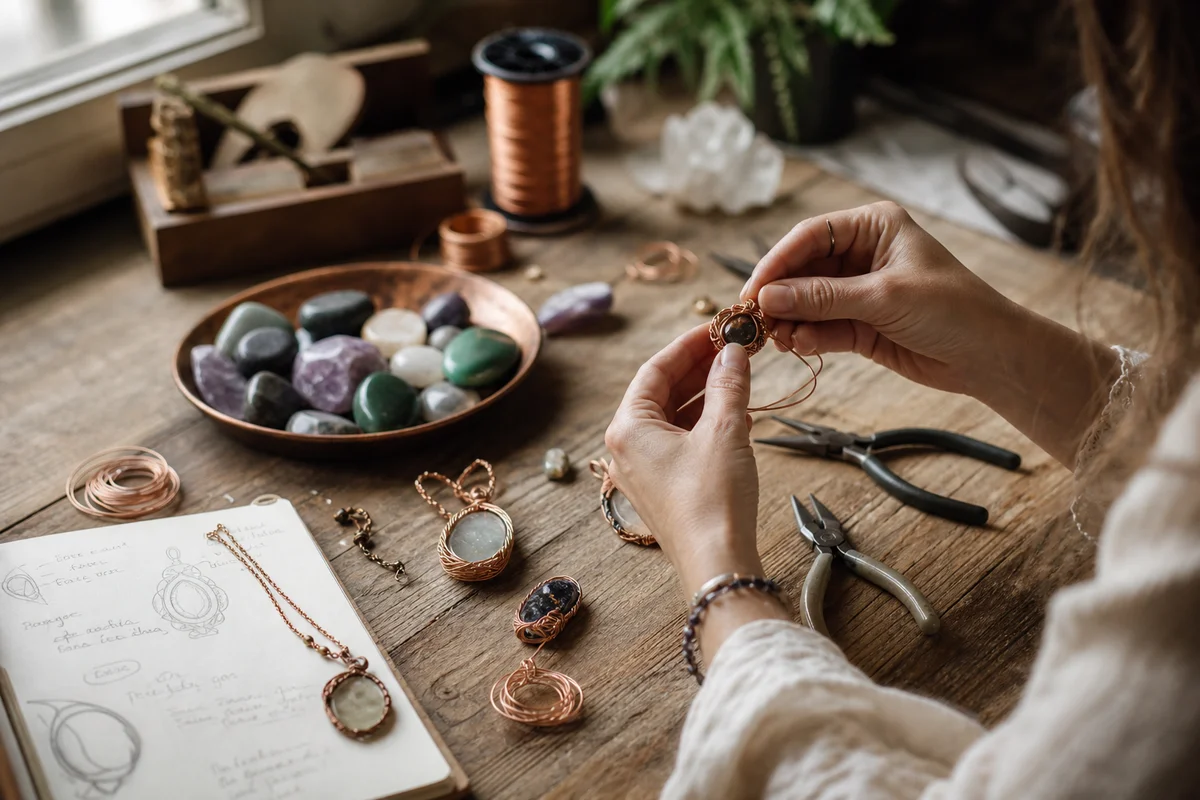
- Round-nose pliers — for making loops. The only specialty tool you genuinely need. ($6-10 at any craft store)
- Flat-nose pliers — for gripping and flattening. Standard household pliers work in a pinch, but flat-nose won't mark the wire as badly.
- Wire cutters — standard diagonal cutters are fine.
- A thick marker or dowel — for bending consistent curves. A Sharpie works perfectly.
That's it. Total cost: under fifteen dollars if you're starting from nothing.
The Cage Wrap Method: Step by Step
This is the most forgiving wire wrapping technique. It works by creating a wire cage that hugs the stone from multiple angles. Even if your bends aren't perfect, the cage holds together through sheer friction.
Step 1: Measure and Cut Your Wire
Wrap your wire loosely around the stone five times, then add another full wrap's worth of length. Cut it. For a grape-sized stone, this works out to roughly 14-16 inches of wire.
The most common beginner mistake is cutting too short. You can always trim excess. You cannot add wire back.
Step 2: Find the Center and Make Your Bail Loop
Fold your wire in half so both ends meet. At the fold point, grip the wire with your round-nose pliers and bend both sides around the plier jaw to form a small loop. This loop — called the bail — is where your chain or cord will pass through.
Squeeze the loop gently to close it. Don't over-tighten or the wire will flatten and look rough.
Step 3: Twist the Bail Stem
Hold the loop with your flat-nose pliers. Take both wire tails and twist them around each other for about half an inch below the loop. This creates a stem that keeps the bail from pulling open under weight.
Twist in the same direction the entire time. Reversing direction creates uneven kinks.
Step 4: Position the Stone
Place your stone against the twisted stem, with the wider part facing down. You want the bail to sit at what will be the top of your pendant when worn.
Step 5: Create the First Wrap
Take one wire tail and bring it across the front of the stone, pulling it snug against the widest point. Bring it around the back, then across the front again at a slight diagonal. You're creating a band that wraps around the stone's equator.
Pull firmly but don't yank. You want the wire tight enough that it doesn't slide, but copper can only take so much tension before it stretches and weakens.
Step 6: Create the Second Wrap
Take the second wire tail and wrap it in the opposite diagonal direction. Cross it over the first wire on the front of the stone. This crossing point is structural — it locks both wraps in place.
At this point you should have a basic cage: two diagonal bands crossing over the front and back of the stone, anchored at the bail stem above.
Step 7: Secure and Finish
Bring both wire tails to the back of the pendant. Wrap each one around the bail stem two or three times, pulling tight with your pliers. Cut the excess wire about a quarter inch from the stem. Use your flat-nose pliers to tuck the cut ends down flat so they don't scratch skin or catch on fabric.
Give the pendant a gentle shake. If the stone shifts significantly, add another wrap across the loose area. Most beginners need three to four bands total for a secure hold.
Troubleshooting the Five Most Common Problems
Wire Keeps Sliding Off the Stone
This happens when your wraps are too close to the stone's widest point. Move them slightly above or below the equator where the stone curves less. The wrap should sit in a natural "valley" on the stone's surface.
Kinks in the Wire
Kinks happen when wire bends back on itself sharply. Once kinked, that spot is permanently weakened. Prevention is the only fix: keep wire loosely coiled when not in use, and pull wire through your fingers to straighten it before starting a new section.
Stone Falls Out When Shaken
Add more wraps. Three bands is the minimum for a secure cage. Five or six gives a more decorative look and holds smaller stones better. The wraps should go in different directions — think of wrapping a gift with ribbon from multiple angles.
Bail Loop Opens Up
Your twist stem isn't tight enough. Untwist and redo it, this time twisting more firmly. A properly twisted stem will not separate under normal pendant weight.
Finished Pendant Looks Messy
This is normal for your first several attempts. Wire wrapping is a motor skill, not a knowledge skill. Your fifth pendant will look noticeably better than your first. Your twentieth will look better than your fifth. Keep the ugly ones — they're progress markers.
Getting Better Faster
Practice with the same stone shape for your first ten pendants. Switching between round, oval, and irregular stones means you're learning three different techniques simultaneously. Nail one shape first, then branch out.
Watch your tension. Most beginners grip too hard and pull too tight. Relaxed hands make cleaner wraps because you can feel the wire seating into position instead of forcing it.
Use good lighting. Wire work is all about seeing small details — where the wire crosses, how tight the wraps sit, whether the stone is centered. A cheap desk lamp pointed at your work area makes a bigger difference than any tool upgrade.
And keep every pendant you make. Six months from now, you'll look at that first bird's-nest attempt and feel something close to affection for it. That's the real reward of learning to wrap wire by hand — not the jewelry itself, but the evidence of your own improvement sitting right there in a drawer.
Expert Tips for Perfecting Your Wire Wrapped Crystal Pendant
Once you've got the basics down, it's time to elevate your wire wrapping skills. Here are some expert tips to help you create stunning pendants that you'll be proud to wear or gift.
1. Master the Loop
The loop is the foundation of your wire wrapped pendant. Practice making tight, even loops with your round-nose pliers. A good loop is round, smooth, and slightly smaller than the diameter of your wire. If it's too loose, your pendant will look flimsy; too tight, and you risk damaging the stone.
2. Control Your Tension
Wire wrapping is all about tension. Too loose, and your wire will slide off the stone; too tight, and you risk cracking the crystal. Aim for a firm grip that holds the stone securely without compressing it. Practice your tension control by wrapping small, smooth stones before moving on to larger, more fragile crystals.
3. Experiment with Wire Gauge
While 20-gauge copper wire is a great starting point, don't be afraid to experiment with different gauges. Thicker wire (18-gauge or even 16-gauge) can create a bolder, more rustic look, while thinner wire (22-gauge or 24-gauge) can give you a delicate, delicate appearance. Just remember that thicker wire may require more force to bend and may be more prone to kinks.
4. Add Texture with Hammering
After wrapping your wire around the stone, use a soft-jawed hammer to gently tap the wire. This technique, known as texturing, can add a unique texture to your pendant. It's best used on copper or brass wire, as it can leave marks on softer metals like silver. Be gentle, and don't hammer too hard or you risk damaging the stone.
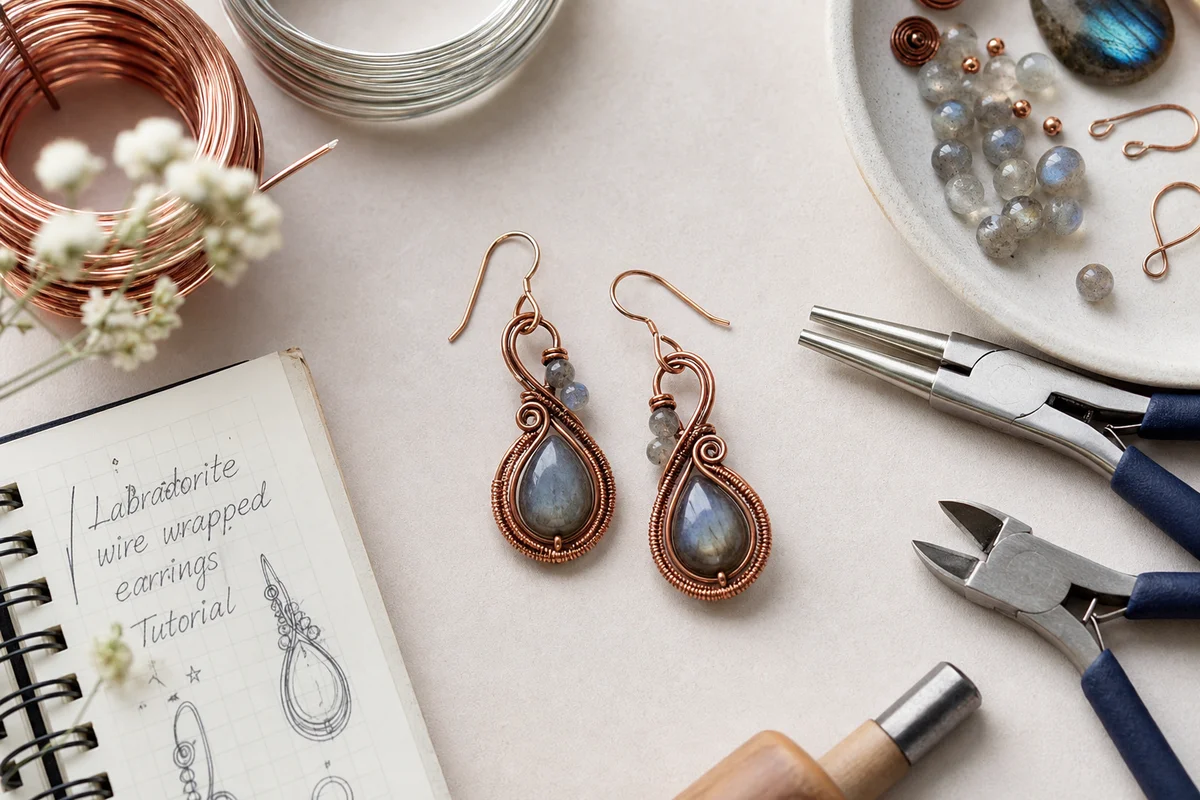
5. Incorporate Beads or Chain
For a more intricate design, consider adding beads or chain to your wire wrapped pendant. This can create a more layered look and add interest to your piece. Choose beads that complement the color and energy of your crystal, and use jump rings to attach them securely.
Common Mistakes to Avoid
Even with all the tips in the world, it's easy to make mistakes when wire wrapping. Here are some common pitfalls to avoid:
1. Not Preparing the Wire
Always strip the ends of your wire before wrapping. This ensures that the wire doesn't fray or kink, making it easier to work with.
2. Forgetting to Clean the Stone
Before wrapping your stone, make sure it's clean and free of oils or residue. This will help the wire adhere better to the stone and prevent any unwanted marks.
3. Using the Wrong Tools
Invest in a good pair of round-nose pliers and flat-nose pliers. These tools are essential for making loops and gripping the wire without damaging it.
4. Not Measuring the Wire
Always measure your wire before cutting. This ensures that you have enough wire to complete your design without running out or having to start over.
5. Rushing the Process
Wire wrapping takes patience. Rushing the process can lead to kinks, loose loops, and an overall uneven appearance. Take your time and enjoy the process.
FAQ
What is the best way to clean my wire wrapped pendant?
What is the best way to clean my wire wrapped pendant?
Use a soft cloth and mild soap to gently wipe down your pendant. Avoid using harsh chemicals or abrasive materials, as these can damage the wire and crystal.
Can I use any type of crystal for wire wrapping?
Can I use any type of crystal for wire wrapping?
Yes, you can use most types of crystals for wire wrapping. However, avoid using crystals with sharp edges or those that are too fragile, as they can be difficult to work with and may break.
How do I know if my tension is too tight or too loose?
How do I know if my tension is too tight or too loose?
Test the tension by gently pulling on the wire. If the stone moves, the tension is too loose. If the wire is strained or the stone is compressed, the tension is too tight.
Can I sell wire wrapped pendants I make at home?
Can I sell wire wrapped pendants I make at home?
Yes, you can sell wire wrapped pendants you make at home. However, make sure to research any local regulations or laws regarding homemade jewelry sales.
How can I make my wire wrapped pendants more durable?
How can I make my wire wrapped pendants more durable?
One way to increase the durability of your wire wrapped pendants is to use a clear, protective finish. This will help prevent tarnishing and protect the wire and crystal from everyday wear and tear.
Conclusion
Wire wrapping is a rewarding craft that allows you to create unique jewelry pieces with your own hands. By following these tips and avoiding common mistakes, you'll be well on your way to creating stunning wire wrapped crystal pendants that you'll be proud to wear or gift.

Comments