What Is Macrame Jewelry, Exactly?
I scrolled past it for the third time in one afternoon — a gorgeous cream-colored macrame necklace with tiny gold beads woven into the knots, sitting on a model's collarbone like it belonged there since birth. "No way I could make something that pretty," I muttered, kept scrolling, then immediately went back to stare at it again. That was about two years ago. Since then, I've made probably forty pieces, gifted half of them, sold a few at a local market, and learned something important: macrame jewelry is not some mystical craft reserved for people with decades of experience. It's knots. Really pretty knots, strung together with patience and the right materials. If you've been eyeing those boho-chic pieces on Pinterest and telling yourself you can't do it — this guide is for you.
What Is Macrame Jewelry, Exactly?
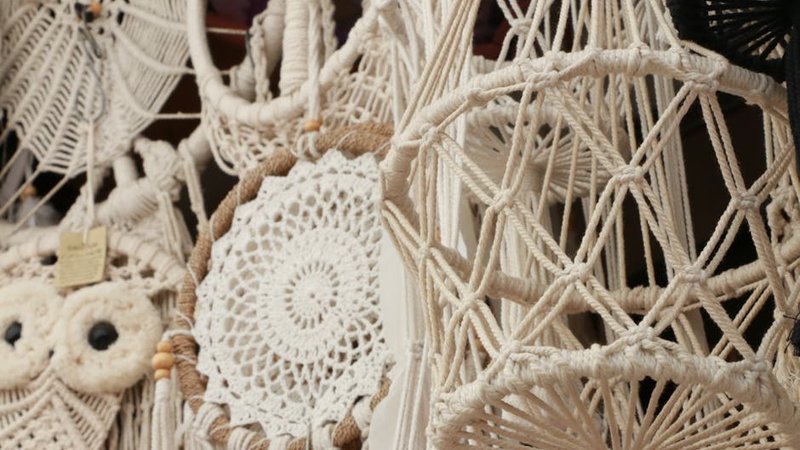
Macrame is a textile art that uses knotting rather than weaving or knitting to create decorative patterns. The technique has been around for centuries — sailors used it to decorate knife handles and bell pulls — but it found its way into the jewelry world sometime in the 1970s and never really left. When you make macrame jewelry, you're essentially tying a series of decorative knots with cord, string, or rope to form wearable pieces like necklaces, bracelets, anklets, and earrings.
What makes it different from regular beading or wire wrapping is that the cord itself is the design. You're not just stringing beads on a thread — the knots create texture, structure, and visual interest all on their own. A well-made macrame necklace can look incredibly intricate, but when you break it down, it's just a handful of knot patterns repeated in different combinations.
Materials You Need to Get Started
One of the things I love most about macrame jewelry is the low barrier to entry. You don't need a studio full of expensive tools. Here's what's actually essential:
Cord or String
This is your main material, and it matters more than you'd think. The two most popular options for jewelry are cotton cord and hemp cord. Cotton is softer, comes in tons of colors, and is forgiving for beginners because it's easy to untie and retie if you mess up. Hemp has a more rustic, natural look and stiffens up nicely once you've worked with it a bit, which gives finished pieces good structure. I'd recommend starting with 1mm to 2mm cotton cord — it's thin enough for delicate jewelry but thick enough that the knots are visible and satisfying to tie.
Scissors
Any decent pair of craft scissors works. You'll be cutting cord a lot, and clean cuts make a huge difference in how your knots sit. Frayed ends are annoying to thread through beads and make your finished piece look messy.
Measuring Tape or Ruler
Precision isn't everything in macrame, but cutting your cords to roughly the right length saves a lot of frustration. Too short and you can't finish your piece. Too long and you're wrestling with a tangle of excess cord for an hour.
Something to Anchor Your Work
A clipboard, a piece of foam board with T-pins, or even a pillow with some tape will work. You need something to hold your piece steady while you tie knots. I started with a clipboard because I already had one, and honestly it's still what I use most of the time.
Findings and Embellishments (Optional)
Jump rings, lobster clasps, crimp beads, and small metal connectors give your jewelry a finished, professional look. Beads — wooden, glass, metal, or stone — can be woven into your knots for extra visual interest. You absolutely don't need these for your first few projects, but they're fun to experiment with once you've got the basic knots down.
Choosing the Right Cord: A Quick Guide
I wasted money on the wrong cord at least twice before I figured out what actually works for jewelry. Here's what I wish someone had told me:
Thickness: For necklaces and bracelets, 1mm to 3mm is the sweet spot. Anything thinner than 1mm and the knots become fiddly and hard to see. Anything thicker than 3mm and you're making chunky statement pieces — which can be cool, but it's harder to achieve delicate details.
Length: A good rule of thumb is to cut your cords 4 to 6 times the finished length of your piece. So if you want a 16-inch necklace, cut your cords somewhere between 64 and 96 inches. Yes, that seems like a lot. Yes, you'll have leftover cord. Better too much than too little — I've ruined pieces by underestimating and running out of cord two knots from the end.
Color: Natural cream, beige, and tan are classic macrame colors for a reason — they look good with everything and give off that earthy, bohemian vibe. But don't be afraid to try colored cord. Deep terracotta, forest green, navy blue, and dusty rose all make stunning jewelry. If you're planning to sell or gift your pieces, stick with neutrals. If it's just for you, go wild.
The Three Essential Knots
Almost every macrame jewelry pattern you'll ever encounter uses some combination of these three knots. Learn them well and you can make virtually anything.
The Reverse Lark's Head Knot
This is usually your starting knot — it attaches your cords to a ring, a bar, or another cord. Fold your working cord in half, place the loop over your anchor point, then bring the two tail ends through the loop and pull tight. It's basically a slip knot, and once you've done it a few times, it becomes muscle memory. I use reverse lark's head knots to attach cords to necklace clasps, earring hooks, and the starting point of most patterns.
The Square Knot
This is the workhorse of macrame. A square knot uses four cords — two outer "working cords" and two inner "filler cords." You cross the left working cord over the two filler cords, pass the right working cord over the left (and under the fillers), then thread it through the loop on the left side. Pull tight. Then you do the same thing in reverse — right cord over fillers, left cord over right, thread through. That's one complete square knot. Repeat it a bunch of times and you get a flat, braided-looking strip. Alternate it with half-twists and you get spirals. It's incredibly versatile.
The Spiral Knot (Half Square Knot)
This is just the first half of a square knot, repeated over and over. Instead of alternating directions, you keep tying the same half-knot, and the cords naturally twist into a spiral. It looks complicated but it's actually the easiest knot to master, and the spiral effect is beautiful for bracelets and necklace sections. I probably use this more than any other knot because of how quickly it creates visual interest.
Three Beginner Projects to Try
Don't start with a complex multi-layered necklace. Build confidence with simpler pieces first.
Project 1: Simple Macrame Necklace
Cut four cords, each about 60 inches long. Fold them in half and attach all four to a small metal ring using reverse lark's head knots — you now have eight working cords. Tie about 2 inches of square knots, then thread a bead onto the four middle cords and tie a few more square knots below it. Repeat this bead-and-knot pattern two or three times, depending on how long you want the pendant section. Finish with another inch of square knots, trim the ends, and attach a chain or cord for the necklace portion. Total time: maybe 45 minutes for your first one, 20 once you've done a few.
Project 2: Macrame Earrings
Earrings are great practice because they're small and use very little cord. Cut four cords about 20 inches each. Attach them to an earring finding with lark's head knots. Tie 10 to 15 square knots, then thread a small bead onto the middle cords and tie 5 more knots. Trim the ends at an angle for a tapered look, and add a drop of craft glue to keep the knots from unraveling. Make a second one to match. These take maybe 15 minutes per pair, and they look surprisingly good — I've had people ask where I bought mine.
Project 3: Adjustable Macrame Bracelet
Cut two long cords (about 30 inches each) for the base and two shorter cords (about 20 inches) for the knots. Lay the long cords side by side and tape them to your clipboard. Use the shorter cords to tie alternating square knots down the length of the base cords. Leave about 3 inches unknotted at each end — you'll use these as the adjustable closure by tying them around your wrist. The whole thing takes about 20 minutes and results in a casual, stackable bracelet that you can wear every day.
Leveling Up: Intermediate Techniques
Once the basic knots feel comfortable, here's where things get really fun.
Multi-Layered Designs
Instead of one row of knots, try creating two or three rows at different lengths. A choker-length knot section paired with a longer pendant section gives you a layered look that's very popular right now. You can also create separate knot sections and connect them with chain or cord for a mixed-media piece.
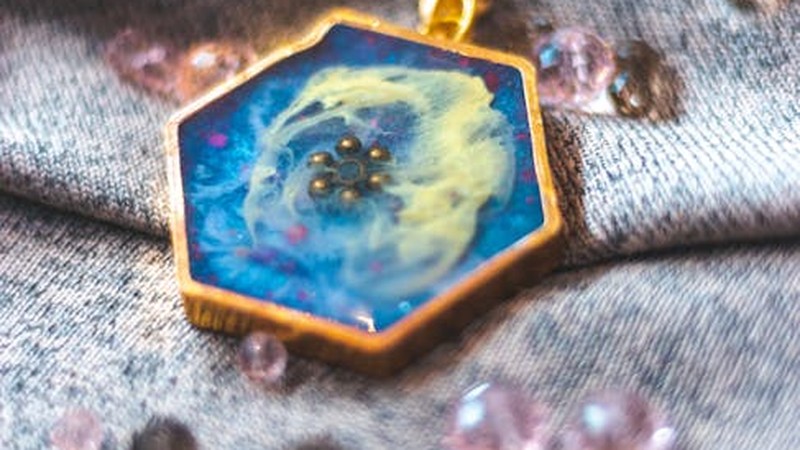
Adding Beads
Thread beads onto your cords between knot sections, or use them as the center of a decorative knot pattern. Wooden beads give an earthy, natural feel. Glass or crystal beads add elegance. Metal beads create contrast against soft cord. The key is to choose beads with holes large enough for your cord to pass through — there's nothing more frustrating than trying to force a 2mm cord through a 1mm bead hole for twenty minutes.
Mixing Materials
Leather cord paired with cotton, wire-wrapped sections combined with knot sections, chain interspersed with macrame — mixing materials is what takes your pieces from "homemade" to "handmade designer." I recently started incorporating thin copper wire into my knot patterns, wrapping it around cords before tying knots, and the result looks like something you'd find in a boutique.
Common Problems (and How to Fix Them)
After making dozens of pieces, I've hit pretty much every speed bump. Here are the ones that come up most often.
My Cord Is Too Stiff and the Knots Won't Tighten
This usually happens with new hemp cord, which can be rigid out of the package. Rub the cord between your hands a few times to soften it, or run it through your fingers repeatedly. Some people lightly dampen the cord with water before working — it helps the fibers relax. Whatever you do, don't pull so hard you snap the cord. Patience.
My Piece Is Too Loose (or Too Tight)
Tension is the trickiest part of macrame and it really just comes with practice. If your knots are too loose, the pattern will look sloppy and the piece won't hold its shape. If they're too tight, the cord bunches up and the design becomes distorted. Try to maintain consistent, moderate tension — pull each knot snug but not strangled. After every few knots, hold your piece up and look at it from a distance. You'll quickly notice if things are getting uneven.
How Do I Clean My Macrame Jewelry?
Here's the honest answer: as little as possible. Cotton cord absorbs water, soap, and oils, which can cause it to stretch, discolor, or fray. If your piece gets a little dirty, spot clean it with a barely damp cloth. If it needs a deeper clean, fill a bowl with lukewarm water and a tiny drop of mild soap, swish the piece gently for a few seconds, rinse in clean water, and lay it flat on a towel to dry. Never wring it out, never put it in a washing machine, and never use hot water. I learned the hard way — a beautiful necklace I spent three hours on went into the washing machine by accident and came out looking like a sad, stretched-out mop head.
How to Care for Your Macrame Jewelry
Proper care keeps your pieces looking good for years. Store them flat or hanging — never crumpled up in a drawer where the cords can tangle and the knots can deform. Keep them away from direct sunlight for long periods, as UV exposure can fade colored cord. Avoid wearing them in the shower, pool, or ocean. Apply perfume and lotion before putting on your jewelry, not after — chemicals in these products can degrade the cord over time.
If a knot starts to loosen, a tiny drop of clear craft glue or nail polish on the knot (use a toothpick for precision) will lock it in place without being visible. If the ends start to fray, you can trim them or seal them with a lighter — just be very careful with the flame, especially with synthetic cord, which can melt rather than seal.
Where to Go from Here
The macrame jewelry world is huge once you start exploring. YouTube has hundreds of free tutorials, and Instagram is full of incredibly talented makers sharing their work and patterns. Etsy is a great place to buy kits that include pre-cut cord, beads, and step-by-step instructions — perfect for when you want to try a new technique without hunting down all the materials yourself.
The best advice I can give is this: start simple, be patient with yourself, and expect your first few pieces to look a little rough. Mine did. Everyone's do. But there's something deeply satisfying about wearing a piece of jewelry that you made with your own hands, knot by knot, and knowing that every single one was placed intentionally. That's something you can't buy in a store.

Comments