<h2>Silver Polish Versus DIY Methods: Which Actually Works Best for Tarnished Jewelry?</h2>
The test setup
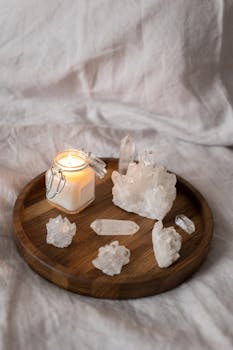
I used eight pieces of heavily tarnished 925 sterling silver jewelry — four rings, two necklaces, and two bracelets — that had been sitting in a drawer without anti-tarnish protection for roughly 18 months. Each piece had a uniform dark gray-black tarnish layer with some yellowish-brown spotting. I divided them into test groups and applied each cleaning method according to its standard instructions, timing each one and photographing before and after. I then rated each method on five criteria: effectiveness (how much tarnish was removed), speed, cost per use, safety for the jewelry and the user, and how often it's practical to use.
Method 1: Commercial silver polish
Products tested: Goddard's Silver Polish ($8 for a 7 oz jar) and Weiman Silver Polish ($6 for an 8 oz tub). Both are widely available at drugstores, supermarkets, and online.
How it works: You apply a small amount of paste to the silver with a soft cloth or sponge, rub gently, let it sit for 30-60 seconds, then buff off with a clean cloth. The polish contains mild abrasives (usually calcium carbonate or diatomaceous earth) and chemical cleaners (often including thiourea or similar compounds) that dissolve tarnish.
Results: This was the fastest method. Each piece took 60-90 seconds to clean, and the results were impressive — the tarnish came off completely, and the silver underneath was bright and reflective. The paste is easy to control, so you can work on detailed areas like chain links and engraved surfaces without much trouble.
Problem: The mild abrasives in silver polish, while gentle compared to something like toothpaste, do remove a microscopic layer of silver with each use. Over years of regular polishing, this can eventually wear down fine details, especially on antique pieces, filigree work, or plated items where the silver layer is thin. For jewelry you clean once or twice a year, this is negligible. For pieces you polish weekly, it adds up.
Safety note: Most commercial polishes contain chemicals you don't want to inhale or get on your skin. Wash your hands after use, and don't use these products on jewelry set with porous stones (turquoise, opal, pearl, coral) because the chemicals can damage or discolor them.
Method 2: Baking soda, aluminum foil, and boiling water
Cost: Under $1 per use (baking soda: $2/box; aluminum foil: $4/roll; both items most people already own).
How it works: Line a glass or ceramic bowl with aluminum foil (shiny side up), place the tarnished silver on the foil, pour in a tablespoon of baking soda, then add boiling water to cover the pieces. The chemical reaction between the aluminum, baking soda, and hot water creates an ion exchange: the silver sulfide (tarnish) transfers from the silver surface to the aluminum foil. You'll see the foil darken as the tarnish lifts. Leave the pieces submerged for 1-3 minutes, then remove with tongs, rinse, and dry.
Results: This method was startlingly effective. Heavily tarnished pieces came out looking almost new after a 2-minute soak. The tarnish lifted evenly, including from recessed areas and chain links that are hard to reach with polish. The reaction is fast and dramatic to watch — the foil turns dark almost immediately.
Problem: This method removes all oxidation, including the natural patina that develops on silver over time. On antique pieces or intentionally oxidized jewelry (where the dark areas in crevices are part of the design), this strips away the finish the maker intended. You end up with uniformly bright silver that looks brand new, which isn't always desirable. It also leaves a slight white residue from the baking soda that needs thorough rinsing, especially in chain links and settings where residue can get trapped.
Stone safety: The boiling water is the main concern here. Gemstones that are sensitive to heat or thermal shock (opal, emerald, tanzanite, pearl, and any stone with internal fractures) can crack or discolor when plunged into boiling water. This method is best reserved for plain silver or pieces set with hard, heat-tolerant stones (diamond, ruby, sapphire, quartz).
Method 3: Toothpaste
Cost: Negligible (whatever toothpaste costs).
How it works: Apply toothpaste to a damp soft cloth or soft-bristle toothbrush, rub the tarnished silver, rinse, and buff dry. The baking soda or silica particles in toothpaste act as a mild abrasive.
Results: It works. The tarnish comes off, and the silver ends up reasonably clean. Not as bright or even as commercial polish, but acceptable for casual cleaning.
Problem: Toothpaste is more abrasive than most people realize, especially whitening toothpaste and gel types that contain hydrated silica particles. These can leave micro-scratches on silver surfaces, which actually make future tarnish build up faster because the scratches create more surface area and more places for tarnish to grip. Over time, toothpaste-cleaned silver develops a dull, hazy appearance that polish alone can't fix — you'd need to have the piece professionally buffed to restore the original finish.
Verdict: I don't recommend this for any jewelry you care about. It's fine for a quick clean on a cheap silver chain you don't mind scratching, but for anything with sentimental or monetary value, the risk of surface damage isn't worth it. Use a proper silver polish or cloth instead.
Method 4: White vinegar and baking soda paste
Cost: Under $0.50 per use.
How it works: Mix white vinegar and baking soda into a thick paste (it will fizz when you combine them — wait for the reaction to subside, then stir into a paste). Apply the paste to the tarnished silver with a soft cloth, let it sit for 2-5 minutes, then rinse with warm water and dry.
Results: This was the gentlest method I tested. It removed light tarnish reasonably well but struggled with heavy, built-up tarnish. On pieces with 18 months of accumulated darkening, the result was noticeably uneven — lighter patches where the paste had good contact, darker patches in recessed areas. A second application improved results but still didn't match commercial polish or the aluminum foil method.
Advantage: This is the safest option for delicate pieces. No abrasives, no boiling water, no harsh chemicals. If you have an antique silver piece with fragile patina or a stone-set item where you can't use heat or strong chemicals, this paste is a reasonable first step. It won't damage anything, even if it doesn't get the silver perfectly clean.
Method 5: Commercial silver dip
Product tested: Hagerty Silver Dip ($12 for a 12 oz bottle). Also widely available.
How it works: Immerse the tarnished silver in the liquid for 10-30 seconds, remove, rinse with water, and dry. No rubbing, no scrubbing — the chemicals in the dip dissolve tarnish on contact.
Results: Extremely fast and effective. The tarnish dissolved off every piece within 10-15 seconds of immersion. The silver came out bright and clean with minimal effort. For speed and ease, nothing else came close.
Problem: Silver dips contain thiourea (or related sulfur-containing compounds) as the active cleaning agent. Thiourea is classified as a suspected carcinogen by some regulatory agencies and requires care in handling. You need gloves, good ventilation, and you should avoid skin contact and inhalation. The liquid is also aggressive — it will strip lacquer coatings, oxidized finishes, and can damage some gemstones if they're immersed along with the silver.
Like the aluminum foil method, silver dip removes all oxidation uniformly, which means it strips intentional patina. For silver pieces where the darkened crevices are part of the design, dip cleaning will flatten the contrast and make the piece look less detailed. Reserve this for pieces you want uniformly bright.
Method 6: Ultrasonic cleaner with mild detergent
Cost: $50-300 initial investment for the machine (I used a $75 model); under $0.25 per use for detergent and electricity.
How it works: Fill the ultrasonic cleaner tank with warm water and a few drops of mild dish detergent. Place the jewelry in the basket, run the cycle (usually 3-5 minutes), remove, rinse, and dry. The ultrasonic waves create microscopic cavitation bubbles that collapse against the jewelry surface, dislodging dirt, tarnish, and debris from areas that are hard to reach by hand.
Results: For lightly to moderately tarnished silver, the ultrasonic cleaner worked very well. Chain links, clasps, and engraved areas came out noticeably cleaner than with any manual method. For the heavily tarnished pieces in my test, one cycle wasn't enough — I needed to run two cycles with a fresh water/detergent solution, and even then, some stubborn tarnish spots remained and needed a light touch-up with a polishing cloth.
Advantage: This is the best method for cleaning intricate pieces with lots of detail work. Filigree, chain maille, textured surfaces, and jewelry with small moving parts benefit enormously from ultrasonic cleaning because the cavitation reaches into spaces that no cloth or brush can access.
Warning: Not all gemstones are safe in an ultrasonic cleaner. Opals, pearls, emeralds, tanzanite, and any stone with internal fractures or inclusions can be damaged or destroyed by ultrasonic vibration. Amber, coral, and turquoise are also risky. Hard stones (diamond, ruby, sapphire, quartz) are generally fine. When in doubt, remove the stone before cleaning or skip the ultrasonic method entirely.
The comparison
Here's how the six methods stack up across the five criteria I rated:
Commercial polish: Effectiveness 9/10, Speed 9/10, Cost 6/10 (moderate), Safety 6/10 (chemicals + mild abrasion), Frequency suitability 7/10. Best for routine cleaning of jewelry you wear regularly.
Baking soda + aluminum foil: Effectiveness 10/10, Speed 8/10, Cost 10/10 (nearly free), Safety 5/10 (boiling water, strips patina), Frequency suitability 4/10. Best for occasional deep cleaning of plain silver pieces.
Toothpaste: Effectiveness 6/10, Speed 6/10, Cost 10/10, Safety 3/10 (abrasive damage), Frequency suitability 2/10. Not recommended for jewelry you value.
Vinegar + baking soda paste: Effectiveness 5/10, Speed 4/10, Cost 9/10, Safety 9/10 (very gentle), Frequency suitability 8/10. Best for delicate or antique pieces where preserving the surface is the priority.
Commercial silver dip: Effectiveness 10/10, Speed 10/10, Cost 5/10, Safety 3/10 (toxic chemicals), Frequency suitability 3/10. Best when you need results immediately and have heavy tarnish on plain silver.
Ultrasonic cleaner: Effectiveness 7/10 (heavy tarnish), 9/10 (light tarnish), Speed 7/10, Cost 3/10 (upfront investment), Safety 6/10 (not for all stones), Frequency suitability 8/10. Best for regular maintenance of intricate pieces with hard gemstones.
What I actually recommend
After testing all six methods, here's what my cleaning routine looks like now:
Daily: A microfiber jewelry cloth kept in a drawer near where I take off my jewelry at night. A quick wipe after each wear removes oils, sweat, and the earliest stages of tarnish before it becomes visible. This takes 5 seconds and costs almost nothing. It's boring advice, but it's by far the most effective prevention strategy. A lint-free microfiber cloth (not a polishing cloth treated with chemicals, just a plain cloth) is the single best investment you can make for silver care.
Weekly: If a piece is starting to look dull, a quick buff with a treated silver polishing cloth (like the Sunshine brand) brings back the shine without the mess of paste polish. These cloths are impregnated with a very mild cleaning agent and work well for light tarnish.
Monthly or as needed: For pieces that have developed visible dark tarnish, the aluminum foil and baking soda method is hard to beat for cost-effectiveness and results. Just remember to skip this for anything with heat-sensitive stones, and accept that it will remove any intentional patina.
For antique or delicate pieces: The vinegar and baking soda paste is the safest option. It's slow and imperfect, but it won't damage anything. Pair it with a very soft brush (a baby toothbrush works well) for detailed areas.
The real takeaway from all of this is that the best cleaning method is the one you use before the tarnish gets bad. Every method works better on light tarnish than heavy tarnish. A 5-second wipe with a microfiber cloth today saves you from needing any of these methods next month.

Comments