Selling Handmade Jewelry at Craft Fairs: The Complete Guide to Your First Show
My first craft fair was a disaster. I showed up with a folding table, a bedsheet as a tablecloth, and about 40 pieces of jewelry laid out in a jewelry box. I made $47 in six hours, most of which went to the booth fee. The vendor next to me — a potter with a cohesive display, proper lighting, and a credit card reader — made over $800.
The difference wasn't our products. It was our preparation. Selling at craft fairs, markets, and pop-ups is one of the most effective ways to grow a handmade jewelry business, but only if you approach it as a real sales event rather than a casual hobby display. Here's everything I wish I'd known before that first disastrous show.
Before You Apply: Is This Show Worth Your Time?
Not every craft fair is worth attending. Some are well-promoted events with hundreds of buyers; others are poorly organized affairs where vendors outnumber customers. Learn to tell the difference before you pay a booth fee.
Red Flags to Avoid
- No vendor list or past photos available. If the organizer can't show you what the event looked like last year, they might be a first-time organizer or running a low-quality show.
- Booth fees seem high relative to expected attendance. A $200 booth fee at an event expecting 200 visitors means each visitor would need to spend $1 just for you to break even on the fee. That's not realistic.
- Wide-open vendor categories. If a "handmade craft fair" also accepts direct-sales companies (Avon, LuLaRoe), imported goods, or MLM products, your handcrafted work will be competing with mass-produced items at lower prices.
- No promotion plan. Ask the organizer how they advertise. If the answer is "social media and word of mouth" with no budget behind it, attendance will likely be low.
Green Flags to Look For
- Juried shows. These require an application with photos of your work. The bar is higher, but so is the quality of both vendors and buyers. Customers who attend juried shows expect to pay artisan prices.
- Established events with history. A show that's run for 5+ years has a loyal following. First-year events are risky but sometimes turn out well if the organizers are experienced.
- Targeted audience. A holiday market in an affluent neighborhood, a farmers market with regular foot traffic, or a festival tied to a specific community (like a university art fair) will bring people who are already in a buying mindset.
- Reasonable vendor-to-attendee ratio. Ideally, there should be at least 10-15 attendees per vendor. More vendors than attendees means thin sales for everyone.
Applying: How to Get Accepted
Juried shows receive far more applications than they have space for. Here's how to make your application stand out.
Photography Is Everything
The jury sees your product photos before they see your actual work. Your application photos need to be clean, well-lit, and representative of your best pieces. You don't need a professional photographer — natural daylight, a plain background (white poster board works), and a smartphone camera with good focus are sufficient.
Include 4-6 photos showing different pieces from your collection, plus one photo of your booth display if you've done shows before. The jury wants to see that you have a cohesive body of work, not just one nice piece.
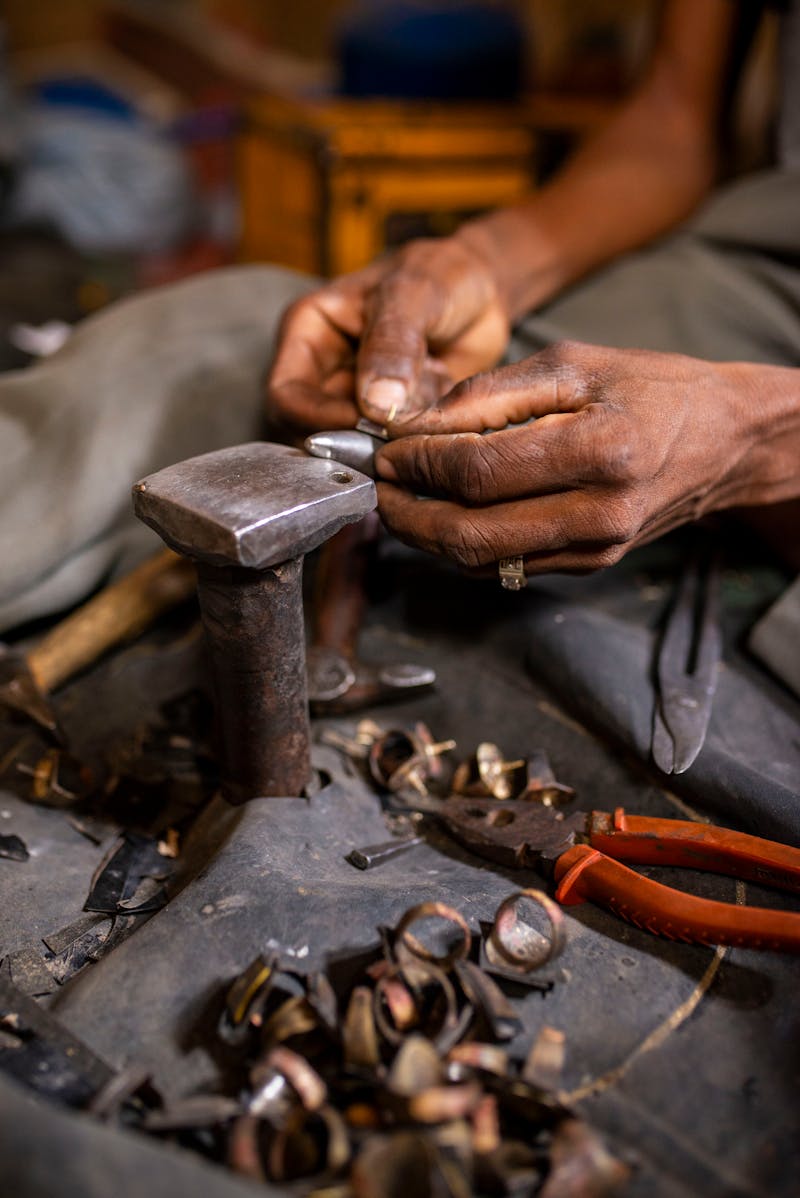
Describe Your Process
Juries want to know that your work is genuinely handmade. Briefly describe your materials and techniques. "Hand-forged gold-fill wire jewelry with natural gemstones" is more compelling than "handmade jewelry." Specificity signals authenticity.
Apply Early
Many shows fill up months in advance. Popular holiday markets often close applications by August or September for November/December events. Set up a calendar of application deadlines for shows in your area and apply as early as possible.
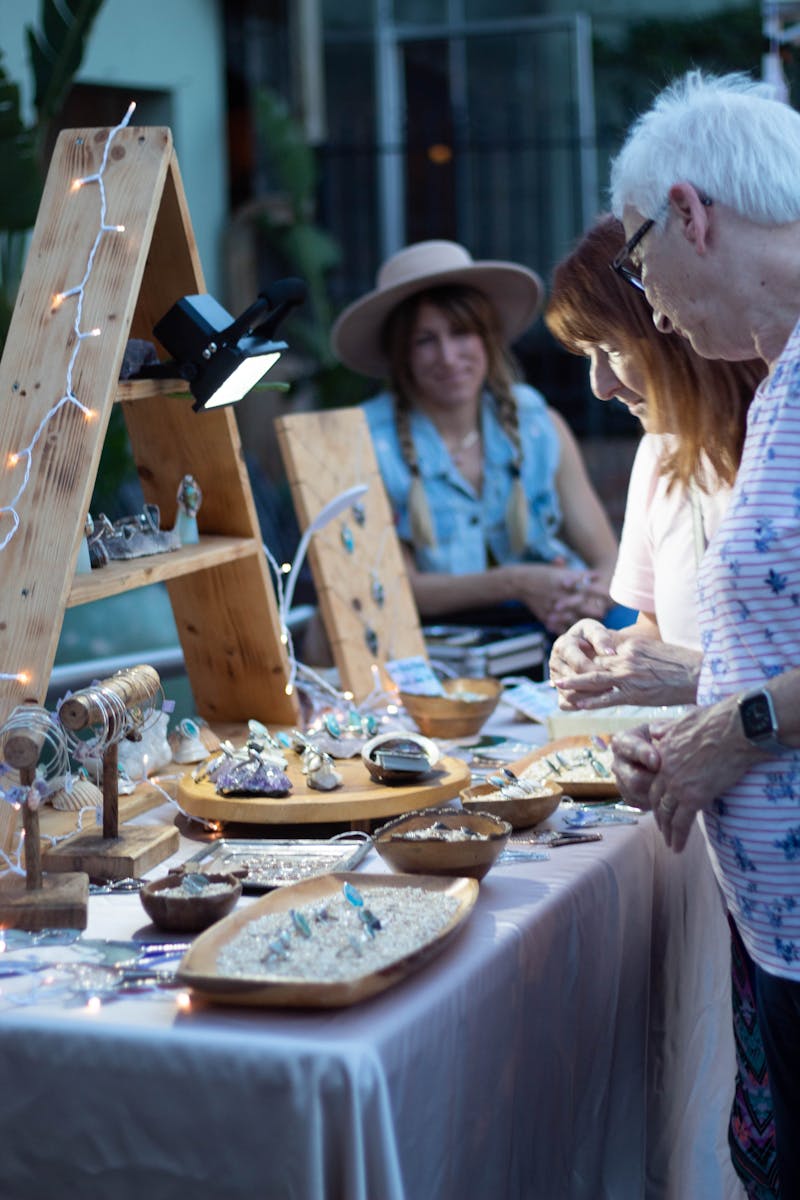
Setting Up Your Booth: The Display Makes the Sale
Your booth display is your storefront. Customers make snap judgments about quality and price based on how your work is presented. A $60 necklace displayed on a beautiful velvet stand looks like it's worth $60. The same necklace lying flat in a jewelry box looks like it's worth $20.
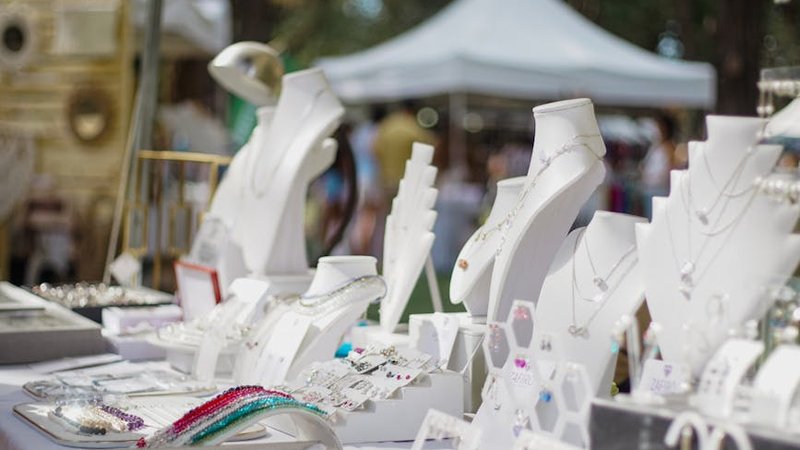
The Essential Display Elements
- Table covering. A floor-length cloth that reaches the ground (hides your storage boxes underneath). Neutral colors work best — black, white, ivory, or dark gray. Avoid busy patterns that distract from your jewelry.
- Height variation. Don't lay everything flat. Use risers, stacked boxes, or small shelves to create different levels. Elevated pieces catch the eye first. Use the back of your table for taller displays and the front for pieces at hand level.
- Necklace displays. Bust forms, T-bar displays, or simple pegboard. Necklaces need to be seen at roughly the angle they'd hang when worn, not flat on a table.
- Bracelet displays. U-shaped displays, rolled fabric, or decorative cylinders. Stackable options save table space.
- Ring displays. Ring cones, tiered ring trays, or small dishes. Rings are easy to overlook — give them their own dedicated area.
- Earring displays. Earring cards on a rotating stand, or small frames with earring hooks. Earrings sell well because they're impulse purchases — make them easy to see and try on.
- Mirror. Non-negotiable. Customers want to see how your jewelry looks on them. A full-length mirror is ideal; a hand mirror is the minimum. Place it where people can check without blocking traffic flow.
- Lighting. If the venue has poor lighting (many do), bring your own. A battery-powered LED strip or clip-on lights can transform a dim corner into an inviting display. Warm white light (2700-3000K) looks best on metal and gemstones.
- Price tags. Every piece should be clearly priced. People won't ask if they have to — they'll just walk away. Small hang tags or sticker dots work well. Include the material (gold-fill, sterling, etc.) on the tag.
Display Budget
You don't need to spend a fortune on displays. Start with these basics for under $75:
- Tablecloth: $10-15
- Folding risers or boxes with fabric: $10-20
- 2-3 necklace busts: $15-25
- 1 bracelet display: $8-12
- 1 ring display: $8-12
- Mirror: $10-15
As your business grows, upgrade gradually. A well-arranged $50 display outsells a messy $500 display every time.
Inventory: How Much to Bring
The Rule of Three
Bring three times what you expect to sell. If you think you'll sell 20 pieces, bring 60. Running out of stock early is both a lost-revenue problem and a perception problem — a sparse table looks unsuccessful, which makes customers hesitate.
Product Mix Strategy
Structure your inventory across three price tiers:
- Low tier ($20-40): Simple earrings, small pendants, stacking rings. These are your impulse buys. They draw people in and start conversations. Aim for 40-50% of your inventory.
- Mid tier ($45-80): Statement earrings, gemstone bracelets, wire-wrapped necklaces. This is where most of your revenue comes from. Aim for 35-40% of inventory.
- High tier ($85-150+): Elaborate necklaces, custom work, one-of-a-kind pieces. These establish your price ceiling and attract serious collectors. Aim for 10-20% of inventory.
This tiered approach means every customer finds something in their budget, and you maximize both the number of transactions and the total revenue per show.
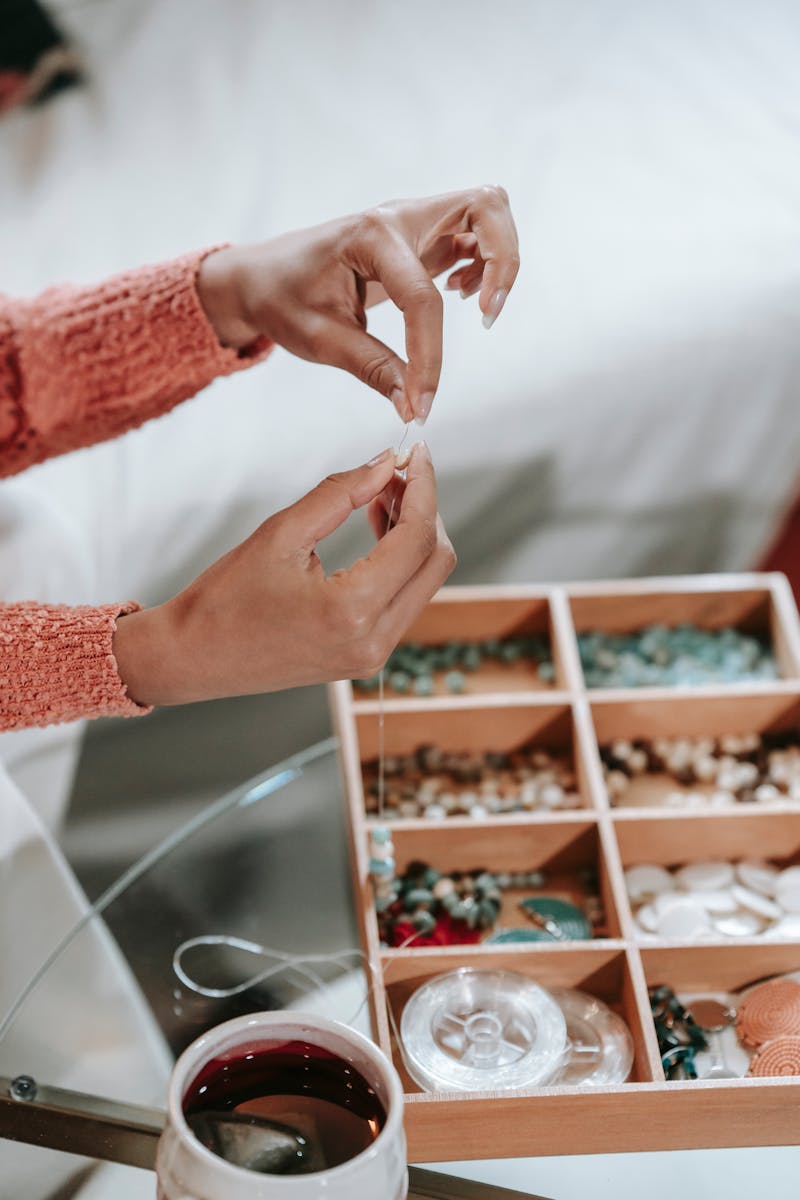
Best Sellers vs. New Designs
Bring your proven best sellers (70%) plus some new designs you're testing (30%). Shows are a great opportunity to get direct customer feedback on new pieces. Watch which items get picked up, tried on, and commented on, even if they don't sell that day.
Pricing for In-Person Sales
Your craft fair prices should be the same as your online prices. Consistent pricing builds trust — customers who find you online after meeting you at a show should see the same numbers. Variable pricing makes people feel like they might have overpaid in one channel or the other.
However, shows are a great opportunity to sell bundles or add-ons. "Buy a necklace and get matching earrings for 15% off" works well in person because the customer can see how they look together. Just make sure your bundled price still meets your minimum profitability threshold.
Payment and Logistics
Accepting Payments
- Mobile card reader (Square, Stripe, PayPal Zettle): Essential. Cash-only vendors lose sales. Sign up is free, the reader is free or low-cost, and fees are typically 2.6-2.9% + $0.10 per transaction.
- Cash. Bring at least $50 in small bills and coins for making change. A surprising number of people at craft fairs still prefer cash.
- Venmo/Zelle. Popular with younger customers. Print your handle on a small sign at the table.
Packaging
How you package the purchase affects how the customer perceives the value. A piece dropped into a plastic bag feels cheap. A piece placed in a small box or tied in a tissue pouch feels like a gift.
- Minimal approach: Small kraft paper boxes ($0.30-0.50 each) or organza bags ($0.10-0.20 each)
- Branded approach: Custom printed boxes or bags with your logo ($0.50-1.50 each)
- Premium approach: Velvet boxes, ribbon-tied pouches, handwritten thank-you notes
- Always include: A business card or care card with your website and social media handles
Working the Booth: Sales Techniques That Actually Work
The Greeting
"Hi, welcome! Let me know if you have any questions." This is friendly without being pushy. Avoid "Can I help you?" — it puts the customer on the spot and triggers a reflexive "Just looking."
Some people need 30 seconds of browsing before they're ready to talk. Give them space, but acknowledge them when they arrive. Ignored customers leave.
The Story
When someone shows interest in a piece, tell them about it. "That's gold-fill wire with a labradorite stone — the blue flash is natural to the stone, and each one is slightly different." People buy stories as much as they buy products. The fact that you made it by hand, that each piece is unique, that the stone was sourced from a specific place — these details create emotional connection and justify your pricing.
Keep it brief. 15-30 seconds of story, then let them decide. Don't lecture.
Try-Ons
"Would you like to try it on?" is one of the most powerful sales tools. Jewelry looks completely different on than on a display. Once someone sees a piece on their own body, they're much more likely to buy. Keep the mirror accessible and offer it proactively.
The "Take It With You" Close
When someone is hesitating: "It's available today at the show, and I only have one in this stone. If you'd like to think about it, I can hold it for an hour." This creates gentle urgency without pressure. If they come back, they've usually already decided to buy.
What Not to Do
- Don't sit behind your table scrolling your phone. Stand or sit at the front of your booth, making eye contact with passersby.
- Don't eat at your table. Take breaks, but eat away from your display.
- Don't badmouth other vendors. Ever.
- Don't haggle aggressively. Small discounts for multi-item purchases are fine; cutting your price in half because someone asked signals that your original price was inflated.
- Don't pack up early. Customers who arrive in the last hour are often the most serious buyers.
After the Show: Follow-Up Is Where the Money Is
The customers who bought from you at the show are your most valuable leads. They've already proven they like your work enough to pay for it. Convert them into repeat customers.
Within 24 Hours
- Add email addresses (collected at the show) to your mailing list
- Post show photos on social media with a thank-you message
- Send a quick email to anyone who signed up: "Thanks for visiting! Here's 10% off your first online order"
Within the Week
- Restock anything that sold well
- Review your sales data — which pieces sold, which got attention but didn't sell, what price points performed best
- Follow up on any custom orders or commissions discussed at the show
The Financial Breakdown: Is It Worth It?
A typical small craft fair for a jewelry maker looks like this:
- Booth fee: $50-150
- Display supplies (amortized): $10-25
- Packaging: $5-15
- Travel and parking: $5-20
- Total investment: $70-210
To break even on a $100 booth fee, you need roughly $135-150 in sales (accounting for material costs). A well-prepared jewelry maker at a decent show can expect $200-600 in sales for a 4-6 hour event. At a good holiday market, $500-1500 is realistic.
Your first few shows might not be profitable — you're learning, building inventory, and investing in displays. But by your third or fourth show, you should be netting $100-300+ per event after all costs. At that point, doing 1-2 shows per month adds $1,200-7,200 per year to your income.
Building a Show Schedule
Start with one show per month. As you learn what works and build your inventory, increase to 2-3 per month during peak seasons (spring and fall are best for jewelry; November-December for holiday shopping).
Keep a spreadsheet tracking every show: date, location, booth fee, gross sales, net profit, best sellers, and notes on what worked or didn't. After a year, this data will tell you exactly which shows are worth repeating and which to drop.
Craft fairs aren't just about the day-of sales. They're marketing events that build your brand, grow your email list, and create personal connections with customers who become long-term supporters. Every person who walks past your booth is a potential future customer — even if they don't buy today.
Show up prepared, present your work with pride, and treat every interaction as the beginning of a relationship. The sales will follow.
Comments