I Resized 10 Rings at Home — Here's What Actually Works and What Doesn't
Why I Even Started This Experiment
Three months ago, I inherited my grandmother's engagement ring — a beautiful but impossibly small gold band. My fingers are a full size larger than hers, and taking it to a jeweler felt wrong somehow. It was her ring. I wanted to figure it out myself. So I did what any reasonable person with an internet connection and too much free time would do: I bought 10 different ring resizing products, tried every "life hack" I could find, and documented everything. Here's what actually works, what's a waste of money, and what you should never, ever do to a ring you care about.
The Clear Winner: Ring Guard Sizing Bar
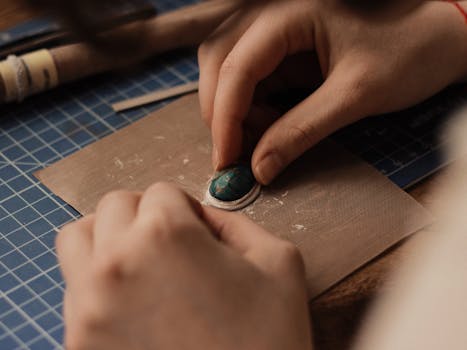
A ring guard (sometimes called a ring sizer or ring reducer) is a small metal or silicone bar that clips onto the inside of your ring band, effectively making the interior circumference smaller. I tested two versions: a $3.99 brass guard from Amazon and a $12 silicone version from a craft store.
The brass guard won, hands down. It took about 90 seconds to attach with a pair of needle-nose pliers — you bend the small tabs over the inside of the band. Once it's in place, you genuinely cannot see it from the outside. My grandmother's ring went from spinning freely to fitting snugly, and the guard itself is thin enough (0.3mm) that I can't feel it when I'm wearing the ring. Three months in, it hasn't loosened or shifted.
The silicone version was fine but less precise. It works by wrapping around the inside of the band like a tiny rubber band. It's easier to adjust — you can trim it with scissors — but it's visible as a slight ridge inside the ring, and I could feel it pressing against my finger. For a temporary solution, it's perfectly adequate. For long-term wear, go with metal.
The Quick Fix: Ring Sizer Tape
This is the transparent adhesive tape designed specifically for rings. You wrap it around the inside of the band, and the layers build up to fill the gap. A single $5 pack from Amazon contains about 100 pre-cut strips, which is more than enough for multiple rings.
It works. I'll say that upfront. My ring stopped spinning within 30 seconds of applying two layers of tape. The problem is longevity. After about 4 days of regular wear, the tape started peeling at the edges. By day 7, I had to replace it. After a month of testing, I was replacing the tape roughly every 5–7 days depending on how often I wore the ring.
For a ring you wear occasionally — say, to a special event — tape is the cheapest and easiest option available. For daily wear, it's too much maintenance. One advantage: it's completely invisible and leaves zero residue, so you can switch between tape and no tape without any hassle.
The Spring Insert: Effective but Fiddly
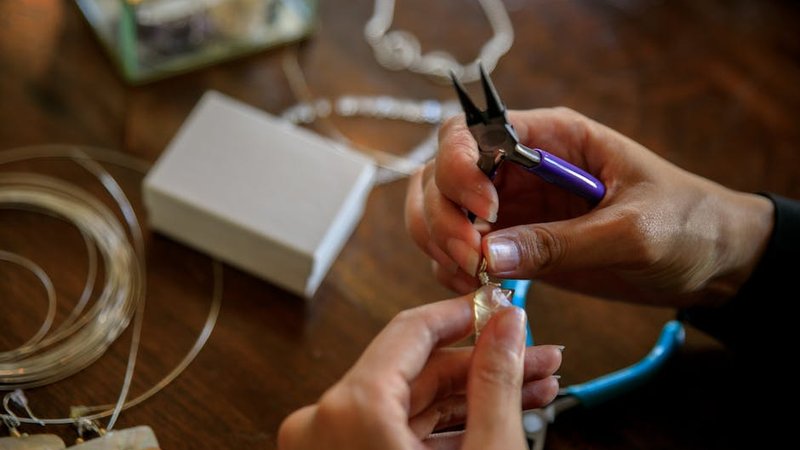
Sizing springs (also called ring adjusters or sizing coils) are tiny metal springs that you insert into the ring band. They compress when you slide the ring on and expand slightly to grip your finger. I bought a pack of 6 for $6.99.
These genuinely work well for the right application. Once inserted correctly, they hold the ring in place without any visible modification. The spring is hidden inside the band, and the ring looks completely normal from the outside. The problem is insertion — getting the spring positioned correctly and at the right depth took me about 10 minutes and a pair of fine-point tweezers. It's not difficult, exactly, but it requires patience and steady hands.
I'd rate this as a solid second choice behind the metal ring guard. The spring is more adjustable (you can slide it to different positions), and it works on wider bands where a guard might be too narrow. The main downside: if the ring has a very thin band (under 1.5mm), the spring can distort the band shape over time.
The Ring Adjuster Clip: A Near Miss
Ring adjuster clips are small silicone or PVC tubes that you cut to length and slide onto the inside of the band. They cost about $8 for a multi-size pack. In theory, they should work the same as the tape but more permanently.
In practice, I found them frustrating. The first issue is sizing: you have to cut the tube to exactly the right length, and there's almost no margin for error. Cut it too long, and the ring won't close around your finger. Cut it too short, and it doesn't grip. I went through 4 clips before getting a reasonable fit on my first ring. The second issue is comfort — the tube creates a noticeable bump inside the band that I could feel constantly. After 2 days of testing, I removed it.
I think these might work better for people with very small sizing adjustments (less than half a size). For anything more, the imprecision makes them not worth the hassle.
The Hammer and Mandrel Approach: Don't
This is the DIY method that appears in about half the YouTube tutorials I watched: place the ring on a steel mandrel (a tapered sizing rod) and tap it gently with a nylon or leather mallet to compress the metal. The idea is that you're physically reducing the ring's circumference.
I tried it on a cheap sterling silver band I bought specifically for this experiment. After about 15 minutes of careful tapping, I had reduced the size by approximately a quarter size. The ring was also noticeably distorted — slightly oval instead of round — and had faint hammer marks that I couldn't polish out completely. I probably could have done better with more practice, but this is not something you should learn on a ring that matters to you.
Professional jewelers use the same basic technique but with calibrated equipment, proper annealing (heating the metal to make it malleable), and years of practice. They also charge about $30–$60 for a simple resize, which is absolutely worth it compared to potentially ruining a meaningful piece of jewelry. I spoke to a local jeweler who told me she sees 3–4 rings per month that people damaged trying to resize at home, and roughly half of them can't be fully restored.
Jewelry Adhesive: It Works but There's a Catch
Clear jewelry adhesive (I used E6000, which is widely recommended online) is another popular method. You apply a small bead of adhesive to the inside of the band, let it partially cure, then wear the ring. The adhesive fills the gap between the ring and your finger.
Here's the honest assessment: it works, and it's probably the most secure of all the methods I tested. Once fully cured (24 hours), the adhesive bond is strong enough that the ring genuinely feels like it was made for my finger. I couldn't detect any movement at all during two weeks of daily wear.
The catch is reversibility. Removing cured E6000 from gold or silver requires either acetone (which can damage some gemstones and plated finishes) or careful scraping with a wooden tool (which is tedious and risks scratching). I spent 25 minutes removing the adhesive from my test ring, and there were faint residue marks visible under magnification. If you're resizing a plain metal band, adhesive is a viable permanent solution. If your ring has stones, plating, or engraving, I'd skip it entirely.
The Other Methods I Tested (And Their Results)
Method 7: Clear Nail Polish (Layers)
Apply 3–5 coats of clear nail polish to the inside of the band, letting each coat dry before adding the next. This was one of the cheapest methods (I used polish I already owned), and it did reduce the ring size by roughly a quarter size after 5 coats. However, nail polish chips and wears off within 1–2 weeks. It's fine for an event, but not sustainable.
Method 8: Silicone Ring Snuggies
Small silicone pads that stick to the inside of the band. Cost: $7 for a pack of 12. These were surprisingly comfortable — I couldn't feel them at all once positioned correctly. The adhesive backing lasted about 10 days before the pad started sliding around. Better than tape for comfort, worse for longevity.
Method 9: Thread Wrapping
The old-school method: wrap sewing thread around the inside of the band until it fits. Free, effective for about a day, and absolutely visible. This is what you do in an emergency, not as a real solution. The thread also absorbs moisture and can leave fibers trapped in ring settings.
Method 10: Moleskin Padding
Dr. Scholl's moleskin, cut to size and placed inside the band. Comfort was actually excellent — moleskin is soft and cushioned. But it's thick (about 1mm), so it only works for rings that are very loose. It's also not waterproof, which limits daily wear. I'd use this for a ring I only wear indoors.
My Ranking: What I'd Actually Recommend
If I had to pick just one method based on three months of testing, it's the brass ring guard. It's cheap ($3.99), invisible once installed, lasts indefinitely, and doesn't damage the ring. For quick fixes, ring tape is reliable if you don't mind replacing it weekly. And for anything involving gold, platinum, or rings with gemstones, skip the DIY entirely and pay a professional jeweler.
The one method I'd actively warn people against is the hammer-and-mandrel approach unless you're practicing on disposable rings first. The risk of permanent damage is real, and the savings ($30–$60) aren't worth potentially destroying something irreplaceable. I nearly ruined my grandmother's ring before I knew better, and that mistake taught me more than any of the ten methods I tested.
Comments