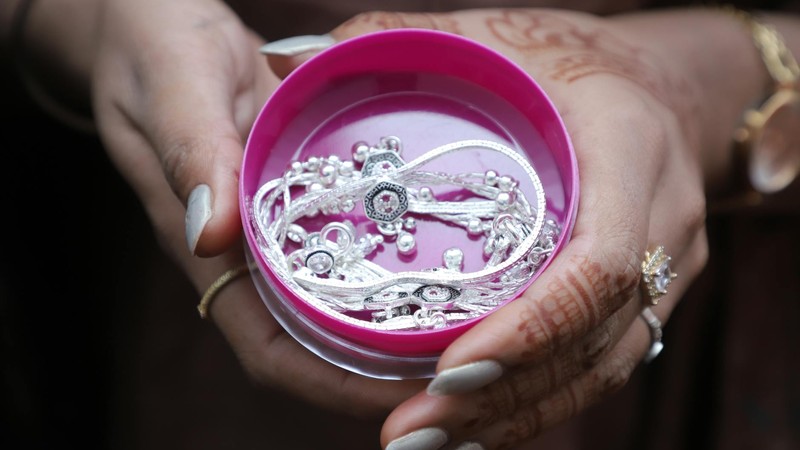
How to Polish Silver Jewelry at Home: 5 Methods That Actually Work
Why Silver Tarnishes in the First Place
Before diving into cleaning methods, it helps to understand what's actually happening on the surface of your jewelry. Silver reacts with sulfur compounds in the air — a process that accelerates in humid environments, near polluted air, or around certain foods like eggs and onions. What you're seeing as that dark, dull layer is silver sulfide, and it forms faster than most people realize.
I once left a sterling silver bracelet on my bathroom counter for three weeks. When I picked it up again, it had gone from mirror-bright to almost black. That experience taught me that prevention matters more than cure — but when you need the cure, you need it to actually work.
Here's something most jewelry blogs won't tell you: the tarnish rate depends on the alloy. Fine silver (99.9% pure) barely tarnishes at all. Sterling silver (92.5% silver, 7.5% copper) is the sweet spot for durability, but that copper content is exactly what causes the discoloration. The methods below all work on sterling silver — which is what most of us actually own.
Method 1: The Baking Soda and Aluminum Foil Trick
This is the method that gets the most attention online, and for good reason — it's fast, cheap, and genuinely effective. But most tutorials get the science slightly wrong, so let me clear that up first.
The chemical reaction at work here is called a galvanic displacement. When you place silver in contact with aluminum (the foil) and add an electrolyte (baking soda dissolved in hot water), electrons transfer from the aluminum to the silver sulfide. The sulfur bonds to the aluminum instead, and your silver reverts to its metallic state. It's not magic — it's electrochemistry.
Step-by-step instructions
Line a glass or ceramic bowl with aluminum foil, shiny side up. The foil needs to be in direct contact with the silver pieces, so arrange your jewelry so it's touching the foil surface. Boil water — not just hot tap water, actually boiling — and dissolve roughly two tablespoons of baking soda per liter.
Pour the solution over your jewelry. You'll see bubbling almost immediately, and if the tarnish is heavy, you might catch a faint sulfur smell. Let everything sit for 1 to 5 minutes. Light tarnish lifts off in under a minute; heavier buildup might need the full five. Remove the pieces with plastic tongs (metal tongs can scratch), rinse under cool running water, and dry with a microfiber cloth.
One important caveat: this method strips a microscopic layer of silver each time. If you use it weekly on the same piece for months, you will eventually notice pitting on detailed engravings or raised areas. I'd recommend limiting this to once a month at most for heavily worn pieces.
Method 2: Toothpaste — but Not Just Any Toothpaste
Toothpaste is one of those household fixes everyone's heard of, but the results are wildly inconsistent. That's because the formula matters enormously. Gel toothpastes barely work. Whitening toothpastes are too abrasive. What you actually want is a basic, non-gel, non-whitening paste — the cheapest tube on the shelf is usually the best choice.
The active cleaning agent here is mild silica abrasives combined with a small amount of baking soda. It's essentially a very gentle polish. Apply a pea-sized amount to a soft toothbrush — one you'll never use on your teeth again — and work in small circular motions. Focus on one small section at a time rather than scrubbing the whole piece at once.
Rinse thoroughly. Toothpaste leaves a residue in crevices that looks worse than tarnish if you miss it. I run pieces under warm water for a good 30 seconds, then use a soft brush with plain water to get into detailed areas.
This method works best on flat surfaces and broad chains. For intricate filigree work or pieces with set stones, toothpaste is a poor choice — the abrasive particles lodge in tiny gaps and are nearly impossible to rinse out completely.
Method 3: Commercial Polishing Cloths
If you want the most controlled, least aggressive approach, polishing cloths are the answer. These are impregnated with micro-abrasives and anti-tarnish compounds — typically a mix of silica, calcium carbonate, and sometimes a mild chelating agent that bonds to sulfur compounds on the surface.
I've tested six different brands over the past year, and the performance gap between the cheapest and the mid-range is significant. The $2 cloths from craft stores tend to shed fibers and lose effectiveness after about five uses. The $8–12 range (Connoisseurs, Goddard's, Sunshine) consistently lasts for 20+ uses and provides a noticeably brighter finish.
The technique matters more than the cloth brand, though. Fold the cloth into a firm pad and buff in straight lines along the grain of the metal — not in circles. Circular buffing creates visible swirl marks under direct light, especially on polished surfaces. Work one section at a time, and flip to a clean section of the cloth when the area you're using gets dark with removed tarnish.
Polishing cloths are the only method I'd recommend for pieces with patina that you want to preserve. Because you're working by hand, you have complete control over which areas you polish and which you leave alone.
Method 4: Ultrasonic Cleaners for Home Use
Ultrasonic cleaners work by generating high-frequency sound waves (usually 40–42 kHz) that create microscopic cavitation bubbles in a cleaning solution. When these bubbles collapse, they produce tiny shock waves that dislodge dirt and tarnish from surface crevices. The process is gentle on the silver itself but remarkably effective at reaching areas that no cloth or brush can access.
Home ultrasonic cleaners cost between $25 and $150. The $25 models work fine for occasional use — I've had one running for two years without issues. The main differences at higher price points are larger tank capacity, heating elements (warm solution cleans faster), and more consistent frequency output.
Use plain warm water with a drop of mild dish soap. Don't add ammonia or harsh chemicals — they can damage the transducer and any adhesives holding stones in place. Run cycles of 3 to 5 minutes. Check progress between cycles rather than running it once for 20 minutes, because prolonged ultrasonic exposure can loosen stone settings over time.
There are a few things ultrasonic cleaners cannot do. They won't remove heavy tarnish on flat surfaces — they're not abrasive. They're also not safe for porous gemstones like turquoise, opal, or pearls, which can absorb water and crack. For sterling silver chains, though, they're unmatched. A chain that takes 15 minutes to polish by hand comes out looking new after one 3-minute cycle.
Method 5: Commercial Silver Dip Solutions
Silver dip is the nuclear option — fast, thorough, and not something to use casually. These solutions typically contain thiourea and dilute acids that dissolve silver sulfide chemically. You literally dip the piece in for a few seconds, pull it out, rinse, and the tarnish is gone.
The downside is that the same chemistry that removes tarnish also removes a thin layer of silver with each dip. After 10–15 uses on the same piece, you'll start to notice surface pitting, especially on high points and engraved details. I reserve this for pieces with deep tarnish in hard-to-reach areas where no other method is practical.
Safety matters here. These solutions are toxic if ingested and can cause skin irritation with prolonged contact. Use in a ventilated area, wear nitrile gloves, and never dip pieces with porous stones or organic materials (shell, bone, wood, pearl). The solution can seep into stone settings through microscopic gaps and cause discoloration that's difficult to reverse.
Preventing Tarnish: What Actually Works
All five methods above deal with tarnish after it forms. But the most effective silver care strategy is slowing it down in the first place. After testing various approaches for months, here's what makes a measurable difference.
Anti-tarnish strips — those small paper squares you find in jewelry boxes — work surprisingly well. They contain activated charcoal and sulfur-absorbing compounds that neutralize the airborne sulfur before it reaches your silver. Replacing them every 6 months in a closed jewelry box extends the time between polishing sessions by roughly 3x compared to no protection at all.
Zip-lock bags are underrated. Storing each piece in its own sealed polyethylene bag with the air squeezed out dramatically reduces tarnish formation. The plastic barrier blocks most airborne sulfur compounds. I store my everyday silver pieces this way and only need to polish them every 2–3 months instead of every 2–3 weeks.
Chalk is an old trick that has some science behind it. Calcium carbonate absorbs moisture and some sulfur compounds. A piece of blackboard chalk in your jewelry box won't prevent tarnish entirely, but it slows the process measurably — especially in humid climates. Replace the chalk every few months when it starts looking powdery or cracked.
Silica gel packets serve a similar purpose by controlling humidity. Keep a few in your jewelry storage area and replace them when they change color (most silica gel has an indicator dye that shifts from blue to pink when saturated).
What to Avoid
A few common silver cleaning mistakes cause more damage than the tarnish itself. Never use abrasive scrubbers — steel wool, scouring pads, or even baking soda applied dry will leave permanent scratches. The DIY toothpaste method is safe only with a soft brush and basic paste formula; anything with baking soda granules or microbeads applied directly is too harsh for sterling.
Avoid bleach at all costs. Even brief contact with bleach causes irreversible blackening of silver — not surface tarnish that can be polished away, but a chemical reaction that penetrates the metal. The same goes for chlorinated pool water. If you wear silver jewelry to a pool or hot tub, rinse it immediately afterward.
Finally, don't over-clean. Some tarnish on textured or antique pieces actually enhances the visual depth of the design. If you polish every time you see the slightest discoloration, you'll gradually wear down surface details. A light patina on an engraved ring or a textured cuff bracelet often looks better than factory-bright silver.
Comments