How to Photograph Jewelry for Instagram: A Complete Realistic Guide
Two hours. That's how long I spent setting up, shooting, and editing a batch of photos for my handmade ring collection. I was genuinely excited — I'd arranged everything on a white marble slab, used natural light from my bedroom window, and even scattered some dried lavender around for aesthetic. I posted the best shot on Instagram with a caption I'd spent twenty minutes crafting.
Twelve likes. In three days.
I refreshed the app so many times my thumb started to cramp. Meanwhile, some other jewelry accounts I followed were pulling in hundreds of likes on photos that — honestly — didn't look that much better than mine. What was I doing wrong?
Fast forward three months and a lot of trial and error later, my average post now sits around 80 likes with consistent saves and shares. Not viral numbers, but real growth from an account with under 2,000 followers. Here's everything I actually learned, stripped of the fluff.
Phone vs. Camera: You Probably Don't Need That DSLR
When I first started researching jewelry photography instagram tips, every article told me I needed a DSLR, a macro lens, and a light tent. I almost dropped $800 on gear before a friend who runs a successful Etsy shop told me something that saved my wallet: "Dude, just use your phone."
Modern smartphones are absurdly capable. I shoot everything on an iPhone 15 Pro, and the macro mode alone handles most of what I need for close-up detail shots. The key isn't the camera — it's understanding how to use the one you have. Clean your lens (seriously, do this every time — it makes a shocking difference), tap to focus on the jewelry, and lock exposure by long-pressing the screen.
If you do want a camera later, start with a used mirrorless body and a 60mm macro lens. But that's a "phase 2" purchase. Your phone is more than enough to build a solid Instagram presence from scratch.
Lighting: The Only Thing That Actually Matters
I'm putting this here because I wish someone had slapped me with it earlier. Lighting is maybe 70% of a good jewelry photo. You can have a perfect background and composition, but if the light is bad, the photo looks amateur. Period.
Natural Window Light Is King
Position your setup near a large window. Not in direct sunlight — you want soft, diffused light. Direct sun creates harsh shadows and blown-out highlights that make metal look terrible and gemstones lose their color depth.
Cloudy Days Are Your Secret Weapon
Counterintuitive, but cloudy days produce the most even, flattering light for jewelry photography. The clouds act as a giant natural diffuser. I actually check the weather forecast before planning a shoot day now. Overcast? Perfect shooting conditions.
What About Artificial Light?
If you're shooting at night or your workspace has terrible natural light, a ring light can work in a pinch — but position it at an angle, not head-on. Head-on ring lighting creates that flat, lifeless look that screams "stock photo." A cheap LED panel with a diffuser sheet positioned at 45 degrees will give you much better results for around $30.
Avoid mixing light sources. If you're using window light, don't also turn on your desk lamp. Different color temperatures will make your white balance a nightmare to fix later.
Backgrounds: Set the Mood Without Spending a Fortune
Your background communicates your brand before anyone reads a single word of your caption. Here's what I've tested and what actually works:
White or Light Gray Card Stock — Clean and Minimal
A sheet of white or pale gray card stock from any craft store gives you that crisp, gallery-like look. It's perfect if your jewelry is colorful or intricate — the neutral background lets the pieces speak for themselves. Pro tip: use matte card stock, not glossy. Glossy reflects light and creates weird bright spots.
Marble Texture — Luxury Vibe
I bought a marble contact paper and wrapped it around a piece of foam board. Total cost: $12. It looks expensive in photos and works beautifully for gold and silver pieces. The subtle veining adds visual interest without competing with the jewelry.
Wood Grain — Warm and Handmade
A piece of reclaimed wood or even a nice cutting board can give your photos that artisan, small-batch feel. This works especially well for bohemian, earthy, or nature-inspired jewelry. The warm tones complement copper, brass, and natural stone pieces.
Lace or Linen Fabric — Vintage Charm
I draped a piece of antique lace over a flat surface for a pearl necklace shoot once, and it was one of my best-performing posts. Fabric backgrounds add texture and depth, but keep the pattern subtle. You want people to notice the jewelry, not get lost in the fabric.
Shooting Angles: Mix It Up or Look Like a Template
Flat Lay (Top-Down)
The most common jewelry photo angle, and for good reason — it shows the piece clearly and works great for Instagram's square format. But if every single post is a flat lay, your feed becomes visually monotonous. Use flat lays for overview shots and collection displays, not for everything.
45-Degree Angle — The "Real Life" Shot
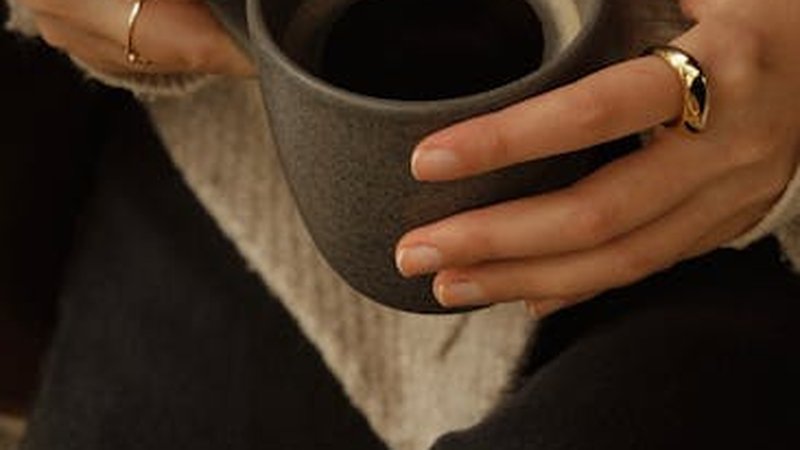
This is my personal favorite. Shooting at 45 degrees mimics how someone would naturally look at jewelry on a table or in a display case. It adds dimension and feels more relatable. I often shoot hands wearing rings or bracelets at this angle — it helps potential customers imagine the piece on themselves.
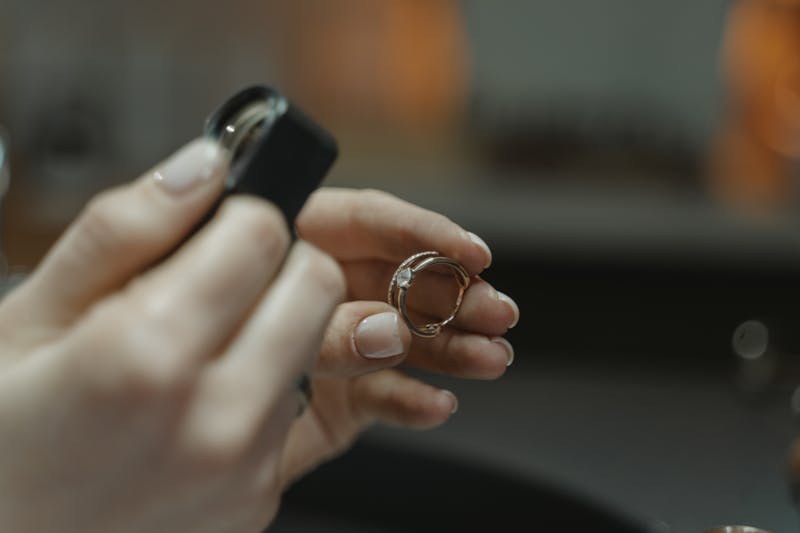
Macro — Show Off Your Craft
Get close. Really close. Macro shots of texture, stone inclusions, or solder joints tell a story about the quality of your work. These detail shots perform surprisingly well on Instagram because they're the kind of thing people save for reference. Use your phone's macro mode or a clip-on macro lens if your phone doesn't have one built in.
Props: Enhance, Don't Overwhelm
I went through a phase where every photo had like eight props in it. Dried flowers, a vintage book, coffee cup, scattered beads, a piece of driftwood — the frame was so cluttered you could barely find the necklace. Lesson learned: one or two props max, and they should support the jewelry, not compete with it.
Good prop combinations I keep going back to:
Dried eucalyptus or lavender sprigs alongside silver pieces. A single open book page with a ring resting on it. A linen napkin with a subtle fold. Fresh green leaves (not too many) for nature-inspired collections. A simple ceramic bowl holding loose stones next to the finished piece.
The prop should answer the question "what mood does this jewelry belong in?" If you can't answer that about a prop, leave it out.
Editing: Keep It Simple, Keep It Consistent
I edit everything in Snapseed. It's free, it's powerful enough, and it keeps me from overthinking the process. The editing routine that works for me takes about two minutes per photo:
First, adjust brightness to make the jewelry pop without washing out the background. Then bump contrast slightly — maybe +10 to +15 — to add depth. Pull the warmth slider a touch toward cool if the photo looks too yellow from indoor lighting. Finally, use the "Selective" tool to brighten just the jewelry piece if the background exposure is slightly different.
That's it. I don't use heavy filters. I don't add vignettes. I don't crank the saturation until gemstones look neon. The goal is to make the photo look like what the jewelry actually looks like in good lighting — because that's what builds trust with buyers. When someone receives your piece and it looks exactly like the photo, that's a repeat customer in the making.
If you want a consistent feed aesthetic, pick one editing approach and stick with it. My feed has a slightly cool, bright tone across all posts. It's subtle, but it makes the grid feel cohesive when someone scrolls through your profile.
Instagram Strategy: Posting Is Only Half the Battle
Consistent Posting Schedule
I post at 6:00 PM and 12:00 PM EST, alternating days. I picked these times after two weeks of testing and checking my Instagram Insights. Your audience might be different — check your own data and experiment. The key word is "consistent." Posting five times in one day and then vanishing for two weeks does more harm than posting twice a week, every week.
The Grid Matters
Before posting, I check how the new photo will look in my grid. I try to alternate between flat lays, detail shots, and lifestyle-style images so the grid doesn't become a wall of identical compositions. Color variety helps too — I won't post three cool-toned photos in a row if I can help it.
Reels Are Worth the Effort
My most-watched Reel is a 15-second clip of me soldering a ring, with no talking, just the sound of the torch and some text overlay. It got 2,400 views and brought in 30 new followers. People love seeing the process. You don't need to be a videographer — just prop your phone up, hit record, and show whatever part of your process looks interesting. Polishing, stone setting, packaging orders — it all works.
Captions and Hashtags
I stopped writing generic captions like "Love this new piece! Available in the shop." Now I write short, specific paragraphs: what inspired the piece, what materials I used, or a quick tip related to the design. The more specific and genuine, the better the engagement.
For hashtags, I use a mix of broad and niche tags. Something like #jewelryphotography #handmadejewelry #sterlingsilverring #jewelryphotographer #smallbusinessjewelry — a blend of high-volume discovery tags and smaller community tags where my content actually gets seen. I rotate them so I'm not using the exact same set every post.
My Numbers After Three Months
Month one was rough. Average likes per post: 12-18. A couple of posts got zero engagement beyond my immediate friends. I almost quit Instagram entirely.
Month two, after implementing the lighting and background changes: average likes jumped to 35-45. I started getting comments from strangers. Two people asked about custom orders through DMs.
Month three, after nailing my editing consistency and starting Reels: average likes hit 70-85. My follower count went from 320 to 1,847. I made my first three sales directly attributed to Instagram — people found me through a Reel, scrolled my feed, and DM'd me to buy.
Is 80 likes a lot? Not really. But for a small handmade jewelry account with under 2,000 followers, a consistent 80 likes means your content is resonating. It means your ideal customer is finding you. And that's the whole point.
The biggest thing I wish I'd known from day one: stop obsessing over viral moments and focus on making every post slightly better than the last one. The compound effect of consistently decent content beats one lucky viral hit every time.
Now go take some photos. And clean your phone lens first.
Comments