Master Crystal Photography: Easy Phone Tips
May 14, 2026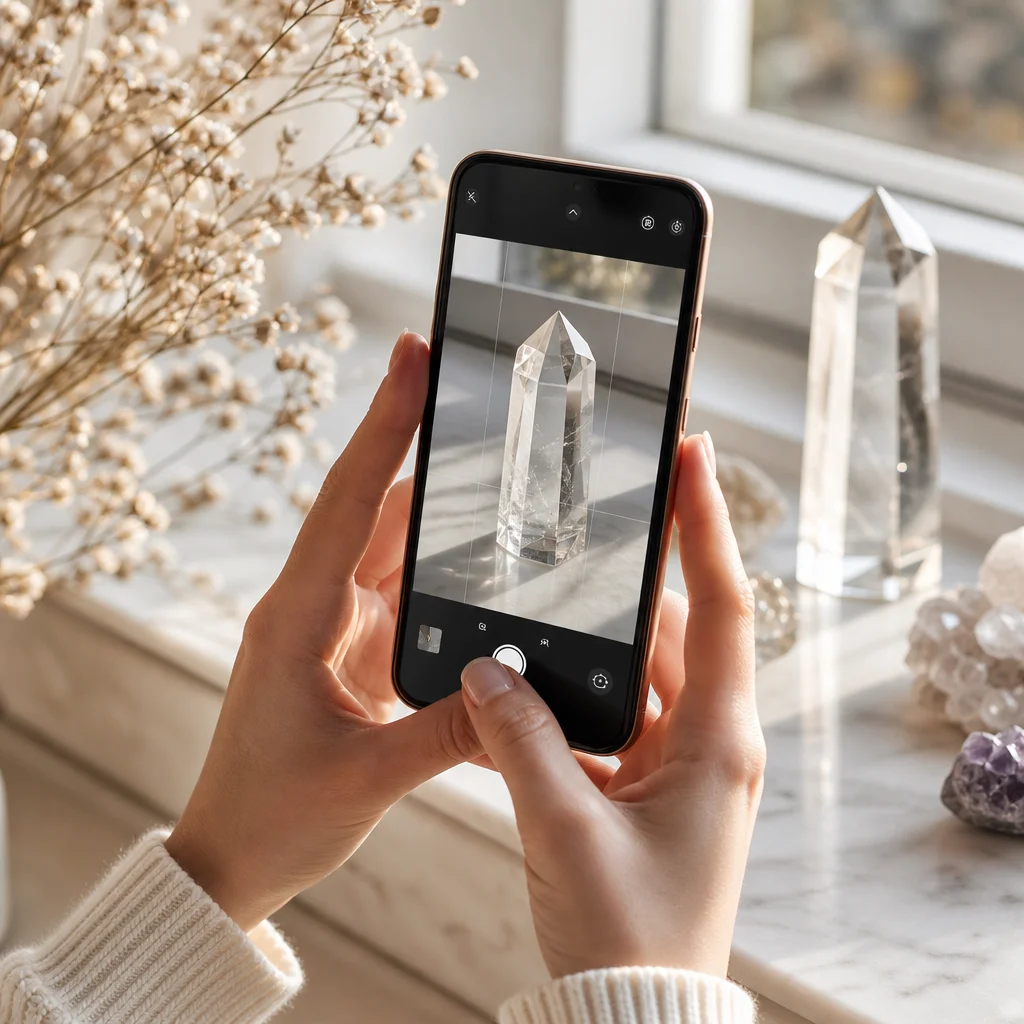
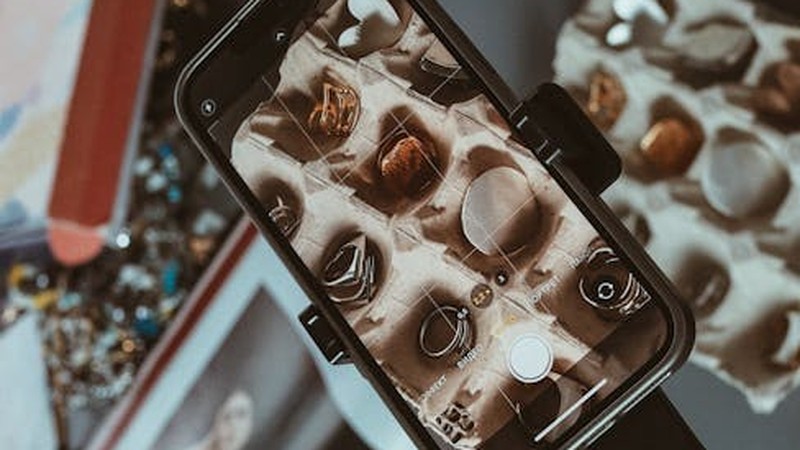
How to Photograph Crystals: Tips That Don't Require Expensive Equipment
Crystal photography is frustrating. You pick up a piece that looks incredible in your hand — flashes of blue, internal rainbows, deep color — and when you photograph it, you get a blurry, washed-out blob that could be a dirty ice cube. I've been there. Hundreds of times.
After three years of photographing crystals for an online shop and social media, I've figured out what actually matters. None of it requires a $2000 camera. Most of it doesn't even require a camera — a phone from the last three years will do fine if you understand a few principles.
The Single Most Important Thing: Light Direction
Crystals interact with light. That's their whole thing. If the light is wrong, the crystal looks wrong. Specifically:
- Front lighting (flash pointed at the crystal): Almost always terrible. It flattens the image, washes out color, and creates harsh reflections on polished surfaces.
- Back lighting (light behind the crystal): Great for translucent stones (quartz, calcite, fluorite). Place the crystal between your camera and a light source to show internal features and color depth.
- Side lighting (light from the left or right): Best for showing texture, striations, and surface details on raw crystals. A single desk lamp to one side creates shadows that reveal the three-dimensional form.
My default setup: one cheap desk lamp from the left side, natural window light from behind if it's a translucent stone. Total equipment cost: $12 for the lamp.
Phone Camera Settings That Matter
You don't need to shoot in RAW or buy a third-party camera app. But two settings make a huge difference:
Turn off the flash
Always. Without exception. Use any other light source instead. Your phone's LED flash is the enemy of crystal photography.
Tap to focus, then adjust exposure
On both iPhone and Android, tapping the screen sets the focus point AND the exposure. After tapping to focus on the crystal, slide your finger up or down to adjust brightness. Crystals often need slightly less exposure than the auto setting — overexposure kills color saturation in translucent stones.
Use a white background
A plain white surface (copy paper, a white plate, a light pad) serves two purposes: it provides clean contrast, and it gives your camera a neutral reference point for color balance. Colored backgrounds affect how the camera perceives the crystal's color.
Specific Crystal Types, Specific Approaches
Transparent/Clear Stones (Clear Quartz, Apophyllite, Danburite)
These are the hardest to photograph because they're defined by what light does through them, not on their surface. Use back-lighting: place the crystal on a light box or hold it up to a window. The goal is to show inclusions, internal fractures, and clarity. A cheap light tracing pad ($15-20 on Amazon) is the best investment you can make for this type of photography.
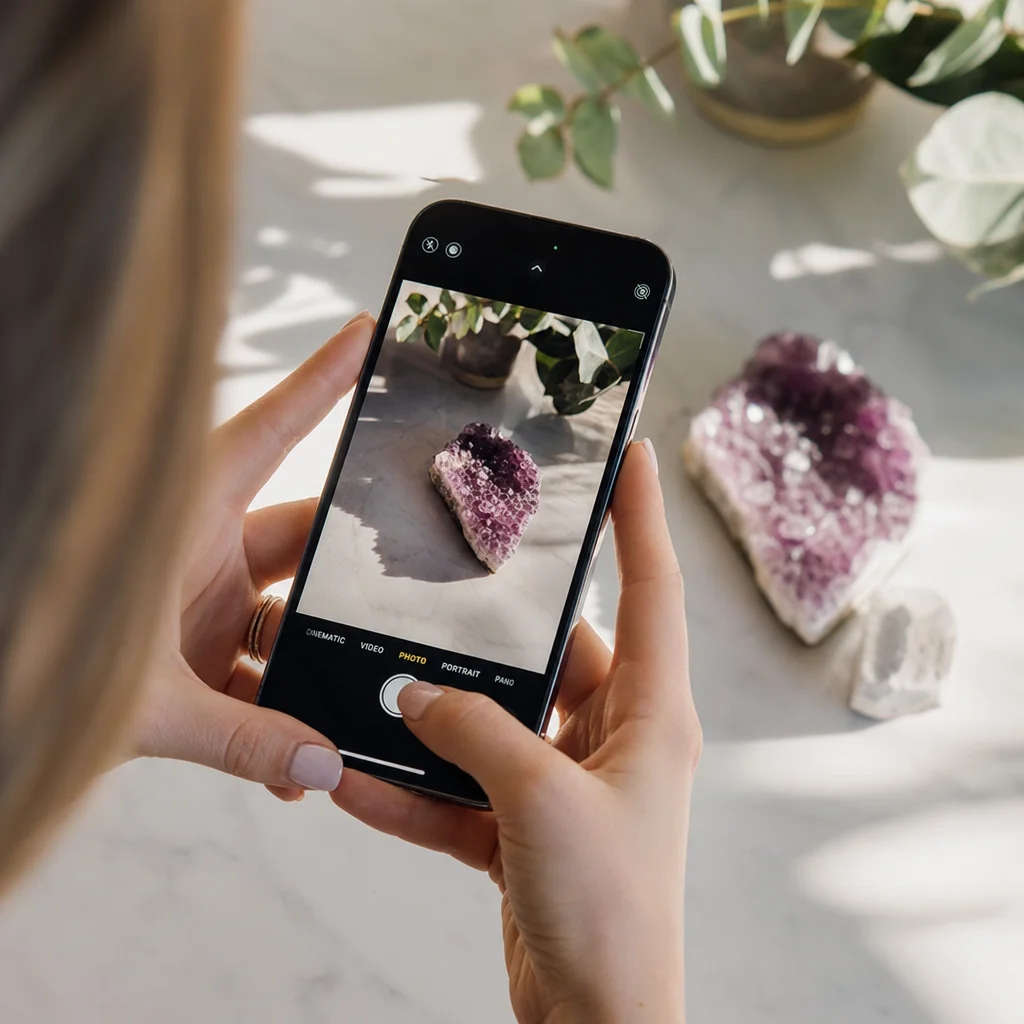
Translucent Colored Stones (Amethyst, Rose Quartz, Fluorite)
Side lighting with a slightly bright background. You want to show both the surface texture and the internal color glow. The color should look deep and saturated, not pale and washed out — if it looks pale, reduce the exposure slightly.
Opaque Stones (Black Tourmaline, Lapis Lazuli, Malachite)
These are actually the easiest. Side lighting from one direction creates shadows that show the stone's shape and surface texture. No need for fancy lighting setups. A single lamp at a 45-degree angle works.
Iridescent/Play-of-Color Stones (Labradorite, Moonstone, Opal)
The most frustrating category. The flash of color that looks amazing in person often refuses to show up in photos. Solution: slowly rotate the crystal under a single light source while watching through your camera. The play of color appears at very specific angles. When you see it, freeze and shoot. Take 20-30 photos from slightly different angles and pick the best one.
For labradorite specifically, I've found that the blue flash shows up best with a single overhead light source at about 60 degrees from horizontal. Direct overhead (90 degrees) flattens it; too low an angle creates too much shadow.
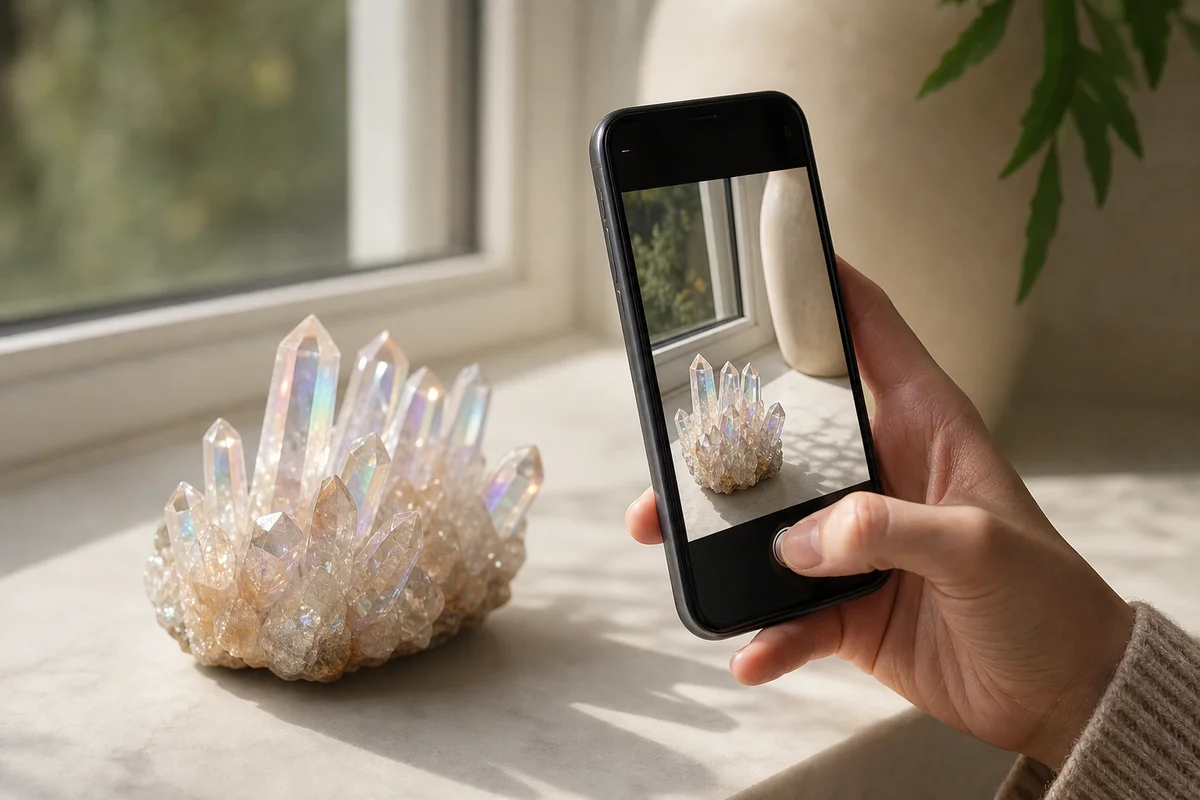
Clusters and Geodes
These need depth of field — getting the front crystals and back crystals both in focus. On a phone, this means tapping to focus on the middle of the cluster and making sure you're close enough that the background blurs but the whole cluster stays sharp. If your phone has a "portrait" mode, it can help blur the background while keeping the subject sharp.
Background and Composition
Backgrounds I use regularly:
- White paper: Clean, neutral, works for everything
- Black velvet or felt: Creates a "floating" effect. Great for单个 bright or colorful stones. The dark background absorbs light, making the crystal pop.
- Slate or dark stone tile: Adds natural texture without competing with the crystal. $5 at a hardware store.
- Sand or salt: For a naturalistic setting. Pour a thin layer on a plate and nestle the crystal in it.
Composition tips:
- Fill the frame. The crystal should take up at least 70% of the image. Tiny crystal in a huge white space looks like an eBay listing, not a photograph.
- Shoot from slightly above, not straight on. A 20-30 degree angle shows more of the crystal's three-dimensional form.
- Odd numbers look better than even numbers in group shots. Three or five crystals arranged with varied heights is more visually interesting than two or four.
Post-Processing (Minimal, But Important)
Don't over-edit. Heavy filters make crystals look fake. Three adjustments that help:
- Crop: Tighten the composition. Remove distracting background elements.
- Brightness/contrast: Slight contrast boost makes textures more visible. Slight brightness reduction makes colors richer.
- White balance: If the crystal looks too yellow/warm or too blue/cool, adjust the temperature slider until colors look natural. This is where shooting on a white background helps — you can see whether the white is actually white.
That's it. No saturation boost, no sharpening, no vignette. If the crystal looked good in person, good lighting and these three adjustments are enough.
What I've Learned After Thousands of Photos
The biggest lesson: take more photos than you think you need. Every crystal looks different from different angles and under different lighting. For one product listing, I typically shoot 30-50 photos and select the best 3-4. The ratio of usable to total is always lower than you expect.
Also: your eyes see differently than your camera does. The flash of labradorite blue that's vivid to your naked eye may not show up in the first 20 shots. The internal rainbow in a quartz point might only be visible from one specific angle that you haven't tried yet. Patience and quantity are the two biggest factors in crystal photography quality, not equipment.
For a comprehensive overview, see our Ultimate Crystal Guide for Beginners.
Optimizing Your Phone Camera for Crystal Photography
Now that we've covered the basics of lighting and camera settings, let's dive a bit deeper into optimizing your phone camera for crystal photography. The key is to make your phone's camera as much like a DSLR as possible, without the bulk and expense.
Use a Macro Mode
Most smartphones have a macro mode designed to take close-up shots. This mode is perfect for crystal photography as it focuses on the fine details of the crystal. On an iPhone, it's the little flower icon in the camera app. On Android, it's often the first option in the camera settings.
Consider a Phone Clip-on Lens
Clip-on lenses can dramatically improve your phone's camera capabilities. There are wide-angle lenses, fisheye lenses, and even macro lenses specifically designed for phone cameras. These lenses can help you capture more of the crystal or focus on different aspects of its structure.
Post-Processing Your Crystal Photos
Even with the best settings and lighting, your crystal photos might still need a little touch-up. Here's how to make them pop:
Adjusting Brightness and Contrast
Overexposure is a common issue with crystal photography. Adjusting the brightness and contrast can help. Most photo editing apps have sliders for these settings. A little goes a long way; be careful not to overdo it and lose the crystal's natural beauty.
Color Correction
Colored backgrounds can skew the color of your crystal photos. Use the color correction tool in your editing app to balance the colors. This is especially important for clear stones, where the color is a key feature.
Adding a Filter
Filters can add a unique touch to your photos. There are apps that offer a variety of filters specifically designed for crystal photography. Just be cautious; too many filters can make your photos look unnatural.
Crystal Photography Tips for Different Environments
Photographing crystals isn't just about the equipment and settings; it's also about the environment. Here are some tips for different scenarios:
Indoors
Indoor photography is great for control, but you might face challenges with lighting. Use a softbox or a diffuser to soften the light and avoid harsh shadows. If natural light is available, use it to your advantage. Position your crystal near a window with the light coming from behind or the side.
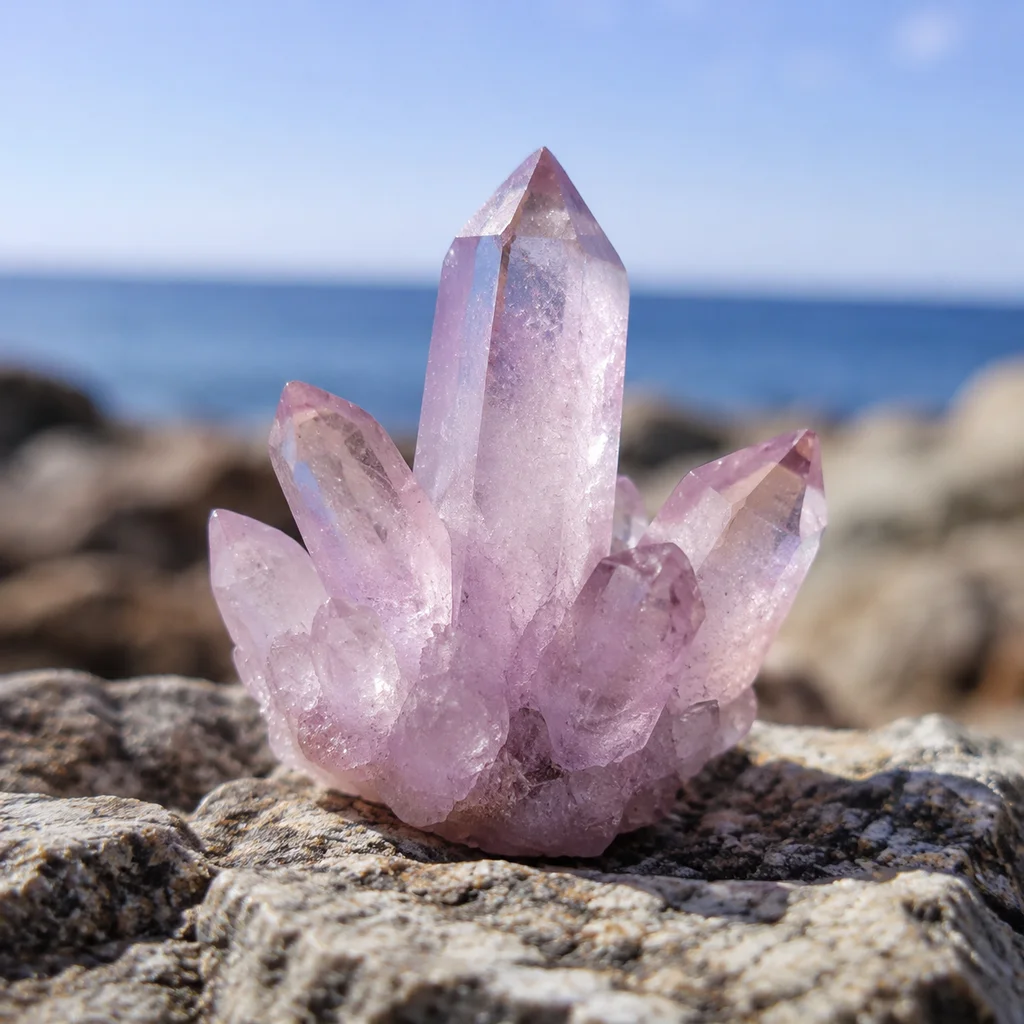
Outdoor photography is all about the weather and the time of day. Early morning or late afternoon light is soft and diffused, making it ideal for crystal photography. Be prepared for changing light conditions and use a reflector to bounce light back onto your subject if needed.
Crystal Photography Gear Checklist
While you don't need a lot of gear, having the right tools can make a big difference:
- Phone with a good camera
- Clip-on lens (macro, wide-angle, fisheye)
- Softbox or diffuser
- Reflective surface (white foam board, etc.)
- Light stand (optional, for stability)
Crystal Photography for Beginners: A Quick Guide
Here's a quick rundown for beginners who want to get started with crystal photography:
- Choose your crystal: Pick a stone that you're excited about and that has interesting features you want to capture.
- Set up your lighting: Use a combination of natural and artificial light to get the best results.
- Adjust your camera settings: Turn off the flash, use the macro mode, and adjust exposure as needed.
- Take multiple shots: You can always delete the bad ones later.
: Use a photo editing app to enhance your images.
Crystal Photography: A Personal Passion
Photographing crystals has become more than just a hobby for me. It's a way to connect with the natural world and the beauty it holds. Each crystal tells a story, and capturing that story through photography is incredibly rewarding.
There's something magical about the way light interacts with crystals. It's as if they're alive, glowing with an inner light. That's what I aim to capture in my photos — the essence of each stone, its unique character, and the beauty that lies within.
Comparing Crystal Photography Techniques
| Technique | Description | Best for |
|---|---|---|
| Front Lighting | Pointing the flash directly at the crystal | Not recommended |
| Back Lighting | Lighting from behind the crystal | Translucent stones |
| Side Lighting | Lighting from the side | Raw crystals, texture |
| Macro Mode | Close-up photography | Detail shots |
| Post-Processing | Editing photos after capture | Enhancing images |
FAQ
What's the best time of day for outdoor crystal photography?
What's the best time of day for outdoor crystal photography?
Early morning or late afternoon when the light is soft and diffused. This avoids harsh shadows and overexposure.
Can I use a regular light bulb for crystal photography?
Can I use a regular light bulb for crystal photography?
Yes, but a softbox or diffuser will help soften the light and reduce harsh shadows.
How do I clean my crystals before photographing them?
How do I clean my crystals before photographing them?
Use a soft cloth and gentle cleaning solution. Avoid using harsh chemicals or abrasive materials.
Should I use a tripod for crystal photography?
Should I use a tripod for crystal photography?
A tripod can be helpful for stability, especially if you're using a clip-on lens or editing your photos extensively.
Can I use any photo editing app for crystal photography?
Can I use any photo editing app for crystal photography?
Most photo editing apps have the basic tools you need. Look for apps with features like brightness, contrast, color correction, and filters.


Comments