Metal Forging Basics for Jewelry Making: A Complete Beginner's Guide
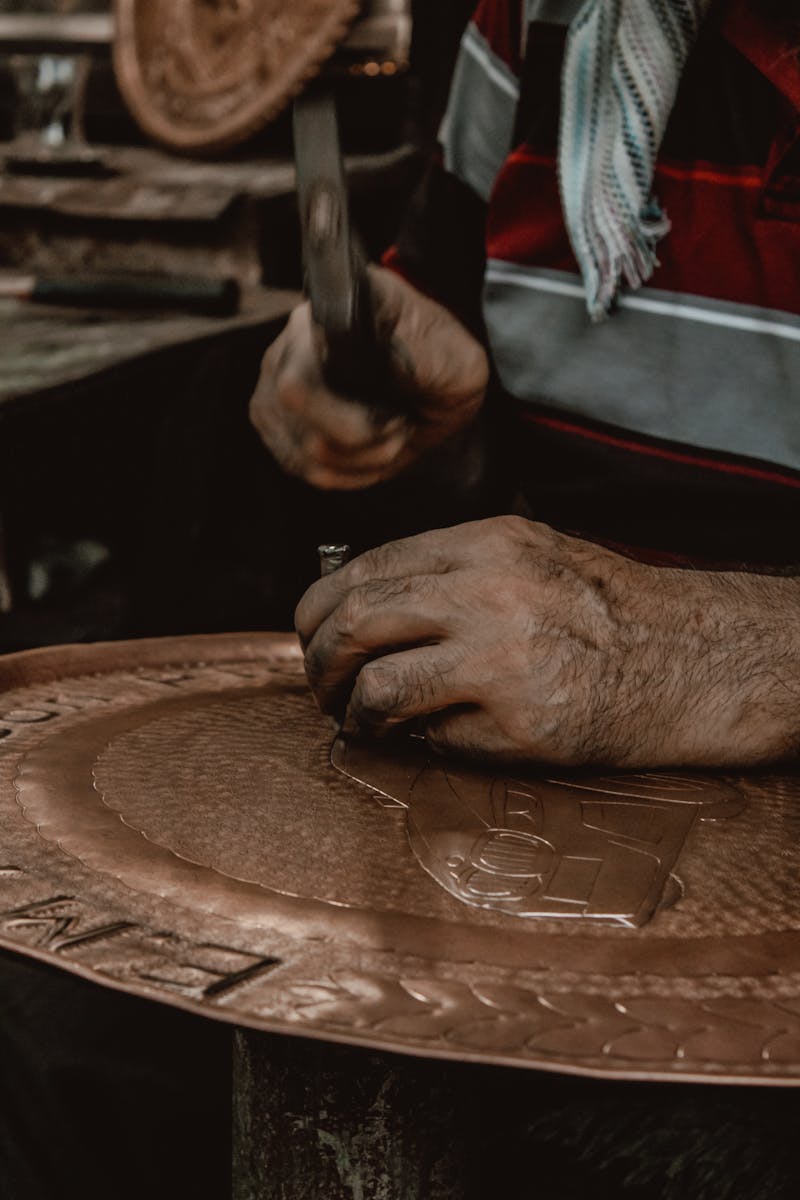
The first time I hit a piece of copper with a hammer, I was terrified. The hammer bounced off at a weird angle, the copper flew across my desk, and I dented the table. I was pretty sure I'd chosen the wrong hobby.
But I picked up the copper again, held it tighter this time, and hit it straight down. The metal flattened and spread under the hammer. It felt like magic. That simple act — hitting metal with a hammer to change its shape — is called forging, and it's one of the oldest and most satisfying jewelry-making techniques there is.
You don't need a forge or a kiln or years of training. You need a hammer, some metal, and a hard surface. That's the starting point for texturing, shaping, and forming metal into jewelry. Here's how to get started without spending a fortune or losing a finger.
What You Actually Need to Start Forging
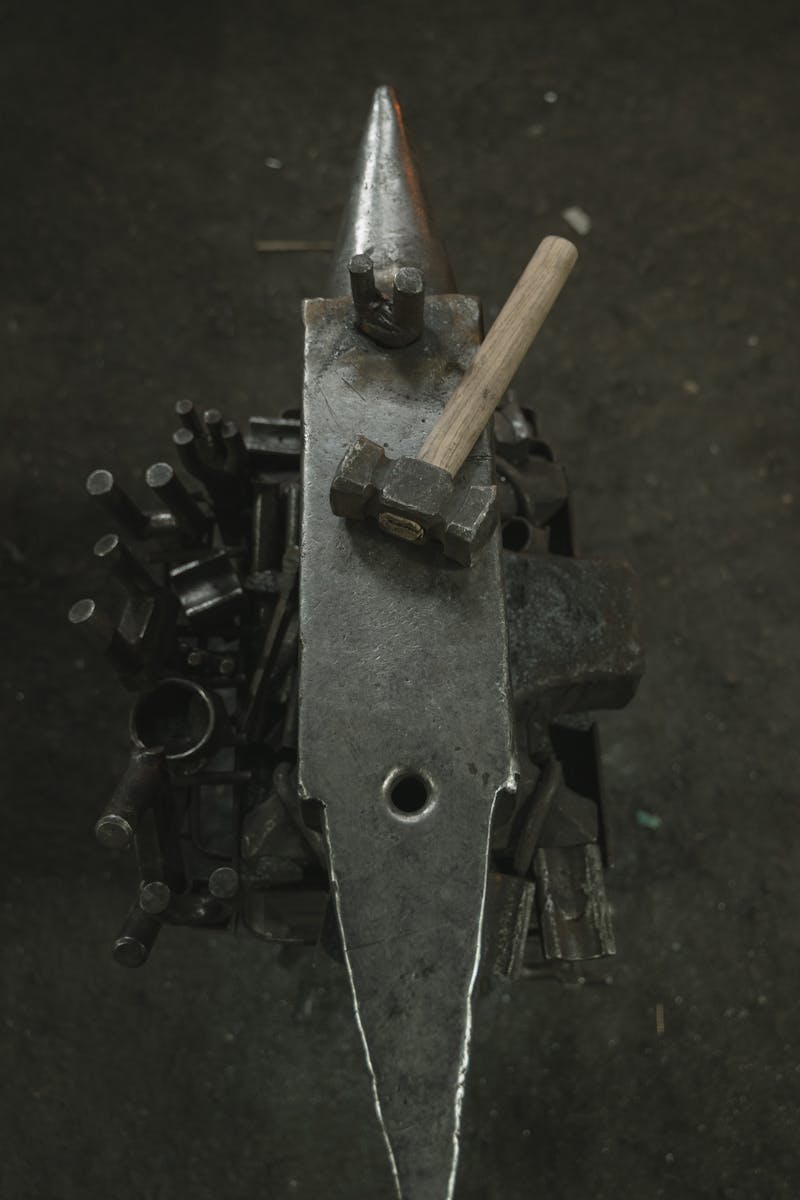
The Hammer
You can't forge with just any hammer. The hardware store hammer you use for nails will work in a pinch, but it's not ideal — the face is usually too large and too smooth for controlled jewelry work.
- Chasing hammer (25-30mm face): The most versatile starter hammer. One flat face for smoothing and one ball-peen face for texturing. Costs $15-30. This is the one hammer I'd recommend buying first.
- Raising hammer: A cross-peen hammer with a narrow, slightly rounded face. Used for forming metal into curves and domes. Not essential for beginners but useful as you advance.
- Texturing hammer set: A set of 3-6 hammers with different patterned faces (dots, lines, checkerboard, etc.). These create decorative textures on metal surfaces. Costs $20-40 for a basic set.
- Rawhide or nylon mallet: For shaping metal without leaving marks. Used after you've textured a surface and don't want to flatten the pattern. Costs $10-20.
Start with a chasing hammer. It does 80% of what a beginner needs.
The Anvil or Bench Block
You need a hard, smooth surface to hammer against. Options from cheapest to best:
- Steel bench block: A 2×2×1 inch block of polished steel. $8-15. Works for basic flattening and texturing. The downside: it's small and can bounce around. Tape it to your desk or put it on a rubber mat.
- Steel bench block on rubber pad: The same steel block mounted on a rubber base. The rubber absorbs shock and noise, and keeps the block from sliding. $15-25. This is the best value option.
- Mini anvil (horn anvil): A small steel anvil with a horn (curved surface) for forming curves. $25-50. Overkill for a beginner but useful for more advanced forming work.
- Stump or wooden block: A piece of hardwood for forming work where you want the metal to sink into the surface. Free if you have access to scrap wood. Not for hammering directly — use it with a nylon mallet.
Get the steel block on rubber pad. It's the most practical starter option.
The Metal
Start with copper. It's cheap, soft enough to work easily, and takes textures beautifully. Buy 20-24 gauge (0.5-0.8mm thick) copper sheet or blanks. 24 gauge is easiest for beginners — thin enough to shape without much force, thick enough to hold its form.
Once you're comfortable with copper, move to brass (slightly harder, golden color), then bronze (harder still, warm brown tone). Silver and gold-fill come later — they're expensive, and you want to make your mistakes on $0.50 worth of copper, not $15 worth of silver.
Safety Equipment
- Safety glasses: Non-negotiable. Small metal fragments and tool chips can fly when you're hammering. $5-10.
- Ear protection: Hammering metal is loud. Earplugs cost $1. A decent pair of earmuffs costs $15. Your hearing is worth more than either.
- Finger protection: Not required, but cut-resistant gloves help when you're handling sheet metal edges. $5-10 for a pair.
Essential Extras
- Bench pin: A small wooden wedge that clamps to your desk edge. Used for supporting metal while you saw, file, or work on it. $5-10. Much better than trying to hold metal in your hand.
- Jeweler's saw and blades: For cutting shapes out of sheet metal. Not strictly forging, but you'll want to cut shapes before texturing them. Saw frame $10-15, blades (2/0 size for 24 gauge) $5-10 per dozen.
- Files: Needle files for smoothing edges after cutting. A basic set of 6 costs $8-12.
- Sandpaper: 220, 400, and 600 grit for finishing surfaces. $5 for assorted pack.
- Steel wool (grade 000 or 0000): For final polishing before applying patina or sealant. $3-5.
- Marker or scribe: For drawing shapes on metal before cutting. A fine-tip permanent marker works. $2.
Total starter investment: $80-120 for everything listed. You can start even cheaper ($30-40) with just the hammer, bench block, copper, and safety glasses.
Basic Forging Techniques
Technique 1: Flattening (Planishing)
Place the metal on your bench block. Hold the hammer loosely — tight grip = less control and more fatigue. Raise the hammer about 6 inches and strike the metal straight down. Rotate the metal slightly and strike again, slightly overlapping the first hammer mark.
Continue rotating and striking until the surface is uniformly flat. The goal is even, overlapping hammer marks that create a subtle textured surface. If you want a mirror-smooth finish, you'd follow this with filing and sanding — but for textured jewelry, the hammer marks are the point.
Key points: strike straight down (angled strikes bend the metal), overlap your blows, and don't hit too hard. Light, controlled strikes are better than heavy, wild ones. You have more control than you think — it just takes a few minutes of practice to find the right touch.
Technique 2: Texturing
Texturing is where forging gets creative. By using different hammer faces, you can create dozens of surface patterns on metal:
- Ball-peen texture: The round face of your chasing hammer creates small circular indentations. Overlap them slightly for a pebbled, organic look. This is probably the most popular jewelry texture.
- Flat hammer texture: The flat face creates subtle facets when you angle your strikes. Random, varied angles create a "hammered" look that's popular in rustic and organic styles.
- Cross-peen texture: The narrow edge of a cross-peen hammer creates parallel lines. Rotate the metal 90 degrees between passes for a crosshatch pattern.
- Patterned hammers: Each patterned face creates its own unique texture — dimples, waves, stars, ridges. Experiment with different pressures and angles.
- Nail set texture: A nail set or center punch struck lightly creates small round dots. Perfect for stippled or dotted patterns.
Pro tip: before texturing your final piece, practice on scrap copper. Hit it with every hammer and tool you have at different pressures. Label each texture with a marker. This becomes your personal texture reference sheet — invaluable when you're designing a new piece.
Technique 3: Dishing (Forming Curves)
Dishing is the process of forming flat metal into a curved shape — like a dome or a bowl. You need a dishing form (a hardwood block with carved-out depressions) or a steel dishing block, and a rawhide or nylon mallet.
Place the metal over a depression in the dishing form. Strike the center with the mallet, working from the center outward in a spiral. The metal will gradually sink into the form and take on a curved shape.
If you don't have a dishing form, you can use the rounded end of a stump, the bottom of a steel bowl, or even a depression carved into a block of hardwood with a Dremel tool. The surface needs to be hard enough to resist the metal but not so hard that it dents the metal.
Doming blocks (a steel block with graduated half-sphere depressions) are the professional tool for this. They're $30-50 and produce consistent, symmetrical domes. Worth buying when you're ready to make matching earrings or pendants.
Technique 4: Cold Connections (Riveting)
Riveting is a way to join two pieces of metal without soldering. It's perfect for beginners who don't want to invest in a torch setup yet, and it creates a distinctive industrial look.
Basic rivet process:
- Drill matching holes in both pieces of metal (use a hand drill or drill press with a small bit — 1mm to 1.5mm for jewelry-scale rivets)
- Cut a piece of wire (copper, brass, or silver) slightly longer than the combined thickness of both pieces
- Insert the wire through both holes
- Place the assembly on your bench block (metal side down, wire sticking up)
- Use the ball-peen end of your chasing hammer to flatten the protruding wire end, spreading it into a mushroom shape that holds the pieces together
- Flip over and repeat on the other side
The result is a visible rivet head on both sides, creating a secure mechanical connection. Practice on scrap pieces first — it takes a few tries to get the pressure right. Too little and the rivet is loose; too much and you distort the surrounding metal.
Technique 5: Bending and Forming
Wire and thin sheet metal can be bent into curves, angles, and shapes using just your hands and a few simple tools:
- Round-nose pliers: Create loops and curves in wire. The graduated cone shape lets you make different sized loops. $8-12.
- Flat-nose pliers: Make sharp bends and hold work. $8-12.
- Chain-nose pliers: Tapered tips for reaching into tight spaces. $8-12.
- Bracelet mandrel (or a dowel/pipe): For forming bracelets and rings to specific sizes. A wooden dowel works for practice; a steel mandrel ($15-30) is more precise.
- Ring mandrel: A graduated steel cone for sizing and forming rings. $15-25.
Bend metal gradually, working from the center of the bend outward. Sharp bends in thin metal can cause cracking — if you need a tight bend, use thicker metal or anneal (heat and cool) the metal first to make it softer.
Your First Project: Hammered Copper Earrings
This project uses everything covered above and takes about 30-45 minutes. It's forgiving, looks professional, and teaches the core skills.
Materials
- 24-gauge copper sheet, 2 pieces approximately 25mm × 40mm
- 2 ear wires (gold-fill or sterling silver)
- 1mm drill bit
Tools
- Chasing hammer and steel bench block
- Jeweler's saw with 2/0 blades (or metal shears as a shortcut)
- Marker
- Needle files
- Sandpaper (220, 400, 600)
- Hand drill or flex shaft
- Round-nose pliers
- Flat-nose pliers
Steps
- Draw your shape. On the copper sheet, draw two matching shapes. A simple rectangle with rounded corners, a teardrop, or a leaf shape works well for a first project. Keep it between 20-30mm wide and 35-50mm long.
- Cut out the shapes. Using your jeweler's saw, cut along the lines. If you're using metal shears, cut slightly outside the line and file to the line. Take your time — sawing is a skill that improves with practice.
- File the edges. Use a needle file to smooth all edges. The edge should feel smooth when you run your finger along it. If it catches, keep filing.
- Texture the surface. Place one blank on your bench block. Using the ball-peen end of your chasing hammer, create an even pattern of small dimples across the surface. Work from the center outward, overlapping your strikes. Repeat with the second blank, trying to match the texture density.
- Drill the ear wire hole. Mark a point about 5mm from the top center of each blank. Drill a 1mm hole through both blanks. Go slowly and support the metal from the back with a piece of scrap wood to prevent burrs.
- Sand the edges. Use 220-grit sandpaper to smooth the edges, then 400, then 600. The copper will develop a warm, satiny finish.
- Optional: add a patina. Dip the blanks in a solution of liver of sulfur (follow the product instructions) to darken the metal. The dark patina settles into the hammer marks and makes the texture more visible. Polish the high spots with 0000 steel wool to reveal the bright copper underneath. Skip this step if you prefer the natural copper color.
- Attach ear wires. Open the loop of each ear wire with flat-nose pliers (pull sideways, don't pull apart — you want to preserve the round shape). Thread the blank onto the loop, then close it.
You now have a pair of handmade textured earrings. If the texture is a bit uneven, that's fine — it looks handmade, which is the point. If the edges aren't perfectly smooth, file and sand a bit more. Practice makes every subsequent pair better than the last.
Common Beginner Problems
Metal Is Too Hard to Shape
Metal gets harder the more you work it (a process called work hardening). If your copper is getting stiff and resistant, it needs to be annealed — heated with a torch until it glows dull red, then quenched in water. This softens the metal so you can continue working it.
You need a small butane torch ($15-25) for annealing. It's a good investment if you plan to do much metalwork. Heat the metal evenly, moving the flame continuously. Don't concentrate the heat in one spot. When the metal glows a dull cherry red (not bright orange), remove the flame and drop the metal into a bowl of water.
After annealing, the metal will be soft enough to work again. You can anneal copper 3-4 times before it becomes brittle and needs to be replaced.
Hammer Marks Look Messy
Uneven hammer marks usually come from two things: inconsistent strike angle and inconsistent force. Focus on striking straight down with the same force for each blow. Start slow — speed comes later.
Another common issue: the hammer face isn't clean. Even a tiny bit of dirt or a microscopic scratch on the hammer face transfers to the metal. Polish your hammer faces with fine sandpaper or a polishing cloth before important work.
My Saw Blades Keep Breaking
The number one cause of broken saw blades is too much pressure. Let the saw do the cutting — you just guide it. Apply light, even downward pressure and use long, smooth strokes. Short, choppy strokes break blades.
Other causes: the blade is installed backward (teeth should point toward the handle), the blade is too thick for the metal gauge (use finer blades for thinner metal), or you're twisting the blade while cutting (let up on pressure when you need to change direction).
The Metal Is Bending When I Hammer
If you're trying to flatten or texture a piece and it keeps curving, you're probably hammering too close to the edge or with too much force. Work from the center and use lighter blows. If the piece has already bent, flip it over and hammer the convex side gently to flatten it back out.
My Hands Hurt
Hammer fatigue is real. If your hands, wrists, or forearms hurt after 15 minutes, you're gripping the hammer too tightly. Hold it like you're holding a small bird — firm enough that it can't escape, loose enough that you're not crushing it. The hammer should almost feel like an extension of your hand.
Also: take breaks. Every 10-15 minutes, set down your tools and stretch your hands. Shake them out, flex your fingers, rotate your wrists. Forging is physical work, and warming up (literally) makes it more enjoyable and sustainable.
Setting Up Your Workspace
You don't need a dedicated jewelry bench. A sturdy desk or table in a well-ventilated area works fine. Here's what matters:
- Good lighting. You need to see what you're doing. A desk lamp with daylight LED bulb positioned over your work area is essential.
- Stable surface. Your table shouldn't wobble or bounce when you hammer. If it does, put a rubber mat under your bench block to absorb shock.
- Tool organization. A small tray or magnetic strip for your most-used tools (hammer, pliers, files). Digging through a drawer for your round-nose pliers every 30 seconds kills momentum.
- Ventilation. Important if you're using patina chemicals, polishing compounds, or soldering. An open window or a small fan is usually sufficient for basic forging.
- Comfortable seating. You'll be sitting for extended periods. A chair at the right height for your work surface makes a huge difference in fatigue and precision.
Where to Buy Supplies
- Online: Rio Grande (US, comprehensive), Contenti (US), Cookson Gold (UK), Gesswein (tools). These are professional suppliers with good quality and reasonable prices.
- Budget online: Amazon and Etsy have basic tools and materials. Quality varies — read reviews. Good for starter tools, less ideal for precision equipment.
- Local: Hardware stores for basic tools (hammer, sandpaper, drill bits). Craft stores for copper sheet and basic findings. Metal suppliers for bulk sheet and wire (usually much cheaper than jewelry suppliers).
For copper sheet, a local metal supplier often sells 6×12 inch pieces of 24-gauge copper for $3-8 — much cheaper than the $15-25 that jewelry suppliers charge for smaller pieces. Search for "copper sheet metal near me" or check hardware stores in the roofing/flashing section.
Next Steps After Forging Basics
Once you're comfortable with basic hammering, texturing, and forming, here's what to explore next:
- Soldering: Join metal pieces permanently with heat and solder. Opens up design possibilities enormously — layered pendants, bezel settings for stones, hollow forms.
- Stone setting: Learn to set cabochons and faceted stones in your forged pieces. Bezel setting is the most beginner-friendly technique.
- Etching: Use chemical or electrical processes to create detailed patterns on metal surfaces. Produces textures impossible to achieve with hammers alone.
- Enameling: Fuse powdered glass to metal at high temperatures. Creates colorful, permanent surface designs.
- Keum-boo: Bond thin gold foil to silver surfaces using heat. Creates a gold-on-silver effect without the cost of solid gold.
Each of these is a rabbit hole worth exploring. But the foundation — hammer, metal, and determination — stays the same. Everything builds on the basic forging skills you develop in your first few sessions.
Start with copper. Start simple. Hit the metal. See what happens. Then hit it again, differently. That's how every jeweler starts, and that's how every piece of handmade jewelry begins — one hammer strike at a time.


Comments