Making Resin Crystal Jewelry at Home
What Resin Crystal Jewelry Actually Is
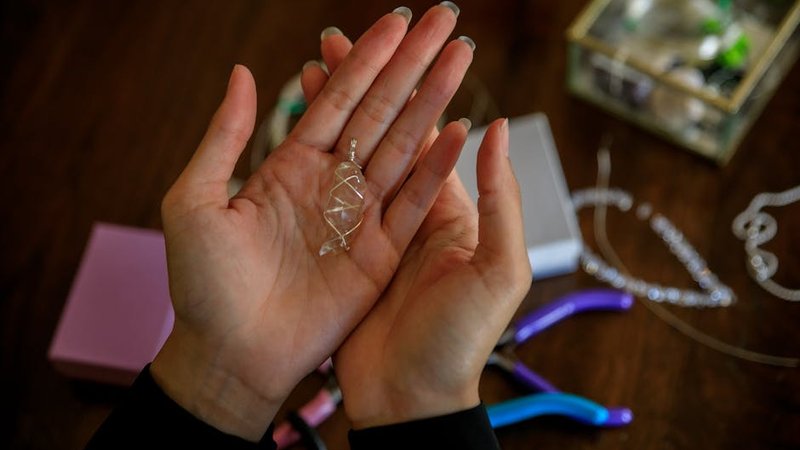
Resin crystal jewelry sits at the intersection of two satisfying crafts: working with natural stones and creating with a moldable medium. The basic idea is straightforward — small crystals, dried flowers, or other decorative elements are suspended in clear resin, which hardens into a durable, glossy piece that can be worn as a pendant, earring, or ring.
The appeal is obvious. You get to showcase beautiful stones and botanicals in a way that protects them from damage while creating a smooth, wearable surface. The resin magnifies the colors and textures of whatever's embedded inside it, often making even modest materials look striking.
Resin as an artistic medium gained serious traction in the 1960s and 70s, when artists began experimenting with polyester and epoxy resins for sculpture and decorative objects. The jewelry application came naturally — the material's clarity, durability, and ability to preserve delicate items made it ideal for wearable art. Today, improved formulations have made it safer and more accessible for home crafters.
Understanding the Two Main Resin Types
Not all resins are the same, and choosing the wrong type is the most common reason first attempts at resin jewelry fail. The two options you'll encounter are epoxy resin and UV resin, and they behave quite differently.
Epoxy Resin (Two-Part)
Epoxy resin comes as two separate liquids — resin and hardener — that you mix in a precise ratio (usually 1:1 by volume, though some require different ratios). When combined, a chemical reaction causes the mixture to gradually thicken and harden over several hours to a day, depending on the formulation.
The advantages of epoxy are significant. It cures to a very hard, durable finish that resists scratching and yellowing. It has a long working time (typically 30–45 minutes), which gives you plenty of time to arrange your crystals and remove any air bubbles. And it can be poured in thicker layers than UV resin without issues.
The main downsides are the mixing step (you need to be precise with ratios), the longer curing time, and the fact that you'll need to wait at least 24 hours before you can handle or sand your pieces. Some people also find the smell unpleasant, though quality art-grade epoxies have minimal odor compared to industrial formulations.
UV Resin
UV resin comes premixed in a single bottle. It stays liquid until exposed to ultraviolet light, at which point it cures in minutes. A UV lamp (or even direct sunlight) is all you need to set it.
UV resin is popular for small jewelry pieces because it's convenient — no measuring, no mixing, and very fast results. You can create a pendant, cure it, and have it ready to wear within an hour. It's also less messy since there's only one bottle to manage.
However, UV resin has limitations. It can only be poured in thin layers (typically 1–2mm per cure), so building up thickness requires multiple pours and cures. It's also slightly less durable than epoxy and can yellow over time with UV exposure — which is somewhat ironic given that UV light is what cures it. For small, simple pieces, UV resin works well. For larger or more complex projects, epoxy is the better choice.
Setting Up Your Workspace
Resin is sticky, and once it's on something, it's very difficult to remove. Preparing your workspace properly before you start will save you significant cleanup time later.
Cover your work surface with a silicone mat, wax paper, or a plastic sheet. Silicone is ideal because cured resin peels right off it. Have paper towels within reach — you'll need them frequently. Wear nitrile gloves (latex works too, but some people have sensitivities), and consider an apron or old shirt you don't mind ruining.
Ventilation matters more than most beginners realize. Work in a room with open windows or a fan running. You don't need industrial ventilation for small jewelry projects with art-grade resin, but you also shouldn't be working in a sealed closet.
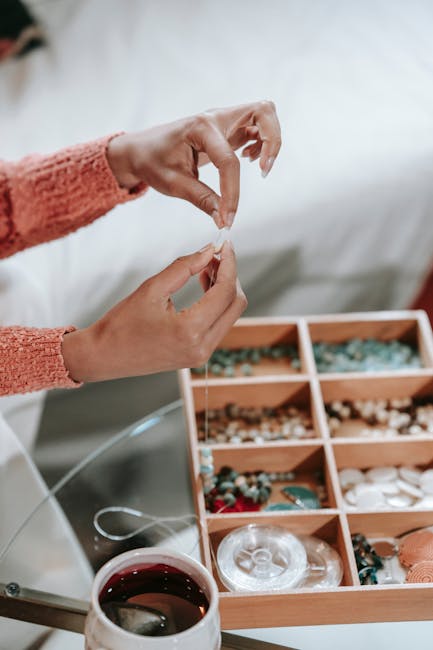
Keep your crystals, dried flowers, molds, and any decorative elements organized and within arm's reach before you start mixing. Once the resin is mixed, you're on the clock — you don't want to be scrambling for materials while your working window shrinks.
Preparing Your Crystals and Botanicals
The materials you embed in resin need to be dry and clean. Any moisture trapped inside the resin can cause cloudiness, bubbling, or even prevent proper curing. This is especially important for natural materials like dried flowers, leaves, and porous stones.
If you're using dried flowers, make sure they're completely dry. Commercially dried flowers from craft stores usually are, but if you've dried your own, give them an extra day in a silica gel desiccant container to be safe. You can seal delicate botanicals with a light coat of hairspray or clear acrylic spray before embedding — this helps maintain their color and prevents the resin from soaking in and making them translucent.
For small crystals and tumbled stones, a quick wipe with a dry cloth is usually sufficient. If the stones are particularly dusty or have been stored in a humid environment, a short session in a warm (not hot) oven or a desiccant box will drive off any surface moisture.
Size matters. Your crystals and decorative elements need to fit comfortably in your mold with room for resin to flow around them. Pieces that are too large relative to the mold will sit too close to the surface and may poke through. A good rule of thumb is that your elements should occupy no more than about 60–70% of the mold's volume, leaving space for resin to fully encase them.
The Pouring Process Step by Step
Mixing
If you're using epoxy, measure the resin and hardener in the exact ratio specified by the manufacturer. Use separate measuring cups for each component, then combine them in a clean mixing cup. Stir slowly and thoroughly for at least two minutes — scraping the sides and bottom of the cup. Incomplete mixing is the most common cause of resin that stays tacky or doesn't cure properly.
After mixing, let the resin sit for a minute or two. This allows trapped air bubbles to rise to the surface. You'll see them as small white dots — pop them with a toothpick or gently exhale across the surface (the warmth from your breath helps bubbles expand and pop).
Layering
Pour a thin layer of resin into your mold first — just enough to cover the bottom. This creates a smooth, clear base. Place your crystals and decorative elements on top of this base layer, arranging them with tweezers or a toothpick. Take your time here; the arrangement is what makes each piece unique.
Once you're happy with the arrangement, pour more resin to fill the mold. Pour slowly from a height of just an inch or two — pouring from too high creates more bubbles. Fill the mold to just below the rim, since resin can expand slightly during curing.
If you see bubbles clinging to your crystals or the sides of the mold, use a toothpick to gently coax them loose. You can also pass a small kitchen torch quickly over the surface (never hold it in one spot) — the heat causes bubbles to expand and rise. Some crafters use a warm breath technique, which works for surface bubbles.
Curing
For epoxy, cover your molds to keep dust out and leave them undisturbed for the manufacturer's recommended curing time. Don't poke, touch, or move them during this period. Temperature affects curing speed — most epoxies cure best at room temperature (around 70°F/21°C). Cooler temperatures slow the cure; warmer temperatures speed it up but can also cause yellowing.
For UV resin, place the mold under your UV lamp for the time specified (usually 2–5 minutes per layer). Rotate the mold if possible to ensure even exposure.
Demolding and Finishing
Once fully cured, flex the silicone mold gently to release the piece. Most pieces will pop out easily. If any resin has seeped over the edge of the mold, you can trim it with fine scissors or sand it smooth.
For a perfectly smooth, glossy finish, you can apply a thin coat of clear nail polish or a dedicated resin gloss to the back of the piece. If the front surface has minor imperfections, a very light sanding with fine-grit wet sandpaper (400 grit, then 800, then 1200) followed by polishing will bring it back to a high shine.
Attach your findings — jump rings for pendants, earring posts for earrings, or glue-on bail bases — using a small amount of two-part epoxy or jewelry adhesive. Let the adhesive cure fully before wearing.
Practical Tips from Experienced Makers
Work in small batches when you're starting. It's tempting to mix a large amount of resin and fill multiple molds at once, but this increases the chance of mistakes and wasted material. One or two pieces per session is plenty while you're learning the rhythm.
Keep a dedicated set of tools for resin work — mixing cups, stir sticks, tweezers. Resin is difficult to clean off tools once it cures, and you don't want to discover hardened resin on your good jewelry pliers. Silicone mixing cups are reusable and make cleanup easier.
Label your molds. If you're using multiple shapes and sizes, a small piece of tape on the back with the dimensions written on it saves time when you're selecting the right mold for a particular crystal.
Finally, save your mistakes. Cured resin pieces that didn't turn out as planned can be crushed and used as decorative elements in future pours. The crushed resin creates a beautiful, ice-like effect when suspended in fresh resin — a technique that turns failures into design features.
Comments