Jewelry Photography Tips: How to Take Stunning Product Photos at Home
I spent months making beautiful jewelry and photographing it on my bedsheet-covered desk with my phone's camera. My photos were blurry, the colors were wrong, and the background always had a visible crease. My online shop looked like a Craigslist ad for used furniture.
Then I spent one afternoon learning basic product photography, and my sales tripled within two weeks. Same jewelry, same prices, same shop. The only difference was the photos.
Product photography isn't about having expensive equipment or being a skilled photographer. It's about following a handful of principles that make your handmade jewelry look as good in a photo as it does in real life. Here's everything that actually matters.
The Non-Negotiable: Lighting
Lighting is 80% of product photography. You can have a $3,000 camera and terrible lighting, and your photos will look worse than a phone photo in good light. Get the lighting right and everything else falls into place.
Natural Window Light (The Best Option)
Set up next to a large window on a cloudy day or in the shade of a sunny window. Cloudy/overcast light is actually ideal — it's soft, even, and doesn't create harsh shadows or blown-out highlights.
Position your setup so the light comes from the side or at a 45-degree angle to your jewelry. This creates gentle shadows that give the piece dimension and show texture. Front lighting (light behind you, hitting the jewelry straight on) is the most common beginner mistake — it flattens everything and makes metal look like plastic.
Direct sunlight is too harsh. It creates tiny bright spots on metal surfaces and deep black shadows. If the only window available gets direct sun, hang a white sheer curtain over it to diffuse the light.
Artificial Lighting (When Natural Light Isn't Available)
If you photograph at night or your workspace has no good windows, artificial lighting works fine with the right setup.
- Two desk lamps with daylight LED bulbs (5000-5500K): Position one on each side of your jewelry at 45-degree angles. This creates even, shadow-free lighting. Cost: about $30-40 for two lamps and bulbs.
- A light tent or light box: A collapsible fabric box with built-in LED strips. These solve the lighting problem entirely — you just put your jewelry inside and shoot through the opening. Cost: $20-50 on Amazon.
- Ring light: Not ideal for jewelry. Ring lights create circular catchlights in reflective surfaces and don't provide the directional light that makes jewelry look dimensional.
The key with artificial light is color temperature. Use "daylight" or "cool white" bulbs (5000K-5500K). Warm bulbs (2700K-3000K) make everything look yellow. Mixed lighting (one warm, one cool, plus window light) creates weird color casts that are hard to fix in editing.
Never Use Flash
Your phone's built-in flash and your camera's popup flash are the enemy of jewelry photography. Direct flash creates blown-out highlights on metal, washes out gemstone colors, and produces flat, lifeless images. Turn it off and use available light instead.
Backgrounds: Keep It Simple
The background exists to showcase your jewelry, not compete with it. The most effective backgrounds are simple, neutral, and consistent across your entire product line.
Recommended Backgrounds
- White poster board or white fabric: The standard for clean, professional product shots. Works with every style of jewelry. The key is pure white, not off-white or cream.
- Light gray or beige: Slightly warmer than white, works well for gold and warm-toned jewelry. Less clinical than pure white.
- Marble contact paper: Wrapping a piece of foam board with marble-print contact paper creates an elegant, textured background for about $5. Looks expensive but costs nothing.
- Wood grain: Light pine or birch surfaces create a warm, natural feel. A piece of sanded plywood or a wooden cutting board works. Avoid dark wood — it absorbs too much light.
- Velvet or suede fabric: Dark velvet (navy, forest green, burgundy) creates a luxurious feel for statement pieces. The fabric absorbs light and creates a rich, deep background.
What to Avoid
- Patterned backgrounds (unless the pattern is very subtle)
- Reflective surfaces (glass, glossy tile) — they create confusing reflections
- Backgrounds that are brighter than your jewelry — the camera will underexpose the piece
- Cluttered backgrounds — no craft supplies, tools, or personal items visible
Create an Infinite Curve
Place your background surface so it curves up from the table to the wall (or a vertical support behind it). This "sweep" or "infinity curve" eliminates the horizon line and creates a seamless background. A large piece of poster board taped to the wall does this perfectly.
Your Camera: Phone Is Fine
You don't need a DSLR. Modern smartphones (anything from the last 3-4 years) take excellent product photos if you follow these guidelines:
- Clean the lens. Your phone's camera lens is probably smudged with fingerprints right now. Wipe it with a soft cloth before every shoot. This single step makes a bigger difference than any camera upgrade.
- Tap to focus. Before taking the photo, tap on the screen where your jewelry is sharpest. This tells the phone's camera to focus and meter light on that spot.
- Lock exposure. After tapping to focus, press and hold until "AE/AF Lock" appears. This prevents the camera from readjusting exposure between shots, which causes inconsistent brightness.
- Use the grid. Turn on your camera's grid overlay and use the rule of thirds: place the main point of interest at one of the four grid intersections, not dead center.
- Don't zoom. Digital zoom reduces image quality. Instead, move your phone closer to the jewelry. If you need to be closer than your phone can focus (usually about 10cm), use a clip-on macro lens ($10-15).
- Shoot in natural mode. Turn off beauty filters, portrait mode, HDR, and any AI-enhanced processing. You want an accurate representation of your jewelry, not an algorithm's interpretation.
Camera Settings If You're Using a Real Camera
If you have a mirrorless or DSLR camera, use these settings as a starting point:
- Aperture: f/8 to f/11 for overall sharpness. Wider apertures (f/2.8) blur parts of the piece, which looks artistic but doesn't show the customer what they're buying.
- ISO: As low as possible — 100 or 200. Higher ISO adds grain/noise.
- Shutter speed: At least 1/125 second. Slower speeds risk motion blur from tiny hand movements. Use a tripod.
- White balance: Set to match your light source. "Daylight" for window light, "Custom" or "Kelvin" set to 5500K for LED panels. Auto white balance is inconsistent between shots.
- File format: RAW if your camera supports it. RAW files give you much more flexibility in editing than JPEGs.
Stabilize Your Camera
Camera shake is the number one cause of blurry product photos. Even at fast shutter speeds, the act of pressing the shutter button can introduce micro-movement.
- Use a tripod or phone stand. Even a cheap $10 mini tripod eliminates shake. Position your camera at roughly 45 degrees to your jewelry — this angle shows both the top and side of the piece, which is more informative than a straight overhead shot.
- Use the timer. Set a 2-3 second delay so the act of pressing the shutter doesn't shake the camera. On phones, use the volume button or a remote shutter.
Composition: How to Frame Your Jewelry
Single Hero Shot
One piece, centered, filling most of the frame. This is your primary product photo — the one that appears in search results and category listings. The piece should be clearly visible with no ambiguity about what it is.
Detail Shot
Get close. Show the texture, the stone setting, the clasp mechanism, the surface finish. Customers want to see the craftsmanship up close. This is where a macro lens or the "close-up" mode on your phone camera helps.
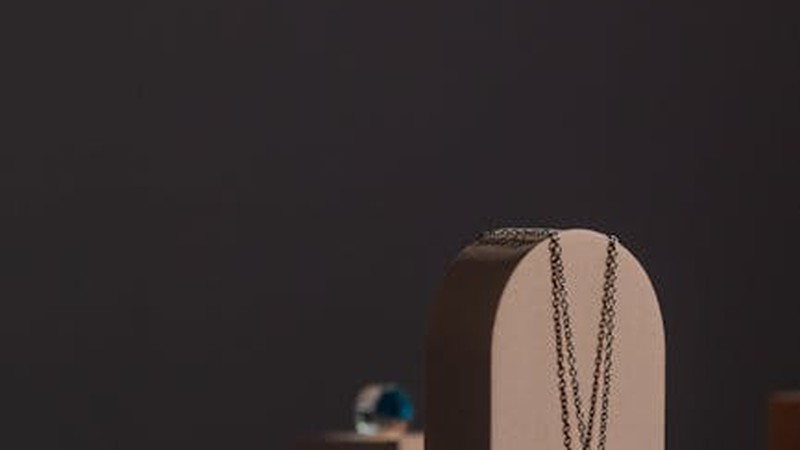
Scale Shot
Show the piece in context so customers can judge its size. A necklace draped on a simple stand, a ring on a mannequin hand, or a bracelet around a small object for reference. Many customers return jewelry because it's smaller or larger than they expected — a scale shot prevents this.
Lifestyle Shot
The piece being worn or styled in a setting. A bracelet on a wrist over a linen table, a necklace on a collarbone against a plain wall, earrings on a model's ear. These photos sell the feeling of owning your jewelry, not just the physical object.
For most online shops, aim for: 1 hero shot + 1-2 detail shots + 1 scale shot per listing. Lifestyle shots are great but not essential for every listing — a few good ones across your shop are enough.
Showing Metal Accurately
Photographing metal is the hardest part of jewelry photography. Reflective surfaces pick up everything around them — your ceiling, your clothes, your camera. Here's how to handle it:
- Gold-fill and gold: These read warm and rich in photos. Avoid cool-toned backgrounds (blue, gray) which make gold look dull. White or warm cream backgrounds work best.
- Sterling silver: Silver is highly reflective and tends to pick up color casts from surrounding surfaces. A white background is the safest choice. Silver also looks best with slightly more exposure than other metals — slightly bright is better than slightly dark.
- Rose gold: The most forgiving metal to photograph. It looks good against almost any background.
- Oxidized/antique finish: These need slightly less exposure than polished metal to show the darkened details. Overexposure washes out the patina.
The White Balance Test
Before your shoot, take a photo of something pure white (a piece of paper, a white plate) in the exact lighting you'll be using. Check the result — does it look white, or does it look yellow, blue, or green? If it doesn't look white, your white balance is off and your jewelry colors will be inaccurate.
On a phone, try different white balance settings until the white object looks white in the preview. On a camera, use custom white balance or shoot a reference frame and correct in editing.
Showing Gemstones Accurately
Gemstones are the second hardest thing to photograph well, because their beauty often depends on light interaction — sparkle, flash, depth — that cameras struggle to capture.
- Opaque stones: Turquoise, lapis lazuli, onyx — these photograph easily because they have consistent color. Side lighting shows surface texture and polish quality.
- Translucent stones: Rose quartz, amethyst, aventurine — hold the piece up and angle it toward the light source. Some backlight shows the stone's internal depth and glow. Don't overdo it — too much light washes out the color.
- Chatoyant stones: Tiger's eye, cat's eye — these need directional light to show the "eye" effect. Position the light at an angle and gently rotate the piece until the chatoyancy is visible.
- Iridescent stones: Labradorite, moonstone — these are the hardest to capture because their flash changes with every angle. Take multiple shots at different angles and use the one that best represents the stone. Don't expect any single photo to fully capture the effect.
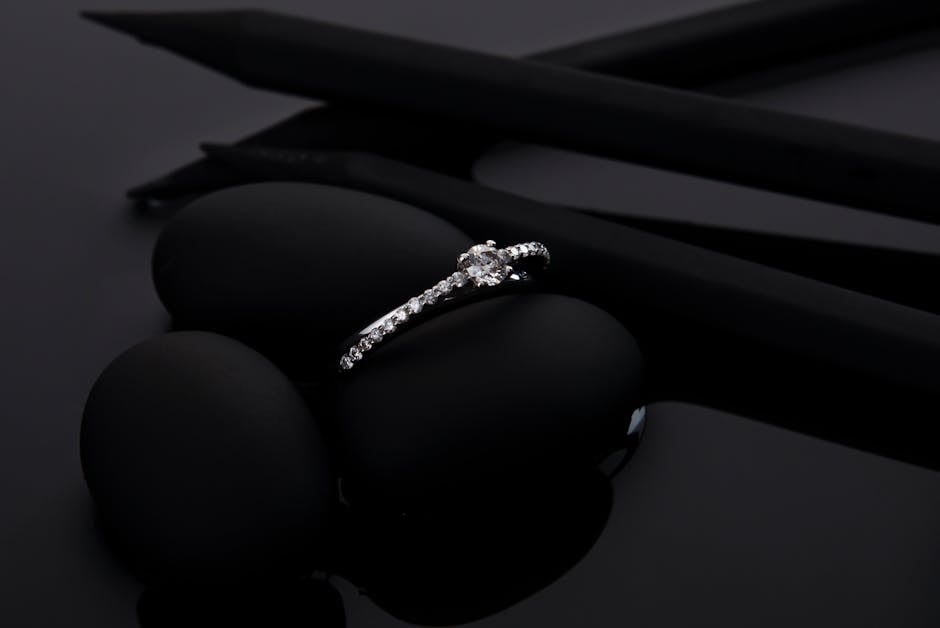
- Faceted stones: These sparkle in real life but often look flat in photos. Side lighting at about 30 degrees from the surface creates small highlights on the facets that suggest sparkle.
Editing: Less Is More
Basic editing improves every product photo. The goal is accuracy, not artistry. You want your customer to receive exactly what they saw in the photo.
Essential Edits
- Crop and straighten. Remove excess background. Make sure the horizon line is level.
- Exposure/brightness. Your jewelry should be well-lit but not washed out. The metal should have visible dimension (highlights and shadows), not look like a flat gray rectangle.
- White balance correction. If your photos look yellow, blue, or green, adjust the temperature slider until metal looks like the correct color of metal and white backgrounds look white.
- Contrast. A small contrast increase (5-10%) makes metals look more metallic and gemstones look more vivid.
- Sharpening. Apply a modest amount of sharpening to bring out details in texture and stone inclusions. Too much sharpening creates visible halos around edges.
Edits to Avoid
- Oversaturation. Boosting colors beyond reality. Your customer will be disappointed when the real stone doesn't look as vivid as the photo.
- Heavy filters. Instagram-style filters and presets have no place in product photography. They change colors unpredictably.
- Removing flaws that exist in real life. If your piece has a visible scratch, either fix it or disclose it. Don't Photoshop it out — that's misleading and will cost you a customer's trust.
- Cloning or adding elements. Don't add sparkle effects, background elements, or anything that isn't in the actual product photo.
Editing Tools
- Phone: Snapseed (free), Lightroom Mobile (free tier is sufficient), or the native photo editor
- Desktop: Lightroom ($10/month), Photoshop Elements ($70 one-time), or free options like GIMP and Photopea
Consistency: The Secret to a Professional-Looking Shop
The single most impactful thing you can do for your brand is make all your product photos look consistent. Same background, same lighting direction, same camera angle, same editing style. When someone scrolls through your shop, every photo should feel like it belongs to the same collection — even if the jewelry itself is diverse.
Create a "photo setup" that you can replicate quickly: a specific background, a specific lamp arrangement, a specific phone position on a tripod. Once you've found a setup that works, don't change it. Consistency looks professional; variation looks amateur.
Batch Shooting: Efficiency Tips
Don't photograph one piece at a time. Set aside 2-3 hours and photograph your entire collection (or a large batch of new pieces) in one session. This is faster because you only set up once, the lighting is consistent across all pieces, and you get into a rhythm.
Workflow for a batch shoot:
- Set up your lighting and background (15 minutes)
- Photograph each piece: 1 hero shot + 2 detail shots + 1 scale shot (3-5 minutes per piece)
- Review all photos on a larger screen (tablet or laptop) and reshoot any that aren't sharp or well-exposed
- Edit in batch: apply the same preset/corrections to all photos (30-60 minutes for 20-30 pieces)
This workflow produces a full collection of photos in one session. Spread this across 2-3 sessions per month and you'll always have fresh product photos ready.
Common Mistakes That Kill Sales
- Blurry photos. If your customer can't see the details, they can't evaluate the quality. Blurry photos signal low quality, whether or not that's true.
- Different backgrounds across listings. White background on one listing, wood on another, wrinkled fabric on a third. This looks like photos from three different sellers.
- Photos that are too small. Most platforms want images at least 1000px on the longest side. Upload the highest resolution your camera produces.
- Only one photo per listing. Customers want to see details from multiple angles. One photo isn't enough to make a purchase decision. Aim for at least 3-4 per listing.
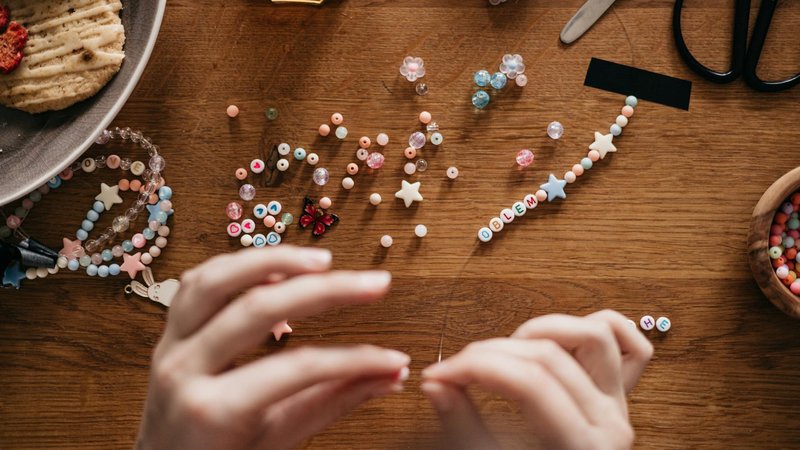
- Photographing on a cluttered desk. The customer can see your coffee cup, your scissors, your charging cable in the background. It undermines the perceived value of your work.
- Not updating photos. If your photography skills have improved since you first listed your products, go back and re-photograph your best sellers with your current setup. Better photos directly translate to better conversion rates.
Quick Setup Guide: Professional Photos for Under $50
- White poster board (background): $2
- Two desk lamps with daylight LED bulbs: $30
- Mini tripod or phone stand: $10
- Clip-on macro lens (optional): $10
- Your phone's camera: $0
- Total: $52
Set the poster board in an L-shape against the wall. Position one lamp on each side at 45 degrees. Mount your phone on the tripod. Clean the lens. That's your complete product photography studio. It won't win any awards, but it'll produce photos that sell jewelry — which is the whole point.
Good photography isn't a luxury for established brands with big budgets. It's a fundamental business skill that every handmade jeweler needs from day one. Your jewelry deserves to look as good in photos as it does in person. Spend the afternoon getting your setup right, and you'll reap the benefits in every sale that follows.
Comments