Jewelry Making Tools Guide: Everything You Need to Start Making Jewelry
I'll never forget walking into my friend's jewelry studio for the first time. The walls were lined with tools — dozens of them — and I couldn't tell a crimping plier from a chain-nose plier if my life depended on it. There were things that looked like tiny scissors, things that looked like medieval torture devices, and things I couldn't even begin to identify. I stood there for a solid five minutes just staring before sheepishly asking, "Which one do I grab first?" She laughed and handed me a pair of round-nose pliers. That was the beginning. Now, three years and roughly 200 finished pieces later, I want to save you that deer-in-headlights moment. Here's everything you actually need to start making jewelry, organized by priority so you don't waste money on stuff you'll never touch.
The Three-Tier System: Don't Buy Everything at Once
The biggest mistake new jewelry makers make is walking into a craft store and dropping $300 on every shiny tool in the aisle. Don't do that. Jewelry making tools fall into three clear categories:
- Tier 1 — Essential: You cannot make jewelry without these. Period. Buy these first.
- Tier 2 — Advancement: These make your work faster, cleaner, and more professional. Get these once you've made 10-20 pieces and know you're committed.
- Tier 3 — Nice to Have: Specialized tools for specific techniques. Buy these when a project actually demands them.
Let's break down each tier.
Tier 1: The Absolute Essentials
If you buy nothing else on this list, buy these five items. They're the foundation of virtually every jewelry-making technique, from basic stringing to wire wrapping to bead weaving.
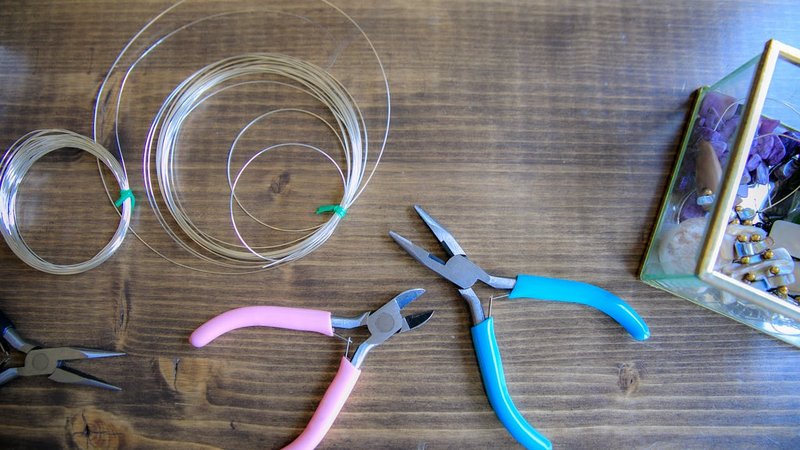
Round-Nose Pliers
This is the single most important tool in your kit. Round-nose pliers have tapered, conical jaws that taper to a fine point. Their entire job is to make loops and curves in wire. Every pair of earrings you'll ever make starts with a round-nose plier loop. Every wrapped wire connection depends on it.
What to buy: Spend $15-25 on your first pair. Cheap $5 round-nose pliers from the big-box craft store have a tendency to have rough jaws that scratch your wire, and the taper isn't always even — meaning your loops will be slightly different sizes depending on where on the jaw you work. Look for pliers with smooth, polished jaws and a comfortable spring-loaded handle. Brands like Wubbers, Beadalon, and Xuron are solid mid-range choices.
Common beginner mistake: Trying to make loops with chain-nose (flat) pliers. It doesn't work. The flat jaws create kinks in the wire instead of smooth curves. I know because I tried it during my first week and ruined an entire spool of copper wire before someone set me straight.
Chain-Nose (Flat) Pliers
Chain-nose pliers have flat inner jaws that taper to a point. They're your all-purpose workhorse — gripping wire, opening and closing jump rings, flattening crimps, and reaching into tight spots. If round-nose pliers are for making curves, chain-nose pliers are for everything else.
What to buy: Same price range as round-nose — $15-25 for a good pair. The key feature to check is whether the jaws are smooth inside. Some budget pliers have a textured or serrated grip on the inside of the jaws, which will leave marks on your wire and findings. You want smooth jaws. If you accidentally buy serrated ones, you can sand them smooth with fine-grit sandpaper, but it's easier to just get the right ones from the start.
Common beginner mistake: Using regular household needle-nose pliers instead of proper jewelry chain-nose pliers. They're not the same thing. Household pliers are heavier, the jaws are often too wide for delicate work, and the pivot point is in the wrong spot for fine motor control. Spend the money on the real thing.
Wire Cutters (Flush Cutters)
You need to cut wire. A lot of wire. Flush cutters are designed to cut wire with one flat side and one slightly beveled side, giving you a clean, flush cut instead of a pinched, pointy end. This matters because sharp wire ends will snag on skin, fabric, and other components.
What to buy: $12-20 will get you a perfectly good pair of flush cutters for soft wire (copper, brass, sterling, craft wire up to about 18 gauge). Look for the Xuron 410T or 2175T — they're widely considered the gold standard for beginners and cost under $20. If you plan to work with thicker wire or memory wire, you'll want a separate, heavier-duty cutter later.
Common beginner mistake: Using scissors or kitchen shears to cut wire. It ruins the scissors, it mangles the wire, and it's genuinely dangerous — cut wire ends are sharp and will go flying across the room. Also, don't use flush cutters on steel memory wire; it'll dent the blades. Memory wire needs its own heavy-duty cutter.
Measuring Tape or Ruler
Jewelry making is precise work. Necklace lengths need to hit specific measurements (16" choker, 18" standard, 20" princess, 24" opera), bracelet sizes vary by wrist, and wire wrapping requires consistent loop sizes. A flexible measuring tape is ideal because you can wrap it around a wrist or neck to get an accurate measurement.
What to buy: A basic flexible sewing tape measure costs $2-3. Get two — one for your desk and one for your travel kit. Alternatively, a small metal ruler with both inch and millimeter markings is great for measuring wire lengths and bead spacing. I use both.
Bead Mat (Beading Board)
A bead mat is a flocked, non-slip surface that keeps beads and components from rolling off your table. It sounds trivial until you've knocked a tray of tiny seed beads off your desk for the third time and spent an hour sweeping them up. The mat also helps you lay out designs before stringing, so you can see how a piece will look and make adjustments without committing.
What to buy: Basic flocked bead mats cost $3-8. Bead boards (mats with built-in channels and measurements for necklaces and bracelets) run $8-15. I started with a bead board and still use it regularly — the channels are genuinely helpful for laying out multi-strand designs.
Tier 2: Advancement Tools
Once you've made a handful of pieces with the essentials and caught the bug (you will), these tools will take your work to the next level.
Crimping Pliers
If you're stringing beads on beading wire (which most beginners do), you need crimping pliers to secure crimp tubes and beads at the ends of your strands. Using regular flat pliers to squash crimps leaves them ugly, weak, and prone to failure. Crimping pliers fold the crimp into a neat, rounded shape that's both stronger and more attractive.
What to buy: $12-20. The Beadalon Ergonomic Crimping Pliers are a reliable choice. Learn to use them properly — there's a specific two-step technique (first crush with the back notch, then round with the front notch) that makes all the difference.
Beading Needles
Essential for bead weaving and any work with small beads. Beading needles are long, thin, and flexible — they thread through tiny bead holes that regular sewing needles can't handle. They come in sizes (the higher the number, the thinner the needle). Size 10 or 12 is a good starting point.
What to buy: A pack of assorted sizes costs $5-8. Get big-eye needles too — they have a split in the middle of the needle that makes threading ridiculously easy. I use big-eye needles for everything now.
Wire Wrapping Tools (Bail Making Pliers, Nylon Jaw Pliers)
Bail-making pliers have two or three different sized cylindrical jaws that let you create consistent loops, bails, and jump rings quickly. Nylon-jaw pliers have soft plastic jaws that let you straighten bent wire without scratching it — absolute magic if you work with wire regularly.
What to buy: $10-15 each. These aren't urgent but will save you significant time and frustration once you start doing more wire work.
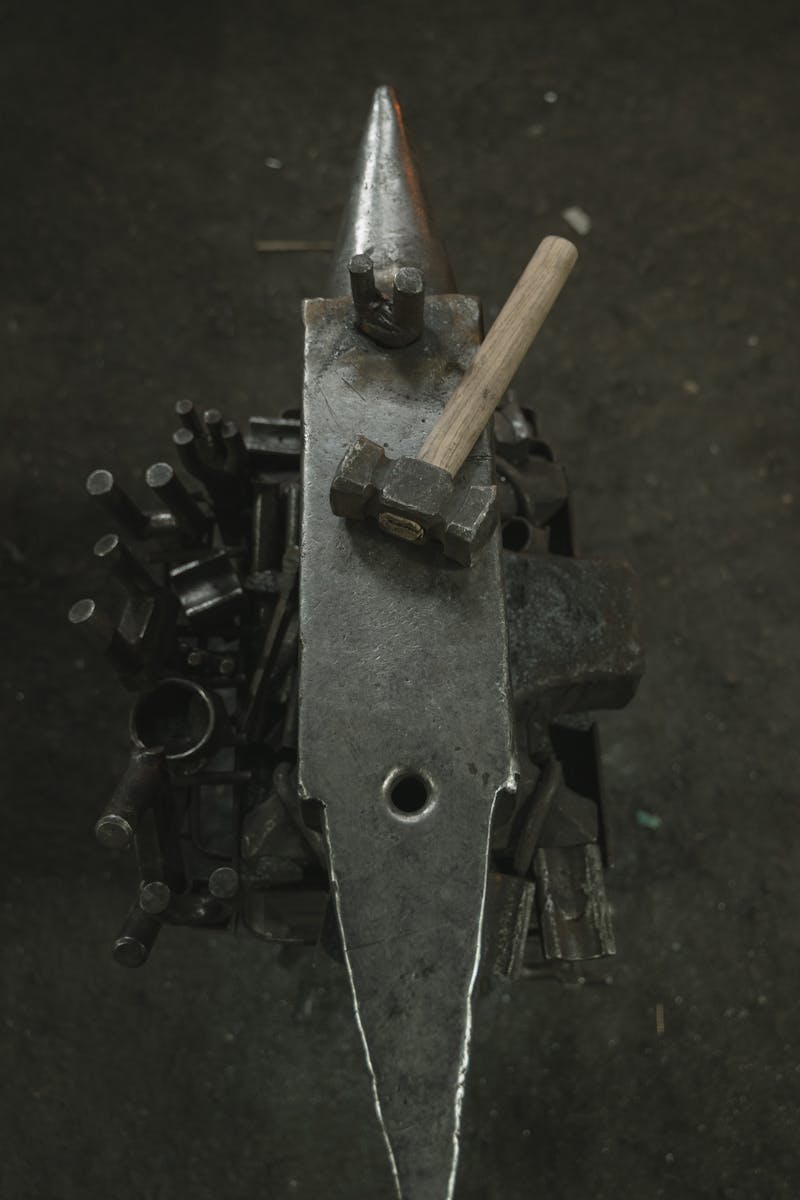
Jewelry Hammer and Bench Block
A nylon or rawhide hammer paired with a steel bench block lets you flatten, texture, and harden wire and sheet metal. This opens up texturing techniques that take your pieces from "homemade" to "handcrafted."
What to buy: $20-30 for a basic set. A nylon hammer won't mar your metal, and a small steel bench block gives you a solid working surface.
Magnifying Lamp or Loupe
Once you start working with small findings, tiny crimps, or detailed wire work, your eyes will thank you. A desk magnifying lamp provides both light and magnification, which makes close-up work dramatically easier.
What to buy: $25-50 for a basic LED magnifying lamp. Alternatively, a small jeweler's loupe (10x magnification) costs $10-15 and is great for inspecting your work and checking for sharp edges.
Material Storage and Organization
This isn't glamorous, but it will save your sanity. Nothing kills the joy of jewelry making faster than spending 20 minutes looking for a specific size of crimp bead in a tangled mess of bags and boxes.
Storage Solutions
Compartment boxes: Clear plastic boxes with adjustable dividers are perfect for beads, findings, and small components. The $5-10 ones from hardware stores (meant for sorting screws and nails) work just as well as expensive craft-specific versions.
Ziplock bags: For larger quantities and odd-shaped items. Write the item name and size on each bag with a permanent marker. I keep a stack of both small (2x3") and medium (4x6") bags at my desk.
Label everything: Seriously. That spool of silver wire looks identical to the copper wire until you've made half a bracelet with the wrong one. Label spools, bags, and compartments with the material, gauge, and color.
Portable cases: A fishing tackle box or a dedicated craft organizer with a handle is perfect for taking your supplies to classes, craft fairs, or a friend's house. I use a $15 plastic tackle box from the hardware store and it holds everything I need for a day of jewelry making.
Setting Up Your Workspace
Your workspace matters more than you'd think. A bad setup leads to back pain, eye strain, and projects that take twice as long as they should.
Lighting
This is non-negotiable. You need good, bright, neutral-colored light. A desk lamp with a daylight-spectrum LED bulb (5000K-6500K color temperature) is ideal. Avoid warm yellow lighting — it distorts the colors of beads and stones, and you'll end up making pieces that look different in natural light than they did at your desk. I use a $30 LED desk lamp with adjustable color temperature and it made a massive difference in my work.
Chair and Posture
Jewelry making involves hours of fine, close-up hand work. A chair with good lumbar support and a desk at the right height (elbows at roughly 90 degrees when your hands are on the work surface) will prevent the neck and back pain that plagues many crafters. I learned this the hard way — spent my first six months hunched over a kitchen table and paid for it with a month of physical therapy. Get a proper chair.
Desk Surface
You want a clean, flat surface with enough room to spread out your tools, materials, and the piece you're working on. A dedicated desk is ideal, but a cleared kitchen table works fine if you can leave your setup up between sessions. Protect the surface with your bead mat and a cutting mat for any wire cutting.
Budget Breakdown: What to Spend at Each Level
$50 Starter Kit
This gets you making basic strung jewelry immediately:
- Round-nose pliers: $18
- Chain-nose pliers: $18
- Flush cutters: $14
- Bead mat/board: $8
- Basic beading wire and crimps: $10
You won't be winning any craftsmanship awards, but you'll be able to make wearable necklaces, bracelets, and simple earrings from day one.
$100 Advancement Kit
This adds crimping tools, wire wrapping capability, and better materials:
- Everything in the starter kit: $50
- Crimping pliers: $15
- Bail-making pliers: $12
- Nylon-jaw pliers: $10
- Bead organizer box: $8
- Assorted beads and findings: $20
At this level, you can tackle wrapped loops, multi-strand designs, and basic wire-wrapping techniques.
$200 Professional Kit
This adds finishing tools and proper workspace setup:
- Everything in the advancement kit: $100
- Hammer and bench block: $25
- Magnifying desk lamp: $35
- Beading needles and thread assortment: $15
- Quality storage system: $15
- Premium materials (sterling findings, gemstone beads): $30
This is a serious hobbyist setup. You can make professional-quality pieces, sell at craft fairs, and tackle advanced techniques like bead weaving and metal texturing.
The 5 Biggest Tool Mistakes Beginners Make
I've made most of these myself. Learn from my mistakes so you don't have to repeat them.
1. Using Needle-Nose Pliers Instead of Round-Nose Pliers
I mentioned this earlier but it bears repeating because it's the single most common beginner error. Needle-nose (or hardware store) pliers have flat, tapered jaws that will kink and damage your wire when you try to make loops. Round-nose pliers exist specifically for loops. Just buy them. Your wire will thank you.
2. Buying the Cheapest Pliers Available
The $5 multi-pack of pliers at the craft store checkout is tempting, but it's a false economy. Cheap pliers have poorly finished jaws that leave scratches and gouges on your wire and findings. The hinges loosen quickly, the springs break, and the handles are uncomfortable during extended use. Spend $15-25 per pair for mid-range pliers and they'll last for years. That $5 set will need replacing in a month.
3. Not Filing or Sanding Sharp Wire Ends
Even with good flush cutters, wire ends are often slightly sharp. A quick touch with a needle file or fine sandpaper (400 grit or higher) smooths them out. This takes two seconds and prevents the wire from snagging on skin, fabric, and other components. I keep a small file in my pliers case and use it on almost every cut.
4. Using One Pair of Pliers for Everything
I see beginners do this all the time — using chain-nose pliers to open jump rings (which distorts them), using them to crimp (which leaves ugly crimps), and using them to make loops (which kinks the wire). Each plier has a specific job. Using the right tool for the right task is faster, produces better results, and actually makes the work easier. You don't need every specialty plier ever made, but you do need at minimum: round-nose, chain-nose, flush cutters, and crimping pliers.
5. Ignoring Ergonomics
Jewelry making is repetitive fine motor work. Using tools with uncomfortable grips, working in poor lighting, and sitting in a bad chair will cause hand fatigue, eye strain, and back pain. Spring-loaded handles on pliers reduce hand strain significantly. Good lighting prevents eye fatigue. A proper chair prevents back problems. These aren't luxuries — they're necessities if you plan to make jewelry regularly. Your body will remind you of this if you ignore it.
Getting Started Today
You don't need to buy everything on this list right now. Start with the Tier 1 essentials — round-nose pliers, chain-nose pliers, flush cutters, a measuring tape, and a bead mat — and make a few simple pieces. String a necklace. Make a pair of earrings. Get a feel for the process and the tools in your hands. Once you've got a few projects under your belt, you'll know exactly which Tier 2 tools will help with the techniques you're naturally gravitating toward.
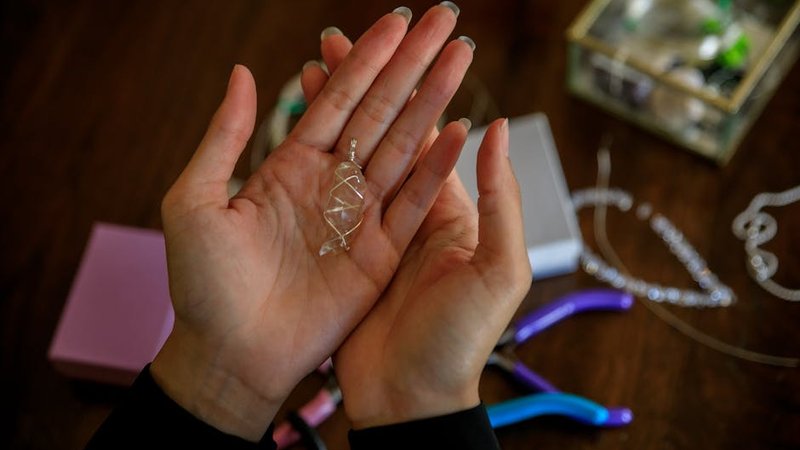
Jewelry making is one of those crafts where the learning curve is incredibly rewarding. Your first few pieces might look a little rough — mine certainly did — but every piece teaches you something. And with the right tools in your hands, that progress happens fast. Grab those pliers and get started.
Comments