Jewelry Making Tools — The Only 12 You Actually Need (Starter Kit Under $50)
This article was created with the help of AI tools and reviewed by a human editor. We believe in being upfront about how our content is made, and we hope you find it genuinely useful for your jewelry-making journey.
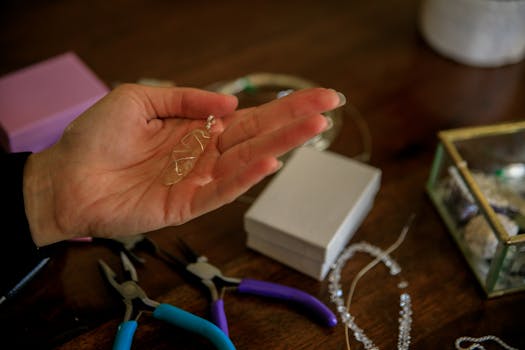
Why Most Beginners Buy the Wrong Stuff
Walk into any craft store and the jewelry aisle will hit you like a wall. Pliers, mandrels, looms, polishing wheels, tumblers, reamers, files — hundreds of products screaming "buy me." It's overwhelming. Most people either walk away entirely or drop $150 on a fancy kit they'll use twice.
Here's the truth: you don't need most of that stuff. Not right now, anyway.
After watching dozens of beginners figure this out the hard way (myself included), I've narrowed it down to twelve tools that cover roughly 90% of what you'll actually do in your first year. Twelve. That's it. And the best part? You can start with just six of them for under thirty bucks.
Let's get into it.
The First Six — Start Here ($30 Total)
These six tools are your non-negotiables. Buy them before anything else. They're the foundation that everything else builds on.
1. Round Nose Pliers — $8
If you only own one pair of pliers, make it these. The conical jaws taper to a fine point, which lets you create loops and curves in wire. Making wrapped loops on headpins? That's round nose pliers. Shaping ear wires? Same tool. Bending a neat little eye at the end of a wrapped wire? You guessed it.
Cheap ones work fine when you're starting out. Look for comfort grips — your hands will thank you after an hour of repetitive looping.
2. Chain Nose Pliers — $7
Think of these as the "all-purpose" pliers. The flat inner jaws taper to a point, making them perfect for opening and closing jump rings, gripping small components, and flattening wire wraps. You'll reach for these constantly.
One quick tip: always twist jump rings open sideways (pull one end toward you, push the other away). Never pull them apart like stretching a rubber band — that weakens the metal and your rings won't close properly.
3. Wire Cutters — $6
Also called flush cutters or diagonal pliers. They snip wire cleanly. That's their whole job, and they do it well. You'll use them every single time you finish a wrapped loop to trim the excess tail.
Spend the extra dollar or two for flush cutters rather than the super-cheap ones. The difference is a clean, flat cut versus a crushed, angled mess that leaves a sharp burr on your wire.
4. Flat Nose Pliers — $7
Similar to chain nose pliers but with jaws that stay flat and wide all the way to the tip. This makes them better for gripping flat components, opening stubborn jump rings, and holding wire steady while your other hand does the tricky work.
Some people skip these at first and use chain nose pliers for everything. That works for a while, but once you start doing multi-step projects, having both chain nose and flat nose pliers means you can grip with one hand and bend with the other. Game changer.
5. Crimping Pliers — $8
These look weird at first — they have two notches in the jaws instead of flat surfaces. Each notch does something different: the first notch crushes a crimp bead into a U-shape, and the second notch folds that U over on itself to create a neat, rounded crimp that holds your wire securely.
Sure, you can flatten crimp beads with regular pliers. The wire won't fall out or anything. But it looks sloppy, and a neat crimp is one of those small details that separates "homemade" from "handmade." If you're selling your pieces, this matters.
6. Bead Mat — $5
The cheapest tool on this list, and arguably the most underrated. A bead mat is a flocked fabric pad that you put on your work surface. Beads sit on it without rolling around. Try stringing tiny seed beads on a bare table and you'll understand why this exists.
They come in different sizes. Get one that's at least 11" x 17" so you have room to spread out. The standard gray ones work great, though they do come in fun colors if you want your workspace to look pretty.
The Next Six — Expand Your Toolkit ($49 More)
Once you've made a few simple projects with the first six tools, you'll start noticing gaps. These next items fill those gaps.
7. Bead Board — $10
A bead board is a flat tray with shallow channels and measurements printed along the edges. You lay out your design before committing to stringing anything. This lets you see how a necklace will look, check the length, and rearrange beads until you're happy — all without threading a single bead.
It sounds like a luxury until you've strung an entire necklace only to realize the pattern looks off and you have to cut it all apart. A bead board prevents that frustration entirely.
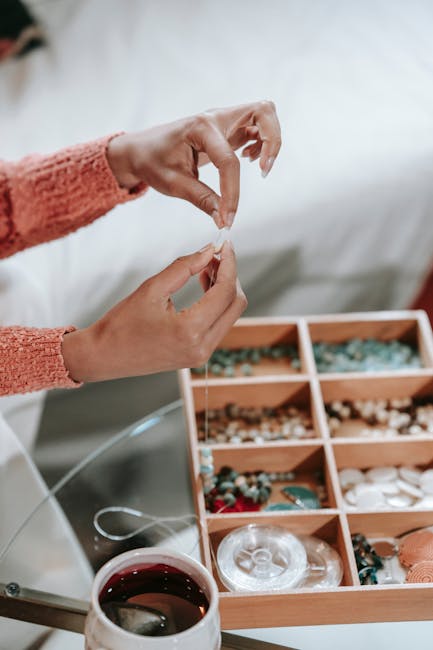
8. Beading Needles — $3
Standard sewing needles are too thick for most seed beads and small pearls. Beading needles are long, flexible, and extremely thin — they slide through size 11/0 seed beads and smaller without a fight.
Big-eye needles are a solid choice for beginners because the entire needle is essentially one giant eye. Threading them is effortless. Flexible wire needles are another option — they collapse and thread through beads like a tiny snake. Both types work. Grab whichever catches your eye.
9. Jewelry Glue — $5
E6000 is the gold standard here. It bonds metal, glass, plastic, wood, fabric, and just about anything else you'd use in jewelry. It dries clear, flexible, and strong. Use it to secure knot covers, glue end caps onto cord, attach flat-back crystals, and reinforce wrapped loops that feel a bit loose.
Work in a ventilated area when using it — the fumes are no joke. A little goes a long way, so one tube will last you months. Keep it upright in a jar or cup so it doesn't tip over and ooze everywhere (learned that one the messy way).
10. Jump Rings — $4 for 100
Jump rings are tiny metal circles that connect components together. Clasps to chain. Charms to bracelets. Earring hooks to beaded dangles. You'll burn through these fast, so buying a mixed-size pack of 100 is the smart move.
Grab both open and closed jump rings. Open ones you can twist apart with your pliers. Closed ones (already soldered shut) are great for permanent connections where security matters more than adjustability.
11. Crimp Beads — $3 for 100
These are tiny metal tubes or beads that you crush with your crimping pliers to anchor wire at the end of a strung piece. They're what keeps your beads from sliding off when you attach a clasp.
Stick with 2x2mm crimp tubes to start — they work with most standard beading wire and are easy to crimp neatly. Crimp beads (round ones) work too, but tubes give a cleaner result.
12. Stringing Wire — $6 for 30 feet
Beadalon 49-strand wire is the go-to for most beaded jewelry. The "49-strand" part means it's made of 49 tiny stainless steel wires braided together and coated in nylon. More strands equals more flexibility, more drape, and better resistance to kinking.
Seven-strand wire is cheaper but stiffer — it holds its shape when you bend it, which can look unnatural in necklaces. Stick with 49-strand for anything you plan to wear or sell. A 30-foot spool will make quite a few pieces before you need to restock.
Budget Breakdown
Here's the real talk about money. All twelve tools and supplies come to about $79 total. That's not nothing, but compare it to those $150+ kits that include stuff you'll never touch.
The smart move is phased buying. Start with just the first six items (the pliers, cutters, crimping tool, and bead mat) for around $30. Make a few simple stretch bracelets, a pair of beaded earrings, maybe a basic strung necklace. Once you're hooked — and you will be — pick up the remaining six items as you need them.
Three Tools to Save for Later
These are fantastic tools. You'll want them eventually. Just not on day one.
Chasing hammer and bench block: Used for flattening, texturing, and hardening wire. Fun, but you need to learn basic wire work first before texturing makes sense in your designs.
Rotary tool (like a Dremel): Polishing, drilling, sanding. Overkill for a beginner, but incredible once you start working with metal sheets or doing detailed finishing work.
Ultrasonic cleaner: Drops your finished jewelry into a bath of vibrating water and comes out sparkling. Luxurious, not essential. Soap, warm water, and a soft toothbrush handle 95% of cleaning jobs just fine.
Where to Buy Everything
Amazon is the easiest starting point. Search for "jewelry making kit starter" and you'll find bundles that include several of the tools listed above at a slight discount compared to buying individually. Just double-check that the kit includes the specific items you need — some starter kits pad their count with low-quality extras you didn't ask for.
If you prefer to see things in person, Michaels and Joann carry a decent selection of basic tools and findings. Their individual prices run a bit higher than online, but both stores run frequent sales (especially with their coupons), and there's something to be said for holding pliers in your hand before buying them.
For supplies like crimp beads, jump rings, and beading wire, online specialty shops like Fire Mountain Gems and Rings & Things offer better variety and bulk pricing than big-box craft stores.
Final Thoughts
The biggest mistake new jewelry makers make isn't buying bad tools — it's buying too many tools too fast. Start small. Learn what your hands like to do. Figure out what kind of jewelry excites you. Then add tools one at a time as specific needs come up.
Twelve tools. Under eighty bucks total (thirty to start). That's all you need to go from "I think I want to try making jewelry" to actually making jewelry people compliment you on.
Now go make something beautiful.
Comments