Jewelry Display Ideas — How to Set Up a Booth That Sells at Craft Shows
My First Craft Show Was a Disaster (and What I Fixed)
Full disclosure: I started making jewelry as a hobby in my apartment, selling a few pieces to friends and coworkers. Nobody paid me to write this article, and yes, some of the links here might earn me a small commission if you click through. I just want to share what actually worked for me after a lot of trial and error at craft shows.
My very first market was a small weekend fair near my apartment. I brought two folding tables, spread my jewelry out flat, and hoped for the best. Six hours later, I'd sold exactly one pair of earrings — to my mom, who felt bad for me. People walked past my booth without even slowing down. I packed up feeling defeated and confused because I knew my pieces were good. The problem wasn't my jewelry. It was my setup.
Over the next two years, I did maybe thirty markets. Some were weekend fairs, others were indoor holiday bazaars, and a few were outdoor summer festivals. Each one taught me something new about how people shop at these events. I'm going to walk you through everything I figured out — the six essentials that turned my booth from invisible to profitable, the mistakes that cost me sales, and how to put it all together on a tight budget.
The Six Things Your Booth Actually Needs
1. Get Your Table Height Right
This one sounds boring but it's probably the single biggest upgrade I made. Standard folding tables sit at about 74 cm, which is fine for eating dinner but terrible for shopping. When your jewelry sits that low, people have to bend over to see it. Most won't bother. They'll glance down, keep walking, and never really look at what you're selling.
I grabbed a couple of sturdy storage boxes and put them under one end of my table, raising that section up to about 95 cm. That's roughly standard counter height — the same height as a jewelry store display. The difference was immediate. People stopped. They could see my pieces at eye level without crouching. They touched things. They picked things up. Sales went up that same day.
You don't need anything fancy. Plastic storage bins, wooden crates, even stacked shoe boxes work. Just make sure whatever you use is stable — you don't want your display wobbling when someone leans on it.
2. Use a Dark Background Cloth
My first few markets, I just used the white plastic table cover that came with the rental. Big mistake. White reflects light and washes everything out. Silver chains disappear against white. Light-colored gemstones lose their depth. The whole setup looks flat and uninteresting.
I switched to a deep navy velvet cloth, and it was like putting on glasses for the first time. Every piece of jewelry popped against the dark background. The velvet texture added a sense of quality and luxury that made even my $15 earrings look like they belonged in a real store. Black works great too. Dark green can look really nice if that fits your brand.
Fabric choice matters more than you'd think. Velvet and velour grab light in a soft, flattering way. Cotton and linen give a more rustic, handmade feel that works well for artisan markets. Avoid anything shiny or reflective — it competes with your jewelry for attention. A 1.5-meter piece of good fabric costs maybe $10-15 and lasts for dozens of shows.
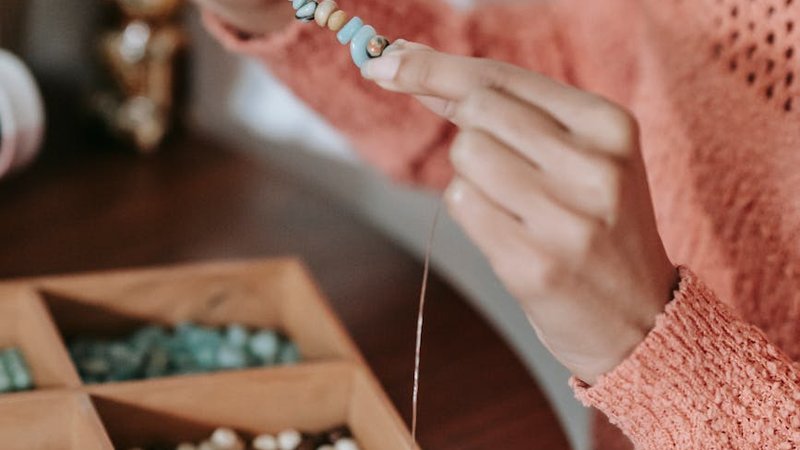
3. Invest in Proper Jewelry Displays
Laying necklaces flat on a table is basically hiding them. A customer has to pick up every single one to see what it looks like, and most people won't do that. You need vertical display so people can see the shape and drape of each piece from a few feet away.
For necklaces, T-bar stands are the way to go. They cost around $5-10 each on Amazon and they show off the full length of a necklace beautifully. I use three T-bars at different heights to create visual interest. For bracelets, tiered step displays work great — you can show 10-15 bracelets at once, and the staircase effect draws the eye. Those run about $8-15. For rings, small cone-shaped displays are perfect and they're usually $4-5 each. I put five of them in a row along the front of my table.
The key is variation. If every piece sits at the same height, your booth looks like a grid. Mix tall stands with short ones. Layer different levels. Let people's eyes travel across your table naturally.
4. Lighting Changes Everything
Here's something nobody tells you about indoor markets and evening events: the venue lighting is almost always terrible. Overhead fluorescents make everything look washed out. Outdoor markets under tents can be surprisingly dim. Without good lighting, your jewelry loses all its sparkle.
I picked up two portable LED light bars for about $15 each. They clamp right onto the edge of my table and run on batteries. I set them to warm white (around 3000K), which gives jewelry a rich, golden glow. I angle them so they cross over my display — one from the left, one from the right. This creates depth and makes gemstones catch the light from multiple angles.
Do not skip this. I've seen vendors with gorgeous work sit in the shadows while the booth next to them with mediocre products but great lighting drew all the foot traffic. Lighting is not optional. It's the difference between someone noticing your booth and walking right past it.
5. Clear Price Tags Are Non-Negotiable
I used to think that not having prices would encourage people to pick things up and ask. I was wrong. Most people are too polite. They'll see something they like, notice there's no price tag, assume it's probably too expensive, and walk away. I lost countless sales this way before I figured it out.
Now every single piece has a small, neat price tag. I use consistent little sticker tags that cost about $0.10 each. Each tag shows the price and the material — something like "$28 / Sterling Silver & Amethyst." Knowing the material helps customers feel confident about what they're buying, and seeing the price removes that awkward hesitation.
Keep your tags uniform. Same font, same size, same style. When every tag looks different — some handwritten, some printed, some sticky notes — it feels messy and unprofessional. Consistency signals that you take your craft seriously.
6. Keep Your Storage Organized Under the Table
Customers can see under your table. If it's a chaotic mess of tangled chains, loose beads, and crumpled bags, it undermines the polished impression you've created on top. Plus, when you need to restock or find a specific size, you'll waste time digging through piles.
I use three small boxes under my table: one for necklaces, one for bracelets and rings, and one for supplies like extra tags, bags, and business cards. Everything has a place. When something sells, I can grab a replacement in seconds without turning my back on the booth for too long. Small plastic drawer units work well too. The point is, keep it tidy and keep it accessible.
Three Mistakes That Killed My Sales Early On
Mistake 1: Cramming Too Much Onto the Table
I wanted to show everything I had. Every necklace, every earring, every bracelet — all out at once. The result was a cluttered, overwhelming table that looked more like a yard sale than a curated jewelry display. People would glance at the chaos and keep moving.
Less is more. I now display maybe 40-50 pieces at a time and keep the rest in my organized storage underneath. Each piece gets breathing room. Customers can focus on individual items instead of scanning a wall of shiny things. When something sells, I replace it from underneath. The table always looks fresh and full without being packed.
Mistake 2: No Price Tags (Yes, I'm Saying It Again)
I know I covered this already, but it deserves its own section in the mistakes list because it was genuinely the biggest revenue killer in my early days. I watched people pick up a necklace, turn it over looking for a price, not find one, hesitate, and put it back down. Over and over. I estimated I was losing 30-40% of potential sales just from this one issue.
The psychology is simple. When people don't know the price, their brain fills in the worst-case scenario. A $25 pair of earrings suddenly feels like it might be $75. So they don't ask. They just leave. Tag everything. Every single piece.
Mistake 3: Poor or Missing Lighting
At my third market, the venue was a community hall with dim yellow overheads. I didn't bring any extra lighting because I thought the room was bright enough. It wasn't. My crystals looked dull. My silver chains looked gray. A woman picked up one of my favorite pendants, squinted at it, and said "oh, it's actually really pretty" — she literally couldn't see how nice it was until she held it directly under one of the ceiling lights.
That was the day I ordered my first LED light bars. Don't rely on venue lighting. Ever. Bring your own and set it up as soon as you start setting up your table.
Putting It All Together on a Budget
You don't need to spend a fortune to build a great booth. Here's roughly what I spent on my complete setup:
Two T-bar necklace stands: $16. One tiered bracelet display: $12. Five ring cones: $20. Two LED light bars: $30. Dark velvet cloth: $12. Price tag stickers (500 pack): $8. Storage boxes: $15. Miscellaneous (tape, clips, tablecloth clips): $7.
Total: about $120. And honestly, you could do it for closer to $50 if you shop around on AliExpress or hit up IKEA for some of the basic display pieces. Amazon is the easiest option — just search "jewelry display stand" and you'll find hundreds of options. AliExpress is cheaper but shipping takes longer. IKEA sometimes has simple white or black display stands in their home organization section that work perfectly.
Start with the essentials: a dark cloth, proper display stands, and lighting. Those three things alone will put you ahead of most vendors at any market.
Three Bonus Touches That Make a Real Difference
A Small Mirror for Trying Things On
I found a lightweight standing mirror for about $10. It sits at the corner of my table, and I actively encourage people to try things on. Something magical happens when a customer sees themselves wearing your jewelry — suddenly it's not just a product, it's something that belongs to them. I've seen people pick up a necklace, try it on, look in the mirror, and immediately reach for their wallet. The mirror pays for itself in one market.
A Little Dish of Candy
This sounds silly but it works. I put a small glass dish of wrapped candies near the front edge of my table. People grab one, say thank you, and then they're standing at my booth. They start looking at my jewelry while eating the candy. It breaks the ice. Kids love it too, and parents linger longer when their kids are happy. A bag of mixed candies costs $3 and lasts me two or three markets.
Business Cards and a QR Code
Most people at craft shows won't buy on the spot. They want to think about it, or they want to check your website later. I keep a stack of simple business cards at the corner of my table — $5 gets you about 100 cards printed online. I also printed a small QR code sign that links to my Instagram, which costs almost nothing if you make it yourself.
I've had people come back to my booth an hour later because they looked me up online and liked what they saw. I've gotten online orders weeks after a market from someone who kept my card. It's the cheapest marketing you'll ever do.
The Bottom Line
A great booth setup isn't about spending money. It's about understanding how people move through a market, how their eyes scan a table, and what makes them stop and engage. Get your height right so they don't have to bend. Use dark fabric so your pieces stand out. Display vertically so the shape of each piece is visible from a distance. Light everything properly. Tag every item with a clear price. Keep your storage neat underneath.
And please, learn from my mistakes. Don't overcrowd your table. Don't skip the price tags. Don't assume the venue lighting is good enough.
Start small, improve over time, and watch your sales grow. Every market is a chance to tweak something and do better next time. That's the fun part, honestly — seeing your booth evolve from that first embarrassing setup into something you're genuinely proud of.


Comments