How to wire wrap a crystal point step by step
Wire wrapping is simpler than it looks
Wire wrapping a crystal point is one of those skills that intimidates people until they actually try it. The tools are minimal — round nose pliers, chain nose pliers, and wire cutters are the entire toolkit. The technique involves a handful of basic moves repeated in sequence. And the results look far more complex than the process actually is.
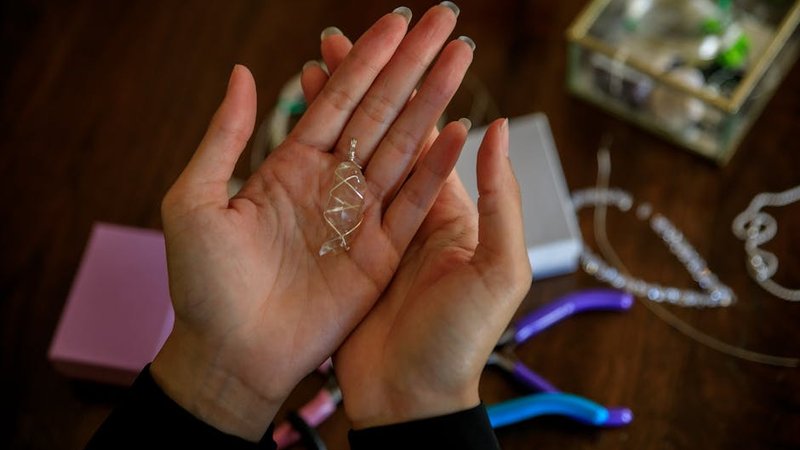
A wrapped crystal point makes a versatile pendant. It works on a chain, a cord, or even a keyring. The wire cage holds the stone securely without glue, which means the crystal can be removed and swapped later if you want to change the design. That modularity is a real advantage over adhesive settings.
This guide covers the most common wrapping style: a partial cage wrap that secures the point while leaving the crystal faces visible. It is the style you see most often in handmade crystal jewelry and at craft markets. Once you learn this one pattern, variations come naturally.
Wire and tools
Wire type and gauge
The best wire for beginners is dead-soft round copper wire in 20-gauge (0.8mm). Copper is cheap, easy to bend, and looks good with a light patina. You can buy a 30-foot spool for about $6-8, which makes 4-6 pendants depending on size.
Dead-soft wire bends easily, which is good for learning but means your finished piece will be a bit delicate. Half-hard wire holds its shape better but is harder to manipulate. Start with dead-soft and move to half-hard once you are comfortable with the technique.
Gauge matters. 18-gauge is thicker and more structural — good for large stones over 40mm but overkill for small pieces. 22-gauge is thinner and more delicate — fine for tiny stones under 20mm but too flimsy for anything larger. 20-gauge is the middle ground that works for most crystal points between 20-50mm.
Silver-plated and gold-plated copper wire are available if you want a different finish. They cost roughly twice as much as bare copper. Solid sterling silver in 20-gauge runs $15-25 for 30 feet. It is worth the upgrade if you are making pieces to sell or gift, but unnecessary for practice.
The three tools you need
Round nose pliers have tapered, cone-shaped jaws. You use them for making loops and curves. The position on the jaw determines loop size — closer to the tip makes smaller loops, closer to the base makes larger ones.
Chain nose pliers have flat, semi-tapered jaws. They grip wire, flatten bends, and tuck wire ends. Do not use needle nose pliers from a hardware store — the serrated jaws will mark the wire.
Wire cutters. Flush cutters are best because they cut flat on one side, leaving a clean edge. Side cutters leave a pointed edge that can scratch skin or snag on fabric.
A set of all three in basic quality costs $10-15 on Amazon or at any craft store. You do not need professional jeweler's tools to start.
Optional but helpful
A ruler or measuring tape for cutting consistent wire lengths. A small piece of fine sandpaper (400-grit) for smoothing cut wire ends. Nylon jaw pliers for straightening bent wire without marking it. A sharpie marker placed on one jaw of your round nose pliers creates a consistent loop size every time — mark the spot where you want the wire to cross.
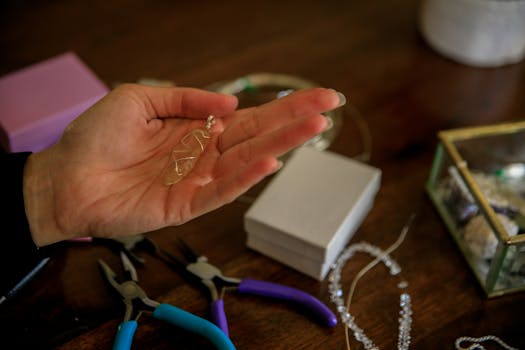
Preparing the crystal
Wipe the crystal point with a soft cloth to remove dust and oils. A clean surface gives the wire better grip. If the crystal has been handled a lot, a quick rinse in warm water and mild soap, then a thorough dry, is enough.
Examine the crystal and decide which end will be the top of the pendant. Most people choose the wider base as the top, with the point hanging down. This keeps the pendant balanced and visually stable. If the crystal is roughly symmetrical, it does not matter much.
Check for any sharp edges where the wire will sit. A truly sharp edge can cut into soft wire over time, causing the wrap to loosen. You can lightly sand rough spots with fine sandpaper.
Cutting and measuring wire
For a crystal point between 25-40mm long, cut one piece of wire about 20 inches (50cm) long. This is your main wrapping wire. You will also need a shorter piece, about 4 inches (10cm), for the bail (the hanging loop at the top).
Why 20 inches? You need enough wire to create 4-5 wraps around the crystal, form decorative loops at the top and bottom, and still have a tail left for tucking. Running out of wire mid-wrap is frustrating and usually means starting over. An extra 2-3 inches of waste is cheap insurance.
If your crystal is larger than 40mm, add 4-6 inches. Smaller than 25mm, you can get away with 16 inches.
Step one: creating the bail loop
Grip the main wire about 2 inches from one end with your round nose pliers. Wrap the wire around one jaw of the pliers to form a loop. The loop should be large enough to thread a chain or cord through — about 5-6mm in diameter. If you marked your pliers with a sharpie, use that mark for consistency.
Hold the loop flat between the jaws of your chain nose pliers and grip the short tail with your fingers. Wrap the short tail around the main wire stem 2-3 times, just below the loop. These wraps secure the loop and create a neat transition from bail to body. Trim the excess tail with flush cutters and use chain nose pliers to press the cut end flat against the wraps.
You now have a wire with a neat loop at one end and a long straight tail. The loop is the top of your pendant.
Step two: the first bend around the crystal
Hold the crystal point in your non-dominant hand. Position the wire so the bail loop sits against one side of the crystal, about 5-8mm below the top edge. The long tail of wire wraps around the crystal to the opposite side.
Bend the wire across the front of the crystal, then around the back, creating a single wrap. Use your fingers to press the wire against the crystal surface as you bend — it should follow the contour of the stone, not bridge across it. The wire should sit snug against the crystal faces.
Make a second wrap parallel to the first, about 3-4mm below it. These two wraps form the top section of the cage. They do not need to be perfectly parallel — slight irregularity looks handmade rather than sloppy.
Step three: creating the side anchors
After your second wrap, bring the wire around to the front of the crystal. Bend it at a 90-degree angle away from the crystal surface, creating a small wing or tab that extends outward about 5-8mm. This is a decorative anchor point.
Use your round nose pliers to curl the end of this tab into a small spiral or loop. The loop should be about 3-4mm across. This is where you can later attach a small bead or charm if you want, but for now it is just decorative.
Repeat this on the other side of the crystal. Bring the wire around to the back, wrap once, come around to the front, bend out another tab, and curl it into a loop. You now have two decorative anchors on opposite sides of the crystal.
Step four: wrapping down the crystal
Continue wrapping the wire around the crystal, working downward toward the point. Space your wraps about 4-5mm apart. Each wrap should go completely around the crystal — front, side, back, side — and return to the front.
As the crystal tapers toward the point, the wraps will naturally get closer together. This is fine and actually looks good. The taper creates a visual flow from wide to narrow.
You do not need to wrap all the way to the very tip. Stop when you have covered about 70-80% of the crystal length. The exposed tip gives the piece a clean, finished look and shows off the natural crystal point.
Step five: the bottom finish
At your last wrap, bring the wire to the front of the crystal. Create one more decorative tab like the side anchors — bend it outward, curl it into a loop, and spiral it inward so it sits against the crystal surface. This bottom loop mirrors the top bail and creates visual balance.
Take the remaining wire tail and wrap it back up toward the top, spiraling loosely around the crystal over the existing wraps. This adds texture and covers any gaps. When you reach the top wraps near the bail, tuck the end under one of the wraps and trim it flush with cutters. Press the cut end flat with chain nose pliers so it does not scratch.
Step six: adding the bail wire
Take your 4-inch bail wire piece. Thread it through the bail loop you created in step one. Center it so equal lengths extend above and below the loop.
Use round nose pliers to bend both tails upward, creating a U-shape above the bail loop. Then bend the tips of the U outward and curl them down to meet the sides of the bail loop. Wrap each tail around the base of the bail loop once or twice and trim. This reinforces the bail and gives it a more finished, structured look.
Alternatively, you can simply thread a jump ring through the bail loop and skip the bail wire entirely. This is faster and works fine for casual wear. A jump ring is less secure than a wrapped bail, though — if the wire is thin, a jump ring can pull open under tension.
Shaping and adjusting
Once the wrapping is complete, spend a few minutes adjusting. Look at the piece from all angles. Gently squeeze wraps that are loose with chain nose pliers. Reposition tabs that are crooked. The wire is soft enough that you can make small adjustments without risk of breaking anything.
Check that the crystal sits straight in the wrap. If it tilts to one side, the wire is tighter on that side. Loosen the tight wraps slightly by gently prying them open with the tip of your chain nose pliers, then reposition and squeeze.
The bail should hang centered. If it leans, the initial wrap position was off-center. You can correct this by gently bending the wire wraps to redistribute tension. Small corrections compound — each one shifts the balance a little.
Common problems
Wire kinks are the most common frustration. A kink happens when you bend the wire at too sharp an angle or try to force it into a shape it does not want to take. Prevention is easier than fixing: bend slowly, use your pliers to support the wire on both sides of the bend, and never try to bend dead-soft wire back and forth more than once in the same spot. Work-hardening from repeated bending makes the wire brittle and it will snap.
Scratched wire comes from using the wrong pliers. Chain nose pliers with smooth (not serrated) jaws are essential. If your only pliers have serrated teeth, wrap the jaws in a layer of painter's tape. It is not elegant, but it works.
Gaps between the wire and the crystal happen when the wraps are too loose or the crystal is an unusual shape. For irregular crystals, try making V-shaped bends in the wire that conform to the angles of the stone rather than trying to make the wraps follow a smooth curve. The wire should fit the crystal, not the other way around.
Patina and finishing
Bare copper develops a natural patina over time, darkening to a warm brown. Some people like this. If you want to speed it up, you can use a commercial patina solution like Liver of Sulfur, which turns copper dark brown or black in minutes. Dip the finished piece, rinse with water, and buff the high spots with a polishing cloth to create contrast between the dark patina and bright copper highlights.
If you prefer to keep the bright copper look, spray the finished piece with a clear acrylic sealer. Krylon makes a matte finish spray that works well and does not make the wire look overly shiny or plastic.
Sterling silver pieces can be polished with a jewelry polishing cloth or a dip in silver cleaner. Do not use silver polish on copper — the chemicals are different and it will not work properly.
Making it your own
Once you have the basic pattern down, experiment. Try wrapping with two colors of wire — copper and silver together creates a two-tone effect. Add small beads onto the wire before wrapping to incorporate them into the cage. Use 18-gauge wire for the structural wraps and 24-gauge wire for decorative spirals and details. The contrast in thickness adds visual depth.
Practice on inexpensive quartz points before moving to more expensive crystals. A $2 clear quartz point from a rock shop is the perfect training stone. You can unwrap it and reuse it indefinitely until your technique is consistent.
Comments