How to wire wrap a crystal: a beginner's step-by-step guide
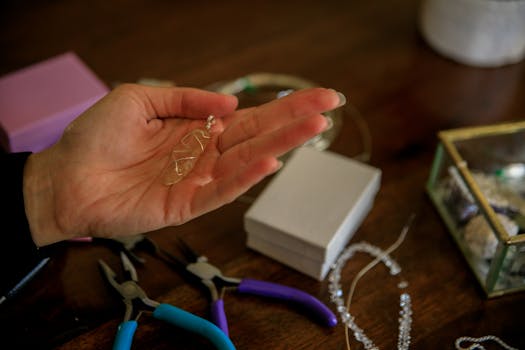
I started wire wrapping because I broke a nice amethyst point trying to drill a hole through it. The drill bit cost $12. The crystal was worth maybe $4. So I looked for a way to turn it into a pendant without putting any more holes in anything, and wire wrapping turned out to be the answer.
This guide covers the basics. No soldering, no torch, no chemicals. Just wire, pliers, and patience. If you have steady hands and twenty minutes, you can make something wearable.
What you need to get started
The tool list is short. You do not need a jewelry bench or a fancy setup. I do most of my wrapping at the kitchen table.
Round nose pliers. These have tapered, cone-shaped jaws. They make loops and curves. Cost: $8-15 at any craft store. Do not use needle-nose electronics pliers — the jaws are flat and will leave creases in your wire.
Chain nose pliers. Flat-jawed pliers for gripping, bending at sharp angles, and tucking wire ends. Same price range. You want smooth inner jaws. If the jaws have grooves or serrations, they will mark your wire every time you grip it.
Wire cutters. Flush cutters are ideal. They cut flat on one side and angled on the other. The flat side should face your finished work so you do not leave a sharp tail. Budget $6-12.
Wire. Start with copper. Dead-soft temper, 20-gauge or 22-gauge. A 50-foot spool costs about $5-7 on Amazon. Copper is soft, cheap, and forgiving. You will make ugly things at first. Better to waste copper at $0.10 per piece than sterling silver at $2 per piece.
Sterling silver wire (22ga, dead-soft) is the natural upgrade once your loops look like loops instead of squiggles. Half-hard temper holds its shape better for structural wraps but is harder to manipulate. Start with dead-soft.
The crystal. Almost anything works. Tumbled stones are easiest. Points are a bit trickier but look better as pendants. Rough chunks can work too — the irregular shape is part of the appeal. Pick something with at least one flat edge or a natural narrowing point where the wire can grip.
Why copper wire is the right call for beginners
Copper has a Mohs hardness of 3. Your fingernail is 2.5. This wire bends easily, which means you can form shapes without fighting the material. Dead-soft copper bends with light finger pressure.
Sterling silver is harder (2.5-3 on the Mohs scale, but it work-hardens faster). It fights back. Brass is stiffer. Gold-filled wire is expensive enough that mistakes feel painful. Copper gives you permission to fail cheaply.
The other advantage: copper develops a patina over time. That darkened, warm-brown look is actually popular in handmade jewelry. So even if your first few wraps are imperfect, they will still look intentional after a week or two of oxidation.
Three basic techniques you should learn first
The simple loop
This is the foundation of everything. Cut about 2 inches of wire. Grip one end with round nose pliers, about a third of the way up from the tip. Rotate the pliers to bend the wire into a circle. Stop when the wire tail meets itself. That is a simple loop.
The loop size depends on where you grip on the tapered jaw. Near the tip = small loop. Further back = larger loop. Consistency comes with practice. My first twenty loops were all different sizes. Now I can match loop diameters within half a millimeter by marking my pliers with a permanent dot.
The wrapped loop
Make a simple loop, but do not close it all the way. Instead, grip the loop flat in chain nose pliers and wrap the tail end around the neck of wire below the loop. Two or three wraps is enough. Snip the excess. Use chain nose pliers to crimp the cut end flat against the wraps.
This is stronger than a simple loop because the wraps prevent the loop from opening under tension. If you are making a pendant that will hang from a chain, use wrapped loops. Simple loops are fine for lightweight earrings or decorative elements.
The cage wrap
This is what most people picture when they think of wire-wrapped crystals. The stone sits inside a cage of wire, held in place by tension and a few strategic bends.
Start with 12-18 inches of wire for a stone the size of a grape. Form a flat spiral at the center (this becomes the back plate). Place the stone against it. Bend wire up on both sides, cross over the top, twist once, and bring the wire back down. Repeat this crossing pattern 3-5 times, spacing the wraps evenly. Finish by forming a wrapped loop at the top for hanging.
The cage wrap works best on stones that are wider in the middle than at the top and bottom. Tumbled stones and small crystal points are ideal. Large, perfectly round beads are actually harder to cage-wrap because the wire slides around too much.
Step-by-step: your first wire-wrapped pendant
Step 1: measure and cut
Hold your crystal and estimate how much wire you need. For a standard pendant on a tumbled stone (about 1 inch long), I use 14-16 inches of 20-gauge wire. Cut it with flush cutters. It is better to cut too much and have a tail to trim than to cut too short and have to start over.
Step 2: make the bail (hanging loop)
Find the center of your wire. Grip it with round nose pliers and bend it into a U-shape. Cross the wire tails over each other once to form a small loop at the top. This loop is your bail. Twist the wire tails together below the loop for about half an inch to lock the shape.
Step 3: shape the frame around the stone
Open the twisted tails into a V-shape. Place your crystal between them, with the bail at the top. Bend both wire tails around the widest part of the stone, crossing at the bottom. Twist once at the bottom to lock. You now have a rough frame.
Step 4: wrap and secure
Take one wire tail and wrap it around the frame 2-3 times near the bottom. Then bring it up and across the front of the stone, wrap around the other side of the frame, and repeat. Two or three decorative wraps across the front are enough to hold the stone. Do not over-wrap — it looks cluttered and adds weight.
Finish by trimming the wire tail to about a quarter inch and tucking it under an existing wrap with chain nose pliers. Repeat on the other side if needed.
Step 5: check and adjust
Gently tug the stone. It should not rattle or shift. If it does, add another wrap or tighten an existing one. Check that the bail loop is centered and the pendant hangs straight. Hold it up and look at it from a few angles. Minor asymmetry is fine and actually looks handmade in a good way.
Common mistakes (I have made all of these)
Cutting wire too short. This happens to everyone. You get to the last wrap and the wire tail is an inch from where it needs to be. Solution: always cut 2-3 inches longer than you think you need. The waste is negligible. Starting over because you ran out of wire is frustrating.
Bending too sharply. Sharp 90-degree bends create stress points where the wire will eventually break. Use smooth, gradual curves. Round nose pliers are curved for a reason. If you need a sharp angle, use chain nose pliers but support the wire on both sides of the bend.
Scratching the crystal surface. Wire is metal. Crystals sit between 5 and 7 on the Mohs hardness scale. Copper is softer than most crystals, but if you drag the wire across the surface under pressure, you can leave marks. Wrap gently. If the stone has a polished face, avoid dragging wire across it.
Over-tightening. You are trying to hold a stone, not strangle it. Excessive force deforms the wire, makes the wrap look cramped, and can crack softer stones like calcite or fluorite. The wire should be snug, not biting into the crystal.
Leaving sharp tails. Always tuck your cut ends. A quarter-inch wire tail sticking out will snag on clothing, scratch skin, and generally annoy whoever wears it. Flush cut, then use chain nose pliers to press the end flat against an adjacent wrap.
What wire wrapping is not
It is not soldering. You do not need heat. There is no melting, no flux, no fire hazard. The wire holds the stone through tension and geometry alone. This makes it the most accessible entry point into jewelry making — the startup cost is under $30, and you can start producing wearable pieces within an hour of opening your pliers.
It is also not precision machining. Your wraps will be slightly uneven. Your loops will vary. That is fine. Handmade jewelry is supposed to look handmade. The slight irregularities are what distinguish a wire-wrapped pendant from a factory-produced casting. Buyers of handmade jewelry actually pay for those imperfections.
Next steps after the basics
Once you can reliably make a cage-wrapped pendant, try these variations:
Double-wrapped frames use two wires instead of one for a bolder look. Weave wraps incorporate thinner gauge wire (26-28ga) wrapped around the frame in patterns. Freeform wrapping abandons symmetry entirely and lets the wire follow the natural shape of an irregular stone.
Practice on cheap tumbled stones from a $5 mixed bag. Move to nicer crystals once your wraps are clean and consistent. I wrapped about forty stones before I made anything I would actually give to someone. That sounds like a lot, but each one takes about fifteen minutes. You will know you are improving when you stop having to start over.
Comments