How to Tell if a Crystal Is Real or Fake
Why Authenticity Matters More Than You Think
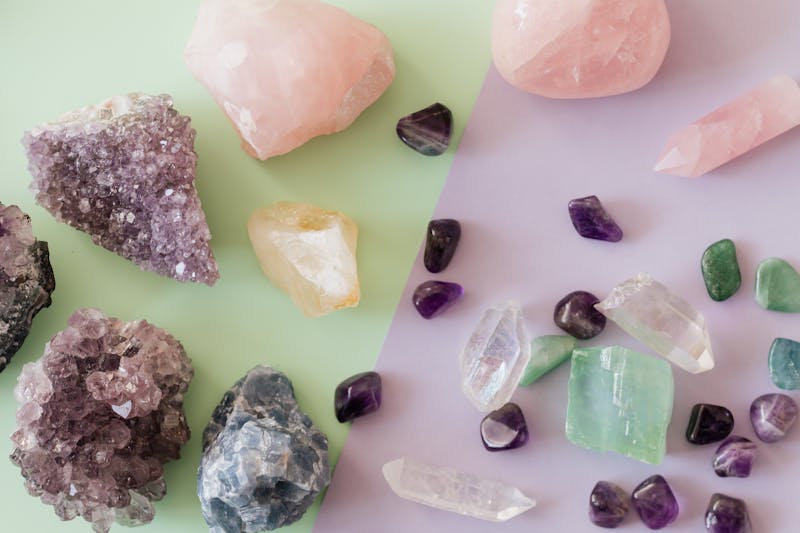
The crystal and mineral market has exploded in recent years. Walk into any gift shop, metaphysical store, or even a department store, and you will find shelves lined with colorful stones. The problem is that a significant portion of what is being sold is not what it claims to be. Identifying genuine specimens is not just about getting your money's worth. It is about understanding geology, respecting natural processes, and building a collection that holds real value over time.
Counterfeit crystals are everywhere. Dyed quartz sold as expensive minerals, glass molded to look like natural formations, and plastic resins mixed with mineral dust are just a few of the tricks dealers use. Some fakes are obvious once you know what to look for. Others are sophisticated enough to fool experienced collectors. The good news is that with a few straightforward techniques, you can dramatically improve your ability to spot the difference.
The Visual Inspection Test
Your eyes are the first line of defense. Natural crystals have imperfections. They have inclusions, uneven color distribution, tiny fractures, and growth patterns that are essentially impossible to replicate perfectly in a lab or factory setting. If a stone looks too perfect, that is actually a red flag.
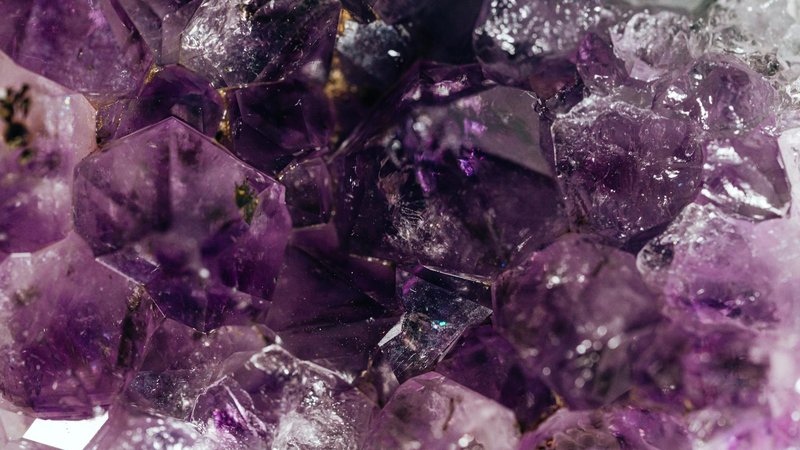
Look at the color first. Natural amethyst ranges from pale lilac to deep purple, but the color should not be perfectly uniform throughout the crystal. You should see bands, zones of lighter and darker shades, and subtle variations. If every single piece in a batch has identical color saturation and tone, something is off. Dyed stones often show concentrated color along fractures and near the surface, with paler interiors.
Examine the surface texture. Natural crystals have microscopic growth lines, minor scratches from millions of years of geological activity, and slightly irregular faces. Even well-polished stones should show some evidence of their natural origin under close inspection. Glass fakes, by contrast, tend to have perfectly smooth surfaces with no growth patterns whatsoever.
Check for air bubbles. This is one of the easiest giveaways. Glass and resin replicas frequently contain tiny spherical air bubbles trapped during the manufacturing process. Natural crystals virtually never have round, perfectly spherical inclusions. If you spot bubbles, you are almost certainly looking at something manufactured.
The Temperature and Weight Test
Real crystals feel different in your hand compared to glass or plastic. Natural stone tends to feel colder initially and takes longer to warm up when you hold it. This is because most minerals have higher thermal conductivity and specific heat capacity than glass or resin. Pick up the stone and pay attention to how it feels against your skin. If it warms up almost immediately, that suggests a lower-density material like plastic or resin.
Weight is another useful indicator. Most natural minerals are denser than they look. A piece of real quartz feels noticeably heavier than a similarly sized piece of glass. This is not foolproof on its own, since some natural minerals are relatively light, but it becomes a useful data point when combined with other observations. If a large crystal feels surprisingly light for its size, that warrants further investigation.
Using a jeweler's loupe
A simple 10x loupe costs less than ten dollars and opens up an entirely new world of detail. With magnification, you can see whether internal features look natural or manufactured. Natural inclusions in quartz, for example, include needle-like rutile, chloritephantom shapes, and irregular fluid pockets. These look organic and haphazard. Fake inclusions, whether painted on, glued in, or created through dye injection, tend to look too uniform or too deliberately placed.
Pay special attention to the boundaries between different colored zones. In natural stones, these transitions are gradual and follow the crystal's growth history. In dyed pieces, you can often see sharp, unnatural boundaries where the dye has penetrated to a certain depth and then stopped abruptly.
Common Fakes and How to Spot Them
Some of the most frequently faked minerals have well-known tells once you know them. Citrine is a prime example. Natural citrine is actually quite rare. Most of what is sold as citrine in the market is actually amethyst that has been heat-treated. While heat treatment is a legitimate process in the gem trade and is generally disclosed, some sellers present treated amethyst as natural citrine, which is misleading. The giveaway is the color: natural citrine tends to be pale yellow to smoky gold, while heat-treated amethyst often has an orange-yellow hue with subtle traces of purple at the base.
Malachite is another commonly faked stone. Real malachite has distinct concentric banding patterns that vary in width and intensity. Fake malachite, often made from molded resin with malachite powder, shows bands that are too regular, too evenly spaced, and sometimes repeat in a way that natural geological processes would never produce. If the banding looks like a machine made it, it probably did.
Turquoise is perhaps the most faked mineral of all. Reconstituted turquoise, made by grinding up low-grade material and pressing it back together with binders, is extremely common. Dyed howlite is another frequent substitute. Real turquoise has a waxy luster and natural matrix patterns that look random and three-dimensional. Dyed howlite shows color concentrated in the porous areas, and the matrix patterns tend to look painted on rather than integrated into the stone.
Advanced Testing Methods
For collectors who want to go beyond visual inspection, there are several more technical approaches. The scratch test is simple but effective. Genuine quartz will scratch glass because quartz has a hardness of 7 on the Mohs scale while glass sits around 5.5. However, this is a destructive test and should only be used on inconspicuous areas or on specimens where minor damage is acceptable.
The UV light test is non-destructive and can reveal a surprising amount of information. Many minerals fluoresce under ultraviolet light in specific colors that serve as identifying signatures. Fluorite, for instance, often shows bright blue or green fluorescence. Some synthetic materials also fluoresce, but the patterns and colors differ from their natural counterparts. This test is especially useful for distinguishing natural from synthetic ruby and sapphire, since their fluorescence responses differ noticeably.
Specific gravity testing involves measuring the weight of a stone in air and then suspended in water. This gives you a density value that can be compared against known values for genuine minerals. A simple jeweler's scale and a small container of water are all you need. While this method requires some calculation, it is one of the most reliable non-destructive tests available to hobbyists.
Buying Smart: Red Flags and Best Practices
The single biggest red flag is price. If someone is selling a large piece of supposed high-quality mineral at a fraction of its market value, that should immediately raise suspicion. Genuine minerals, especially rare varieties, have real scarcity behind their pricing. Deep discounts on supposedly premium specimens almost always indicate a fake or a significantly lower quality material being misrepresented.
Seller reputation matters enormously. Established mineral dealers who have been in business for years, who belong to professional organizations, and who offer return policies are far more likely to sell genuine material. Online marketplaces where anyone can list anything are where the vast majority of fakes circulate. This is not to say good deals cannot be found online, but the burden of verification falls entirely on the buyer.
Ask questions. A legitimate dealer should be able to tell you where a specimen was mined, what treatments it has undergone, and whether it is natural or lab-grown. Vague answers, evasive language, or claims that a stone is "100% genuine guaranteed" without any specifics are warning signs. Knowledgeable sellers are usually happy to discuss their specimens in detail.
Build your knowledge gradually. Start with common, inexpensive minerals where you can afford to make mistakes. Learn what real quartz, amethyst, and citrine look and feel like. Once you have trained your eye and hand on these basics, you will be much better equipped to evaluate more expensive and unusual specimens. The crystal world rewards patient, informed collectors far more than impulsive buyers.
The Scratch and Hardness Test
Beyond the basic visual and tactile checks, hardness testing provides another layer of verification. The Mohs scale runs from 1 (talc) to 10 (diamond), and each mineral species occupies a specific position. Knowing the expected hardness of a stone and testing it against reference materials can quickly confirm or challenge an identification.
Quartz, one of the most commonly sold crystals, has a Mohs hardness of 7. It will easily scratch glass (5.5), a steel knife blade (5.5), and a copper penny (3). If a stone sold as quartz fails to scratch glass, something is wrong. It might be glass itself, which has a similar hardness to window glass and would not scratch another piece of glass. This is one of the simplest and most reliable field tests available.
Feldspar minerals have hardnesses around 6 to 6.5. Topaz sits at 8. Corundum (ruby and sapphire) at 9. Each step on the Mohs scale represents a meaningful difference in scratch resistance. A genuine piece of ruby should be able to scratch topaz but not diamond. If you have access to a set of Mohs hardness picks, you can narrow down a specimen's identity with reasonable accuracy.
The limitation of hardness testing is that it can damage your specimen. Scratch marks are permanent, and testing in a visible area reduces the aesthetic value of the stone. For this reason, hardness tests are best performed on the back or bottom of a specimen, or on an inconspicuous edge. Some collectors keep a separate set of reference specimens specifically for destructive testing so they do not risk damaging their display pieces.
The Bottom Line
No single test can guarantee authenticity with absolute certainty. The most reliable approach combines multiple methods: visual inspection, temperature and weight assessment, magnified examination, and knowledge of common faking techniques. Over time, your instincts will sharpen and you will develop an almost unconscious ability to sense when something is not right. Trust that feeling, verify it with the techniques described here, and you will build a collection that is both genuinely impressive and genuinely real.
Comments