How to Start a Jewelry Business from Home
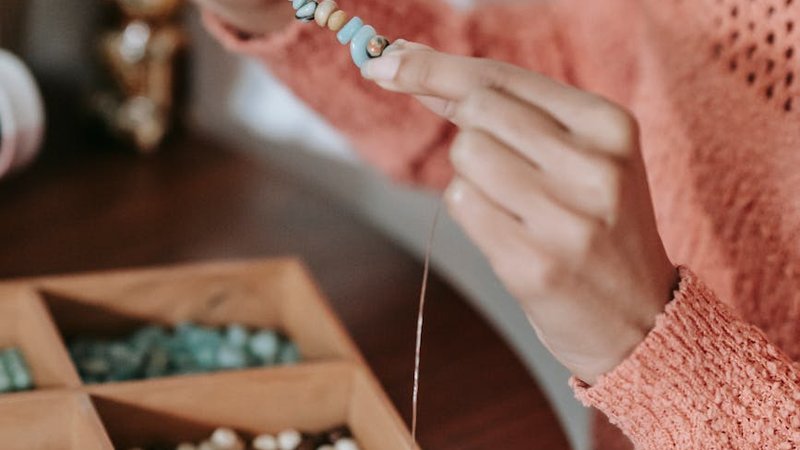
Back in 2019, I was sitting at my kitchen table with a pair of round-nose pliers, some wire, and a handful of beads I'd bought on a whim from a craft store. I had no business plan. No savings set aside. No idea what I was doing, really. I just thought, "I bet someone would buy this."
Five years later, that kitchen table side hustle brings in over $3,000 a month consistently. It's not get-rich-quick money — it took work, mistakes, and a lot of stubborn refusal to quit. But it's real, and more importantly, it's repeatable. If you're reading this, you're probably where I was: excited but overwhelmed. Let me walk you through exactly how I got here, and how you can do the same thing.
Before You Start: The Question Nobody Asks
There's one thing you need to figure out before buying a single bead, and it's not your brand name or your color palette. It's this: are you building a side hustle or a full-time business?
I know that sounds obvious, but the answer changes everything. A side hustle means you're working evenings and weekends, reinvesting some profit, and keeping your day job. A full-time business means you need enough runway to cover your bills while you build traction. I started as a side hustle, and I'm glad I did. The pressure to "make rent from jewelry" would've killed the joy in the first month.
Be honest with yourself. There's no wrong answer — but there is a wrong way to start (and that's not deciding at all).
Step 1: Pick a Niche (and Stop Trying to Do Everything)
When I started, I made a bit of everything. Wire-wrapped rings, beaded necklaces, resin earrings, charm bracelets. I figured more variety meant more customers. It didn't. It meant I was mediocre at ten things instead of good at one.
Here's what actually works — pick one of these angles:
Material Niche
You become the "sterling silver minimalist" person, or the "upcycled glass" person, or the "seed bead embroidery" person. Customers who love that material know exactly where to find you. My breakthrough came when I stopped making random stuff and focused exclusively on hammered gold-filled wire jewelry. That specificity built trust.
Style Niche
Boho, minimalist, gothic, art deco, nature-inspired — pick a lane. Your style niche is your visual fingerprint. When someone scrolls through your Instagram and immediately thinks "oh, this is that brand," you've nailed it.
Audience Niche
Jewelry for nurses (badge reels, comfortable pieces for long shifts). Jewelry for bridesmaids. Jewelry for pet lovers with custom paw prints. When you solve a specific person's problem, marketing becomes almost effortless.
The common thread? Niche down until it feels slightly uncomfortable. That's probably the right spot.
Step 2: Make It Legal (It's Easier Than You Think)
I put this off for three months because it sounded intimidating. Don't be like me. In most US states, you can register a business online in under an hour. Here's what you actually need:
Business License / DBA
A "Doing Business As" registration lets you operate under your brand name. It costs $10–$50 depending on your state and county. File it through your local county clerk's website. In many places, you don't even need to visit an office.
EIN (Employer Identification Number)
This is free from the IRS website. It takes about five minutes. You need it to open a business bank account, and having one separates your personal and business finances — which you absolutely want to do before tax season rolls around.
Sales Tax Permit
If you're selling to customers in your state (or states where you have "nexus"), you need to collect sales tax. Each state has different rules, and some states don't have sales tax at all. Check your state's Department of Revenue website. Most let you register online and file quarterly.
None of this requires a lawyer. I did it all myself with Google and coffee. The whole setup cost me less than $60.
Step 3: Pricing That Actually Pays You
Pricing was the hardest part for me, emotionally. I kept thinking "who would pay $45 for a pair of earrings I made at my kitchen table?" The answer: people who value handmade work and understand what goes into it. But I had to believe that first.
Here's the formula that finally clicked for me:
(Materials + Labor + Overhead) × 2.5 to 3 = Wholesale Price
Wholesale Price × 2 = Retail Price
Let's break that down with a real example. A pair of gold-filled wire earrings uses $8 in materials. Labor (30 minutes at $25/hour) adds $12.50. Overhead (packaging, tools wear, website fees — I estimate 10% of costs) adds about $2. So my base cost is $22.50. Multiplied by 2.5, wholesale is $56. Retail is around $65–$75 depending on the platform.
The key insight: your time has value. If you wouldn't work for free, don't price like you do.
Step 4: Build Your Sales Channels
You don't need to be everywhere. You need to be where your customers are.
Etsy (Best for Starting Out)
Etsy handles the hard stuff — payment processing, search traffic, buyer trust. The downside is fees (listing + transaction + payment processing eat about 15–20% of your revenue). But for a beginner, the built-in audience is worth it. I got my first 50 sales on Etsy before I even thought about building my own website.
Instagram (Direct Sales)
Post consistently. Show your process. Talk about the materials. Build a community, not just a catalog. I sell directly through DMs and Instagram Stories, which means zero platform fees. It takes longer to build, but the margins are much better.
Local Markets and Craft Fairs
Nothing teaches you what sells like standing behind a table watching real people pick up your work. Markets also build local word-of-mouth. Start with small, low-fee events ($25–$50 table fee) before investing in bigger shows.
Wholesale to Boutiques
Once you have a consistent product line and good photography, approach local boutiques. Wholesale means lower margins per piece but higher volume and recurring orders. My first wholesale account came from literally walking into a shop, showing the owner my earrings, and asking if they'd consider carrying them.
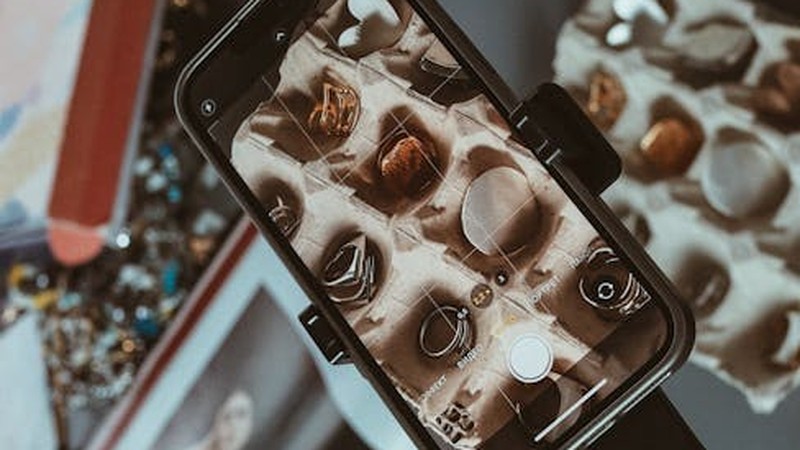
Step 5: Photography and Branding (Without the $5,000 Designer)
I spent $0 on my initial branding. Here's what I used:
Photography: My phone (an iPhone, nothing fancy), a window with indirect natural light, and a piece of white poster board from the dollar store. That's it. No lightbox, no ring light, no fancy backdrop. Natural window light flatters jewelry better than anything else, especially for metals and stones.
Branding: Canva. I made my logo, my thank-you cards, my social media graphics — all in Canva's free tier. Was it award-winning design? No. Was it professional enough to sell $3,000/month? Absolutely.
The biggest branding mistake I see new makers make: spending months and thousands of dollars on branding before selling a single piece. Your brand will evolve. Let your first customers help shape it.
Step 6: Packaging and Shipping
Unboxing experience matters more than you'd think. When someone opens a package and it looks polished and intentional, they feel good about their purchase. They take photos. They tell friends.
My packaging setup: kraft paper boxes (bulk from Amazon, about $0.40 each), tissue paper, a small thank-you card, and a branded sticker on the outside. Total packaging cost per order: under $1.50.
For shipping, USPS Flat Rate boxes are your best friend for anything that fits in a small or medium box. Flat Rate means the price doesn't change based on weight or distance. For small jewelry, First Class Package (under 16 oz) is usually cheaper than Flat Rate — compare both at the post office.
My Real Numbers: The First 6 Months
Transparency matters, so here's exactly how it went for me:
Month 1: $120 in sales. I made 4 orders on Etsy. I was thrilled and also slightly embarrassed. Most of that went right back into supplies.
Month 2: $340. Things started picking up as I got more listings live and learned how to tag my products for Etsy search.
Month 3: $800. I did my first craft market and sold $200 worth of inventory in four hours. That was the moment I thought, "wait, this could actually work."
Month 4: $1,200. Reorders started coming in. Etsy algorithm started favoring my shop because of consistent sales.
Month 5: $2,100. I posted a behind-the-scenes video on Instagram that went somewhat viral in my niche, and DM sales took off.
Month 6: $3,200. This was my first month where profit (after materials, fees, and packaging) replaced what I'd need for a basic part-time income.
Was it linear? Not even close. Some weeks I sold nothing. Some days I'd get five orders at once. The trend was upward, but the day-to-day was messy.
The Most Important Thing I Can Tell You
Don't wait until everything is perfect to launch. I almost did. I wanted the "right" logo, the "right" packaging, the "right" product lineup. Meanwhile, I was sitting on inventory and making zero sales.
Here's what I wish someone had told me in 2019: your first 20 sales will teach you more than six months of planning. The customer who returns a piece because the clasp is too small? That's a product improvement you'd never have thought of. The person who asks "do you have this in rose gold?" — that's a new product line you didn't know you needed.
Start before you're ready. List five items on Etsy this weekend. Post them on Instagram. Tell your friends. Make mistakes. Fix them. Repeat.
The best time to start a jewelry business from home was five years ago. The second best time is right now. Your kitchen table is waiting.
Comments