How to Price Handmade Jewelry So You Actually Make Money: The Real Pricing Guide
When I started selling handmade jewelry, my pricing strategy was basically this: look at what other people were charging, pick a number that felt reasonable, and round down because I was afraid nobody would pay more. My first rings were $15. I thought I was being smart — undercutting the competition to get sales quickly.
I sold three rings that month. After subtracting materials, booth fees, and the hours I spent making them, I probably made about $2 an hour. Less than minimum wage. Less than what I could have made walking dogs.
The problem wasn't my jewelry. It was my pricing. And I've since learned that pricing is the single most important business decision a handmade jewelry maker gets wrong. Not the designs, not the photos, not the social media — the numbers on the price tag.
Here's how to price handmade jewelry so you actually make money, based on what I've learned running SageStone and talking to dozens of successful jewelry makers.
The Pricing Formula That Actually Works
There are a hundred pricing formulas online. Most of them are either too simple or too complicated. Here's the one I use, and it works:
Base Price = (Materials × 2) + (Labor Hours × Hourly Rate) + Overhead
Retail Price = Base Price × 2.2 to 3
Let's break down each component, because the details matter.
Materials: Cost What You Paid, Not What You Think It's Worth
This one sounds obvious but people get it wrong constantly. Your material cost is exactly what you paid for the wire, beads, clasps, packaging, and everything else that goes into the finished piece. Not the "value" of the materials — the actual dollars you spent.
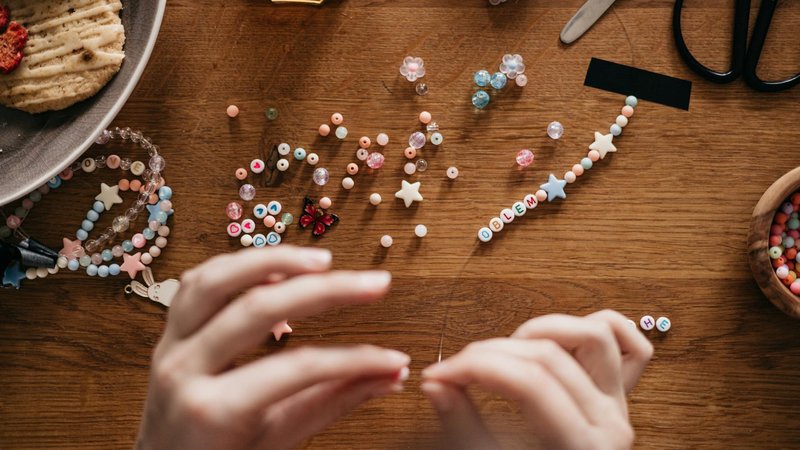
Here's a concrete example for a gold-fill beaded bracelet:
- Gold-fill wire for the clasp: $1.20
- 8mm gold-fill beads (12 pieces): $4.80
- Lobster clasp: $0.60
- Jump rings (2): $0.20
- Stretch cord or crimp beads: $0.15
- Packaging (box + insert + sticker): $0.75
- Total materials: $7.70
Notice I included packaging. It's part of the product — if you're shipping it in a nice box, that box costs money and it's part of what the customer receives. Don't skip it.
Labor Hours: Be Honest With Yourself
This is where most handmade sellers lie to themselves. They think "it only took me 30 minutes" when it actually took 45 minutes, plus 10 minutes of setup, plus 5 minutes of cleanup, plus the 20 minutes they spent at the craft store buying supplies that could have been spent on something else.
Time your actual work. Start a timer when you sit down. Stop it when the finished piece is ready to ship. Do this for 5-10 pieces and take the average. The number will probably surprise you.
For the gold-fill beaded bracelet example, honest timing might look like:
- Gathering materials and setting up: 5 minutes
- Stringing beads: 12 minutes
- Attaching clasp and crimping: 5 minutes
- Quality check and packaging: 3 minutes
- Total labor: 25 minutes (0.42 hours)
Hourly Rate: Pay Yourself Like a Professional
Here's the hardest pill to swallow: your hourly rate should be at least $25-35 per hour if you're in the US, UK, Canada, or Australia. In other markets, adjust for local cost of living, but the principle is the same — you're a skilled craftsperson, not an intern.
If that number feels too high, ask yourself: would you work for $10/hour at a regular job? If not, why would you work for $10/hour at your own business?
For our bracelet example, using $30/hour:
- 0.42 hours × $30 = $12.60
Overhead: The Hidden Costs
Overhead covers everything else — your tools (amortized), your workspace rent or utilities, your website hosting, your craft show fees, your credit card processing fees, your insurance, and the portion of your phone/internet bill that's business-related.
A simple way to estimate overhead: add 10-15% to your materials + labor cost. For beginners, 10% is usually sufficient. As your business grows and you have more fixed costs, increase it.
For our bracelet: ($7.70 + $12.60) × 0.10 = $2.03
Putting It Together
Base Price = ($7.70 × 2) + $12.60 + $2.03 = $30.03
Wait — why multiply materials by 2? Because you need to replace those materials for the next piece. The first $7.70 covers what went into this bracelet. The second $7.70 is your replacement fund — the money you need to buy materials for the next one. If you don't account for this, you'll run out of money for supplies as soon as sales pick up.
Retail Price = $30.03 × 2.5 = $75.08
Round to a clean number: $75.
If that feels expensive for a beaded bracelet, I understand. But let me show you why it's correct.
Why the 2.5x Multiplier Matters
The retail markup (2.2x to 3x your base price) isn't greed — it's survival. Here's what that markup covers:
- Wholesale accounts: If a boutique wants to carry your jewelry, they'll expect 40-50% off retail. At a 2.5x markup, you can still wholesale at a small profit. At a 1.5x markup, wholesale means losing money on every piece.
- Sales and promotions: Holiday sales, coupon codes, bundle deals — they all come out of your margin. If your margin is thin, a 20% off sale means you're barely breaking even.
- Taxes: Self-employment tax, income tax, and potentially sales tax depending on your location. In the US, set aside 25-30% of your income for taxes.
- Business growth: Marketing, better tools, a new website, hiring help — all of these require profit margin.
I've seen too many talented jewelry makers price at 1.5x their base and wonder why they're working 60-hour weeks and still can't afford to upgrade their tools. The math doesn't work at low markups. It just doesn't.
What If Nobody Buys at That Price?
This is the fear that drives underpricing. And it's a valid fear — pricing too high is a real risk. But here's the thing: pricing too low is also a risk, and it's actually worse.
Low prices signal low quality. When someone sees a handmade gold-fill bracelet for $25, they don't think "what a great deal." They think "something must be wrong with it" or "this probably isn't real gold-fill." In the handmade jewelry market, $25 for a gold-fill bracelet is suspiciously cheap. It undermines your credibility.
Here's a pricing experiment that changed my thinking: I had a pair of earrings priced at $28. They sat in my shop for six weeks without a single sale. I raised the price to $48. They sold within a week.
That's not an anomaly. It's a well-documented phenomenon in retail psychology. The right price communicates value. The wrong price — even if it's lower — communicates doubt.
How to Test Your Prices
You don't have to guess. Here's a practical approach:
1. Research Your Competitors
Look at 10-15 makers who create similar work (similar materials, similar skill level, similar brand positioning). What are they charging? Don't just look at the cheapest ones — look at the ones whose brands you admire and whose work is at a comparable quality level to yours.
If most similar pieces are $60-90 and you calculated $75, you're in the right zone. If most are $30-40 and you calculated $75, you're either underestimating your market or your work is genuinely more complex than what they're selling.
2. Start in the Middle
If your calculated price is $75 and the market range is $50-120, start at $75. Don't start at $50 to be safe — you'll just have to raise prices later, which annoys existing customers. Start at the calculated price and adjust based on actual sales data.
3. Give It 30-60 Days
Pricing changes don't show results overnight. Give each price point at least a month of consistent sales effort before adjusting. If you change your price every two weeks, you'll never have enough data to make good decisions.
4. Watch Conversion, Not Just Sales
If 100 people visit your shop and 3 buy at $75, that's a 3% conversion rate. If you lower to $55 and 4 buy out of 100, that's 4% conversion but you're making less total revenue ($220 vs $225). Higher conversion doesn't always mean more money.
Tiered Pricing: A Strategy That Works
Instead of one price point for everything, consider offering three tiers:
- Entry tier ($25-45): Simple designs, smaller pieces, faster to make. Beaded bracelets, simple hammered bands, small stud earrings. These attract first-time buyers and serve as "gateway" products.
- Core tier ($50-100): Your main designs. The pieces that represent your brand. Gold-fill chains with pendants, textured rings, multi-strand necklaces. This is where most of your revenue comes from.
- Premium tier ($120-250+): One-of-a-kind pieces, custom work, complex designs, sterling silver or solid gold. These establish your brand credibility and attract serious collectors.
The entry tier brings in new customers. The core tier pays the bills. The premium tier builds your reputation. You need all three.
Here's what's interesting: many of my SageStone customers start with a $35 beaded bracelet, come back a month later for an $85 necklace, and eventually commission a $200 custom piece. The entry tier is an investment in customer acquisition, not a profit center on its own.
Pricing for Wholesale
If a boutique or gallery approaches you about carrying your work (and they will, if your brand is good), here's how wholesale pricing works:
Wholesale price = Retail price × 0.4 to 0.5
This is why the 2.5x markup on your base price matters. If your base price is $30 and your retail is $75, your wholesale price at 50% is $37.50. You still make $7.50 profit per piece. Not a lot, but you're selling in volume — a boutique might order 20-50 pieces at a time.
If you had priced at 1.5x ($45 retail), wholesale at 50% is $22.50 — below your base cost. You'd lose money on every wholesale order.
Rule of thumb: never accept wholesale terms unless your wholesale price is at least 1.2x your base cost. Anything less and you're subsidizing someone else's business with your labor.
Pricing for Custom Work
Custom orders are trickier to price because they're one-of-a-kind. Here's my approach:
Custom price = Base price for the design + 20-30% custom surcharge
The surcharge covers the extra time for consultation, design iteration, and the fact that you can't batch custom work. It also accounts for the risk — if the customer doesn't like the result (and some won't, no matter how clear you are about the design), you need that margin buffer.
Always get a 50% deposit before starting custom work. Non-refundable. This is standard in the industry and protects you from flaky buyers.
The Psychological Side of Pricing
There are a few psychological pricing tricks that genuinely work for handmade jewelry:
- Charm pricing: $74 instead of $75. Research consistently shows that left-digit pricing increases sales. Use it for your core tier.
- Prestige pricing: Use round numbers ($200, not $199) for your premium tier. Round numbers signal quality and confidence.
- Bundle pricing: "Buy any 2 bracelets, get 15% off." This increases your average order value without requiring new designs or more work.
- Anchor pricing: Show your most expensive piece prominently. When customers see a $250 necklace first, a $75 bracelet feels reasonable by comparison.
When to Raise Prices
Raising prices is scary but necessary. Here's when to do it:
- Annual increase: Raise prices 5-10% every year, regardless of anything else. This keeps up with material cost inflation and your improving skill level.
- Sold out consistently: If a design sells out within days of restocking, raise the price by 15-20%. Demand exceeds supply — that's textbook pricing power.
- New skill level: If your work has visibly improved (better finishing, more complex designs, better photography), your prices should reflect that.
- Cost increase: If gold-fill wire goes up 20%, your prices need to go up too. Don't absorb material cost increases — pass them through.
How to raise prices without losing customers: announce it clearly and positively. "New collection, new prices" is better than "price increase effective immediately." Frame it as growth, not greed.
The Bottom Line
Pricing handmade jewelry is part math, part psychology, and part confidence. The formula gives you a starting point. The market research gives you context. And the willingness to charge what your work is actually worth — that's the part most people struggle with.
Here's what I'd tell my younger self: your work has value. Your time has value. The hours you spent learning to solder, to file, to string, to finish — those have value. Don't give them away for $15 a ring.
Price fairly. Price confidently. And if someone tells you your work is too expensive, smile and thank them — they're not your customer. Your customer is the one who looks at a $75 handmade bracelet and thinks, "That's worth it."

Comments