<h2>How to Photograph Jewelry With an iPhone (No Expensive Gear Needed)</h2>
Why your iPhone is enough
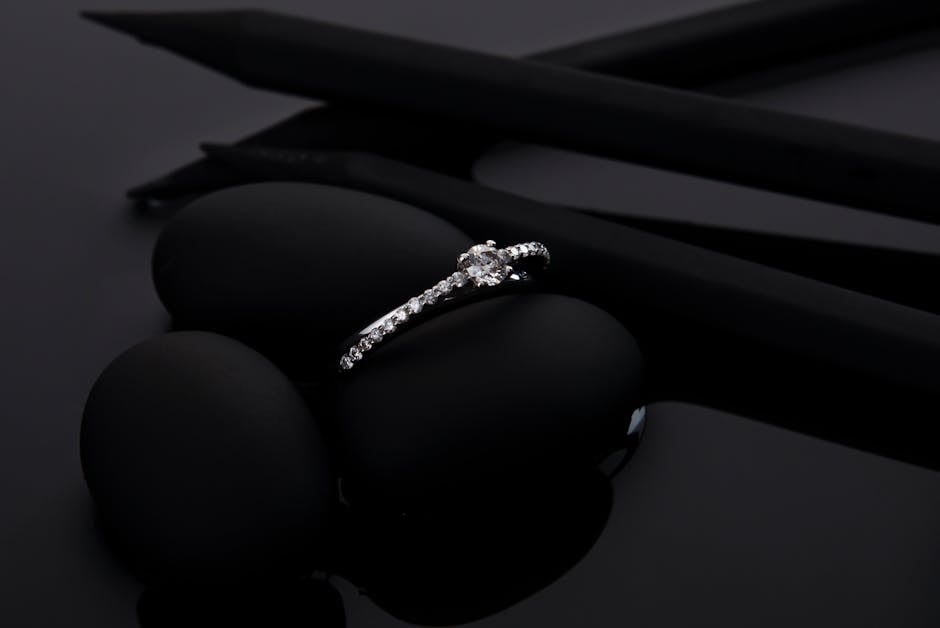
The camera on an iPhone 13 or newer is genuinely capable of producing jewelry photography that looks professional on a website, Etsy shop, or social media feed. The main camera has enough resolution for web use and even moderate print sizes. The Portrait mode creates a natural depth-of-field effect that makes jewelry pop against a blurred background. And if you have an iPhone 13 Pro or newer, the built-in macro mode lets you get extremely close without any additional lens attachment.
I have seen Etsy sellers with $3,000 camera setups produce photos that look worse than someone shooting with a recent iPhone and decent lighting. The gear matters less than the technique. This guide covers the technique.
Step 1: lighting setup
Lighting is the single biggest factor in jewelry photography. Bad lighting makes even expensive jewelry look cheap. Good lighting makes inexpensive pieces look polished and appealing.
The best free light source is a window. Not direct sunlight, which creates harsh shadows and blown-out highlights, but indirect daylight from a window that does not get direct sun. North-facing windows are ideal because they provide consistent soft light throughout the day without the intensity of direct sun.
Position your jewelry near the window and place a white foam board on the opposite side. The foam board acts as a reflector, bouncing light back onto the shadow side of the jewelry and softening the contrast. A 20x30 inch white foam board costs about $2 at any craft store. This one piece of foam board, combined with window light, will give you better lighting than most tabletop photo studios that cost $50 or more.
If you are shooting at night or do not have good window light, a desk lamp with a white shade pointed at the ceiling can work. Bounce the light off the ceiling to diffuse it. Direct light from a lamp creates the same harsh shadow problems as direct sunlight.
Step 2: background
The background should be simple and non-distracting. Two options that cost almost nothing:
White printer paper. Lay two or three sheets on a flat surface to create a seamless white background. The paper should curve up slightly against a wall or stack of books to eliminate the horizon line between the surface and the background. This is called a "sweep" in photography, and it makes the jewelry look like it is floating on an infinite white surface. Cost: about $1.
Marble contact paper. Buy a roll of marble-patterned contact paper and wrap it around a piece of cardboard. This gives you a marble surface that looks like a luxury product photography backdrop. A roll of contact paper costs $5-10 and will make dozens of backgrounds. Cost: $5-10.
Avoid busy backgrounds. Wood grain, textured fabric, and patterned surfaces compete with the jewelry for attention. The viewer's eye should go to the product first, not the surface it is sitting on.
Step 3: iPhone camera settings
Open the Camera app and make a few adjustments before you start shooting.
First, turn off Live Photo. Live Photo creates a short video clip with every shot, which makes it harder to get a perfectly sharp image. Swipe up on the screen or tap the concentric circles icon to turn it off. The icon will have a line through it when Live Photo is disabled.
Second, use Portrait mode for rings, necklaces, and earrings. Portrait mode automatically blurs the background, which separates the jewelry from the surface and creates a clean, professional look. Position the jewelry at the suggested distance (usually 2-8 feet from the camera) and the iPhone will handle the rest.
Third, tap the screen where you want to focus. A yellow square will appear. Next to the square, you will see a small sun icon. Slide that icon up or down to adjust the exposure. For light-colored jewelry like silver and white gold, you may need to reduce exposure slightly to prevent the metal from looking washed out. For dark stones like onyx or obsidian, you may need to increase exposure slightly so the details are visible.
If you have an iPhone 13 Pro or newer with macro mode, switch to the ultra-wide lens (0.5x) and move the phone close to the jewelry. The iPhone will automatically detect that you are shooting something close and switch to macro mode. This lets you capture details like facet patterns, texture, and inclusions without needing a clip-on macro lens.
Step 4: stabilization
Camera shake is the enemy of sharp jewelry photos. Even small hand movements become visible when you are shooting small objects at close range.
You do not need a tripod. Stack two or three books on your table and lean your iPhone against them, using the stack as a makeshift phone stand. Prop the phone at a slight angle so the camera is pointing down at the jewelry at about a 30-45 degree angle. This overhead-ish angle is the most flattering for most jewelry pieces because it shows the top surface and the side profile simultaneously.
Another option: lean your iPhone against a glass or mug. Whatever keeps the phone still and at the right angle works. The point is to eliminate hand movement. If the phone is perfectly still, every shot will be sharp. If your hand is shaking even slightly, some shots will be blurry and you will not know until you review them later.
Use the 3-second timer to trigger the shutter. Tap the timer icon, set it to 3 seconds, press the shutter button, and take your hands off the phone. This eliminates the tiny vibration from tapping the screen.
Step 5: composition
Fill about 70% of the frame with the jewelry. Too much empty space makes the piece look small and insignificant. Too little breathing room makes the image feel cramped. The 70% rule gives the jewelry prominence while leaving enough background to provide context.
For rings, photograph them standing upright if possible. A ring stand, a piece of putty, or even a carefully positioned prop can hold a ring vertical. Vertical rings show off the side profile, the setting, and the stone much better than a ring lying flat.
For necklaces, drape them over a small object or use jewelry display cards to create a natural curve. A necklace lying flat on a surface looks lifeless. A gentle curve shows how it hangs and gives the piece dimension.
For earrings, photograph them as a pair at an angle. Lay them flat and position the camera at a 45-degree angle so both earrings are visible and the light catches the surface of the metal and stones.
Use the rule of thirds for wider display shots where you want to show the jewelry in context. Place the piece at one of the intersection points of an imaginary 3x3 grid overlaid on your frame. The iPhone camera grid is available in Settings under Camera, and turning it on helps you compose more balanced shots.
Step 6: editing
Two free apps will handle everything you need.
Snapseed, made by Google, is the best free photo editor for quick adjustments. Open your photo, tap "Tools," and start with these adjustments: brightness (increase slightly if the image is too dark), contrast (increase slightly to make the metal pop), and warmth (adjust to match the actual color of the metal and stones). Do not over-edit. Subtle adjustments look natural. Heavy adjustments look fake.
Lightroom Mobile (the free version) is better for color accuracy. If your jewelry has colored stones and the iPhone camera is not capturing the color correctly, Lightroom's color tools are more precise than Snapseed's. Use the color mixer to adjust individual hues without affecting the rest of the image.
Crop the image to a consistent aspect ratio for all your product photos. A square crop (1:1) works well for Instagram and Etsy. A 4:5 crop is better for most website layouts. Pick one and stick with it across your entire product catalog. Consistency in crop ratio is part of what makes a shop look professional.
Step 7: consistency is the secret
This is the step that separates amateur-looking shops from professional ones. It is not about having the best camera or the most expensive lighting. It is about shooting every product photo with the same background, the same angle, the same lighting direction, and the same editing settings.
When a customer scrolls through your product listings and every photo has the same white background, the same warm lighting, and the same composition, the shop looks cohesive and trustworthy. When every photo has a different background, different lighting, and different color temperature, the shop looks inconsistent even if individual photos are good.
Create a shooting setup once and reuse it for every photo. Same window position. Same foam board reflector. Same background paper. Same camera angle. Same phone position. Write down the settings or take a reference photo of your setup so you can recreate it exactly next time.
Before and after tips
Take a "before" photo with your current setup before implementing these steps. Then take an "after" photo using the techniques described here. The difference will be immediately visible. Share the comparison on social media if you are comfortable doing so. "Before and after" content performs well and shows potential customers that you care about presentation.
The before photo will likely have flat lighting, a cluttered background, and slightly blurry details from hand shake. The after photo will have soft directional lighting, a clean background, sharp focus, and a composition that draws the eye to the jewelry. That contrast is the entire value proposition of good product photography.
What you do not need
You do not need a clip-on macro lens if you have an iPhone 13 Pro or newer. The built-in macro mode is excellent. Older iPhones can still take usable close-up photos by switching to the telephoto lens (2x or 3x zoom) and moving closer.
You do not need a light tent. Window light and a foam board reflector produce better results than most cheap light tents, which often create uneven lighting and color casts from the white fabric.
You do not need a tripod. A stack of books works fine for stabilization. If you eventually want to upgrade, a basic phone tripod costs $15-20, but it is not necessary to get started.
The total investment for this setup is roughly $15: $2 for a foam board, $1 for printer paper or $5-10 for contact paper, and free apps for editing. That is less than the cost of a single professional product photo, and once you learn the technique, you can shoot unlimited photos for your shop.
Comments