How to Make Wire Wrapped Jewelry: A Complete Beginner's Guide
I was scrolling through YouTube one lazy Sunday when I stumbled on something that stopped me mid-scroll. A woman sat at her kitchen table with nothing but a pair of pliers and a spool of copper wire, turning a rough chunk of turquoise into a pendant. No soldering iron. No glue. No fancy equipment. I watched the whole 12-minute video and thought: wait, you can actually do that?
So I bought a $15 tool kit and some wire off Amazon. That was two years ago. I've made probably 200 pieces of wire wrapped jewelry since, sold a bunch on Etsy, and honestly it's become one of my favorite ways to decompress. The barrier to entry is shockingly low, and the results can be genuinely beautiful.
What Is Wire Wrapping, Exactly?
Wire wrapping is a jewelry-making technique where you use metal wire to hold stones and other elements together through twisting, looping, coiling, and weaving. No heat involved — no soldering, no welding, no adhesives. The wire itself does all the structural and decorative work.
The technique is ancient. The Sumerians were doing some version of it around 3000 BCE, and Egyptian tombs have yielded wire wrapped artifacts that still look incredible after thousands of years. What makes it appealing for beginners is the zero-barrier setup — no kiln, no torch, no workbench. I started on my couch with a cookie sheet to catch wire clippings. That was my entire "studio."
The Tools You Actually Need
You can go down a rabbit hole buying jewelry tools. But to start, you need four things:
Round Nose Pliers
Cone-shaped jaws that taper to a point, for making loops and curves. Loop size depends on where along the jaw you place the wire — closer to the tip means smaller loops. You'll use these constantly.
Chain Nose Pliers
Flat on the inside with a slight taper, these grip wire without leaving deep marks. Essential for closing loops and tucking in sharp wire ends. If you only buy one pair beyond the round nose, make it these.
Wire Cutters (Flush Cutters)
Cut wire flat on one side and slightly pinched on the other. Always cut with the flat side facing the finished piece for a clean edge. Cheap cutters leave ragged ends that will jab your skin.
Flat Nose Pliers
Wide, completely flat jaws for gripping wider wire sections, flattening wraps, and making sharp 90-degree bends. I reach for these less often, but when you need them, nothing else works.
Budget check: expect to spend $15–25 on a basic set. Don't buy the absolute cheapest kit — the joints will be loose and cuts terrible. But you don't need $80 professional pliers either. Something in the middle from Beadsmith or Xuron works well for years.
Choosing Wire
Copper Wire
Cheap, soft, and forgiving. About $8 for a 30-foot spool. Great for practice. Downsides: tarnishes quickly and can turn your skin green. Perfect for learning though.
Silver-Plated Copper Wire
Copper with a thin silver coating. Looks like sterling at a fraction of the price. Great for gifts and personal pieces. The plating can scratch off with heavy handling.
Sterling Silver Wire
The real deal — 92.5% silver. Use for pieces you'll sell or for special gifts. More expensive ($25–40 per spool) and work-hardens faster than copper, but the finished look is worth it.
Brass Wire
Warm golden tone with a vintage, bohemian feel. Harder than copper, which can frustrate beginners, but gorgeous paired with earthy stones like jasper.
Wire Gauge Explained
Higher gauge numbers mean thinner wire. You'll work with three ranges:
18 gauge (1.0mm): Thick and sturdy. Use for structural elements — pendant frames, ring bands, bracelet cores.
20–22 gauge (0.8–0.6mm): Your workhorse. Great for decorative wraps and medium-duty structure. Most projects combine 18ga for the frame and 20-22ga for wrapping.
24–26 gauge (0.5–0.4mm): Thin and flexible. Used for binding, weaving, and securing stones.
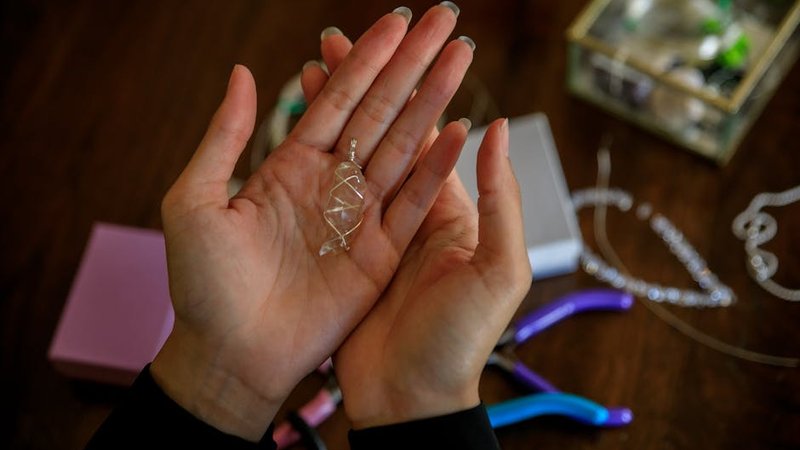
Project 1: Simple Wrapped Stone Pendant
This is the project that got me hooked. A tumbled stone wrapped in wire, no solder, no glue, just clever engineering.
What You Need
A tumbled stone (oval or round works best), about 12 inches of 18ga wire for the frame, and about 3 feet of 24ga wire for wrapping.
Step 1: Pick Your Stone
Choose something roughly symmetrical — not too thick, not too thin. Oval cabochons are easiest because the wrapping follows a natural curve. Hold it in your hand and see if you like the feel. You'll be holding this stone a lot while working on it.
Step 2: Make the Frame
Cut about 12 inches of 18ga wire. Find the midpoint and bend it into a U-shape around the widest part of your stone using round nose pliers. The stone should sit snugly — not so tight it pops out, not so loose it rattles. Cross the two wire ends at the top. This U-shape is your anchor.
Step 3: Start Wrapping
Cut about 3 feet of 24ga wire. Hold the end against one side of the frame near the bottom, and wrap tightly in small neat coils — 3–5 wraps to secure the wire. Now lay the wrapping wire across the front of the stone at an angle, bring it around the back, and continue wrapping on the other side. Repeat this crisscross pattern, working upward. Each pass should be snug against the stone. If the wire is loose, the stone will shift and eventually fall out.
Step 4: Create the Bail
When you've wrapped up to near the top where the frame wires cross, use round nose pliers to bend both frame wires into a loop — the bail, where your chain goes. Wrap the frame wire ends around the base of the bail a few times. Take your time here; a sloppy bail is the most common reason wire wrapped pendants look amateurish.
Step 5: Finish and Tuck
Snip the wrapping wire flush with flush cutters, then press the sharp end flat with chain nose pliers. Do the same with frame wire tails. Run your finger over every wire end — if anything pokes, you missed a spot. A well-finished piece should feel smooth everywhere.
Congratulations — you just made your first wire wrapped pendant. String it on a chain or leather cord. I wore my first one for a solid week.
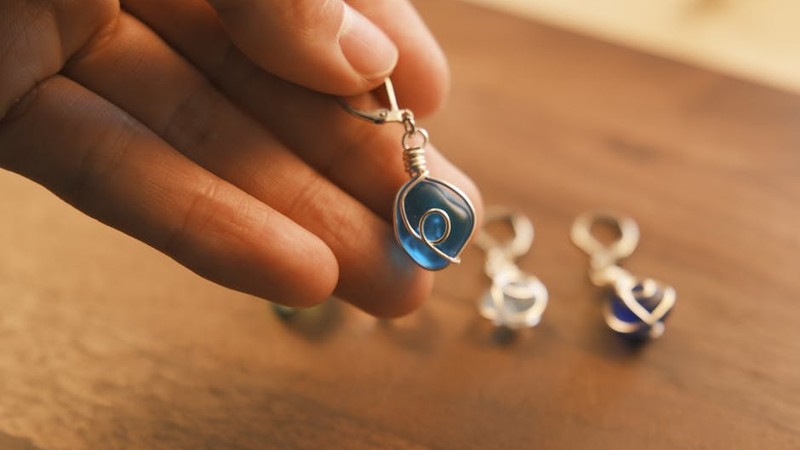
Project 2: Spiral Wrapped Ring
What You Need
About 8–10 inches of 18ga dead soft wire (soft wire is critical for rings), an optional ring mandrel, and a small hammer.
Step 1: Size and Wrap
Wrap the wire around your finger about 2.5 to 3 times. Leave a tiny bit of room — the wire shifts slightly as you work. Slide the coil off carefully.
Step 2: Make the Spirals
Take one wire tail and use round nose pliers to start a small spiral, rotating outward until it's about pea-sized. Do the same with the other tail, spiraling in the same direction. Position both spirals on top of the ring band.
Step 3: Work Harden
Dead soft wire rings bend out of shape fast. Place the ring on a steel block and tap it gently all over with a small hammer — not hard, just enough to compact the metal and stiffen it. This also gives a nice textured, hand-forged look.
Step 4: Final Shaping
Put the ring back on the mandrel and tap to round out any distortion. Check the fit on your finger. Too big? Tap to compress slightly. Too small? Start over. Wire doesn't stretch. Ask me how I know.
Common Beginner Mistakes (I Made All of These)
"The wire is too stiff." You bought half-hard wire. Switch to dead soft — the difference is massive. You can always harden soft wire later, but you can't soften hard wire without a torch.
"Wire ends keep scratching me." Cut with flush cutters (flat side toward the jewelry), then press the cut end flat with chain nose pliers. Run your finger over every cut end before calling a piece done.
"My stone keeps falling out." Not wrapping tightly enough. Wire needs to contact the stone's surface at every crossing point. Add more wraps where the stone sits loose, and pull each wrap snug before starting the next.
"My ring doesn't fit." Fingers swell and shrink throughout the day. Go about a quarter size up on a mandrel. You can always tap a ring smaller, never bigger.
Finding Inspiration
Pinterest — Search "wire wrapped jewelry" and save designs you like. Study how others frame stones, what wire gauge they use, where wraps are placed. Reverse-engineering from photos taught me most of what I know.
Instagram — Follow #wirewrapping. Many artists post process videos showing technique in real time. The talent on there is unreal.
YouTube — Watch the same technique from multiple creators — everyone does things slightly differently and you'll pick up tips from each.
Etsy — Browse wire wrapped listings for free market research. What styles are popular? How do successful sellers photograph their work?
Selling Your Work
Etsy is still the best platform for handmade jewelry. What I've learned:
Pricing: Materials × 3–4 is the starting formula. A $3-in-materials pendant can sell for $15–25. Don't underprice — handmade buyers expect to pay more than mass-produced prices.
Photography: Natural daylight near a window, plain white or gray background, multiple angles. A blurry photo of a beautiful pendant gets zero clicks. I use my phone and a piece of white poster board.
Listings: Include stone type, wire material, dimensions, and chain length. People search for "amethyst wire wrapped pendant" so include those keywords naturally. Mention each piece is handmade and one of a kind — that's a selling point.
Where to Go From Here
Freeform wrapping — no planning, just let the wire flow — produces the most organic, artistic pieces. Tree of life designs, where wire branches hold gemstone chips, are stunning and achievable with practice. Geometric styles use straight lines for a modern look. Mixing wire types — copper frames with fine silver weaving — creates beautiful contrast.
The thing that keeps me coming back is that every stone is a different shape, every design is a new puzzle, and every finished piece feels like a small victory. Start simple, be patient, and don't throw away your early attempts. Looking back at them months later is genuinely satisfying.

Comments