How to Make Wire Wrapped Earrings: A Complete Beginner's Tutorial
I'd been making simple beaded bracelets for a couple months when a wire wrapped earrings video popped up in my YouTube feed. Someone's hands moved with impossible precision, wrapping thin copper wire around a chunky turquoise stone until it became this sculptural, wearable piece of art. I watched it three times, then scrolled to comments full of "I could never do this" and "my hands don't work like that."
I was one of those people. But a week later I ordered a $15 beginner kit on Amazon and sat at my kitchen table with zero expectations. The first pair looked like a toddler's art project — gnarly loops, wire ends poking everywhere, crooked beads. The second pair looked... recognizable. By the fifth, I actually wanted to wear them. By the tenth, a coworker asked where I bought them.
If you're looking at wire wrapped earrings and thinking that's way too advanced, the gap between "never touched craft wire" and "proud to wear my own work" is maybe two afternoons of practice. Here's everything I wish someone had told me on day one.
What Is Wire Wrapping?
Wire wrapping is a jewelry-making technique where you bend, coil, and wrap metal wire around stones or beads to create decorative settings — no soldering, no glue, no heat. The wire holds everything together through tension and clever engineering. It's one of the oldest jewelry techniques in history, dating back thousands of years to ancient Egyptian and Roman artisans.
For earrings, wire wrapping is especially well-suited. Most earring designs are small and lightweight, so you don't need the heavy-duty structural engineering that pendants or bracelets demand. You can create everything from simple looped drops to elaborate crystal cage settings.
Tools and Materials You Need
Round-Nose Pliers
Two cone-shaped jaws that taper to a point, used for making loops and curves. Loop size depends on where you place the wire — closer to the tip means smaller loops, closer to the base means larger. You cannot substitute regular pliers for these.
Chain-Nose Pliers
Flat, tapered jaws for gripping wire, opening jump rings, and tucking sharp ends. Get smooth inner jaws — serrated ones leave permanent scratches. I learned this the hard way on my first pair of earrings.
Flush Cutters
Not scissors. Flush cutters have one flat side (clean cut) and one beveled side (slight point). Always cut with the flat side facing the finished work. A basic pair costs $5-8.
Wire — Two Gauges
20-gauge — Your structural wire for frames, ear wires, and anything that needs to hold shape. About $6-8 per 30-foot spool of copper.
22-gauge — Your wrapping wire for coiling and binding. You'll burn through this fast — buy in bulk. A 100-foot spool is about $8-10.
Start with copper. It's cheap, soft, and forgiving. When you're working with wire that costs pennies per inch, mistakes don't hurt nearly as much.
Ear Hooks and Beads
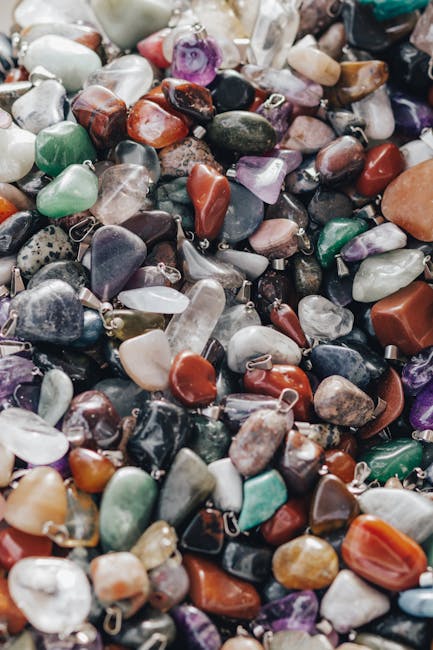
Pre-made ear hooks run about $5 for a pack of 50. For beads, start with tumbled gemstones (amethyst, rose quartz, turquoise), 6-10mm glass beads, or freshwater pearls. A mixed bag of small tumbled stones costs $10-15.
The $15 Starter Kit
Search "wire wrapping kit for beginners" on Amazon. Most $15-25 kits include all three pliers, some wire, basic findings, and practice beads. The quality isn't professional but it's plenty for learning. I used a $15 kit for my first month before upgrading individual tools.
Three Fundamental Techniques
Making a Simple Loop
Thread a bead onto wire, leaving half an inch above it. Grip the tail with round-nose plier tips and rotate away from you to form a loop centered above the bead. Practice until you can make 10 identical loops — loop consistency is the biggest difference between amateur and professional-looking earrings.
The Wrapped Loop
After forming your loop, grip the wire just below it with chain-nose pliers and wrap the tail around the neck between loop and bead. Three to five tight, even wraps look clean. Snip the excess and press the cut end flat so it won't snag.
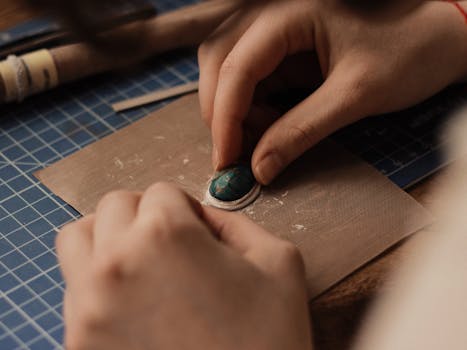
The Basic Wrap (Binding)
Hold two wires parallel, then coil a thinner wire tightly around both. This binding creates frames, cages, and structural elements. Keep coils tight and adjacent — gaps look sloppy and weaken the structure.
Your First Project: Wire Wrapped Drop Earrings
Materials per pair: One 8mm bead, 10 inches of 20-gauge copper wire, 6 inches of 22-gauge copper wire, two pre-made ear hooks.
Step 1: Thread and Fold
Cut 5 inches of 20-gauge wire. Thread your bead onto the center and fold the wire in half so the bead sits in the bend with two equal tails extending upward.
Step 2: Cross the Wires
Pinch the tails together just above the bead and cross them over each other, creating a small V with the bead at the bottom.
Step 3: Start Wrapping
Cut 6 inches of 22-gauge wire. Wrap it around the crossed structural wires 3-4 times, just above where they cross, to lock them together.
Step 4: Build the Bail
Continue wrapping upward for 4-5 more turns, creating a quarter-inch wrapped section — your bail, where the ear hook connects. Keep wraps snug and even.
Step 5: Form the Connection Loop
At the top of the bail, bend one structural wire into a loop using round-nose pliers. The loop should face sideways so the ear hook hangs naturally. Wrap the tail 2-3 times to secure it.
Step 6: Reinforce
Take the other structural wire tail and wrap it downward over your existing wraps, creating a decorative double-wrap pattern. Wrap 2-3 times, then trim.
Step 7: Trim and Tuck
Snip all protruding wire ends as close to the wraps as possible. Press each cut end flat with chain-nose pliers. Run your finger over the section — any sharp point means you need to press harder or trim closer.
Step 8: Shape Below the Bead
The wire tails below the bead can stay straight for a clean look, or use round-nose pliers to curl them into matching spirals for a decorative touch.
Step 9: Make the Match
Repeat for the second earring, matching loops, wraps, and size as closely as possible. Small variations add handmade charm, but noticeably mismatched sizes will bother you every time you wear them.
Step 10: Attach Ear Hooks
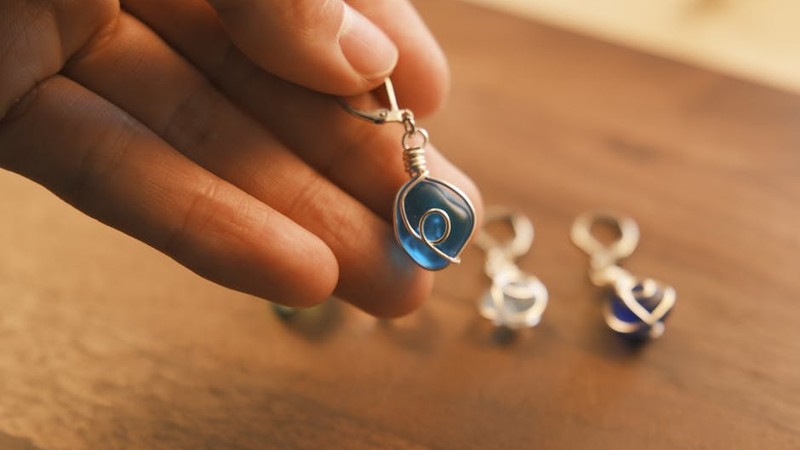
Open the ear hook loop by twisting sideways (never pull apart — that stretches and weakens the metal). Slide your earring connection loop on, then twist closed. You just made your first pair of wire wrapped earrings.
Next Level: Crystal Earrings
Once the basic drops feel comfortable, try wrapping a small crystal point (under 1 inch — larger stones make earrings too heavy). Cut 12 inches of 20-gauge wire, bend it around the crystal's base to create a cradle, then spiral your 22-gauge wrapping wire upward following the stone's natural contour. Don't aim for perfect evenness — the organic, slightly wild look is what makes wire wrapped crystals so appealing. Create your bail and connection loop the same way as the bead project, leaving extra frame wire at the bottom for decorative spirals.
Three Mistakes That Almost Made Me Quit
Using Wire That's Too Hard
Wire comes in tempers: dead soft (bendable), half-hard, and full hard. Beginners must start with dead soft. I bought half-hard copper my first time — every loop fought back, wraps wouldn't stay tight, and I thought I lacked the hand strength. Switched to dead soft and everything clicked. You can work-harden wire later with a nylon mallet if needed.
Making Lopsided Loops
My first dozen loops were all slightly off. The fix: mark your round-nose pliers with a dot at the jaw position where you want your loop size, and place the wire at that dot every time. It forces consistency and builds muscle memory. Within days, I didn't need the marker.
Sharp Wire Ends
Always cut with the flat side of your flush cutters facing the finished work. After cutting, press the end down firmly with chain-nose pliers tips. Still sharp? Hit it with a nail file for 10 seconds. The difference between all-day-comfortable earrings and tiny torture devices comes down to this step.
Wire Types Compared
Copper — The beginner standard. Soft, $6-10 per spool, develops a gorgeous patina. Some people have copper allergies (clear nail polish solves this). I still use copper for practice and personal pieces.
Sterling silver — Pricier ($20-40) and stiffer, so loops hold shape better but are harder to form. Professional-looking results, slower tarnish. Graduate to this after 20-30 copper pairs.
Gold-filled — Thick gold layer bonded to base metal, not the same as thin gold plating. Looks and wears like solid gold, hypoallergenic, $40-80 per spool. Save for special pieces once your skills are solid.
Gold-plated — Thin coating over copper. Cheap ($8-15) but plating wears off, exposing base metal. Fine for prototyping, but I'd be transparent about the material if selling.
Niobium or titanium — Hypoallergenic, comes in permanent colors, $15-25 per spool. My new favorite for colorful statement earrings.
Start with copper, make a lot of ugly earrings, then make fewer ugly ones. Eventually you'll hold up your work and think "I'd actually pay money for this." That moment is worth every gnarly loop that came before it.
Comments