How to make a crystal grid: a no-nonsense guide
Crystal grids look impressive. Geometric arrangements of colorful stones on a wooden board, photographed in warm afternoon light, shared thousands of times on Pinterest. They look like something that requires training or special knowledge.
They do not. You need stones, a flat surface, and maybe fifteen minutes. The whole thing is fundamentally an exercise in arranging objects in a pattern. Whether you think the pattern does anything beyond look nice is between you and your stones. This guide sticks to the practical side: how to actually build one that looks good and holds together. No mysticism required.
Pick a theme or intention
Most crystal grid guides start with energy and intention-setting. I am going to reframe that. Pick a word or a concept. "Calm" works. "Focus" works. "Abundance" works if that is your thing. The point is not magic — it is focus.
Having a theme narrows your choices. Instead of staring at a collection of fifty stones with no idea where to start, you have a filter. "Calm" might lead you toward blue and green stones. "Focus" might point you toward clear or golden ones. This constraint actually makes the design process easier, not harder — fewer choices means less paralysis.
Psychologists call this a "structured creative prompt." Giving yourself a constraint produces better creative output than total freedom. Pick a word. Stick with it. You can always change it later.
Choose your center stone
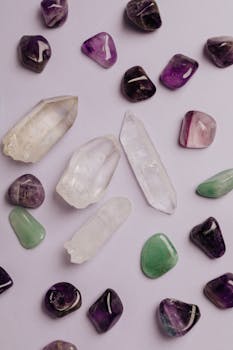
The center stone is the largest piece in the grid. It sits in the middle, and everything else radiates outward from it. Pick something 1.5 to 3 inches across. It does not need to be expensive — a polished agate slice, a large tumbled quartz, or a raw chunk of amethyst all work.
What matters is visual weight. The center stone anchors the whole composition. If it is too small, the grid looks scattered. If it is too large, the surrounding stones look like afterthoughts. Aim for the center stone to be roughly 3-4 times the diameter of your accent stones.
What makes a good center stone
Flat-bottomed stones sit still, which helps. Dome-shaped cabochons roll around and will shift every time you bump the board. Raw crystals with a natural flat base are ideal because they look organic and stay put. Agate slices are also great because they are naturally flat and have visible internal patterns that add visual interest.
Select your accent stones
These are the smaller stones that surround the center. You need 6-12 of them, depending on your pattern. They should be smaller than the center stone but large enough to be visible from arm's length — roughly 0.5 to 1 inch each.
Two approaches work well:
Monochrome. All the same type of stone. Six clear quartz points radiating from a central amethyst, for example. Clean, unified, easy to design. This is the safer choice for your first grid.
Complementary. Different stones that share a color family or visual theme. Rose quartz, pink tourmaline, and rhodonite together. Or a progression: clear quartz near the center, graduating to smoky quartz at the edges. This takes more effort to balance but looks more interesting when done right.
Avoid the "one of everything" approach. Thirteen different stones in thirteen different colors creates visual chaos, not harmony. Limit yourself to 2-3 stone types per grid.
Common grid patterns
Flower of Life
This is the most popular crystal grid layout. Six circles arranged in a hexagonal pattern, each overlapping its neighbors. In practice, you place the center stone in the middle, then six stones at equal distances around it (roughly 2-3 inches out), forming a hexagon. A second ring of twelve stones goes outside that, staggered between the first ring.
The Flower of Life pattern appears in ancient Egyptian, Chinese, and Celtic art. It is visually satisfying because the human brain is wired to find symmetry appealing. Whether you attach any significance beyond that is optional.
Hexagram (six-pointed star)
Two overlapping triangles. Place six stones at the points of the triangles, with the center stone where they intersect. This pattern uses fewer stones (7 total for a basic version) and looks bold and geometric. It works well with pointed crystals because the points naturally echo the triangular shapes.
Spiral
Stones arranged in a spiral radiating outward from the center. Start with the center stone, then place the next stone slightly offset and further out, curving in one direction. Continue the curve with each successive stone, gradually increasing the distance from center.
Spirals are harder to get right because there is no template — you are freeforming the curve. The trick is consistency. Each stone should be roughly the same distance from its neighbors. Use a piece of string or a flexible ruler to mark your spiral path before placing stones.
Simple circle
Center stone in the middle. One ring of stones around it. Done. This is the best pattern for your first grid. It is hard to mess up because symmetry is automatic — just space the outer stones evenly. A ring of six stones works well. Place them at 60-degree intervals. You can eyeball this or use a protractor if you want precision.
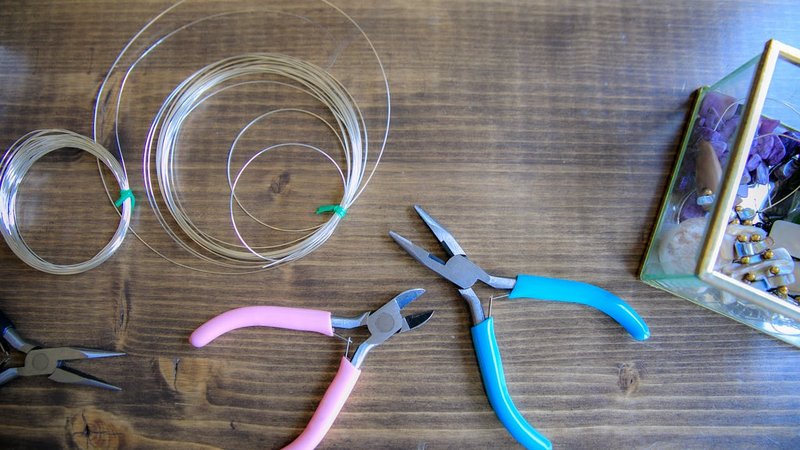
Materials and surfaces
You need a flat surface. That is the main requirement. Options include:
Wooden board. A 10-12 inch round or square piece of wood. Sand it smooth. Some people burn or draw sacred geometry patterns onto the surface as a guide. You can also buy pre-made grid boards online for $15-40. They usually have the Flower of Life or a similar pattern etched into the wood.
Cloth or fabric. A piece of dark velvet or cotton laid flat. Stones show up well against dark backgrounds. The fabric also provides enough friction to keep stones from sliding around. A square foot of black velvet costs about $3 at a fabric store.
Paper template. Print a geometric pattern, put it under a piece of glass or clear plastic, and arrange stones on top. This is the cheapest option and lets you swap patterns easily. I use this method because I like to change layouts without committing to a single board.
Some people add flowers, leaves, or small shells to fill gaps in the pattern. This is optional but can look nice. Keep supplementary elements small — they should complement the stones, not compete with them.
Assembly tips
Start from the center and work outward. Place the center stone first, then build the pattern around it. If you start with the outer ring and try to fit the center in last, the proportions will probably be off.
Work on a stable surface. A wobbly table will shift your stones and wreck your spacing. If you have cats, do this in a room with the door closed. I learned this the hard way. A cat will sit in the middle of your grid, look at you with zero remorse, and knock three stones off the board in a single tail sweep.
Take a photo when you finish. Grids are temporary by nature — the stones will get moved, the board will get bumped, someone will need to borrow a quartz point. Having a photo lets you recreate a layout you liked. It also gives you something to share, if you are into that.
Keep it simple
The biggest mistake beginners make is overcomplicating the design. Twenty stones in a complex pattern with a specific geometric template and a written intention card and candles and incense. That is a lot of setup for what is, at its core, an arrangement of rocks on a board.
Start with a center stone and six accent stones in a circle. Make it look clean. Take a photo. That is a complete crystal grid. You can add complexity later as you develop preferences. Some of the most visually striking grids I have seen use fewer than ten stones in a simple geometric layout. Restraint is a design choice, not a limitation.
The other thing I would tell my past self: do not buy a $40 grid board before you have made your first grid on a piece of printer paper. Figure out whether you actually enjoy the process before investing in dedicated equipment. The stones are the important part. The board is just a stage.


Comments