I Saw a Beaded Bracelet Online and Thought "No Way I Could Make That"
I Saw a Beaded Bracelet Online and Thought "No Way I Could Make That"
Last summer I was scrolling through Instagram — you know, the usual late-night rabbit hole — when a photo stopped me mid-scroll. It was a stack of beaded bracelets, maybe five or six of them, each one slightly different but somehow all working together. Earthy tones, a few metallic beads mixed in, one with tiny letter beads spelling something I couldn't quite read. I stared at it for way too long, then did what everyone does: I checked the price tag. Forty-something dollars. For one bracelet. I closed the app, opened my laptop, and typed "how to make beaded bracelets" into the search bar.
What I found was either way too simple (thread some Cheerios on a string, basically) or way too complicated (wire-wrapping techniques that looked like they required an engineering degree). Nothing in between. Nothing that said "hey, you've never done this before, here's exactly what to do." So I figured it out myself, made about thirty terrible bracelets, and eventually got to a point where friends started asking where I bought mine. That's the story behind this guide — everything I wish someone had told me on day one.
What Exactly Is a Beaded Bracelet?
At its core, a beaded bracelet is exactly what it sounds like: beads strung together and worn around your wrist. But the variety is wild once you start looking. There are stretchy bracelets made with elastic cord that you just slip on. There are wire bracelets with clasps that open and close. There are woven patterns, knotted designs, wrapped pieces. The simplest version — and the one I recommend starting with — is the stretchy beaded bracelet. You thread beads onto elastic cord, tie a knot, and you're done. No clasp, no tools beyond scissors and maybe some glue.
The two main construction methods you'll encounter are elastic cord bracelets and wire-strung bracelets. Elastic is the beginner-friendly route — it's forgiving, quick, and comfortable to wear. Wire (usually a thin beading wire like 49-strand or 7-strand) is more durable and lets you use heavier beads, but you'll need crimp beads, crimping pliers, and a clasp. I started with elastic and honestly still prefer it for everyday wear. We'll cover both in this guide, but the bulk of the step-by-step stuff will focus on elastic because that's where you want to start.
The Materials You'll Need (and Where I Bought Mine)
Before you make anything, you need supplies. Here's the bare minimum to get started:
Beads: This is the fun part and also the overwhelming part. Start with 8mm round beads — they're the most common size, easy to work with, and available in every material imaginable. I grabbed a mixed pack of natural stone beads (amazonite, howlite, and a few others) for about twelve bucks on Amazon. You can also check out local craft stores — Michaels and Joann usually have a decent selection, though online gives you way more options.
Elastic cord: Get 0.8mm or 1mm stretch cord. The brand doesn't matter much — I use Stretch Magic, but Beadalon makes good stuff too. Don't go thinner than 0.5mm unless you're using really tiny, lightweight beads, because it'll snap on you. Trust me, I learned this the hard way.
Scissors: Any sharp pair works. Don't use your good fabric scissors — bead cord will dull them over time.
Glue: Super glue or a specialized bead glue like GS Hypo Cement. You'll use a tiny drop on your knot to keep it from untying. This one step is the difference between a bracelet that lasts a week and one that lasts a year.
Optional but helpful: A bead mat (keeps beads from rolling everywhere), a ruler or measuring tape, and tweezers for pulling knots tight. Total startup cost if you're buying everything: probably twenty to thirty dollars. If you already have scissors and glue at home, more like fifteen.
Picking the Right Beads: A Quick Material Guide
The beads you choose will make or break your bracelet — literally and aesthetically. Here's what I've learned about different materials after making probably a hundred of these things:
Size Matters More Than You Think
Most bracelet beads range from 4mm to 12mm. For a standard adult bracelet, 8mm is the sweet spot. 6mm works if you want a more delicate look or plan to stack multiple bracelets. 10mm and up give a chunkier, statement vibe. I'd recommend starting with 8mm — they're easy to handle, the bracelet comes together quickly, and the proportions look good on most wrist sizes.
The hole size in your beads needs to fit your cord. Most 8mm beads have holes around 1mm to 1.5mm, which works perfectly with 0.8mm or 1mm elastic. If you're buying natural stone beads, check the hole size before ordering — some stones (like hematite or certain jaspers) have frustratingly small holes.
Material Types
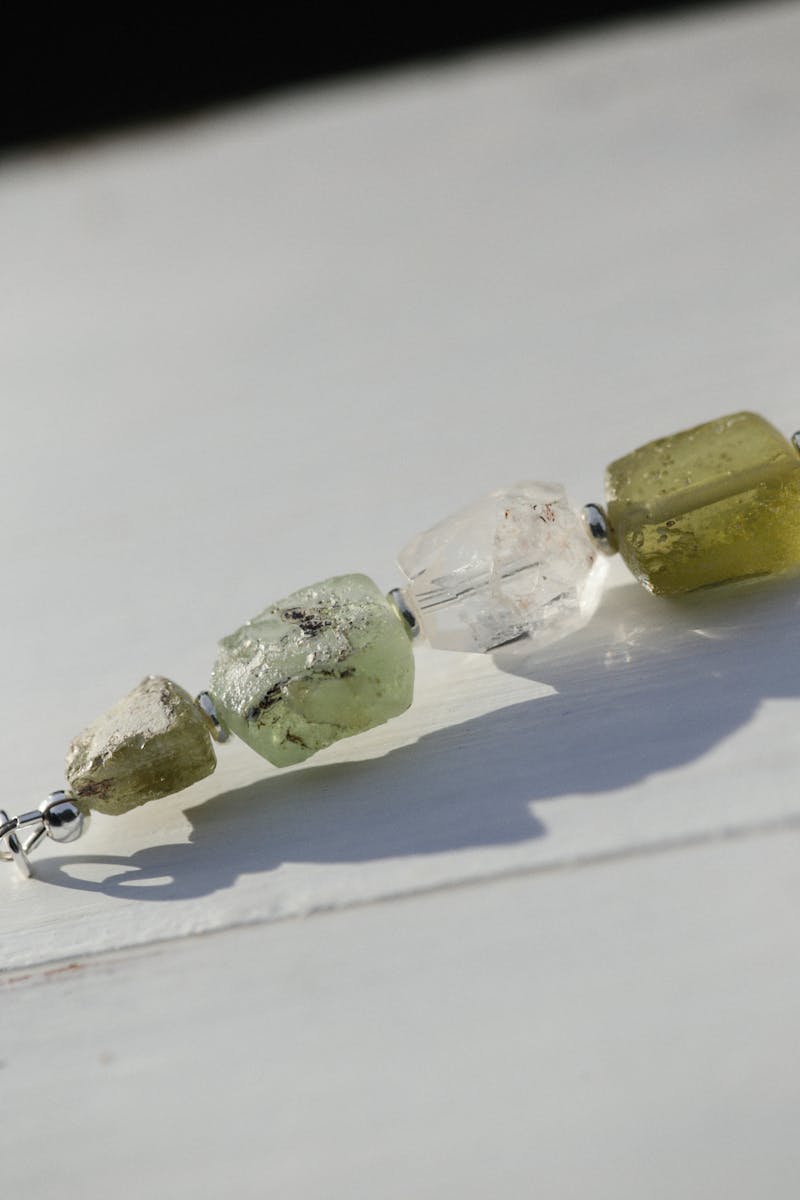
Natural stone beads are my favorite for everyday bracelets. They have weight, texture, and each one is slightly unique. Popular choices include amazonite (soft blue-green), howlite (white with gray veins — looks like marble), black obsidian (sleek and grounding), and tiger's eye (warm golden brown). They're affordable too — usually five to ten dollars for a strand of 50-100 beads.
Glass beads come in an incredible range of colors and finishes. Czech glass beads are particularly nice — they have a slightly handmade quality that adds character. Glass is heavier than stone, so I wouldn't make a full bracelet out of large glass beads, but they're great as accent pieces mixed with lighter materials.
Wood beads give a casual, earthy feel. They're very lightweight, which is nice for larger sizes. The downside is they can look cheap if you go for the lowest quality ones. Look for sandalwood or carved wood beads — they have better grain and finish.
Metal spacer beads are those small disc or barrel-shaped beads you mix between stone beads. They add visual interest and can tie a color scheme together. I use them in almost every bracelet now — even just one or two per bracelet makes a difference. Gold and silver plated are fine for the price, but they will tarnish over time.
Acrylic and plastic beads are the most budget-friendly option. They're lightweight and come in every color imaginable. I'd skip these for a first project — they don't have the weight or feel of stone or glass, and the bracelet can end up looking a bit costume-y. Save them for kids' crafts or experimental color combinations.
Color Combinations That Actually Work
I spent way too much time on my first few bracelets trying to create elaborate color palettes. Here's what I've found works best: pick one "hero" color or material, one neutral, and one accent. For example, blue amazonite (hero), white howlite (neutral), and gold spacer beads (accent). Or black obsidian (hero), wood beads (neutral), and a single red glass bead (accent). Three colors max per bracelet when you're starting out. You can always add more once you develop an eye for it.
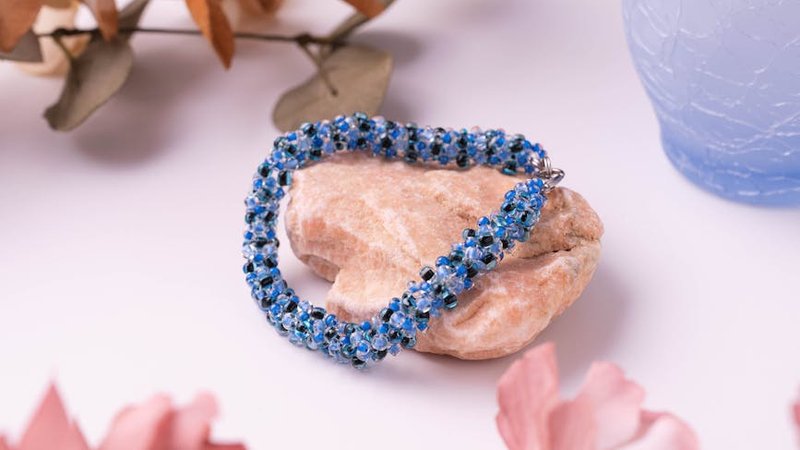
Another approach that never fails: monochromatic. All one type of bead in slightly different shades. A bracelet of mixed blue stones — some lighter, some darker, some with veins — looks sophisticated without any effort.
Elastic vs. Wire: Which Should You Use?
I mentioned this briefly, but let's dig in because it's a decision you'll make every time you start a new project.
Elastic cord is what I use for 90% of my bracelets. Pros: no clasp needed, easy to put on and take off, comfortable, beginner-friendly. Cons: it stretches over time, it can break (especially if you snag it on something), and it doesn't work well with very heavy beads. The 0.8mm to 1mm stretch cord I mentioned is strong enough for most bead types and sizes up to 10mm.
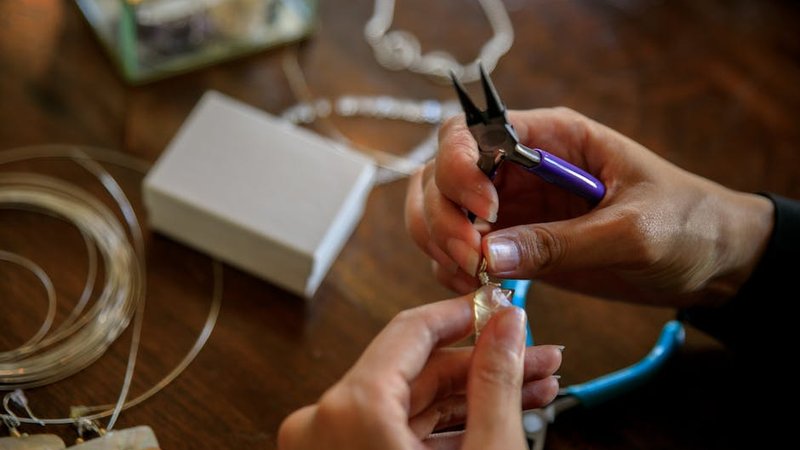
Beading wire (like Beadalon 49-strand) with crimp beads and a clasp is the more "professional" route. Pros: much more durable, supports heavier beads, won't stretch out. Cons: you need extra tools (crimping pliers at minimum), it takes longer, and putting on a clasp bracelet with one hand is annoying. I use wire when I'm making gifts for people who are rough on their jewelry, or when I'm using heavy beads like large glass or metal.
My honest recommendation: start with elastic. Make ten or fifteen bracelets. Get comfortable with bead selection, sizing, and knot-tying. Then, if you want to level up, grab some beading wire and crimping pliers and try a wire bracelet. There's no shame in sticking with elastic forever — many professional jewelry makers do.
The Knot: The Most Important Step Nobody Explains Properly
Okay, here's where most beginner tutorials fall short. They say "tie a knot" and move on. But the knot is literally the only thing holding your bracelet together, so let's do this right.
After you've strung all your beads, cut the elastic cord leaving about 3-4 inches of extra on each end. Hold both ends together and thread them back through the first two or three beads on the opposite side — this creates a loop that pulls the bracelet into a circle. Now you're ready to tie.
I use a surgeon's knot for all my elastic bracelets. Here's how: make a regular overhand knot (right cord over left, through the loop), but instead of pulling it tight right away, wrap the right cord over the left one more time — so you've gone through the loop twice. Now pull tight. Do the same thing in the opposite direction — left over right, through twice. Pull both knots tight against the beads. You should feel the knots lock into place.
After the knot is tied, pull it into one of the larger-holed beads if possible (this hides the knot). Then apply a tiny drop of super glue or bead cement directly on the knot. I mean tiny — like the size of a pinhead. Too much glue will seep into the bead hole and make a mess, and it can actually weaken the elastic. Let it dry for at least ten minutes before wearing.
One more thing: after the glue dries, stretch the bracelet a few times. You want to make sure the knot holds and the elastic isn't going to snap. Better to find out now than when you're out in public.
Three Beginner Bracelet Styles to Try First
Now that you know the basics, here are three distinct styles that will teach you different skills:
Style 1: The Classic Single-Strand
This is the simplest possible bracelet, and it's where you should start. Pick one type of 8mm bead — let's say black obsidian. String enough beads to wrap around your wrist comfortably (I'll cover sizing below, but roughly 20-24 beads for an average adult wrist). Add one or two gold spacer beads somewhere in the middle for a tiny bit of visual interest. Tie off with the surgeon's knot. Done.
This style is great for learning the basics: getting comfortable stringing beads, practicing your knot, and understanding how different numbers of beads affect the fit. Make three or four of these in different materials before moving on.
Style 2: The Patterned Bracelet
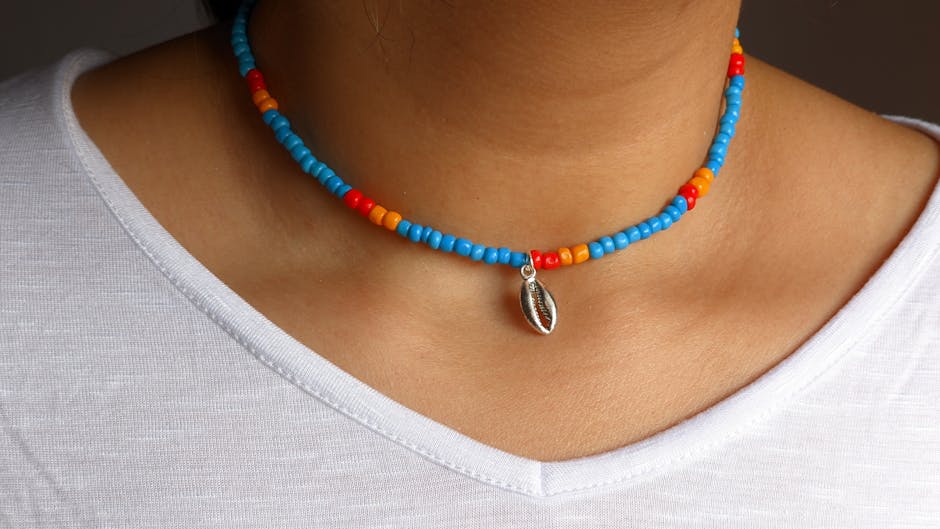
Once you've got the single-strand down, try creating a deliberate pattern. The easiest one: alternate between two bead types. Two stone beads, one metal spacer, two stone beads, one metal spacer, repeat. Or: one blue bead, one white bead, one blue bead, one white bead. The key is planning your pattern before you start stringing.
Here's a trick I use: lay your beads out on a bead mat or towel in the exact order you want them before you start stringing. This lets you see the pattern, adjust colors, and make changes without having to restring everything. I still do this for every bracelet — it takes an extra two minutes and saves so much frustration.
For this style, try using three bead types: a primary stone, a contrasting stone, and metal spacers between groups. Something like: three amazonite, one gold spacer, three howlite, one gold spacer, repeat. It sounds simple but the result looks intentional and polished.
Style 3: The Letter Bracelet
Letter bead bracelets were everywhere in 2023 and they're still going strong. They're also a great project because they teach you how to mix bead sizes (letter beads are usually 6-7mm while round stone beads are 8mm) and how to center a design element.
Here's my approach: decide what word or initials you want. Let's say "LOVE" — four letters. Center them in the bracelet by dividing the remaining bead slots evenly on each side. If your bracelet is 24 beads total, that's ten beads on the left, four letter beads in the middle, ten beads on the right. I usually put a small spacer bead before and after the letters to set them apart visually.
Letter beads come in gold, silver, black, and white plastic or acrylic. Gold letter beads with white howlite or cream-colored stone beads is a classic combo. Black letters on a bracelet of mixed dark stones looks more understated. The letter beads have slightly larger holes than stone beads, so your elastic will thread through them easily.
Stringing Tips That Saved Me From Losing My Mind
A few practical things I wish I knew from the start:
Tape the end of your cord. Before you start stringing, wrap a small piece of masking tape around the end of the elastic cord. This creates a "needle" that's much easier to thread through beads, especially stone beads with slightly rough hole edges. Some people use bead needles, but tape is free and works just as well for elastic cord.
Use a bead tray or a towel. Beads roll. They roll onto the floor, under the couch, into the carpet where you'll find them three months later with your foot. Work on a bead mat, a towel, or a tray with raised edges. This also lets you lay out your pattern before stringing.
Don't cut your cord too short. I know I said 3-4 inches of extra on each end, but honestly, give yourself more. Six inches on each side. You can always trim excess after tying, but you can't add more if you cut it too short and can't pull the ends together for your knot. Ask me how I know.
Pre-stretch your elastic. Before stringing, hold the elastic cord and give it a good stretch a few times. Elastic cord has a natural "memory" and will contract slightly over time. Pre-stretching it means less shrinkage after your bracelet is finished, so it won't end up tighter than you intended.
Watch out for hair wrapping. This sounds weird but it's a real thing — long hair can get wrapped around the elastic and create a tangle that's nearly impossible to fix without cutting the bracelet. If you have long hair, tie it back while making bracelets. And when wearing them, be mindful when you're doing things like blow-drying your hair or leaning over windy areas.
How to Get the Size Right
Getting the sizing right is probably the trickiest part of making beaded bracelets, because it depends on the wearer's wrist size, the bead size, and how snug they want it. Here's the system I use:
Measure the wrist with a soft measuring tape, snug but not tight. Then add about half an inch to an inch of "ease" — this is the extra length that lets the bracelet slide on and off comfortably over your hand. For a stretchy bracelet, half an inch of ease is usually plenty because the elastic will stretch as you slide it on. For a clasp bracelet, you'll want closer to a full inch.
Here's a rough sizing chart based on bead count (for 8mm beads):
Small wrist (6-6.5 inches): 20-22 beads
Medium wrist (6.5-7.5 inches): 22-26 beads
Large wrist (7.5-8.5 inches): 26-30 beads
These are estimates — always do a test fit by holding the strung (but unknotted) bracelet around your wrist before tying off. The beads should sit comfortably without digging in or sliding around too loosely.
If you're making a gift and can't measure the person's wrist, 24 beads of 8mm is a safe middle-ground for most adults. It'll fit a medium wrist perfectly and is close enough for slightly smaller or larger wrists because of the stretch.
Three Common Problems (and How I Fixed Them)
Problem 1: The Elastic Keeps Breaking
This happened to me constantly when I started. The fix was embarrassingly simple: stop using cheap cord. I'd bought a multi-pack of "craft elastic" that was like a dollar for five spools, and it snapped if you looked at it wrong. Switching to proper 0.8mm Stretch Magic made an immediate difference. The other cause of breakage is cutting the cord at an angle — if your cut isn't clean, the end frays and weakens. Sharp scissors, straight cut, pull the cord tight before cutting.
Also, check your bead holes. Some natural stone beads have rough or sharp edges inside the hole that can cut through elastic over time. You can smooth these with a bead reamer (a small pointed file), or just avoid beads with visibly rough holes.
Problem 2: Beads Keep Falling Off
If beads are slipping off the end of your cord while you're stringing, the tape trick I mentioned earlier will fix it. But if beads are falling off a finished bracelet, the issue is your knot — either it wasn't tight enough, or you didn't glue it. A properly tied surgeon's knot with a drop of glue should hold indefinitely. If it's still coming undone, try the "hidden knot" method: after tying, pull the knot inside a large-hole bead before gluing. The bead acts as an extra barrier.
Another possibility: you're using beads with holes that are too large for your cord. If the cord can slide through the bead easily, it might migrate and create slack over time. Switch to slightly thicker cord or add a tiny crimp bead at each end (even on elastic bracelets, a single crimp bead on each side of the knot adds security).
Problem 3: The Bracelet Is Too Tight or Too Loose
This is a sizing issue, and it gets easier with practice. If your bracelet is consistently too tight, you're probably not accounting for the bead size correctly — remember that each 8mm bead takes up about 8mm of space, but the cord running through the center is basically invisible. So your "bead count × bead size" gives you a good estimate of the finished length, but add a little extra for the knot area and any spacer beads.
If it's too loose, the easiest fix is removing one or two beads and re-tying. This is annoying but better than wearing a bracelet that slides off your hand. For future reference, keep a log of how many beads you used for different wrist sizes — after a few bracelets, you'll have your own personal sizing guide.
Where to Go From Here
Once you've made a few basic stretchy bracelets and feel comfortable with the process, there's a whole world of techniques to explore. Multi-strand bracelets, wrap bracelets (using leather cord), macramé knotting, wire wrapping, resin beads, polymer clay beads you make yourself. But all of that builds on the foundation we just covered — choosing good materials, getting your sizing right, and tying a knot that holds.
The biggest thing I've learned from making beaded bracelets is that perfection is overrated. Some of my favorite bracelets are slightly imperfect — a bead that's a different shade than the others, a pattern that's just a tiny bit off-center, a knot that's visible if you look closely. It makes them feel handmade in the best way. So don't stress about getting everything exactly right on your first try. String some beads, tie a knot, wear it for a few days. Then make another one. That's really all there is to it.
Comments