How to Make a Hammered Gold-Fill Ring: A Complete Beginner's Guide
I made my first hammered ring sitting cross-legged on my living room floor with a pair of flush cutters I'd bought at a hardware store. It was ugly — the band was uneven, the texture was patchy, and I'd accidentally bent it into an oval instead of a circle. But I wore it for three weeks straight because I'd made it myself, and that feeling of creating something with my own hands was addictive.
If you've been curious about making jewelry but feel intimidated by the idea, a hammered gold-fill ring is the perfect place to start. It requires minimal tools, the materials are affordable, and the technique is forgiving — even your "mistakes" end up looking like intentional design choices. Here's everything you need to know to make your first one.
What You'll Need: The Complete Tool and Material List
Materials
Gold-fill wire, 14kt, 18 gauge (1.0mm) round — This is the sweet spot for rings. 18 gauge is thick enough to hold its shape but thin enough to work with basic tools. Gold-fill is not gold-plated — it has a much thicker layer of gold bonded to a brass core, which means it won't wear off like plating does. A 1-foot piece costs around $8-12 and will make 2-3 rings depending on finger size. I buy mine from Rio Grande or Halstead, both of which sell to small-scale makers.
Sterling silver wire, 18 or 20 gauge (optional) — If you want to practice first without using gold, silver wire costs about $3-5 per foot. The technique is identical. Some people actually prefer the look of hammered silver — it has this warm, organic feel that polished gold doesn't quite capture.
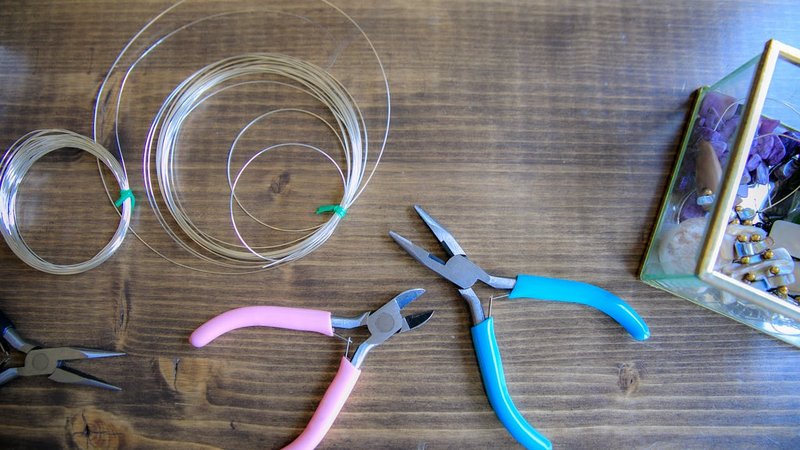
Tools
- Flush cutters ($8-15) — These cut wire flat on one side instead of pinching it into a point. The flat cut is important because that's where your ring ends meet, and you want them flush against each other. Xuron 410 or 490 are popular among jewelers, but any decent flush cutter from a craft store will work.
- Round nose pliers ($6-12) — For shaping the curve of the ring. The tapered jaws let you control the radius. Cheaper ones work fine for this project — you don't need Lindstrom quality for bending 18-gauge wire.
- Flat nose or chain nose pliers ($6-10) — For gripping and making small adjustments. You'll use these more than you'd expect.
- Ball-peen hammer or chasing hammer ($12-25) — This is where the magic happens. A chasing hammer has a large, flat face that creates the signature hammered texture. A ball-peen hammer works too, but the texture will be slightly different (more dimpled, less flat). I started with a $12 chasing hammer from Amazon and it still works great.
- Steel bench block or anvil ($8-20) — You need a hard, flat steel surface to hammer on. A 2×2 inch bench block is perfect. Don't use a wood surface — the hammer will just bounce off, and you won't get clean texture marks.
- Ring mandrel ($8-15) — A tapered steel rod marked with ring sizes. This is essential for shaping and sizing your ring. You can technically use a marker or thick dowel in a pinch, but a proper mandrel makes the process much easier and more accurate.
- Needle file or fine sandpaper (400+ grit) ($3-8) — For smoothing the cut ends of the wire so they don't scratch your skin or catch on fabric.
- Safety glasses ($5) — Wire can snap unexpectedly when you're cutting or bending. Not optional — just wear them.
Total startup cost if you're buying everything: roughly $60-90. If you already have basic pliers, you're looking at maybe $30-40. The tools last for years, and once you have them, each ring costs only a few dollars in materials.
Understanding Ring Sizes: Measure Before You Cut
Before you touch any wire, figure out what size you're making. The most reliable method at home:
- Wrap a piece of string or thin paper strip around the finger you're making the ring for.
- Mark where it overlaps.
- Lay it flat and measure the length in millimeters.
- That's your finger circumference.
For a standard women's size 7, the circumference is about 54mm. Size 6 is roughly 51mm, size 8 is about 57mm. For men, size 10 is around 62mm.
Here's the formula for how much wire to cut: take the circumference and add about 2-3mm for the overlap where the ends meet. For a size 7 ring, cut about 56-57mm of wire.
Pro tip: cut slightly longer than you think you need. You can always file down extra length, but you can't add wire back once it's cut. I'd rather waste 2mm of gold-fill than start over.
Step-by-Step: Making Your Hammered Ring
Step 1: Cut the Wire
Measure your wire against the ring mandrel at the target size, then add those extra 2-3mm. Use your flush cutters to make the cut. The flat side of the cutters should face the usable length of wire — this gives you a clean, flat end that will sit flush against the other end when the ring is closed.
Look at both cut ends. One should be perfectly flat, the other slightly pinched. The flat end is the one you want visible on the outside of your finished ring.
Step 2: File the Ends Smooth
Use your needle file to smooth both cut ends. Run the file across the flat end in one direction — don't saw back and forth, it doesn't work as well. You're aiming for a surface that feels smooth when you run your finger across it. If it catches at all, keep filing.
Test by pressing the two flat ends together. They should meet with no visible gap when viewed from the side. If they don't, file until they do. This is the most important step for a clean-looking finished ring.
Step 3: Shape the Ring on the Mandrel
Wrap the wire around the ring mandrel at your target size. Start by holding one end against the mandrel with your thumb, then use your round nose pliers to gently bend the wire around. Don't try to bend it all at once — work in small increments, rotating the mandrel as you go.
The wire will spring back slightly when you release pressure. That's normal. Just keep working it around the mandrel until the ring holds a roughly circular shape on its own. It doesn't need to be perfect at this stage — you'll refine it later.
Pay attention to how the two ends meet. You want the flat-cut ends to be aligned so they'll press together when you close the ring.
Step 4: Close the Ring
This is the step that trips up most beginners. Slide the ring off the mandrel and grip one end with your flat nose pliers. Gently push the other end toward it with your finger, then use the pliers to squeeze the ends together.
The goal is a seamless join — the two flat ends should press together so tightly that you can barely see the seam. If there's a gap, the ring will catch on things and eventually the ends will splay apart.
Common mistake: gripping too hard and leaving plier marks on the wire. Use the minimum force needed, and if your pliers have serrated jaws, put a piece of tape over them or use nylon-jaw pliers instead.
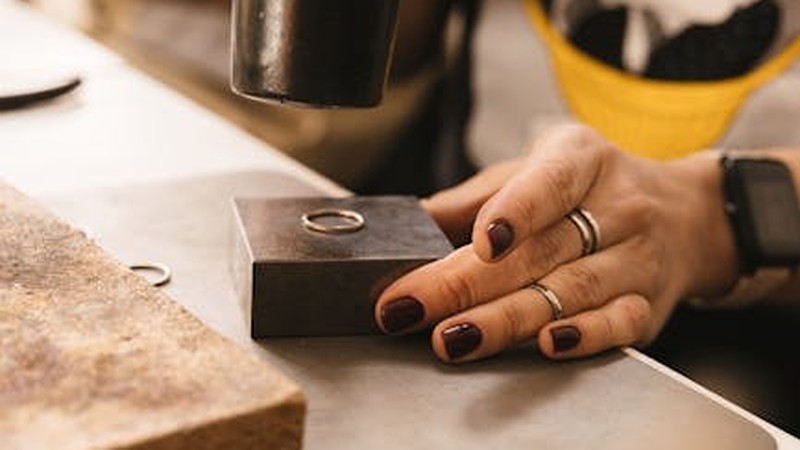
Step 5: Hammer the Texture
Now for the satisfying part. Place your bench block on a sturdy table (or the floor, if you don't want to annoy anyone). Put the ring flat on the block.
Hold the hammer near the end of the handle — this gives you better control than gripping it close to the head. Tap the ring with the flat face of the hammer. Not hard — you're tapping, not smashing. The hammer marks should be visible but not deep.
Work your way around the entire ring, overlapping your hammer strikes slightly. Try to keep the spacing and force consistent. Don't hit the seam area too hard at first — you don't want to open up the joint you just carefully closed.
Here's something that took me a while to learn: the hammering actually work-hardens the metal, making it stiffer and helping the ring hold its shape. So this step isn't just decorative — it's structural too. A well-hammered ring is significantly stronger than an unhammered one.
Step 6: Round the Ring on the Mandrel Again
Hammering will slightly deform the ring — it might become slightly oval or develop a flat spot. Put it back on the mandrel at your target size and tap it gently with the rawhide face of your hammer (or just use your pliers) to round it out.
Slide it up and down the mandrel a few times. If it's too tight to pass through the target size, it's actually slightly too small — the hammering has compressed the metal. You can stretch it slightly by forcing it past the target size on the mandrel and then letting it spring back.
If it's too loose, you'll need to either start over or accept a slightly smaller finished size. This is why cutting slightly long is better than cutting short.
Step 7: Final Polish
Run your needle file lightly over the seam area one more time to make sure it's perfectly smooth. Then check the entire ring for any sharp spots or tool marks you don't want.
Some people polish hammered rings with a polishing cloth or buffing wheel. I actually prefer the matte look of the hammer marks and don't polish further. If you want a high-shine finish on the unhammered areas, a jewelry polishing cloth (Sunshine cloth, about $5) will do the trick.
Inspect the ring one final time. Run it over a piece of fabric — if it snags anywhere, file that spot. Your ring should feel smooth everywhere it touches skin.
Common Mistakes (and How to Avoid Them)
Cutting the Wire Too Short
This is the number one beginner mistake. You measure exactly the circumference, cut it, shape it, and discover the ring is a full size too small. What happened? The wire thickness itself takes up space, and the bend radius of the mandrel is larger than your finger.
Fix: Always add 2-3mm to your measurement. If you're between sizes, go longer, not shorter.
Gapping at the Seam
The two ends of the ring don't meet, leaving a V-shaped gap. This happens when you didn't file the ends perfectly flat, or when you bent the wire past the point where the ends can meet.
Fix: File both ends flat again and re-close. If the ring has already been hammered, you might need to gently bend it open, adjust the ends, and re-close. Hammering near the seam can also help lock the joint.
Uneven Hammer Texture
Some areas are heavily textured while others are barely marked. This usually means you were hammering at inconsistent angles or with inconsistent force.
Fix: This one is hard to fix after the fact, but the good news is that slightly uneven hammering actually looks intentional and handmade. Perfectly uniform texture looks machine-made. Embrace the variation.
Plier Marks
Those annoying parallel lines on your wire from gripping too hard with serrated pliers.
Fix: Prevention is easier than cure. Wrap your plier jaws in tape, or invest in nylon-jaw pliers ($10-15). If the marks are already there, light hammering over the marked area can disguise them.
Ring Is Too Stiff or Brittle
If you've hammered the ring aggressively and it feels rigid or even develops tiny cracks, you've over-worked the metal.
Fix: Unfortunately, this usually means starting over. Work-hardened metal can be annealed (heated with a torch to soften it), but that's a more advanced technique. For now, just hammer more gently next time.
Variations to Try Once You've Mastered the Basics
Wide Band Ring
Use 14 or 16 gauge wire (thicker) and cut it longer — about 8-10mm of extra length for the overlap. Wrap it around the mandrel twice or 1.5 times for a wide band effect. Hammer the entire surface. This creates a chunky, modern look that's very popular right now.
Bezel-Set Stone Ring
Once you're comfortable with basic rings, try adding a small cabochon stone. You'll need a bezel cup (a small cup-shaped setting, about $1-3 each), some solder, and a butane micro-torch ($25-40). Solder the bezel cup onto your shaped ring before hammering. A 4mm or 5mm round stone works beautifully. This takes your ring from "handmade craft" to "real jewelry" territory.
Mixed Metal Ring
Twist together gold-fill and silver wires before hammering. The contrast between the two metals looks stunning. Simply hold both wires together at one end, twist them with your pliers, shape into a ring, and hammer as usual. This technique also makes the ring stronger because the twisted structure distributes stress better.
Organic Texture Ring
Instead of using a hammer, try texturing with other objects. A nail set creates small round dimples. A textured hammer face gives a faceted look. I've even seen people use rocks, coins, or the edge of a file to create unique textures. The key is experimentation — that's half the fun.
Stacked Rings Set
Make 2-3 thin rings in the same size using 20 or 22 gauge wire. Wear them together for a stacked look. Mix textures — one hammered, one smooth, one twisted. These make great gifts because they look more impressive as a set than individually.
Safety Tips You Shouldn't Skip
- Wear safety glasses. Wire ends can fly when cut. I've had a piece ricochet off my glasses — without them, it would have hit my eye.
- Work in a well-ventilated area if you're using any chemical polish or flux for soldering.
- Keep fingers clear of the hammer. Obvious, but when you're concentrating on the ring, your finger position can drift. Establish a habit of placing your non-dominant hand flat on the table, away from the hammer zone.
- Be aware of metal dust. Filing gold-fill produces fine particles. Wipe your workspace with a damp cloth afterward. Don't breathe it in.
- If you progress to soldering (for stone-setting or permanent joins), invest in proper ventilation and fire safety equipment. Butane torches are small but still produce real flames.
Selling Your Handmade Rings
Once you've made a few and they look good, you might start thinking about selling them. A simple hammered gold-fill ring retails for $25-65 depending on the design, material cost, and your local market. The material cost per ring is roughly $4-6 for gold-fill, $1-2 for silver.
That's a healthy margin, but remember to factor in your time. A beginner might spend 30-45 minutes per ring. With practice, you can get it down to 10-15 minutes. At that speed, you're making $40-80/hour worth of product — not bad for work you can do at your kitchen table.
Good photography matters enormously. Natural light, a clean background, and a close-up that shows the hammer texture will make or break your listing. You don't need a professional camera — a phone photo in good daylight is sufficient for most online marketplaces.
What I Wish I Knew When I Started
The biggest lesson I learned is that consistency matters more than perfection. Your first ring won't be perfect. Your tenth ring won't be perfect either. But each one will be better than the last, and after you've made twenty or thirty, you'll start developing a consistent style that's recognizably yours.
I also wish someone had told me that buying better tools earlier would have saved me a lot of frustration. Cheap pliers that slip and mark your wire aren't worth the few dollars you save. A good chasing hammer with a properly polished face makes a visible difference in the quality of your texture.
And finally: document your process. Take photos of each step, even if they're just phone photos. Not only does this help you improve (you'll spot problems you didn't notice while working), but it also creates content that people love to see. There's something genuinely satisfying about watching a piece of wire transform into a beautiful ring, and sharing that process is one of the best ways to connect with customers who appreciate handmade work.
So grab some wire, find a hammer, and start making. The first one might be ugly — but I promise you'll be hooked by the second.

Comments