How to create resin crystal coasters
What resin coasters actually involve
Resin coasters with embedded crystals or stones are one of those projects that looks impressive but does not require expensive equipment. The basic idea is straightforward: pour mixed resin into a mold, arrange stones or crystals inside, let it cure, and pop it out. The reality involves a few more steps and some trial and error, but the learning curve is manageable over a weekend.
A finished coaster should be about 3-4 inches across and roughly 5-8mm thick. Thinner than that and it feels flimsy. Thicker and it uses too much resin, costs more, and takes longer to cure. Most silicone coaster molds sold for this purpose hit the right dimensions, but check the product description before buying.
One thing that surprises beginners: the crystals are not sitting on the surface. They are suspended inside the resin, which means you need to plan your layers. Pour a thin base layer, place your stones, then pour a second layer to cover them. This two-pour approach gives you more control over positioning and prevents stones from drifting to the bottom.
Picking the right resin
Not all epoxy resin is the same. For coasters, you want a clear, low-viscosity craft resin with a work time of at least 30 minutes. Shorter work times (under 20 minutes) create stress because you are rushing, and rushing leads to bubbles, uneven pours, and misplaced stones.
Two-part epoxy resin comes in a resin bottle and a hardener bottle. The ratio matters — most craft resins use a 1:1 ratio by volume, which is easy to measure. Some use 2:1 or even 3:1 by weight, and getting those wrong means the resin stays sticky or never fully cures. Read the label before you start.
Brands that work well for this project include ArtResin, Pro Marine Supplies, and East Coast Epoxy. A 16-ounce kit (8 ounces each part) makes roughly 8-10 coasters and costs between $20-35. That breaks down to about $3 per coaster for materials, not counting the crystals or molds.
Avoid polyester resin. It is cheaper, but it shrinks as it cures, smells terrible, and the fumes are genuinely unpleasant. Epoxy is worth the extra cost for a project you will touch and use daily.
Supplies beyond the resin
You need a few more things:
Silicone molds. Round is the standard shape, but hexagonal and square molds also look good. Flexible silicone is important because it lets you push the cured coaster out without cracking it. Hard plastic molds will fight you on release.
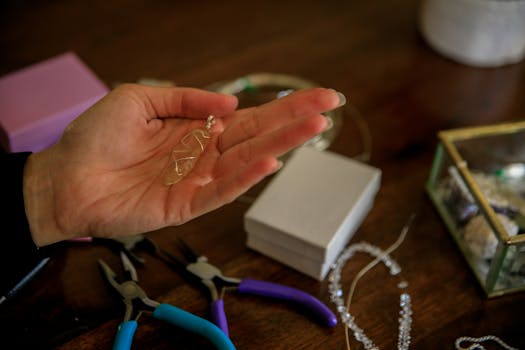
Mixing cups. Plastic or silicone, graduated with measurements. Buy a pack of 20-50 for a few dollars — you will go through them. Trying to wash and reuse epoxy cups is not worth the mess.
Stir sticks. Wooden craft sticks work. Some people use silicone spatulas, which are reusable and easier to clean.
A heat gun or small butane torch. This is for popping bubbles that rise to the surface after pouring. Pass the flame quickly over the resin — do not hold it in one spot or you will scorch the resin and create yellow discoloration. A heat gun on low setting works too and is safer for beginners.
Plastic drop cloth or silicone mat. Resin does not come off surfaces once it cures. Protect your table.
Nitrile gloves. Epoxy resin can cause skin irritation with prolonged contact. Wear gloves every time, even for small pours.
Isopropyl alcohol (91% or higher) and a lint-free cloth for cleaning molds between uses and wiping up drips.
Choosing and preparing crystals
The best crystals for coasters are small, flat, or tumbled pieces between 5-15mm. Large points or raw chunks can look dramatic but they make the coaster uneven, which defeats the purpose. You want a glass to sit flat on the finished piece.
Good options include tumbled amethyst, rose quartz chips, small citrine points, and crushed stone fragments. Crystal chips sold in craft stores or online as "resin art stones" are pre-sorted for size and cost about $8-15 for a bag of 100-200 pieces.
Before embedding them, rinse the crystals in warm water and let them dry completely. Dust and debris trapped under resin creates cloudy spots that you cannot fix later. If the crystals have a powdery residue from mining or shipping, a quick soak in soapy water and a soft brush will clean them up.
Arrange your stone layout on a flat surface the same size as your mold before you start mixing resin. This planning step saves you from the common mistake of mixing resin, opening the mold, and then staring at it for five minutes trying to decide where everything goes.
The two-pour method
First pour: the base layer
Mix your resin according to the package instructions. Pour slowly into one cup, then the other, matching the ratio as closely as you can. Stir slowly for 2-3 minutes. Scrape the sides and bottom of the cup. Then stir for another minute. Under-mixing is the number one cause of soft, sticky resin.
Let the mixed resin sit for 2-3 minutes. You will see bubbles rise to the surface. Some will pop on their own. Pop the rest with your heat gun or torch.
Pour a thin layer into the mold — about 2-3mm deep, or roughly one-third of the mold depth. This base layer gives the stones something to rest on instead of sitting directly on the mold floor, which can create a flat, unfinished look on the bottom.
Wait 30-60 minutes for this base layer to thicken slightly. It should be tacky but not wet. The technical term is "gel stage." If the resin is still fully liquid, your stones will sink to the bottom when you place them. If it has fully cured, the second layer will not bond to the first.
Placing the crystals
Use tweezers or the tip of a toothpick to position your stones on the tacky base layer. Work from the center outward. Press each stone down gently — it should sit partially embedded in the base layer without sinking through it.
Leave a small border of empty resin around the edge. Stones that touch the mold wall can create a weak point where the coaster might chip later. A 3-4mm border is enough.
If you want a layered effect where some stones appear to float at different heights, place some now and add more after the second pour, pressing them into the fresh resin before it sets.
Second pour: the top layer
Mix a fresh batch of resin. Pour it slowly over the stones, starting at the center and letting it flow outward. Pour in a thin stream to minimize new bubbles. Fill the mold to about 1mm below the rim — overfilling makes a lip that looks messy.
Pop bubbles again with your heat gun. Check the edges — bubbles love to hide where stones meet the resin.
Cover the mold with a cardboard box or plastic container to keep dust out while it cures. Even a small speck of dust landing on wet resin becomes a permanent flaw.
Curing time and conditions
Most craft epoxies cure to the touch in 8-12 hours and reach full hardness in 24-72 hours. Temperature matters — resin cures faster in warm rooms (75-85°F / 24-29°C) and slower in cool ones. Below 65°F (18°C), some resins may not cure properly at all.
Do not move the mold during curing. Jostling can shift the stones and create uneven surfaces.
After the initial cure (8-12 hours), the coaster should be firm enough to demold. Flex the silicone mold gently and push the coaster out from the bottom. If it resists, wait a few more hours. Forcing it out can crack the resin or damage the stone placement.
Sanding and finishing the edges
Raw resin edges often have a slight lip or roughness from the mold seam. A quick sand smooths this out.
Start with 220-grit sandpaper, then move to 400, then 800. Wet sanding (dip the paper in water) creates less dust and gives a smoother finish. Work in one direction around the edge, not back and forth, for the most even result.
After sanding, wipe the coaster with a damp cloth to remove dust. Let it dry, then apply a thin coat of resin or a clear polyurethane spray to seal the sanded edge and restore the gloss. This final coat is optional but makes the piece look finished.
Preventing common problems
Bubbles are the most frequent complaint. Mixing slowly (not whipping) reduces the number of air bubbles you introduce. Pouring from height (holding the cup 4-6 inches above the mold) lets bubbles pop as the resin streams down. And the heat gun or torch pass is the last line of defense. You will never eliminate every bubble, but you can get close.
Cloudy resin usually means moisture got into the mix. Store your resin bottles with their caps tight. Wipe out your mixing cups before use — a wet cup from a previous session will contaminate the fresh batch. If you live in a humid climate, a dehumidifier in your workspace helps.
Sticky resin that never fully hardens is almost always a measuring error. Get the ratio right. Use graduated cups, not eyeballing it. If your resin comes with a pump, use it — pumps are more accurate than pouring by hand.
Design ideas beyond basic stone placement
Layered color is a popular technique. Add a few drops of resin pigment or mica powder to one of your pours to create a tinted layer beneath clear resin. Blue or teal tint under clear quartz chips mimics ocean water. A gold-tinted base layer under amethyst pieces creates a rich, warm look. Keep the pigment concentration low — 1-2 drops per ounce of resin is usually enough.
Dried flowers, leaves, or small shells mixed in with the crystals add variety. Press them into the tacky base layer alongside the stones. Avoid fresh flowers — they contain moisture that will cause bubbles and cloudiness.
Geode-style coasters are another option. Pour a colored resin base, arrange stone fragments in a ring along the edge, fill the center with a contrasting color, and add a thin clear top layer. The result looks like a sliced geode. This is more advanced but worth trying once you are comfortable with the basic two-pour method.
A set of four matching coasters makes a solid gift. Pick one color palette and one type of stone, and make all four at once. The consistency looks intentional and professional. Wrap them in tissue paper and a simple box, and you have something store-quality without the markup.
Cleanup and safety
Cured resin peels off silicone cups and stir sticks, which you can reuse or toss. Wipe up any drips on your work surface with isopropyl alcohol before the resin cures — after that, you are scraping with a razor blade.
Work in a ventilated area. Epoxy fumes are not as aggressive as polyester resin, but they can still cause headaches in poorly ventilated spaces. An open window or a small fan is usually sufficient.
Dispose of leftover resin by letting it cure in the mixing cup and throwing the solid piece in the trash. Do not pour liquid resin down the drain — it will clog your plumbing and is bad for water systems.
Comments