My First Time Soldering Jewelry: What I Wish Someone Had Told Me
The Moment I Realized Soldering Wasn't as Scary as I Thought
I still remember the first time I held a butane torch in my hand, aimed it at a tiny jump ring, and watched the silver solder flow like liquid mercury into the seam. It was 2019, I was sitting cross-legged on my apartment floor with a fire blanket underneath me, and my hands were shaking so badly I almost dropped the ring three times. But when I pickled that ring, polished it, and saw a clean, invisible join for the first time — something clicked. Soldering wasn't some mystical craft reserved for master jewelers in dusty workshops. It was a skill. And like any skill, it could be learned.
What nobody tells you is that your first dozen attempts will probably look terrible. Mine did. I overheated a copper disc until it looked like a burnt pancake. I melted more ear posts than I care to admit. But each failure taught me something specific — and that's exactly what I want to share with you here. Not a generic "here's how to solder" guide, but the real, messy, practical stuff I wish someone had told me on day one.
What You Actually Need (My Honest Starter Kit)
When I started, I made the classic beginner mistake of buying a cheap "jewelry making kit" from Amazon that included a tiny butane torch, some mystery solder paste, and a pair of tweezers that couldn't grip anything. I wasted about $45 and two weeks of frustration before I realized I needed to invest in specific, reliable tools.
Here's what I'd recommend to anyone starting out in 2026, based on three years of trial and error:
The torch. I use a Blazer GB4001 Stingray butane torch, which costs around $45-55. It's not the cheapest option, but the flame is pinpoint-precise and it holds enough fuel for about 45 minutes of continuous use. I've tried five different torches and this one is the only one where I can reliably control the heat zone on small pieces. If you're on a tighter budget, the Bernzomatic ST2200T works fine for larger pieces, though the flame tip is wider.
Solder. This is where most beginners get confused, and I was no exception. You need to match your solder to your metal. I work mostly in sterling silver, so I use medium-grade (easy) silver solder paste from Otto Frei — specifically their "medium" paste in the 1mm syringe. Paste solder is more forgiving than sheet or wire solder because it stays where you put it. One 7-gram tube lasts me about 40-50 joints. For brass and copper projects, I switch to Harris Stay-Silv 15% silver-bearing solder, which flows at a lower temperature.
Flux. I can't stress this enough: you absolutely need flux. Solder will not flow onto dirty or oxidized metal, period. I use Handy Flux (Battern's self-pickling flux) in the yellow tub. A small container costs $8 and lasts for months. I've tried four different fluxes and Handy Flux is the most consistent — it bubbles up when it's time to apply heat, which gives you a clear visual cue.
Soldering surface. A charcoal block is cheap ($6-8) and reflects heat back into your piece, which helps with overall heating. Solderite boards are better for delicate work because they don't reflect as much heat. I keep both — charcoal for rings and jump rings, Solderite for chains and thin wire work.
Pickle. After soldering, you need to remove firescale and flux residue. I use Sparex #2, which is a sodium bisulfate powder you mix with hot water. A 16-ounce container is about $12 and makes enough pickle solution for dozens of sessions. Store it in a warm ceramic mug or a dedicated pickle pot — never in anything aluminum, because the chemical reaction will eat through it.
Other essentials: Cross-lock tweezers (I use Lindstrom RX-series, around $35 — they're an investment but worth every penny), a third hand with helping hands, copper tongs for the pickle (never steel), and a brass brush for cleaning after pickling.
Safety First (I Learned This the Hard Way)
On my third soldering session, I set off the smoke detector in my apartment. I was soldering in a closed room with no ventilation, and the flux fumes were thick enough to taste. My roommate was not impressed. That was the day I moved my entire setup to the kitchen with the exhaust fan on full blast and the window wide open.
Here's the non-negotiable safety setup I use now:
Ventilation is your number one priority. Flux fumes contain borax and fluoride compounds that irritate your lungs, eyes, and throat. At minimum, work near an open window with a fan pulling fumes away from you. If you're soldering regularly (more than once a week), invest in a small fume extractor — the VEVOR 4-inch solder fume absorber is around $40 and works well for occasional use. I upgraded to a Weller WSA350 after about eight months of regular work, and the difference in air quality is noticeable.
Wear safety glasses. Not your regular glasses — actual safety glasses with side shields. I use 3M Virtua CCS glasses ($12/pair) because they're lightweight and I can wear them over my prescription glasses if needed. Solder can pop and spit, and flux bubbles aggressively. Getting a tiny blob of molten metal in your eye is not a learning experience you want.
Keep a fire extinguisher within arm's reach. Not in the next room. Within arm's reach. I use a Kidde FA110 kitchen extinguisher ($20) because it's compact and rated for grease and electrical fires. Also, always solder over a fire-resistant surface. I use a Solderite board on top of a ceramic tile, on top of a fire blanket. Layered protection sounds paranoid until you accidentally knock a hot piece onto your desk.
Tie back long hair, remove loose clothing, and don't wear polyester or acrylic — synthetic fabrics melt and stick to skin when exposed to flame. Cotton or denim only. I learned this after a polyester sleeve got too close to my torch and left a permanent scorch mark (and a small burn on my wrist).
The Three Mistakes I Made Most Often (and How to Fix Them)
Underheating the metal
This was my single most common mistake for the first two months. I'd focus the flame on the solder itself, watching it melt into a little ball, and wonder why it wouldn't flow into the joint. The problem? Solder follows heat. It flows toward the hottest part of the metal. If you're only heating the solder, the metal isn't hot enough to accept it.
The fix is simple but counterintuitive: heat the metal, not the solder. Position your flame so it's warming both pieces of metal evenly, on both sides of the joint. Watch the metal's color — when sterling silver starts to glow a dull red (around 1100°F / 593°C), that's your window. The solder should flow on its own at that point. If you have to push it with the flame, the metal isn't ready yet.
I practiced this by taking scrap copper wire, cutting it into 1-inch pieces, and making hundreds of jump rings. Each one was a chance to practice heating evenly until the solder flowed smoothly every time. After about 200 rings, it became muscle memory.
Using the wrong solder for the job
When I first started, I bought "easy" silver solder and used it for everything. Easy solder has the lowest melting point (about 1325°F / 718°C), which means it flows quickly — great for a single joint, terrible if you need to solder nearby areas later. Every time I reheated a piece to add another component, my original joints would come apart.
Silver solder comes in three grades: easy (lowest melting point), medium (about 50°F higher), and hard (about 50°F higher than medium). The rule is to start with hard solder for your first joint, then medium for subsequent joints, then easy for final joints. This way, each new soldering step won't remelt your previous work.
I keep all three grades on my bench at all times, clearly labeled with a Sharpie on the storage tubes. For beginners doing single-joint projects (like closing a jump ring or attaching an ear post), easy solder is perfectly fine. But the moment you start making multi-component pieces — like a pendant with a bail and a stone setting — you'll need the full range.
Not cleaning the metal before soldering
This one seems obvious, but I was guilty of it for weeks. I'd pull wire off the spool, cut it, and immediately try to solder. The results were always the same: solder balling up and refusing to flow, or flowing only partially and creating a weak joint.
Every piece of metal needs to be clean before soldering. For wire and sheet, I sand the joint areas with 320-grit sandpaper, then wipe with rubbing alcohol. For jump rings, I use a fine jeweler's file on the cut ends. The goal is to remove any oils, oxidation, or factory coating so the flux can do its job and the solder can bond properly. This single step improved my success rate from maybe 40% to about 85%.
Two Beginner Projects I Actually Recommend
Jump ring repair and closing
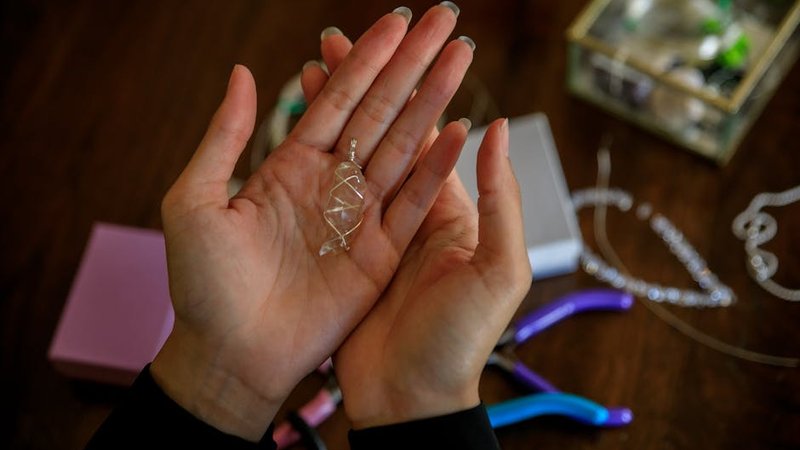
Start here. It's the most fundamental soldering task and it teaches you everything: how to position your work, how to apply flux and solder, how to heat evenly, and how to pickle and clean the finished piece. Every piece of jewelry you'll ever make involves jump rings.
Take some 18-gauge copper wire (it's cheap and you won't feel bad about mistakes) and make 20-30 jump rings using round-nose pliers and flush cutters. Cut each ring with flush cutters so one end is flat and the other is slightly angled. Use the flat ends to make your joint — they'll align much better. Apply a tiny dot of flux to the joint, place a microscopic chip of easy solder on top, and heat the ring evenly until the solder flows into the seam.
Don't worry if the first ten look messy. They will. Focus on getting the solder to flow completely through the joint. Once you can do that consistently, switch to 20-gauge silver wire and try again. Silver takes slightly more heat than copper, so the transition teaches you temperature control.
Soldering ear hooks to ear wires
Once you're comfortable with jump rings, try making a simple pair of drop earrings. Take a pre-made ear wire (the part that goes through your ear), a small bead or charm on a headpin, and solder the headpin loop to the bottom curve of the ear wire.
The tricky part here is that ear wires are thin (usually 20-22 gauge), so they heat up fast and you can easily melt them. I use a micro-flame setting on my torch and keep the flame moving constantly. Position the joint so gravity helps — the ear wire hanging downward, the headpin loop resting on top. Apply flux to the contact point, add a tiny amount of paste solder, and briefly heat from below. The whole soldering time should be 3-5 seconds. Any longer and you'll melt the wire.
I made about 15 pairs of practice earrings before I felt confident enough to give any as gifts. My first few looked crooked and over-soldered, but by pair number 10, the joints were clean and nearly invisible under magnification.
Practice Strategy That Actually Works
After my first month of sporadic, frustrating sessions, I changed my approach completely. Instead of trying to make finished jewelry pieces, I dedicated two weeks to just practicing joints. No finished products, no pressure to make something pretty. Just joint after joint after joint.
I bought 10 feet of 18-gauge copper wire for $6 and made hundreds of joints: butt joints, lap joints, T-joints, jump ring closures, and wire wraps. I timed myself — my goal was a clean joint in under 60 seconds, including fluxing and solder placement. After two weeks of daily 30-minute practice sessions, I could reliably solder a clean jump ring in about 20 seconds. That efficiency translated directly into better finished pieces, because I wasn't overheating the metal while fumbling around.
One thing that helped enormously was keeping a "soldering journal." After each session, I'd write down what worked, what didn't, and what I wanted to try differently next time. Looking back at those notes now, I can see a clear progression from "everything is on fire" to "actually, that went well." It's a simple habit, but it forced me to be intentional about improvement instead of just repeating the same mistakes.
What I Know Now That I Didn't Then
Soldering jewelry is one of those skills where the gap between "terrible beginner" and "reasonably competent" is surprisingly short — maybe 20-30 hours of focused practice. But the gap between "reasonably competent" and "truly skilled" is measured in years. I'm somewhere in the middle, and I'm okay with that.
The biggest lesson I've learned is that soldering is 80% preparation and 20% execution. Clean your metal, apply flux properly, position your solder strategically, and the actual heating part almost takes care of itself. When a joint fails — and joints will fail — it's almost always because I skipped a prep step, not because I did something wrong with the torch.
Start with copper. Move to brass. Then try silver. Don't attempt gold until you're comfortable with silver, because gold soldering requires precise temperature control and the material cost of mistakes is much higher. A single sheet of 24K gold solder costs about $25 for a tiny strip — you don't want to waste that on practice joints.
Most importantly: be patient with yourself. Every professional jeweler I've talked to has stories about their early disasters. The ones who got good weren't more talented — they just practiced more consistently and paid closer attention to what went wrong. Keep a journal, start with cheap materials, and give yourself permission to make ugly things while you learn. The beautiful pieces come later, and they come faster than you'd think.
Comments