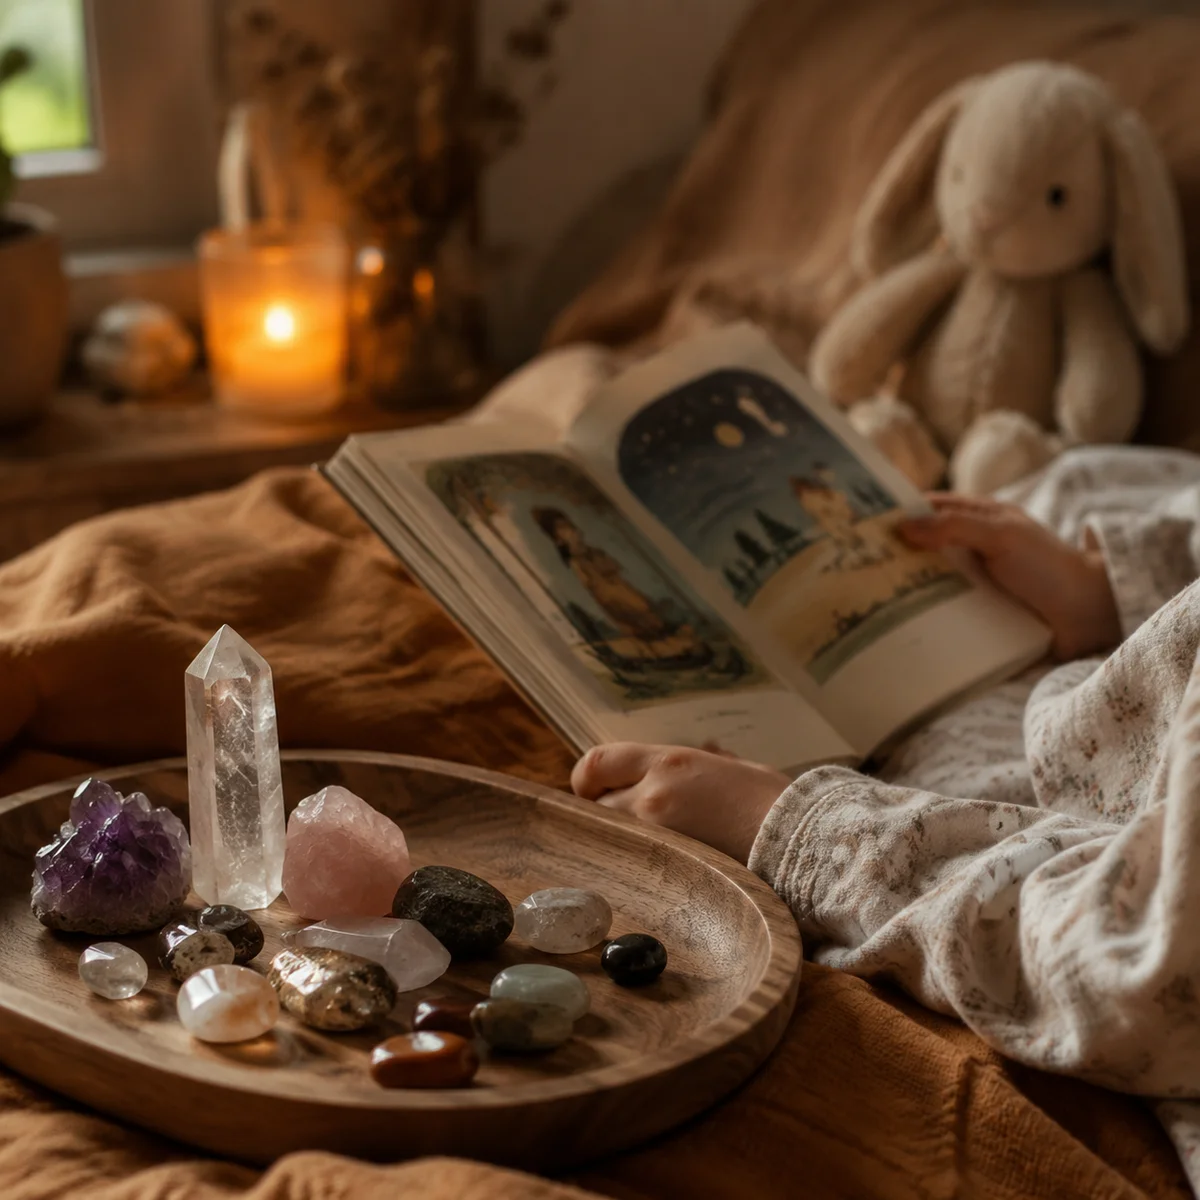
How to Bring Crystals on a Camping Trip
May 14, 2026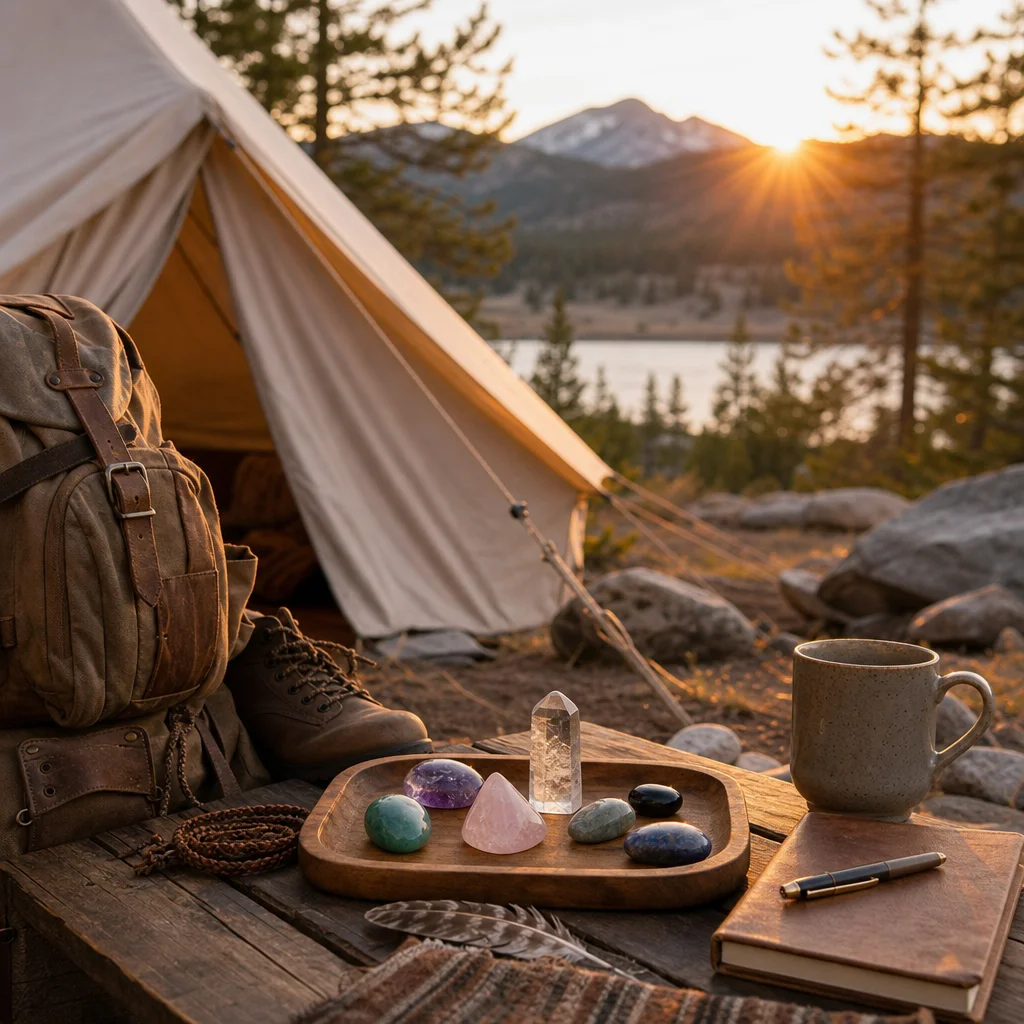
How to Bring Crystals on a Camping Trip (Without Losing Them)
Taking crystals outdoors sounds simple enough—throw a few tumbled stones in your pack and head for the trail. But between river crossings, sudden rain, and the general chaos of camp life, it's surprisingly easy to chip, scratch, or straight-up lose a stone you care about. I've made every mistake on this list at least once, including watching a nice piece of labradorite roll off a picnic table and into a crack between rocks never to be seen again.
This guide breaks down the practical side of packing, carrying, and using crystals outside. No energy theory, no ritual instructions—just the logistics of keeping your stones safe when you're far from home.
Which Crystals Survive the Outdoors (And Which Don't)
Not every stone belongs in a backpack. Hardness on the Mohs scale is the main thing to pay attention to. Anything below a 5 will scratch easily if it rubs against a zipper, key, or another stone in your bag.
Low-maintenance picks (Mohs 6+):
- Quartz (7) — durable, easy to clean, won't mind being tossed in a pocket
- Agate (6.5–7) — dense and resistant to chips
- Jasper (6.5–7) — almost indestructible in normal conditions
- Obsidian (5–5.5) — technically softer but conchoidal fracture means it chips rather than scratches, so small impacts look like they "belong"
- Tiger's eye (6.5–7) — fibrous structure absorbs shock better than most
Leave these at home:
- Selenite (2) — dissolves in water. Even humidity can make the surface cloudy
- Halite (2–2.5) — literally salt. Rain will eat it
- Calcite (3) — soft, reactive to acids (including some rain)
- Amber (2–2.5) — soft and can melt near a campfire
- Malachite (3.5–4) — scratches easily and is slightly toxic in water (copper content)
A quick rule: if you wouldn't throw it in a washing machine, don't throw it in a hiking pack. That filters out about 40% of the common crystal collection right there.
Three Ways to Pack Them: Pouch vs. Hard Case vs. Wrapped
There's no single right answer. It depends on how much hiking you're doing and how rough the conditions get.
The Drawstring Pouch Method
Lightweight, takes up almost no space, and you can clip it to a carabiner on the outside of your pack for quick access. The downside is zero protection from impact. If you fall on your pack or stuff it in a tight compartment, stones will knock against each other.
Works best for: short hikes, car camping, or when you're only bringing 2–3 small tumbled stones.
The Hard Case Method
A small Pelican case or even a pill organizer with individual compartments keeps stones from touching each other. I use a 7-day pill box I got at a pharmacy for $3—each compartment fits one or two tumbled stones, and the plastic walls prevent any contact.
Works best for: backpacking trips, kayaking, any scenario where your gear gets jostled or wet.
One thing I learned the hard way: foam-lined cases can trap moisture. If your stones get damp and you close the lid, you're creating a tiny humidity chamber. Either dry everything first or use a case with ventilation.
The Cloth Wrap Method
Wrap each stone in a square of cotton cloth or a bandana and pack them in a stuff sack. This is the lightest option that still prevents stones from scratching each other. A bandana pulls double duty since you can use it as a cloth later.
Works best for: medium hikes, people who want minimal gear, or when you're bringing stones that are too large for a pill case.
Water, Dirt, and Temperature: The Three Killers
Outdoor conditions are basically a stress test for anything fragile. Here's what actually damages stones versus what people worry about but doesn't matter.
Water damage is real but overblown for most stones. Quartz, agate, and jasper can sit in a puddle all day and be fine. The ones that suffer are the porous or water-soluble types I mentioned earlier. If you're crossing streams or expecting rain, just keep soft stones in a ziplock bag inside your main container. My own system: a small ziplock inside the pill case, so even if water gets into my pack, the stones stay dry.
Dirt is mostly a cosmetic issue. A quick rinse in a stream (for hard stones only) takes care of it. For softer stones, use a damp cloth instead of submerging them. The real problem with dirt is grit in your carrying container—grains of sand between two stones in a pouch act like sandpaper over miles of hiking. That's another point for individual compartments.
Temperature swings do matter for some stones. I left a piece of fluorite in direct sun on a rock slab in Utah, and the surface cracked from thermal shock when a cloud blocked the sun and the temperature dropped maybe 15°F in minutes. Fluorite, apatite, and any stone with visible internal fractures or inclusions is vulnerable to this. Keep them shaded or in your pack during the hottest part of the day.
Keeping Track of Your Stones at Camp
Losing crystals at camp is more common than losing them on the trail. At camp, you set things down, move around, cook, sleep, and the next morning that nice piece of rose quartz you had on the picnic table is gone.
Here's what works:
- Designate one spot. Pick a specific pocket, pouch, or corner of your tent as the "crystal spot." Everything goes back there when you're done handling it. I use the top lid pocket of my backpack—always the same place, easy to check before breaking camp.
- Count them. If you brought 4 stones, check that you have 4 every time you pack up. This sounds obvious. I lost a smoky quartz for three days on the Appalachian Trail because I didn't count. Found it in the bottom of my food bag.
- Avoid setting stones on bare ground or rocks. They camouflage surprisingly well, especially darker stones on dark soil or light stones on granite. Use a bright bandana as a mat if you want to lay them out.
- Don't take them out at night without a headlamp. More stones get lost in the first 20 minutes of darkness than at any other time.
What About Tumbled vs. Raw Stones?
Tumbled stones are the obvious choice for travel—smooth edges, no fragile points, and they fit easily into small containers. Raw crystals are trickier. Termination points chip, clusters can shed, and rough edges snag on fabric.
If you want to bring raw specimens, wrap each one individually in tissue paper or cloth, and pack them where nothing will press against them. A dedicated pocket in the top of your pack is better than the main compartment where everything gets compressed.
Personally, I bring tumbled stones for hiking and save raw specimens for car camping where I can keep a small box in the vehicle. The weight-to-fragility ratio of raw crystals just isn't worth it on a backpacking trip unless you're specifically collecting.
A Packing Checklist
Before you head out:
- Check each stone's Mohs hardness—skip anything below 5
- Pick a carrying method (pouch, case, or wrap) based on your activity
- Put water-soluble or porous stones in their own ziplock
- Choose a designated "crystal spot" in your pack and at camp
- Know how many stones you're bringing so you can count them later
- Pack a bright cloth or bandana to use as a mat
That's it. No special gear required, no expensive cases if you don't want them. A pill organizer, a ziplock, and a bandana covers most situations for under $5 total.
Final Thoughts
Bringing crystals camping doesn't need to be complicated. The main variables are hardness, water resistance, and how much jostling your trip involves. Pick durable stones, keep them separated, and always count before you leave camp. Everything else is optional.
The biggest surprise for me, after years of doing this, is how little gear you actually need. The fancy velvet pouches and wooden boxes look nice on a shelf, but in the field a plastic pill case outperforms all of them. Function over aesthetics, at least until you get home.
For a comprehensive overview, see our Ultimate Crystal Guide for Beginners.
Crystal Care: Keeping Your Stones Clean and Protected
When you're out in nature, taking care of your crystals is as important as taking care of yourself. Here's how to keep them looking their best.
Keep It Dry
Most crystals are sensitive to moisture. Rain, morning dew, and even the sweat from your hands can leave marks or discoloration. Always make sure to dry your crystals thoroughly after use or when they come into contact with water.
Use Gentle Cleaning
Don't use harsh chemicals or abrasive materials to clean your crystals. A soft cloth or a mixture of water and mild soap is usually sufficient. For tougher grime, a soft toothbrush can work wonders, but always be gentle.
Avoid Extreme Temperatures
Crystals can be damaged by extreme heat or cold. Avoid leaving them in direct sunlight for extended periods or near campfires. When storing your crystals at home, keep them in a cool, dry place.
Handle with Care
Even the toughest crystals can chip or crack if handled roughly. Always keep them in a safe place when not in use, and be mindful of where you place them in your pack to avoid them knocking against each other or other hard objects.
Regular Check-Ups
Before each trip, give your crystals a once-over to check for any signs of wear or damage. It's better to fix a problem before it gets worse, especially when you're out in the wilderness.
How to Incorporate Crystals into Your Camping Rituals
Using crystals while camping can enhance your experience, whether it's for meditation, grounding, or simply for the enjoyment of their beauty.
Morning Meditation with Crystals
Start your day with a crystal meditation. Find a quiet spot, sit comfortably, and hold a crystal in each hand. Focus on your breath and visualize the crystal's energy flowing through you. This can help you feel centered and ready to face the day.
Crystal Grid for Grounding
A crystal grid can help you feel grounded and connected to the natural world. Choose crystals that resonate with you, such as quartz, hematite, or smoky quartz. Arrange them in a pattern that feels right to you, and meditate over them for a few minutes.
Using Crystals for Aromatherapy
Some crystals can enhance the benefits of essential oils. For example, citrine can help amplify the uplifting energy of lemon oil, while amethyst can enhance the calming effects of lavender. Place your crystals near the oil diffuser for a more potent blend.
Expert Tips for Crystal Camping Trips
Here are some tips from crystal enthusiasts who have made countless camping trips with their stones.
- "Always have a small cloth or microfiber towel handy for wiping down your crystals after they come into contact with water."
- "Use a small, lightweight ziplock bag for each crystal. It keeps them protected and makes it easy to find what you're looking for."
- "If you're using crystals for meditation or grounding, consider making a small altar with stones and natural elements like leaves or flowers."
- "Keep a small, portable crystal cleaning kit in your pack. It should include a soft cloth, mild soap, and a small brush for tough spots."
- "Remember that crystals are a part of nature. Treat them with respect and gratitude, and they'll bring you joy and protection on your camping trips."
Common Mistakes to Avoid
Even the most experienced crystal enthusiasts can make mistakes when camping with their stones. Here are a few to watch out for:
- "Ignoring the weather. Be aware that rain, humidity, and temperature changes can affect your crystals."
- "Not properly packing your crystals. They can easily become damaged or lost if not stored securely."
- "Using harsh chemicals to clean your crystals. Stick to gentle cleaning methods to avoid damaging the stones."
- "Overlooking the importance of handling with care. Even the toughest crystals can be damaged if handled roughly."
- "Ignoring signs of wear and tear. Regularly check your crystals for any damage and address it promptly."
FAQ: Crystal Camping
Can I use my crystal in a campfire?
Can I use my crystal in a campfire?
No, it's not advisable. Many crystals can melt or react to high temperatures. Always keep them away from open flames.
How do I know if a crystal is too soft for camping?
How do I know if a crystal is too soft for camping?
Soft crystals are those with a Mohs hardness of 5 or less. They can easily scratch, chip, or dissolve when exposed to water or certain substances.
Can I clean my crystals with water?
Can I clean my crystals with water?
Yes, you can clean your crystals with water, but make sure to dry them thoroughly afterward to prevent water spots or damage.
What's the best way to store crystals in a backpack?
What's the best way to store crystals in a backpack?
Use a drawstring pouch, a small container, or a ziplock bag to keep your crystals secure and protected from other items in your backpack.
Can crystals help with bug bites or sunburns?
Can crystals help with bug bites or sunburns?
While there's no scientific evidence to support this, some people believe that certain crystals, like black tourmaline or aventurine, can help alleviate the symptoms of bug bites or sunburns. It's best to use them in conjunction with other first aid measures.
Related Articles
- Top Healing Crystals for Anxiety: Find What Works
- Garnet Comes in 6 Colors (Not Just Red): 6 Species Guide
- Labradorite vs. Moonstone: Iridescent Showdown
- Mohs Scale: Crystal Hardness Guide
- Green Aventurine Guide: Identify & Use This Stone
Conclusion
Crystals can be a beautiful addition to your camping adventures. By following these tips and being mindful of their care, you can enjoy the benefits of your stones while exploring the great outdoors.


Comments