My Favorite Silver Necklace Turned Black — Here's Everything I Learned About Cleaning It
My Favorite Silver Necklace Turned Black — Here's Everything I Learned About Cleaning It
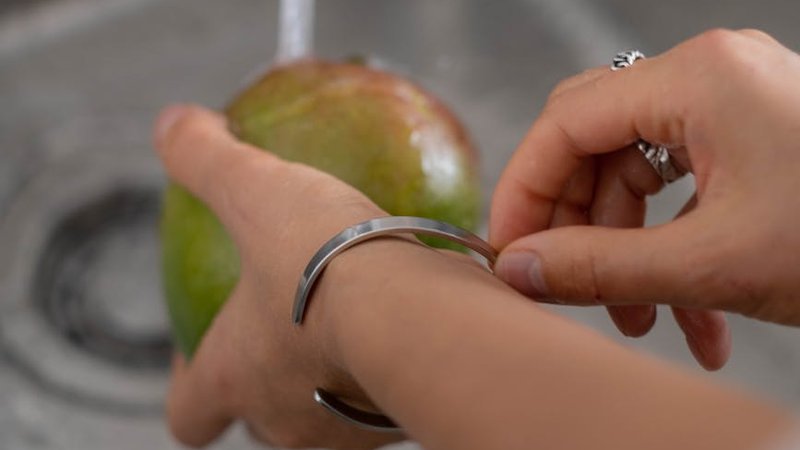
Last weekend I opened my jewelry box to grab my go-to silver chain — the one I wear almost every day — and it looked like someone had dipped it in ink. That gorgeous, bright sterling silver was dull, patchy, and had this weird dark rainbow sheen in spots. I was genuinely annoyed. I'd only had it for about eight months. How does silver go from shiny to sorry that fast?
After way too much research (and a couple of failed experiments), I figured out not just how to clean silver jewelry at home without ruining it, but also why it tarnishes in the first place and how to keep it from happening again. If your silver collection is looking sad right now, save yourself the trial and error — here's what actually works.
Why Does Silver Turn Black in the First Place?
That dark stuff on your jewelry isn't dirt. It's a chemical reaction. When silver comes into contact with sulfur compounds in the air, it forms silver sulfide — a dark, sometimes almost black layer on the surface. The scientific name for this is tarnish, and it's completely natural. Sterling silver, which is 92.5% silver and 7.5% other metals (usually copper), is especially prone because copper accelerates the reaction.
But it's not just air that causes it. A bunch of everyday things speed up how to clean tarnished silver becomes a recurring problem in your life:
Humidity is probably the biggest culprit. If you live somewhere muggy, or you keep your jewelry in the bathroom (guilty), moisture in the air reacts with sulfur compounds and basically supercharges the tarnishing process. I live in a humid climate and my silver absolutely suffers for it.
Sweat is another one. Your perspiration contains salts and acids that react with silver. If you wear a silver ring to the gym or on a hot summer day, you'll notice it dulls much faster. I learned this the hard way wearing a silver bracelet to a music festival — by the end of the night it was practically bronze.
Lotions, perfumes, and makeup are basically kryptonite for silver. The chemicals in sunscreen, hand cream, hairspray, and foundation all contribute to tarnishing. I used to put my earrings in before doing my makeup and couldn't figure out why they kept going dull. Turns out, the order matters — jewelry goes on last, after everything else has dried.
Eggs, onions, and rubber — yes, really. If you cook with eggs or onions and your rings are on, the sulfur in those foods will tarnish them fast. And rubber bands? They're loaded with sulfur. Never store silver near rubber.
Understanding all this actually helped me a lot, because once I knew why it was happening, preventing it became way easier. But first — let's fix what's already tarnished.
Method 1: Warm Soapy Water and a Soft Brush (The Safest Option)
This is my go-to for regular cleaning and for jewelry that's only slightly dulled. It's the gentlest approach and works well for pieces with gemstones, enamel, or any delicate elements.
What You Need
A bowl of warm (not hot) water, a few drops of mild dish soap — I use Dawn, it's what most jewelers recommend — and a soft-bristled brush. A baby toothbrush is honestly perfect because the bristles are super soft and the head is small enough to get into detailed areas.
How to Do It
Fill a bowl with warm water and add a couple drops of dish soap. Drop your silver jewelry in and let it soak for about 5 to 10 minutes — longer if it's really dirty. Then take your soft brush and gently scrub the piece, paying attention to crevices, chains, and around any set stones. Don't scrub hard; you're not trying to remove the silver, just the grime and early tarnish.
Rinse thoroughly under warm running water. This part is important — soap residue can actually cause more tarnish if you leave it on. Then pat dry with a soft, lint-free cloth. I use microfiber cloths that I keep specifically for jewelry. Don't use paper towels or tissues; they'll leave tiny scratches over time.
When This Works Best
This method is ideal for everyday maintenance and for pieces with opals, pearls, turquoise, or other porous gemstones that can't handle harsher treatments. It won't remove heavy tarnish, but it'll handle the light cloudiness that builds up from daily wear. I do this about once a week on the pieces I wear regularly, and it keeps them looking pretty close to new.
Method 2: Baking Soda, Aluminum Foil, and Hot Water (The Science Experiment)
Okay, this one sounds like a middle school science project, but it genuinely works and it's kind of satisfying to watch. This is the method you want for moderately to heavily tarnished silver — the dark, stubborn stuff that soap and water won't touch.
The Science Behind It
Here's what's actually happening: when you line a bowl with aluminum foil, add baking soda, and pour in hot water, you're creating a simple electrolytic cell. The aluminum acts as the cathode (negative electrode), the silver jewelry is the anode (positive electrode), and the baking soda dissolved in water becomes the electrolyte. The sulfur atoms in the silver sulfide (the tarnish) are attracted to the aluminum and transfer over, leaving your silver clean. The foil will turn dark and gross-looking, which means it's working.
Step by Step
Step 1: Line a glass or ceramic bowl with aluminum foil, shiny side up. Make sure the foil covers the bottom and sides — you want maximum contact area.
Step 2: Place your tarnished silver jewelry on the foil. Make sure each piece is touching the foil directly, not just sitting on top of other jewelry.
Step 3: Boil some water. You need it genuinely hot — not just warm from the tap. Boiling is best.
Step 4: While the water is heating, add about 1 tablespoon of baking soda per cup of water to the bowl. You'll see it fizz a bit.
Step 5: Carefully pour the boiling water over the jewelry. You might see some bubbling and a slight sulfur smell — that's normal. Let it sit for 1 to 3 minutes. You can actually watch the tarnish transferring to the foil in real-time, which is honestly pretty cool.
Step 6: Remove the jewelry with tongs or a fork (the water is hot), rinse it under cool running water, and dry thoroughly with a soft cloth.
Important Warnings
Do not use this method on jewelry with pearls, opals, turquoise, coral, or any porous gemstones. The hot water can damage or discolor them. It's also not great for pieces that have been glued together (like some rhinestone jewelry), because the heat can weaken the adhesive. Stick to plain silver or silver with hard stones like diamonds, sapphires, or cubic zirconia.
If the tarnish is really thick, you might need to repeat the process or let the piece soak a bit longer. But I've found that most moderately tarnished pieces come out looking like new after one treatment.
Method 3: Jewelry Polishing Cloths (The Lazy Person's Best Friend)
Not everyone wants to boil water and play chemist every time their silver gets dull. For ongoing silver jewelry care, a good polishing cloth is honestly the most practical solution.
These cloths are treated with a mild abrasive and anti-tarnish chemicals. You just rub the jewelry with the cloth and the tarnish comes off. Simple as that. They're cheap, they're portable, and they work.
Brands I've Tried
Connoisseurs makes a really good disposable polishing cloth that comes in a small pouch. I keep one in my purse and one in my jewelry box. They're treated on both sides — one side for cleaning, one for polishing — and they last a surprisingly long time. I've been using the same one for about three months and it's still going strong.
Hagerty is another solid choice. Their silver polish cloths are a bit larger and they also sell a silver polish cream if you need something heavier-duty for really stubborn tarnish.
The thing I like about these cloths is that they leave a microscopic protective layer on the silver that slows down future tarnishing. It's not magic — your silver will still tarnish eventually — but it buys you some time.
How to Use Them Properly
Don't scrub aggressively. Gentle, even pressure in long strokes works best. Pay extra attention to detailed areas and chain links where tarnish tends to build up first. And don't wash the cloth — washing it removes the treatment and turns it into just a regular piece of fabric.
Things You Should Absolutely Never Do to Silver Jewelry
Before we talk about prevention, let me save you from some mistakes I either made myself or watched other people make.
Don't use toothpaste. I know, your grandmother probably told you to, and a million blog posts repeat this advice. But most toothpaste contains baking soda, silica, or other abrasives that will leave microscopic scratches on your silver. It might look clean at first, but over time those scratches make the surface rougher, which actually attracts more tarnish. A jeweler friend of mine showed me silver under a microscope after being cleaned with toothpaste, and it looked like a plowed field. Just don't.
Don't use ultrasonic cleaners on silver with gemstones. Ultrasonic cleaners work by sending high-frequency vibrations through a cleaning solution, which can loosen dirt from tiny crevices. Sounds great, right? The problem is those same vibrations can crack or weaken gemstones, especially softer ones like opals, emeralds, and pearls. They can also shake loose stones that are set with prongs or glue. If you have plain silver with no stones, an ultrasonic cleaner is fine — but honestly, the baking soda method works just as well.
Don't use bleach, vinegar, or lemon juice. Bleach will literally eat through silver — I'm not exaggerating. It causes a chemical reaction that pits and corrodes the metal. Vinegar and lemon juice are acidic, and while they won't be as destructive as bleach, they can still damage the surface over time, especially on plated silver. Stick to methods that are actually designed for silver.
Don't use abrasive pads or steel wool. Scotch-Brite pads, steel wool, and even some "scratch-free" kitchen sponges are too rough for silver. You'll end up with visible scratches and a dull, matte finish that you can't undo without professional polishing.
How to Prevent Tarnish and Keep Your Silver Looking New
Preventing tarnish is way easier than removing it. A few simple habits will dramatically extend the time between cleanings.
Wipe your jewelry after wearing it. This is the single most effective thing you can do. Keep a soft, dry cloth near wherever you take your jewelry off, and give each piece a quick wipe before putting it away. You're removing the oils, sweat, and residue that cause tarnish. It takes literally 10 seconds and it makes a huge difference.
Store silver in airtight bags with anti-tarnish strips. The less air and moisture your silver is exposed to, the slower it tarnishes. I use small ziplock bags — the kind meant for jewelry or beads — and I toss in a small anti-tarnish paper tab. These tabs absorb sulfur compounds from the air inside the bag. You can buy a pack of these for like $5 on Amazon and they last about 6 months each. This alone probably reduced my tarnish rate by 70%.
Keep jewelry out of the bathroom. I already mentioned this, but it bears repeating. The bathroom is the worst place for silver because of the constant humidity from showers. I moved my jewelry box to my bedroom dresser and immediately noticed a difference.
Put jewelry on after applying products. Let your lotion, perfume, sunscreen, and hair products fully dry and absorb before putting on your silver. Even 5 minutes of waiting helps. And take your jewelry off before applying hand sanitizer — the alcohol is rough on silver.
Take silver off before swimming, bathing, or exercising. Chlorine in pools, salt in ocean water, and the sulfur in hot springs are all terrible for silver. And sweat from exercise is basically a tarnish accelerator. If you're doing anything that involves water or heavy perspiration, take your silver off first.
Wear your silver regularly. This one surprises people, but friction from everyday wear actually helps keep silver clean. The movement against your skin and clothing gently polishes the surface. Pieces that sit untouched in a jewelry box tarnish faster than ones that are worn often. So don't save your silver for "special occasions" — wear it.
When to Take Your Silver to a Professional
Home cleaning handles 95% of tarnish situations. But there are times when you should let a professional jeweler handle it.
Antique or heirloom silver. If you have a vintage piece — especially something from the Victorian era or earlier — the patina might actually be part of its value and character. A professional can clean it while preserving the aged look. Aggressive home cleaning on antique silver can destroy its historical value.
Heavily oxidized pieces. If your silver has turned completely black and none of the methods above make a dent, a jeweler has access to professional-grade polishing equipment and compounds that can handle severe cases. They can also re-plate pieces where the silver layer has worn through to the base metal underneath.
Pieces with delicate or sensitive gemstones. If your silver has opals, pearls, emeralds, turquoise, amber, or any stone that's porous, heat-sensitive, or fragile, professional cleaning is the safest option. Jewelers know how to clean around these stones without damaging them.
Silver with intricate filigree or engraved details. Complex designs with lots of tiny crevices are really hard to clean at home without missing spots. A professional ultrasonic cleaning followed by hand polishing will get into every nook and cranny.
Most jewelers charge $10 to $30 for a basic silver cleaning and polishing, which is pretty reasonable considering they'll also inspect your piece for loose stones or other issues.
Final Thoughts
Silver jewelry is beautiful, affordable, and versatile — but it does require some attention. The good news is that caring for it isn't complicated or expensive. A soft cloth, some mild soap, and a ziplock bag will cover most of what you need. For the tougher tarnish, the baking soda and foil method is basically free and works like a charm.
That blackened silver chain I mentioned at the start? The baking soda method brought it back to about 90% of its original shine. The remaining 10% was in some deep chain links that I'll hit with a polishing cloth over the next few days. It's not perfect, but it's wearable again — and honestly, it looks better than the day I bought it because now I know how to take care of it.
Don't let tarnish discourage you from wearing and enjoying your silver. A little maintenance goes a long way, and now you know exactly what to do.

Comments