The Necklace That Started Everything
The Necklace That Started Everything
I made my first beaded necklace on a Tuesday afternoon in March because I was bored and my sister's birthday was in four days. I had zero jewelry-making experience. I didn't own any tools. I'd never even threaded a needle without getting frustrated.
But I'd seen these layered beaded necklaces all over Pinterest — the kind with mixed stone beads, tassels, and a casual effortless vibe — and I thought, how hard can it be?
Spoiler: the first one was terrible. The beads were uneven, the pattern made no sense, the clasp fell off within an hour, and I accidentally used fishing line instead of beading wire so it stretched and sagged like a sad bracelet. My sister wore it once, politely, and I never saw it again.
But something clicked. I made another one the next week. Then another. Six months later, I'd made over forty necklaces, sold twelve of them at a local craft market, and developed actual opinions about crimp beads. That's the thing about beaded jewelry making for beginners — the learning curve is shockingly steep at the very beginning and then it flattens out fast. You go from "what is a crimp tube" to "I prefer 2x2mm sterling silver crimps over base metal" in about two weeks.
This tutorial is everything I wish someone had handed me on that first Tuesday. No gatekeeping, no assumed knowledge, no skipping steps. If I can figure this out, you absolutely can.
The Stuff You Need (And What Each Thing Actually Does)
Before we get to the fun part, let's talk about materials. One of the biggest mistakes I made early on was buying the wrong supplies because I didn't understand what they were for. Here's your shopping list, with explanations:
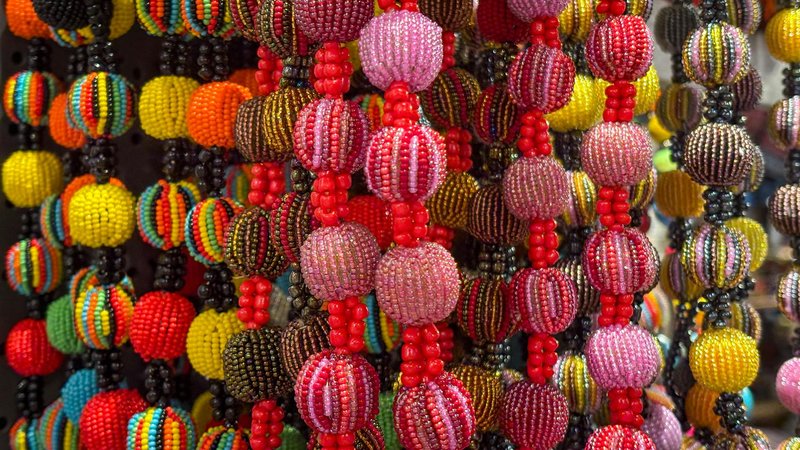
Beads
This is where most beginners go a little wild, and honestly, that's fine. Beads come in an overwhelming variety — glass, gemstone, wood, ceramic, seed beads, metal, acrylic, shell, bone, resin. For your first few necklaces, I'd recommend sticking with gemstone chips or 6-8mm round beads. They're forgiving (slight size variations look intentional), relatively inexpensive, and they photograph well if you decide to share your work.
Buy more beads than you think you need. Running out of a particular bead mid-design is incredibly frustrating, and dye lots vary — the same amethyst bead from the same seller might look noticeably different between orders.
Beading Wire
This is not regular string. Do not use thread. Do not use fishing line (I learned this the hard way). Beading wire is a multi-strand stainless steel cable coated in nylon. It's strong, it doesn't stretch, and it drapes beautifully. The most common brand is Beadalon, and it comes in different thicknesses (measured in "strand count" and diameter).
For most necklaces, .018" or .019" diameter, 49-strand wire is ideal. It's flexible enough to drape naturally but strong enough to hold up to daily wear. Thinner wire (.015") is fine for very lightweight beads. Thicker wire (.024") is better for heavy stones but gets stiff and doesn't hang as nicely.
Crimp Beads and Crimp Tubes
Crimp beads are the tiny metal tubes or beads that you squash flat to secure the wire to your clasp. They're the unsung heroes of jewelry making — invisible when done right, disastrous when done wrong. Crimp tubes (tiny cylinders) are generally more reliable than crimp beads (tiny round beads). Get 2x2mm sterling silver or gold-filled crimp tubes if you can. Base metal crimps are cheaper but they don't hold as well and can tarnish quickly.
Clasps
The clasp is what opens and closes your necklace. For beginners, lobster clasps are the easiest to work with — they're secure, common, and available everywhere. Toggle clasps (a bar through a ring) are prettier but slightly less secure for heavy necklaces. Magnetic clasps are great for people with dexterity issues but can come undone if the necklace catches on something.
Jump Rings
Small wire rings that connect your crimped end to the clasp. You'll need two per necklace. Get 4-5mm jump rings in the same metal as your crimps and clasp.
Tools
You need exactly three tools to start: chain-nose pliers (flat on the inside, tapered to a point — for gripping and bending wire), crimping pliers (have two notches in the jaw — specifically designed for closing crimp tubes), and wire cutters or flush cutters (for trimming wire ends). That's it. You can add more tools later, but these three will handle 90% of what you'll do as a beginner.
Don't buy the cheapest tools you can find. Mid-range tools (around $15-25 each) will last years. Ultra-cheap pliers have misaligned jaws that will crush your crimps unevenly and leave sharp wire edges.
Three Basic Stringing Techniques (And When to Use Each)
Once you have your supplies, you need to know how to actually put the beads on the wire. There are three fundamental approaches that cover almost everything you'll want to make as a beginner.
Technique 1: Single-Strand Stringing
This is exactly what it sounds like — beads strung on a single piece of wire. It's the simplest technique and the best place to start. Cut your wire to about 4-6 inches longer than your finished necklace length (you need extra for the clasp attachment), string your beads in your planned order, and secure both ends with crimp tubes.
Single-strand necklaces are versatile. They work for uniform bead patterns (all the same size and type), graduated patterns (small beads transitioning to larger ones in the center), and random mixed patterns. The key to making a single-strand necklace look professional is the drape — the way the wire curves when worn. Good beading wire and appropriate bead weight will give you a natural, flattering curve. Bad wire or too-heavy beads will make it hang stiffly or kink.
Technique 2: Multi-Strand Stringing
Multi-strand necklaces use two or more strands of wire, each with its own beads, worn together. The trendy "layered necklace" look is essentially this — multiple strands at different lengths that create visual depth.
The trick with multi-strand is managing the lengths. Each strand needs to be a consistent amount longer than the one above it (usually 1-2 inches). And you need to attach all the strands to a single clasp, which means using a multi-strand clasp or a bead bar — a metal bar with multiple holes that gathers all your strands at each end.
For your first multi-strand piece, start with two strands. Use similar bead types on each strand but vary the sizes or colors. Two strands of amethyst at different lengths, or one strand of matte black onyx and one of silver-gray hematite. Keep it simple and let the layering do the work.
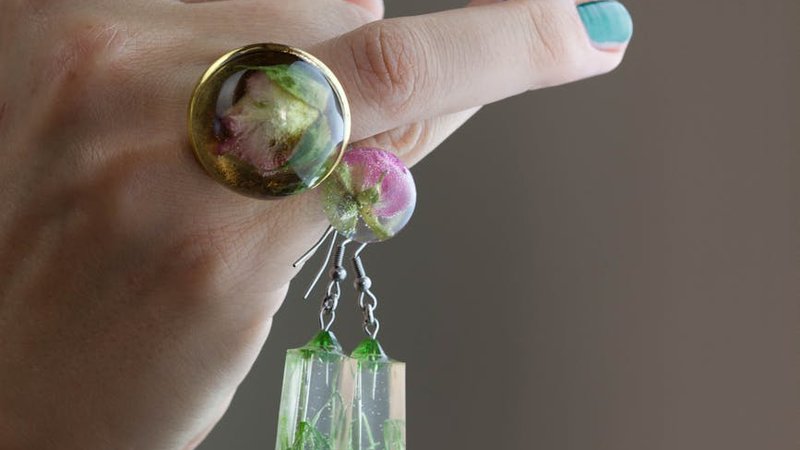
Technique 3: Basic Wire Wrapping (For Pendants and Drops)
Wire wrapping is a slightly different skill from stringing, but it's essential if you want to add pendants or drop beads to your necklaces. The basic idea: you create a small loop at the top of a bead using thin craft wire, and that loop becomes the attachment point.
For a simple wrapped loop, you'll need 22- or 24-gauge craft wire (much thinner than beading wire — this is rigid wire, not cable). Thread the wire through your bead, make a small loop above it with round-nose pliers, and wrap the tail of the wire around the "neck" between the bead and the loop several times. Trim the excess with wire cutters.
It takes practice. My first twenty wrapped loops looked like little wire tornadoes. But once you get the muscle memory down, it takes about 30 seconds per bead and opens up a world of design possibilities.
Design Principles That Actually Matter
Technical skill gets you a structurally sound necklace. Design sense gets you one that people actually want to wear. Here are the principles I've found most useful:
Color and Material Harmony
The easiest approach for beginners is a monochromatic palette — different shades and textures of the same color family. All blues, for example: navy lapis, bright turquoise, pale blue lace agate, silver beads as accents. It's almost impossible to make a monochromatic palette look bad.
The next step up is a two-color palette with a neutral. Black and white with gold accents. Green and purple with silver. Earth tones (brown, amber, cream) with copper. The rule of thumb: pick one dominant color (60-70% of beads), one secondary color (20-30%), and one accent color or metal (5-10%).
Avoid throwing in every color you own. I know it's tempting. Resist it. More colors doesn't mean more interesting — it usually means more chaotic.
Length Matters More Than You Think
Necklace length completely changes how a piece looks and where it sits on the body. The standard lengths you'll see:
Choker (14-16 inches): Sits tight against the neck. Good for single-strand pieces with small beads. Can feel restrictive if too tight.
Princess (17-19 inches): The most common length. Sits just below the collarbone. Flattering on almost everyone. This is your default unless you have a reason to go longer or shorter.
Matinee (20-24 inches): Sits above the bust. Great for layering with a shorter piece. Works well with larger beads and pendant styles.
Opera (28-36 inches): Long and dramatic. Can be worn single or doubled. Best for simple bead strands — heavy multi-strand pieces at this length get uncomfortable fast.
When in doubt, make it 18 inches. You can always add an extender chain later if someone wants it longer.
Pendant Placement
If you're adding a focal bead or pendant, it should sit at the center of the necklace — but "center" is measured along the wearing length, not the stringing length. Since clasps and crimps take up about an inch on each end, your pendant should be placed about an inch off-center on the strung portion.
Also consider the pendant's weight relative to the beads. A heavy stone pendant on delicate seed beads will pull the necklace out of shape. Either use a lighter pendant or beefier companion beads.
Finishing: The Part Where Most Beginners Mess Up
I'm going to describe the crimping process in detail because this is where most first necklaces fail. A bad crimp means your necklace will literally fall apart. A good crimp is secure, neat, and invisible.
How to Crimp (Step by Step)
Thread your wire through a crimp tube, then through the loop of your clasp (or jump ring), then back down through the crimp tube, leaving about an inch of tail wire. The wire makes a small loop around the clasp, and the crimp tube sits right at the base of that loop.
Using your crimping pliers, place the crimp tube in the back notch (the one closer to the hinge). Squeeze firmly. This creates a U-shape or crescent in the tube, with the two wire strands sitting in the channel.
Now rotate the crimp tube 90 degrees and place it in the front notch (the one at the tip of the pliers). Squeeze again. This folds the U-shape closed, creating a neat rounded crimp that locks both wire strands in place.
Trim the tail wire as close to the crimp as possible with flush cutters. Thread the tail back through the first few beads if there's room — this hides the cut end and adds a bit of security.
Repeat on the other end, but be careful about tension. You want the beads to sit snugly against each other with no visible gaps, but not so tight that the necklace is rigid. Hold the necklace in a U-shape while you crimp the second end — this gives you the right amount of slack for natural draping.
The Surgeon's Knot Alternative
If you're working with silk thread instead of wire (common for pearl knotting), you'll finish with knots rather than crimps. The surgeon's knot — essentially a double overhand knot — is the most secure option. Thread through your clasp, tie the knot, add a drop of jewelry cement (not superglue — it degrades silk), and trim close.
Common Problems (And How I Fixed Them)
My wire keeps breaking at the crimp
This usually means you're using wire that's too thin for your beads, or you're crushing the crimp too hard and cutting through the wire strands. Switch to a thicker wire (more strands, larger diameter) and use gentler pressure when crimping. Also, make sure you're using crimping pliers and not regular flat-nose pliers — flat pliers crush the crimp flat, which can sever the wire inside.
My clasp keeps coming undone
If the clasp itself is opening, you might need a different style. Lobster clasps are the most secure for most applications. If the whole crimp-clasp assembly is pulling off the wire, your crimp isn't seated properly — make sure the wire goes back through the crimp tube after passing through the clasp, creating a complete loop.
My necklace doesn't drape right — it's stiff or kinked
This is almost always a wire issue. Switch to a more flexible wire (higher strand count) or reduce the total weight of your beads. Beading wire has a natural breaking point where too much weight makes it hang straight instead of curving. Also check for kinks in the wire itself — once a multi-strand cable is kinked, it won't recover. Cut your losses and restring.
My beads keep sliding over the crimp
You need crimp covers — small metal beads that look like round beads but are actually hinged covers that snap over your flattened crimp tubes. They give the crimp a finished look and act as a barrier that prevents beads from sliding over the crimp end. They're cheap and they make a huge difference in the professional appearance of your finished piece.
Where to Go From Here
Once you're comfortable with basic single-strand stringing and crimping, the world of jewelry making opens up fast. Knotting between pearls, working with memory wire for cuffs, learning to make your own jump rings and ear wires, exploring seed bead weaving — there's always another technique to try.
But don't rush it. The first few necklaces you make will teach you more than any tutorial. You'll discover which beads you love working with, what length feels right for your own body, and whether you prefer symmetrical designs or organic chaos. That personal style is worth more than any technique you can learn from a guide.
My sister's birthday is coming up again next month. I'm making her a multi-strand labradorite necklace this time — graduated strands in shades of gray and blue with gold-filled findings. It's taken me two years to get here, and honestly, the process has been as rewarding as the result. There's something deeply satisfying about wearing something you made with your own hands, knowing exactly where every bead came from and why it's there.
Get some beads. Get some wire. Make something terrible. Then make something slightly less terrible. Repeat. That's the whole beaded necklace tutorial in one paragraph.
Comments